Night Owl Connect Troubleshooting If no devices are shown, verify the device has been added to the Night Owl Connect Mobile App. Once the device is added in the Mobile App, log in to your Night Owl Connect CMS software again and the device should display.
1. Mobile App (iOS and Android Smart Devices)
A. Initial Setup
i. Downloading the Night Owl Connect App
ii. Creating an Account
iii. Sign In
iv. Adding a Device
a. Adding a Recorder (DVR/NVR/Wi-Fi NVR)
b. Adding a Gateway
c. Adding a Standalone IP Camera
d. Adding a Doorbell
B. Live View
C. Playback
D. Push Notifications
i. Enabling/Disabling Push Notifications
ii. Notification Troubleshooting
E. Password Reset
i. Forgot your Night Owl Connect App Password
ii. Changing your App Password
iii. Connecting a DVR/NVR/Wi-Fi NVR after a Password Reset
F. Connectivity Troubleshooting
G. Audio Troubleshooting
2. CMS (Control Management Software) For Remote Viewing on a PC or Mac
A. Initial Setup
B. Login Troubleshooting
C. Connection Troubleshooting
3. Google Home (For Compatible Devices Only)
NOTE: Images may vary slightly. This troubleshooting guide was accurate at the time it was created, but new firmware updates may not be reflected. However, the steps will be the same!
1. Mobile App (iOS and Android Smart Devices)
Basic setup and troubleshooting for the Night Owl Connect Mobile App.
i. Downloading the Night Owl Connect App
a. Go to the Google Play Store (Android) or App Store (iOS) to download and install the Night Owl Connect App on your Smart Device.
 |
 |

NOTE: Before you continue with the initial setup of the Night Owl Connect App and product pairing, ensure that your Wi-Fi router is transmitting signals at 2.4Ghz band.
Currently, some products are not compatible with Wi-Fi signals of 5Ghz or above.
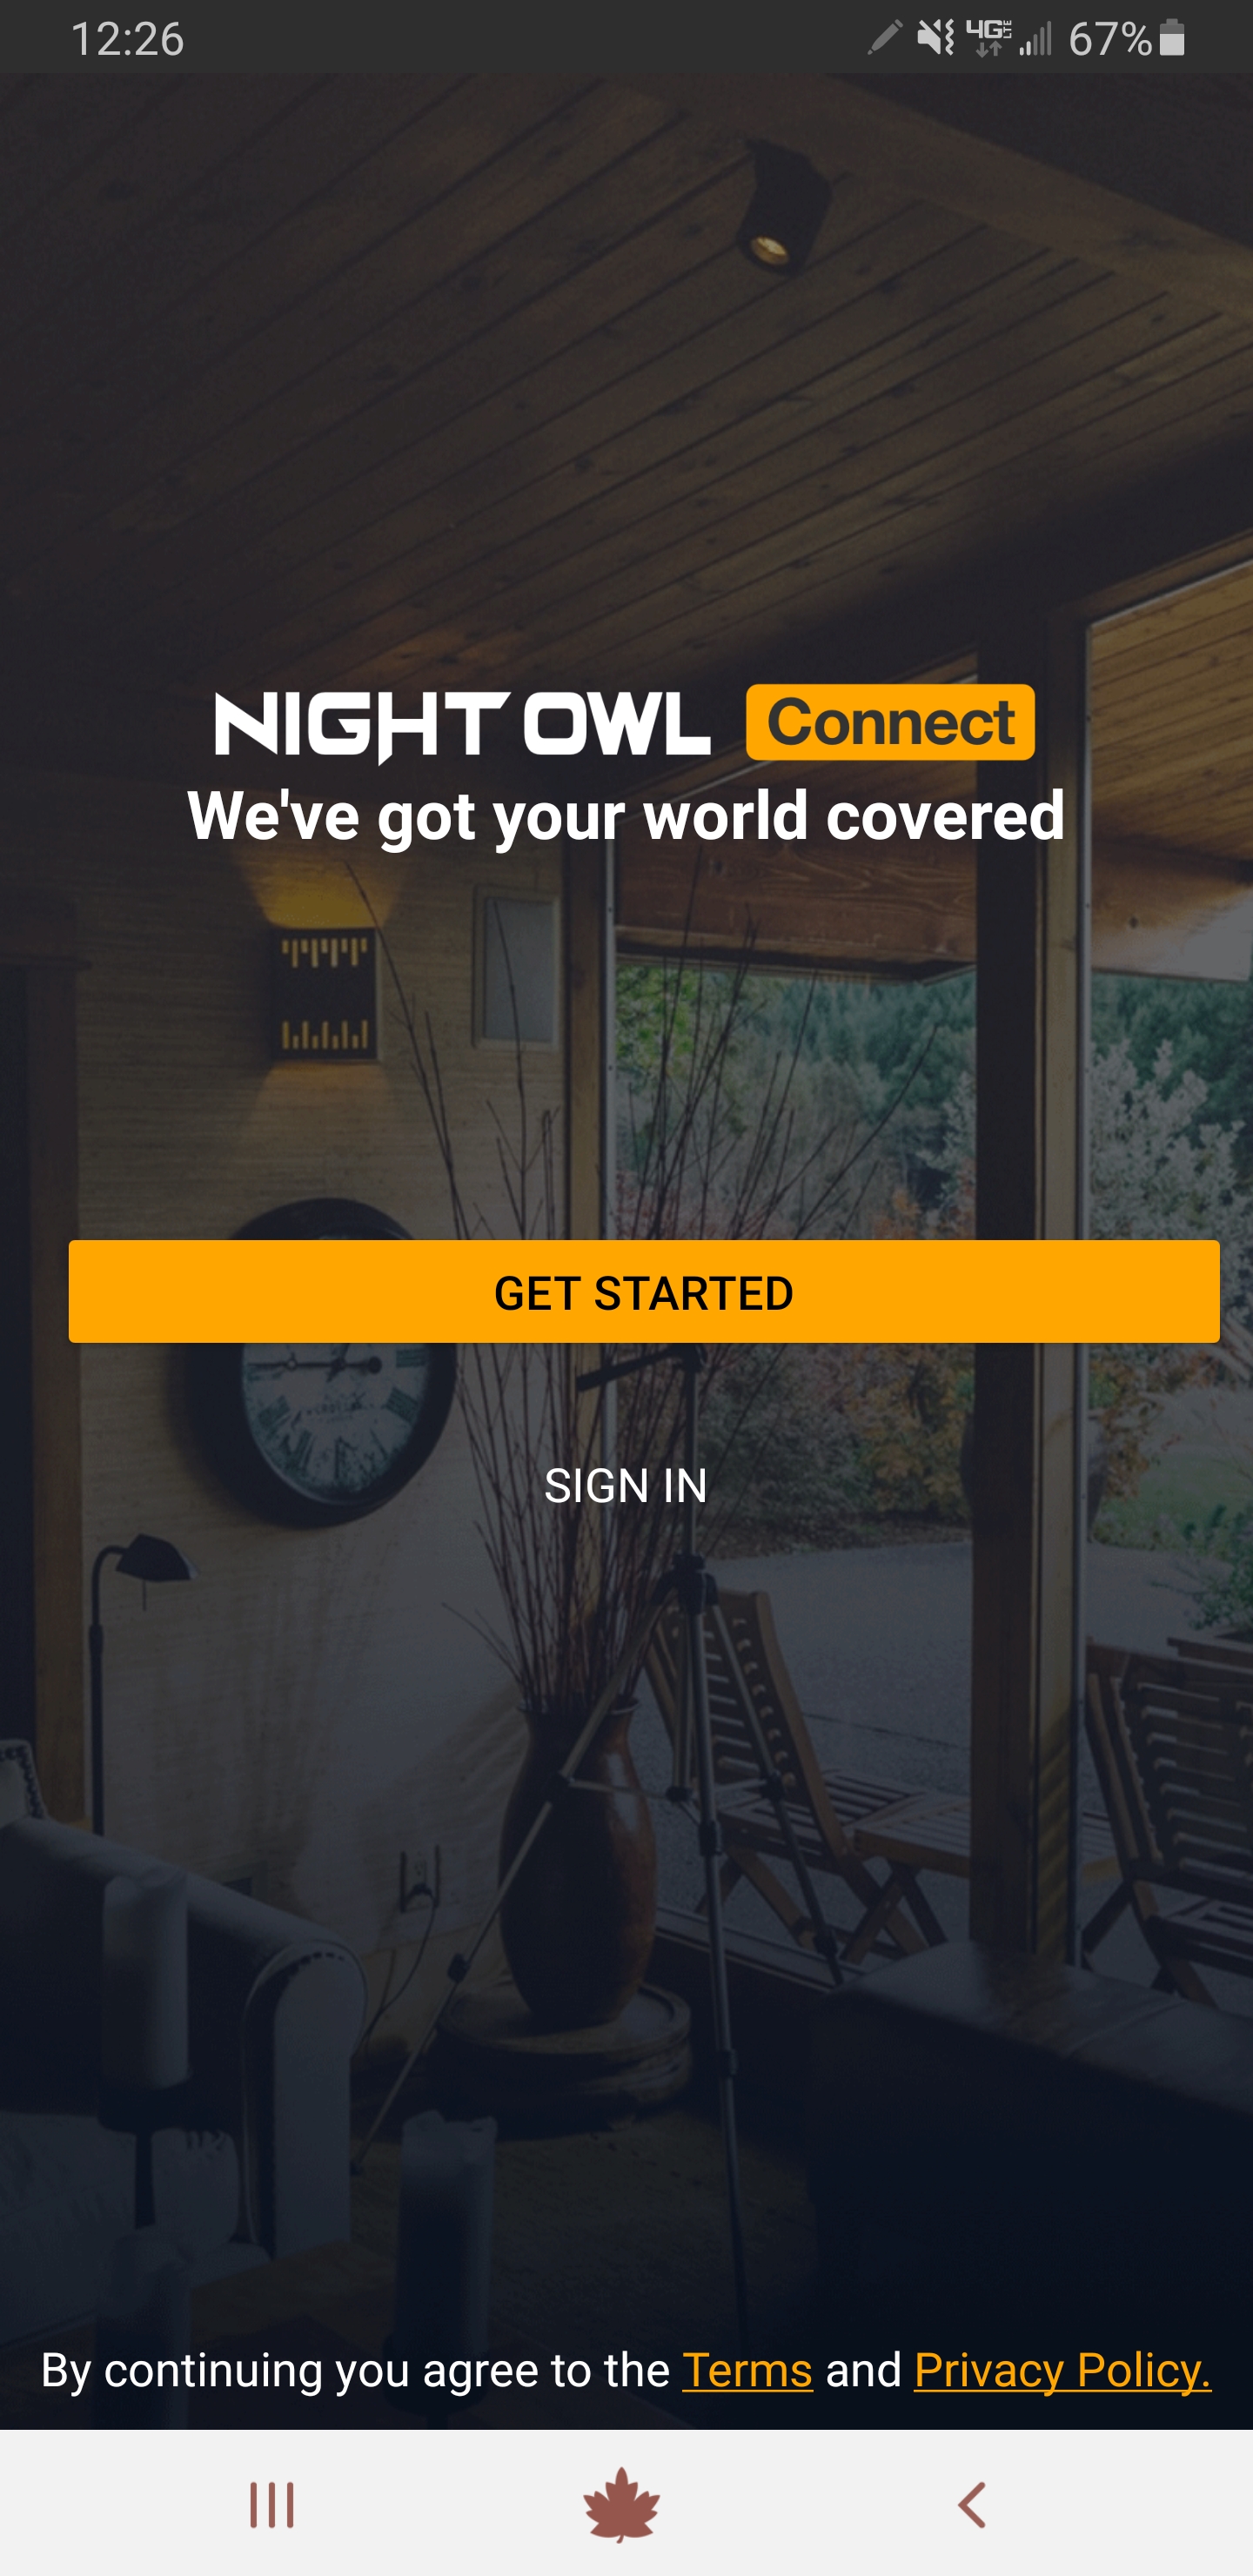
a. Tap “Get Started.”
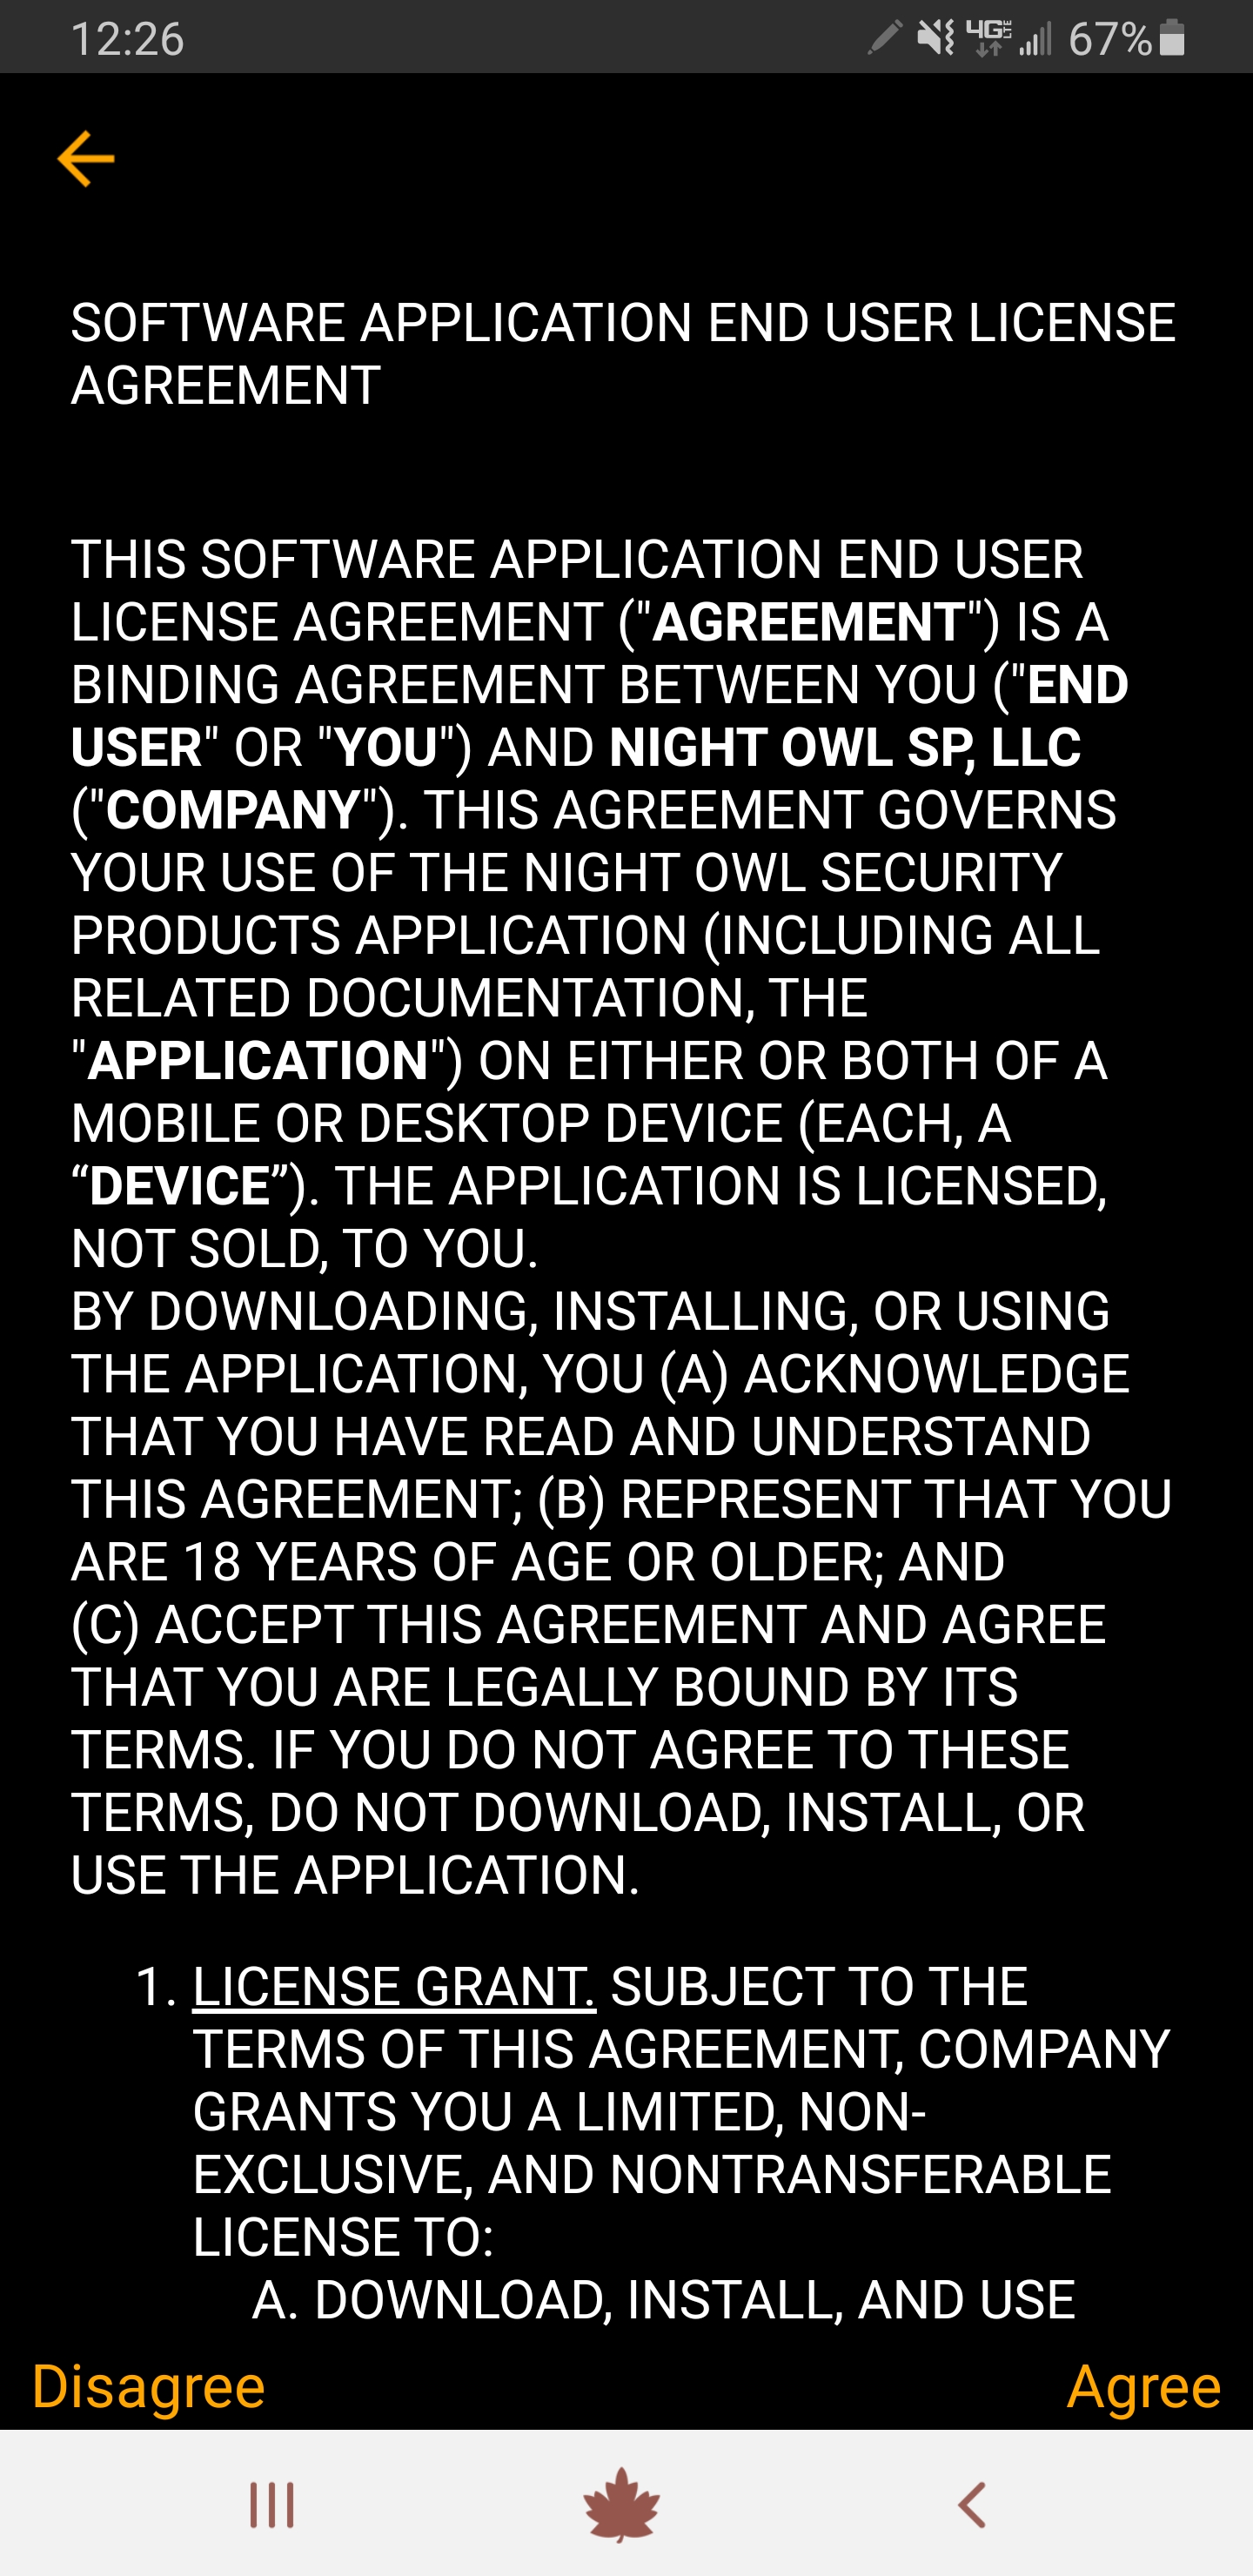
b. Next, you must agree to the terms and conditions to use the App. Tap “Agree” to continue.
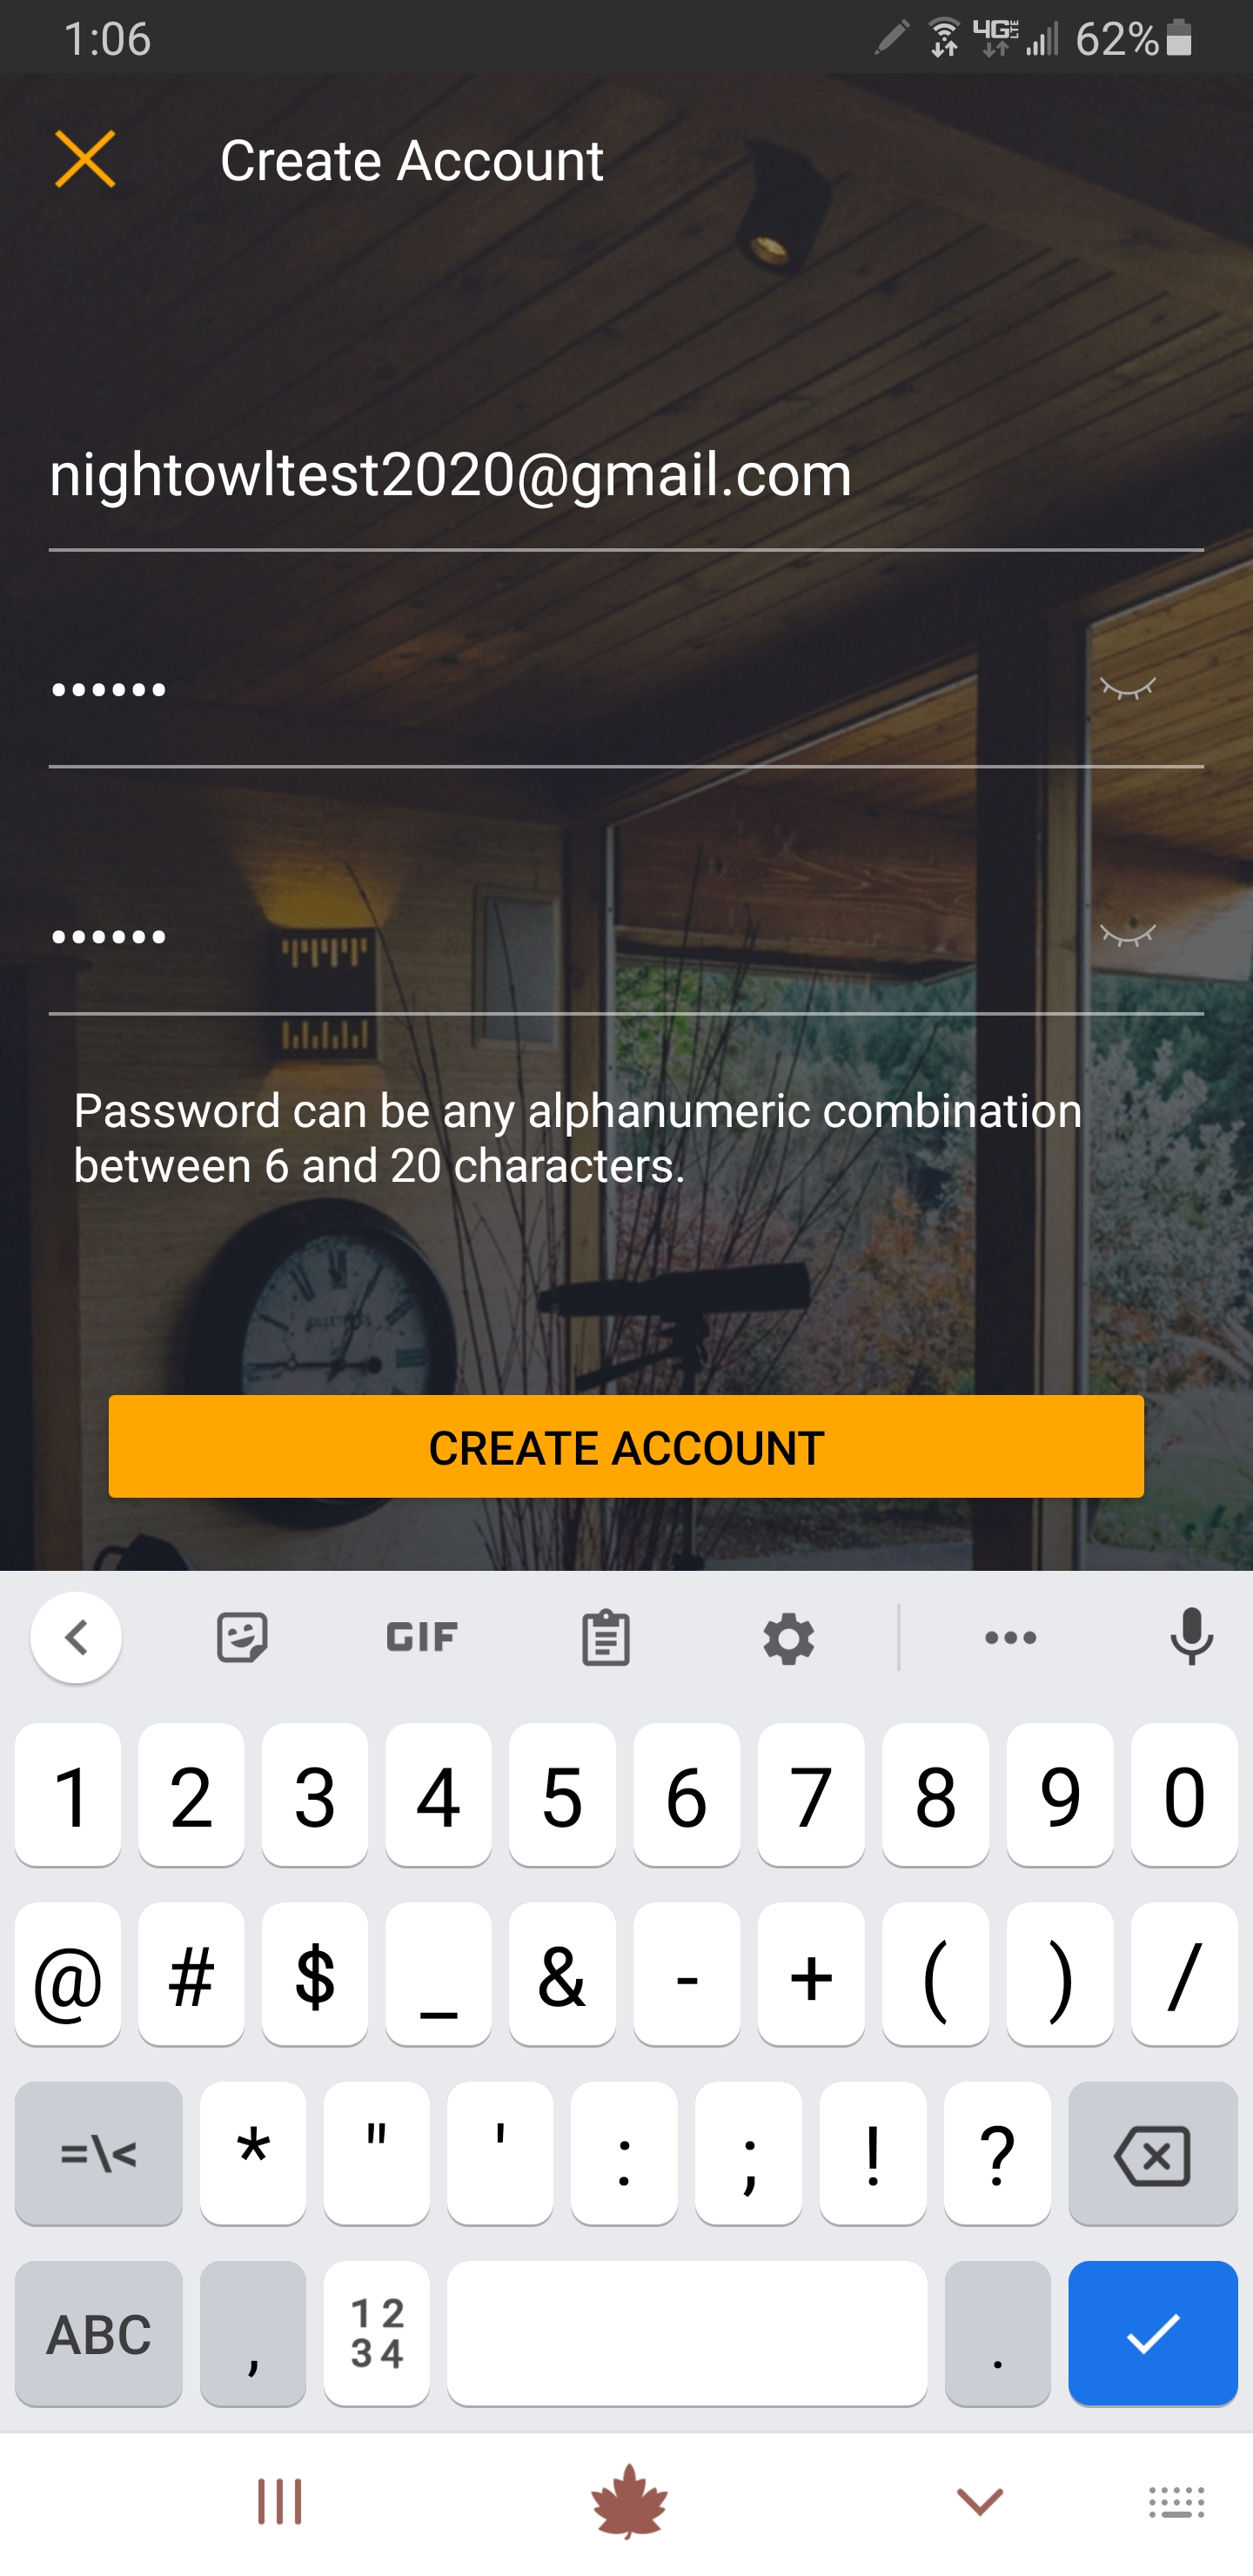
c. Now you will need to type a valid email address, create a password and confirm the password. The password can be any alphanumeric combination between 6 and 20 characters. Tap “Create Account” to proceed.
NOTE: This is ONLY the password for the Night Owl Connect App, not the password for your DVR/NVR or device.
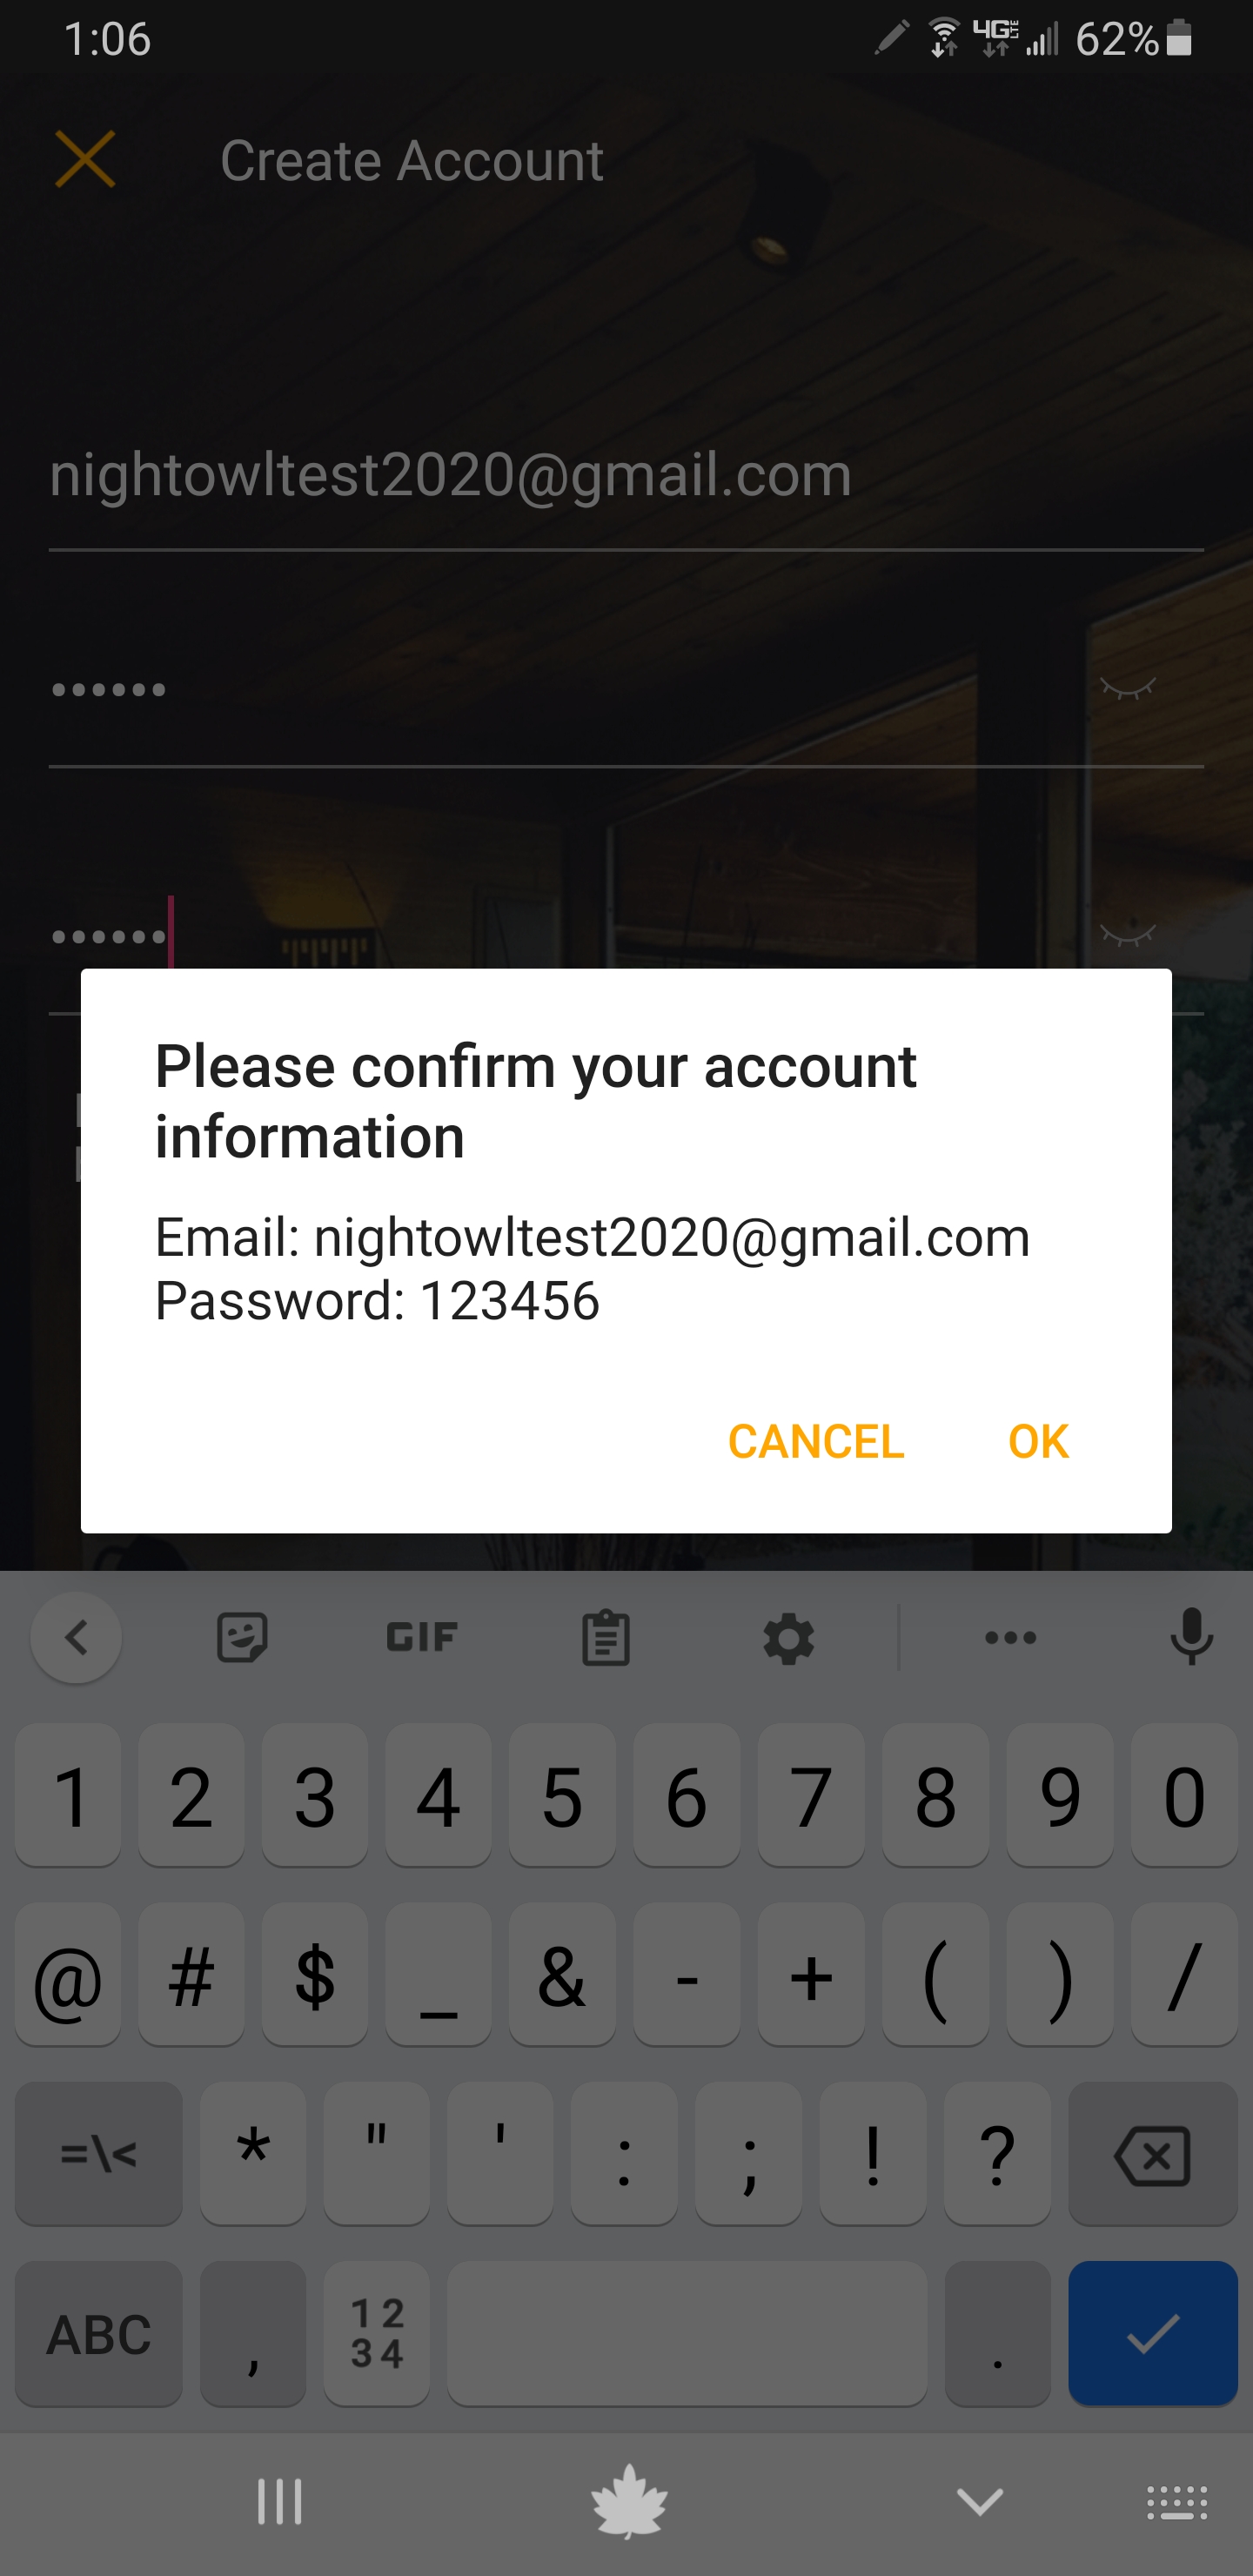
d. Tap “OK” to confirm your account information.
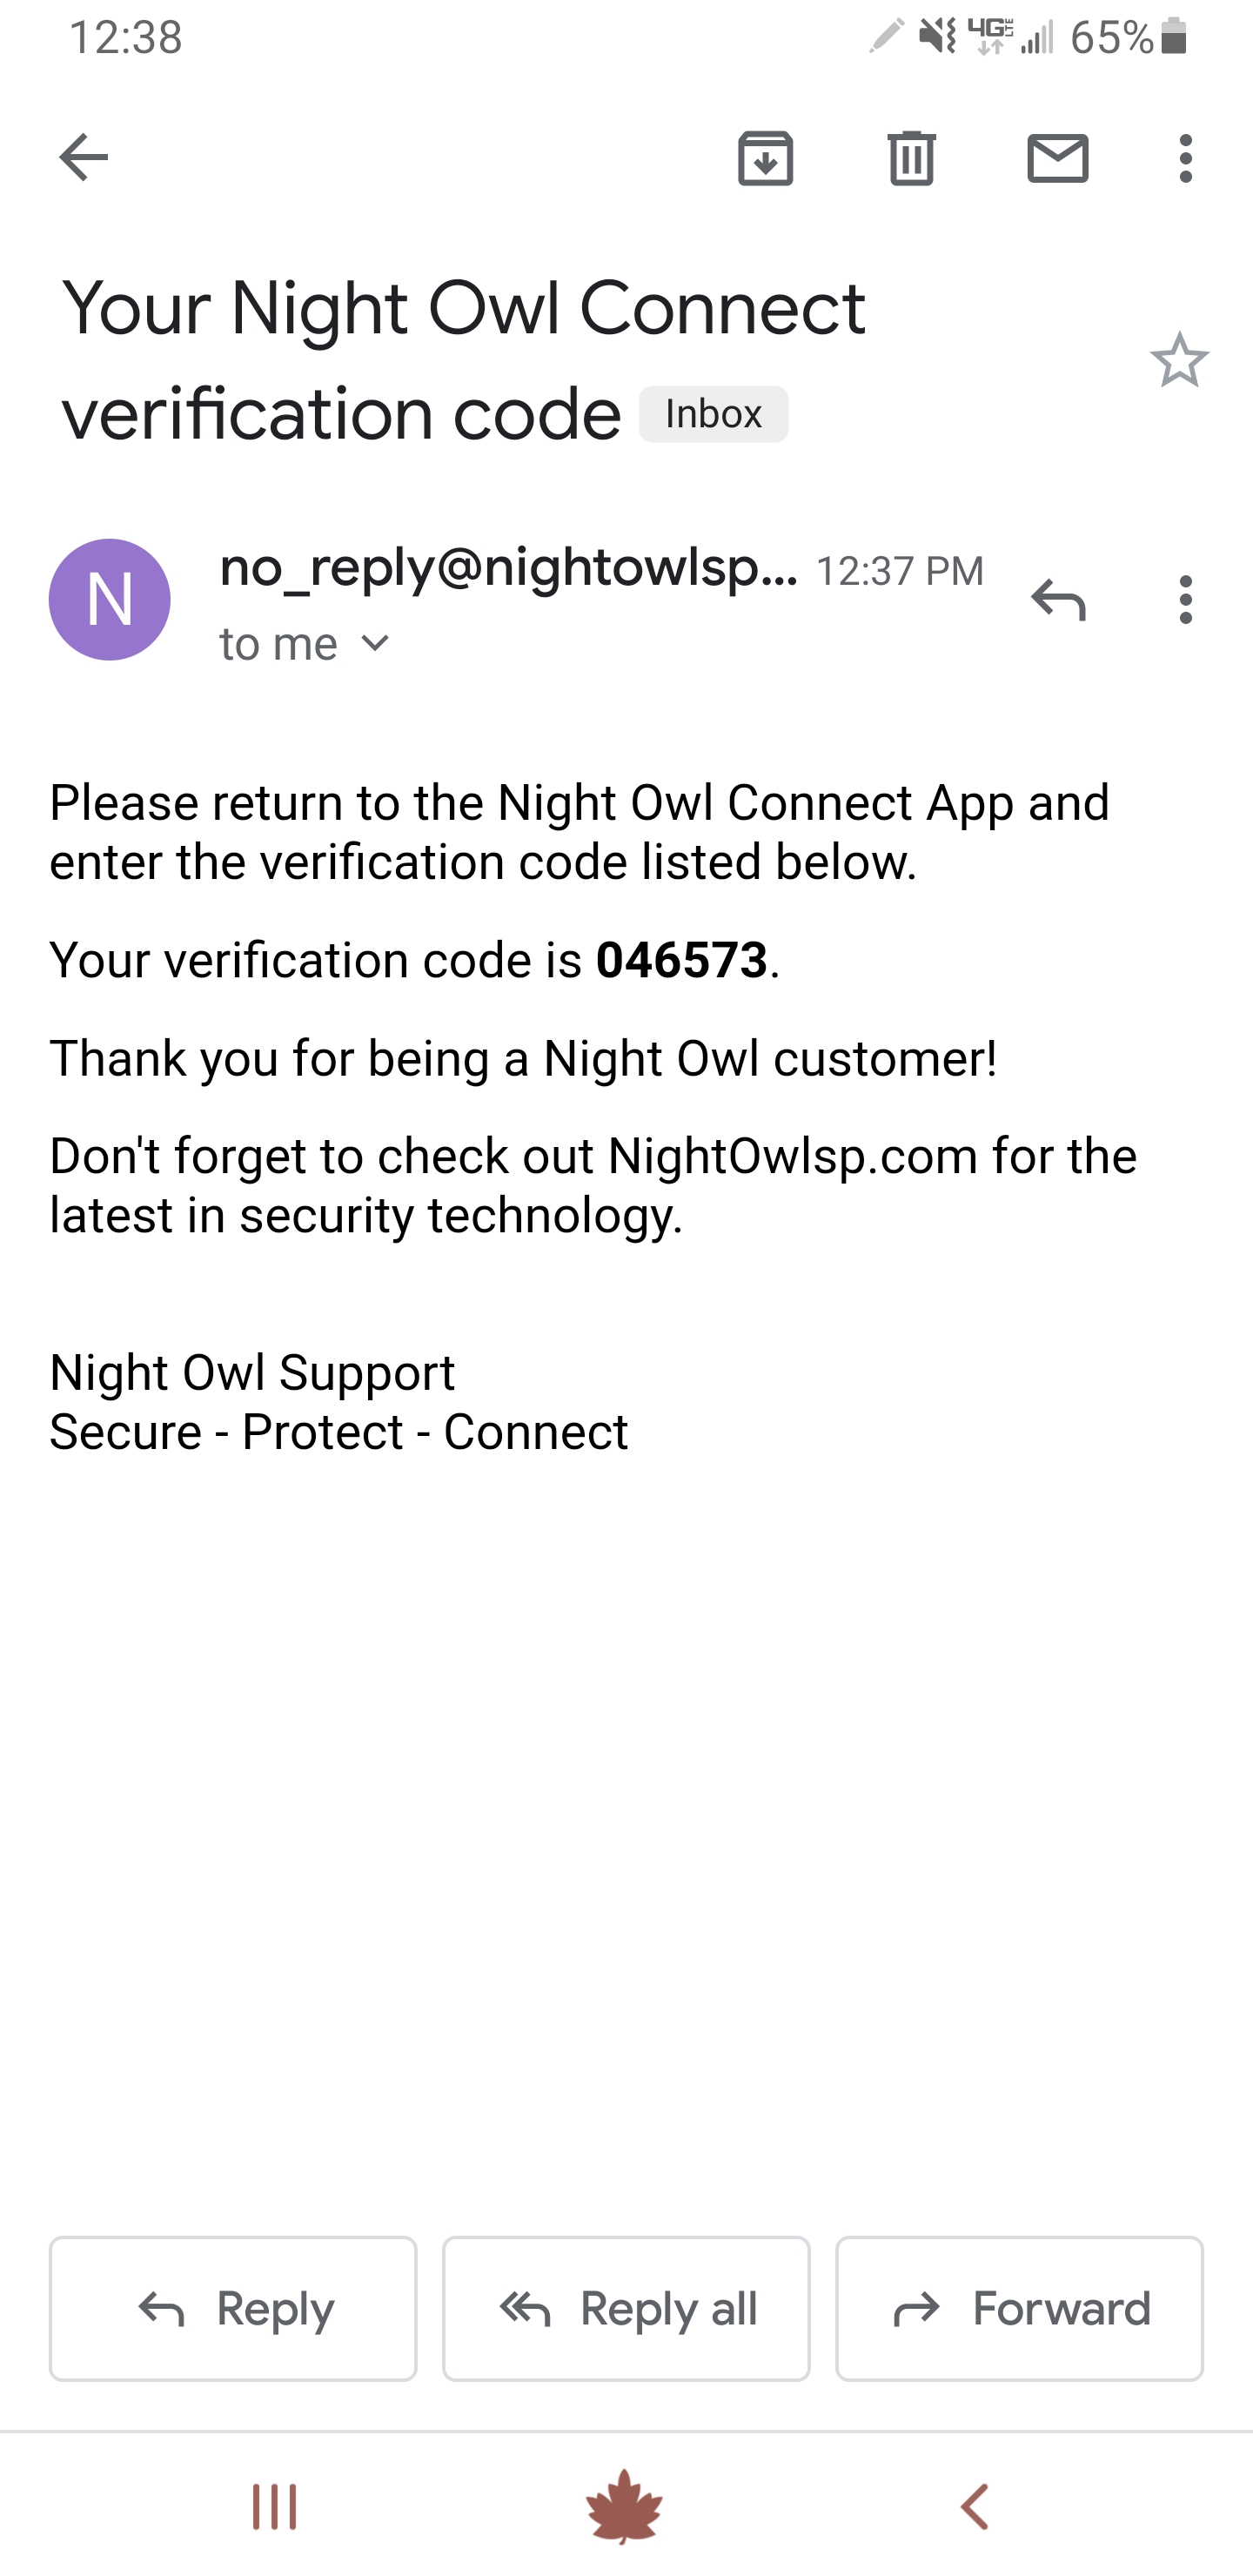
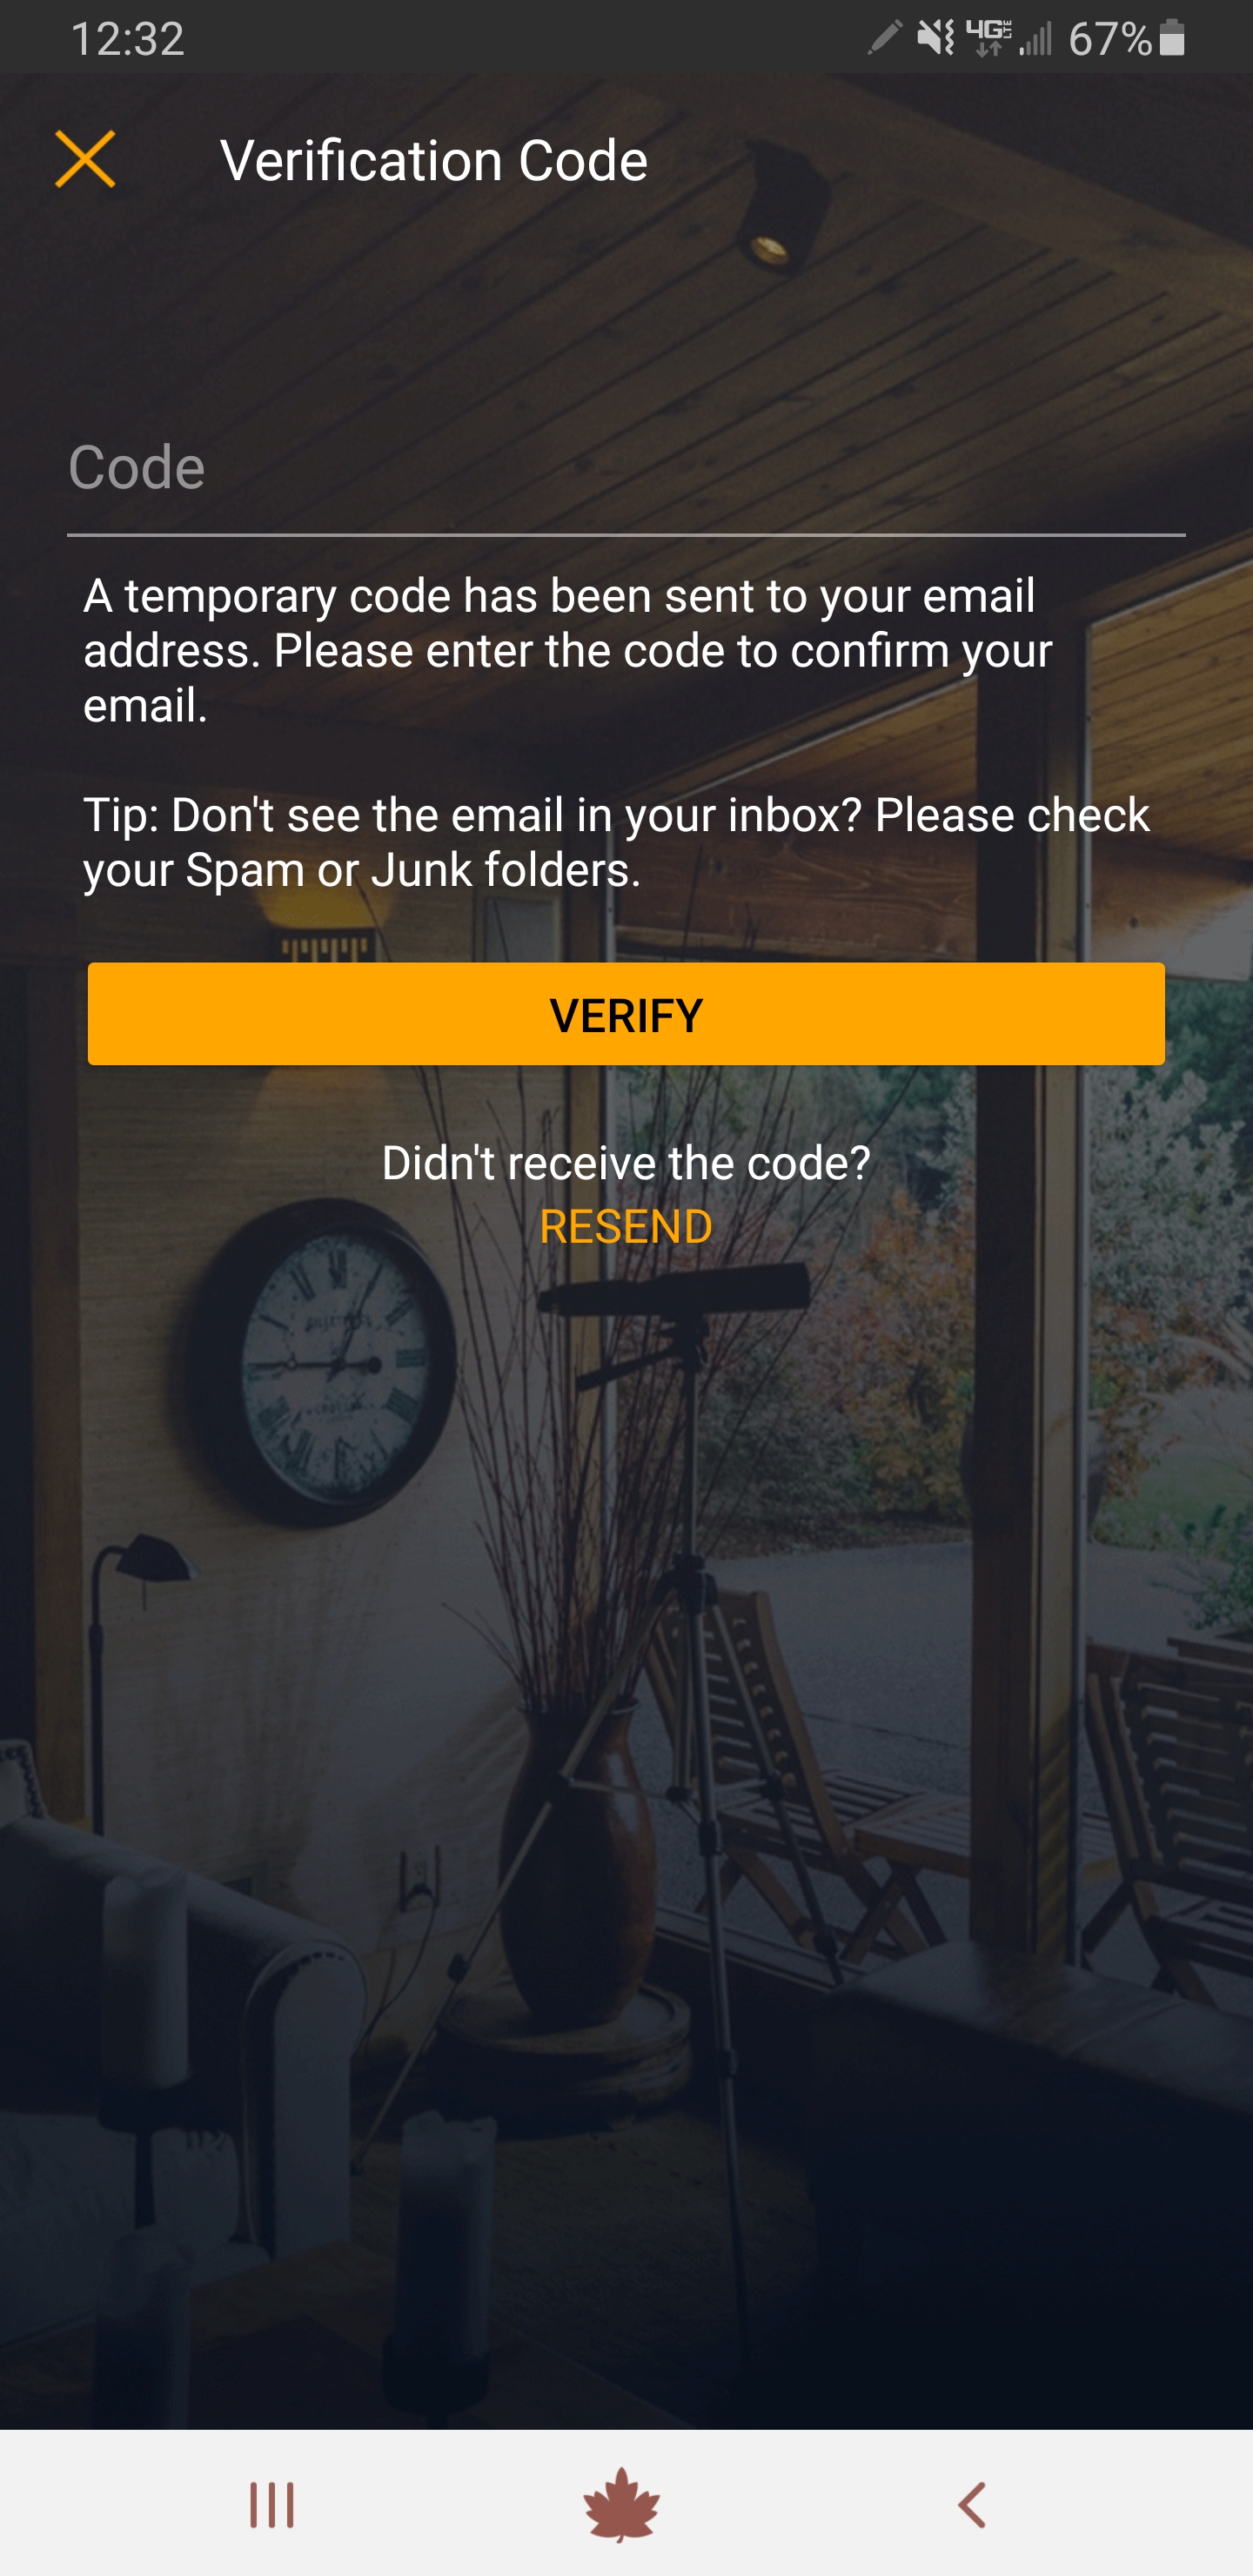
e. You must confirm your email address. Sign into your mailbox and locate the verification email. Enter the code that is shown in your email into the Code field within the app. Tap “Verify” to continue.
|
|
Copy and paste the verification code into the Code field.
|
|
NOTE: You will not be able to log in to the App without confirming your email address. If you do not receive the email, tap “Resend.”
Congratulations! Your Night Owl Connect account has been successfully created and verified.
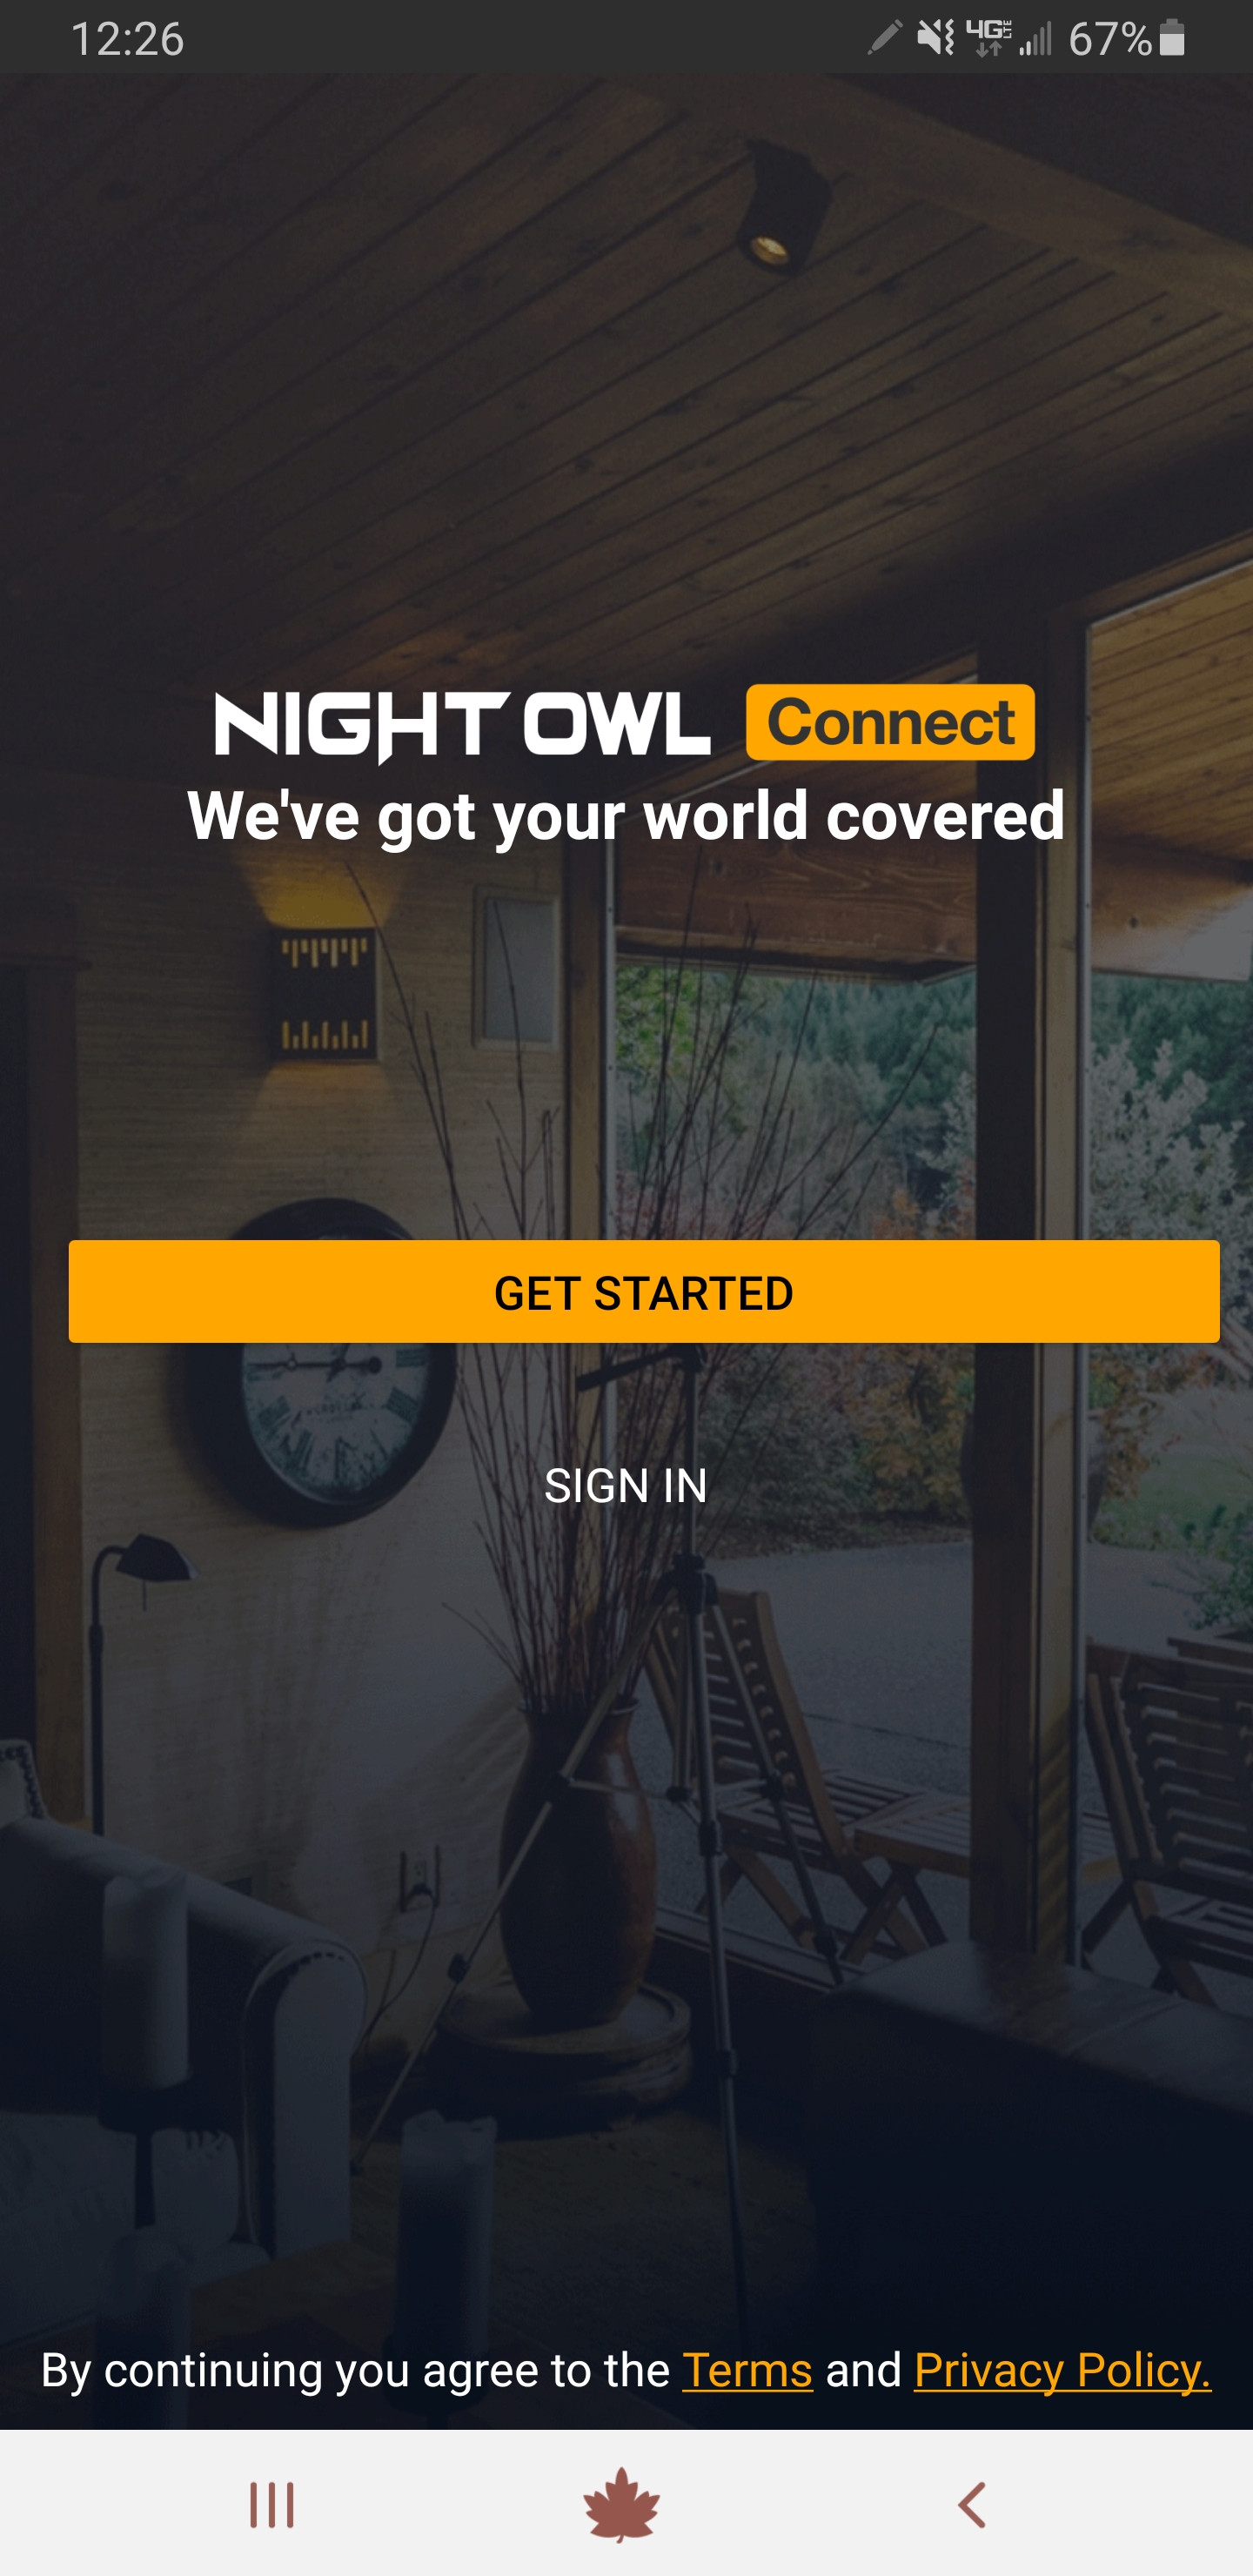
a. Open the Night Owl Connect App from your Smart Device and tap “Sign In.”
b. Enter the email address and password used for setup and tap “Sign In.”
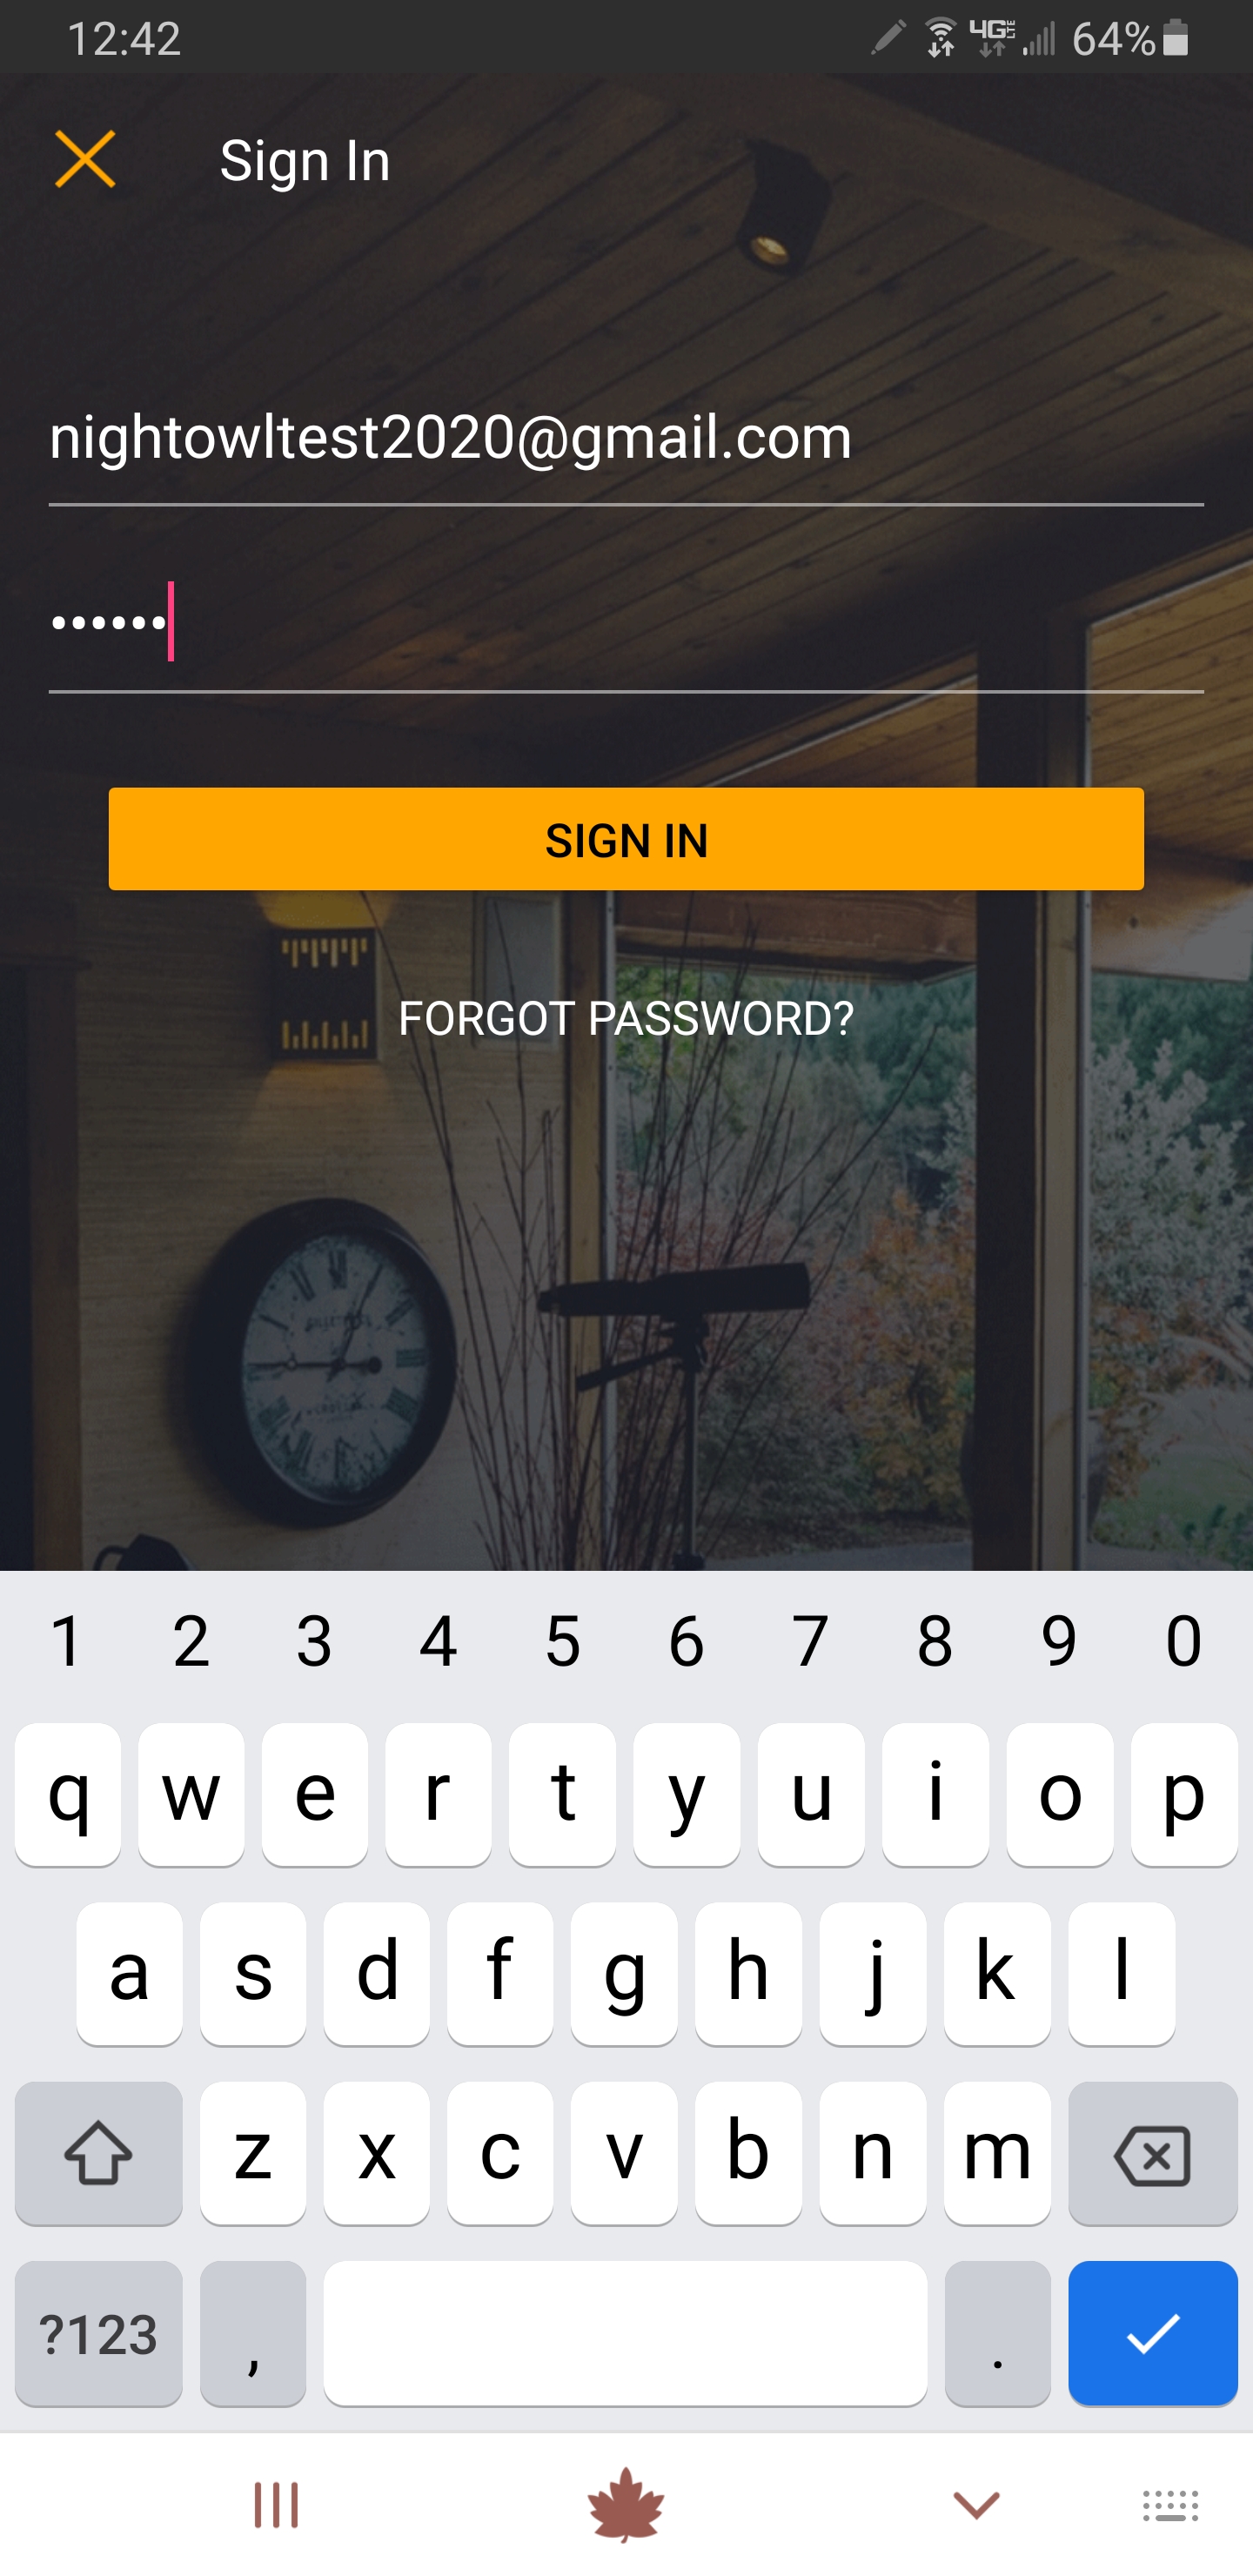
NOTE: If you do not remember your password, tap “Forgot Password” and see section 1E Password Reset.
a. Adding a Recorder (DVR/NVR/Wi-Fi NVR)
(Click Here for a Short Video Tutorial)
Before proceeding, please ensure that your Recorder is connected to the Internet using the included Ethernet cable. Once connected, please follow the steps below:
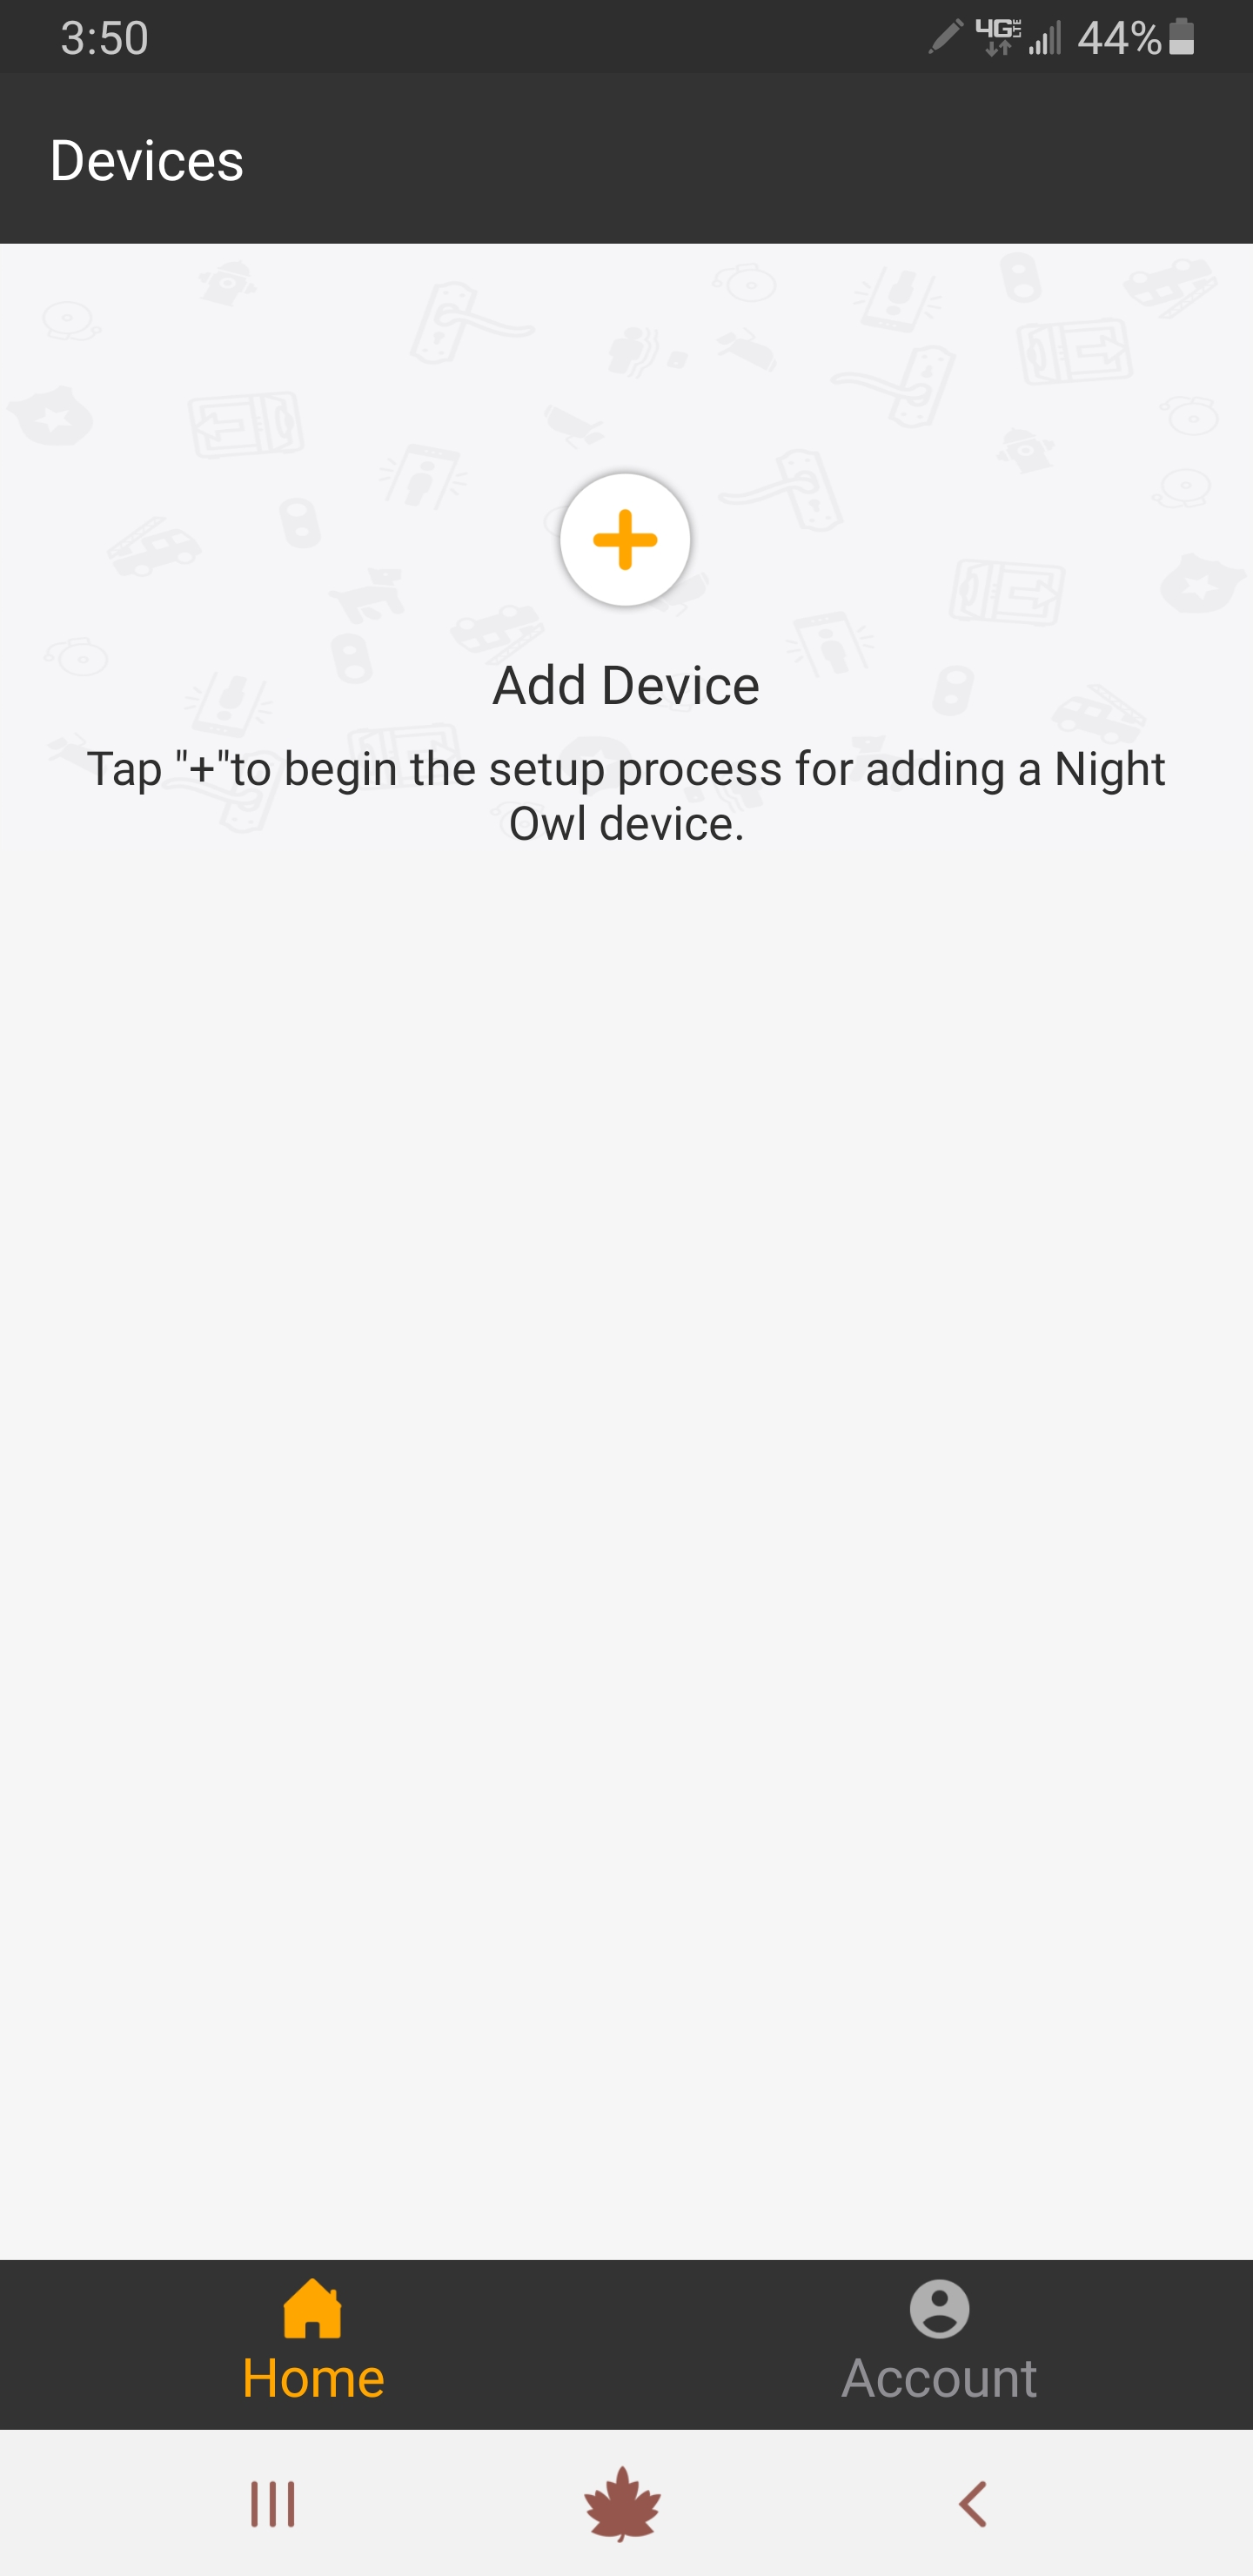
1. Please log in to the App and tap “Add Device.”
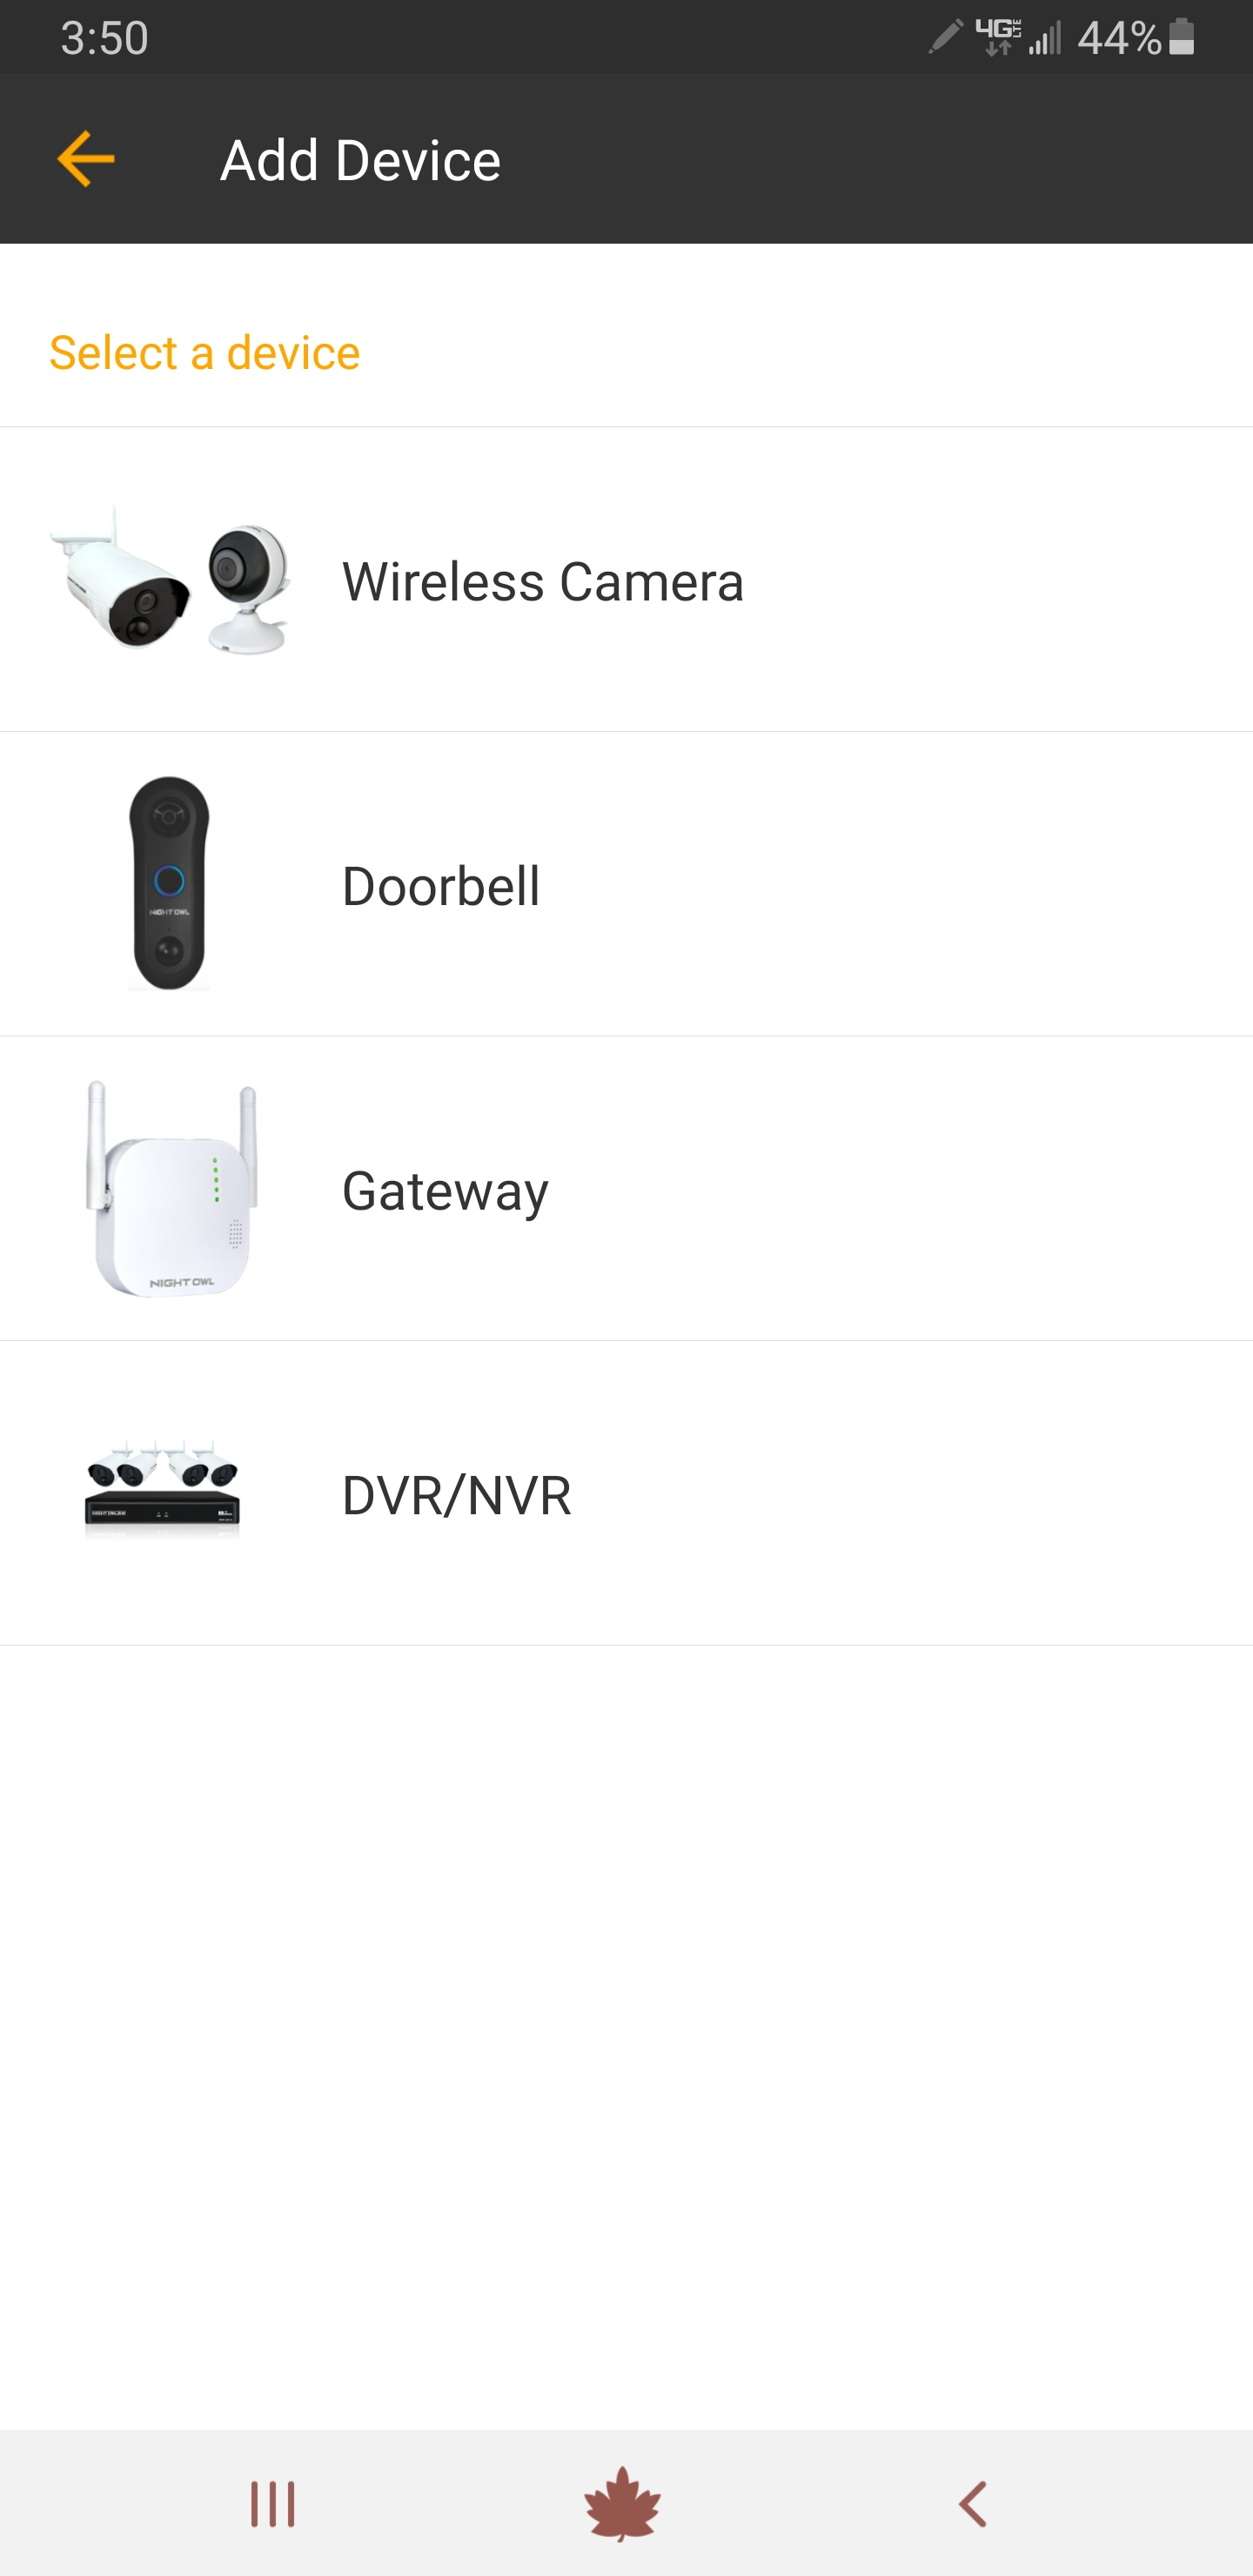
2. Tap “DVR/NVR.”
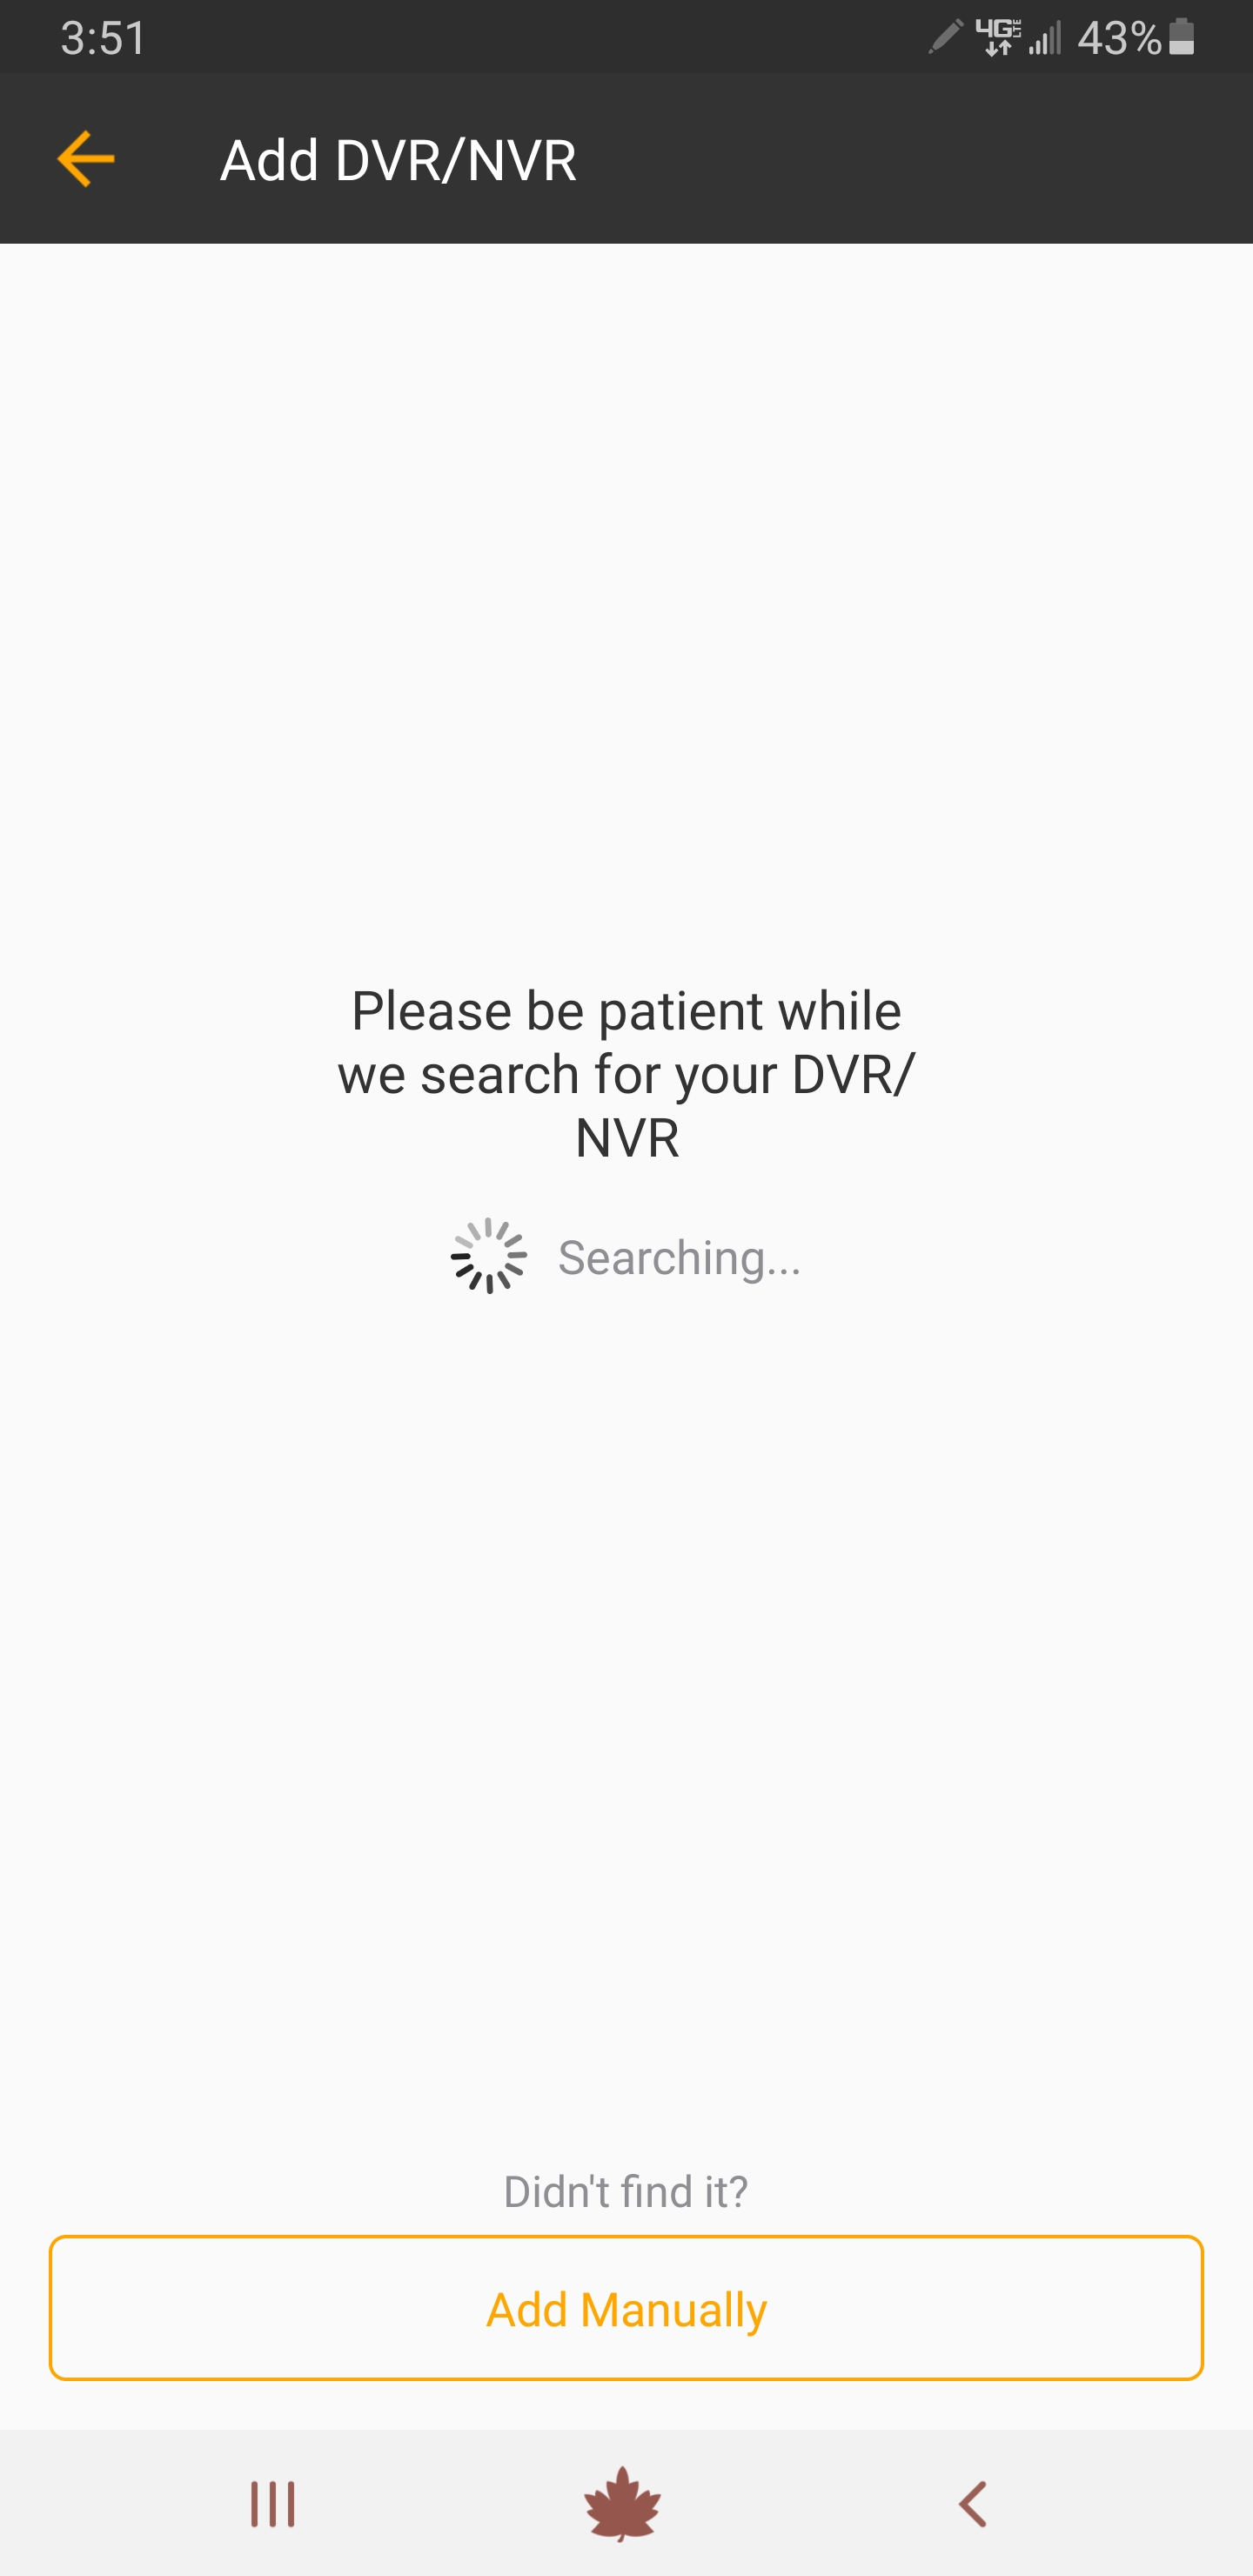
3. The App automatically searches for any Recorder on your network. For this method, your Smart Device and Recorder must be on the same network.
|
|
Copy and paste the verification code into the Code field.
|
|
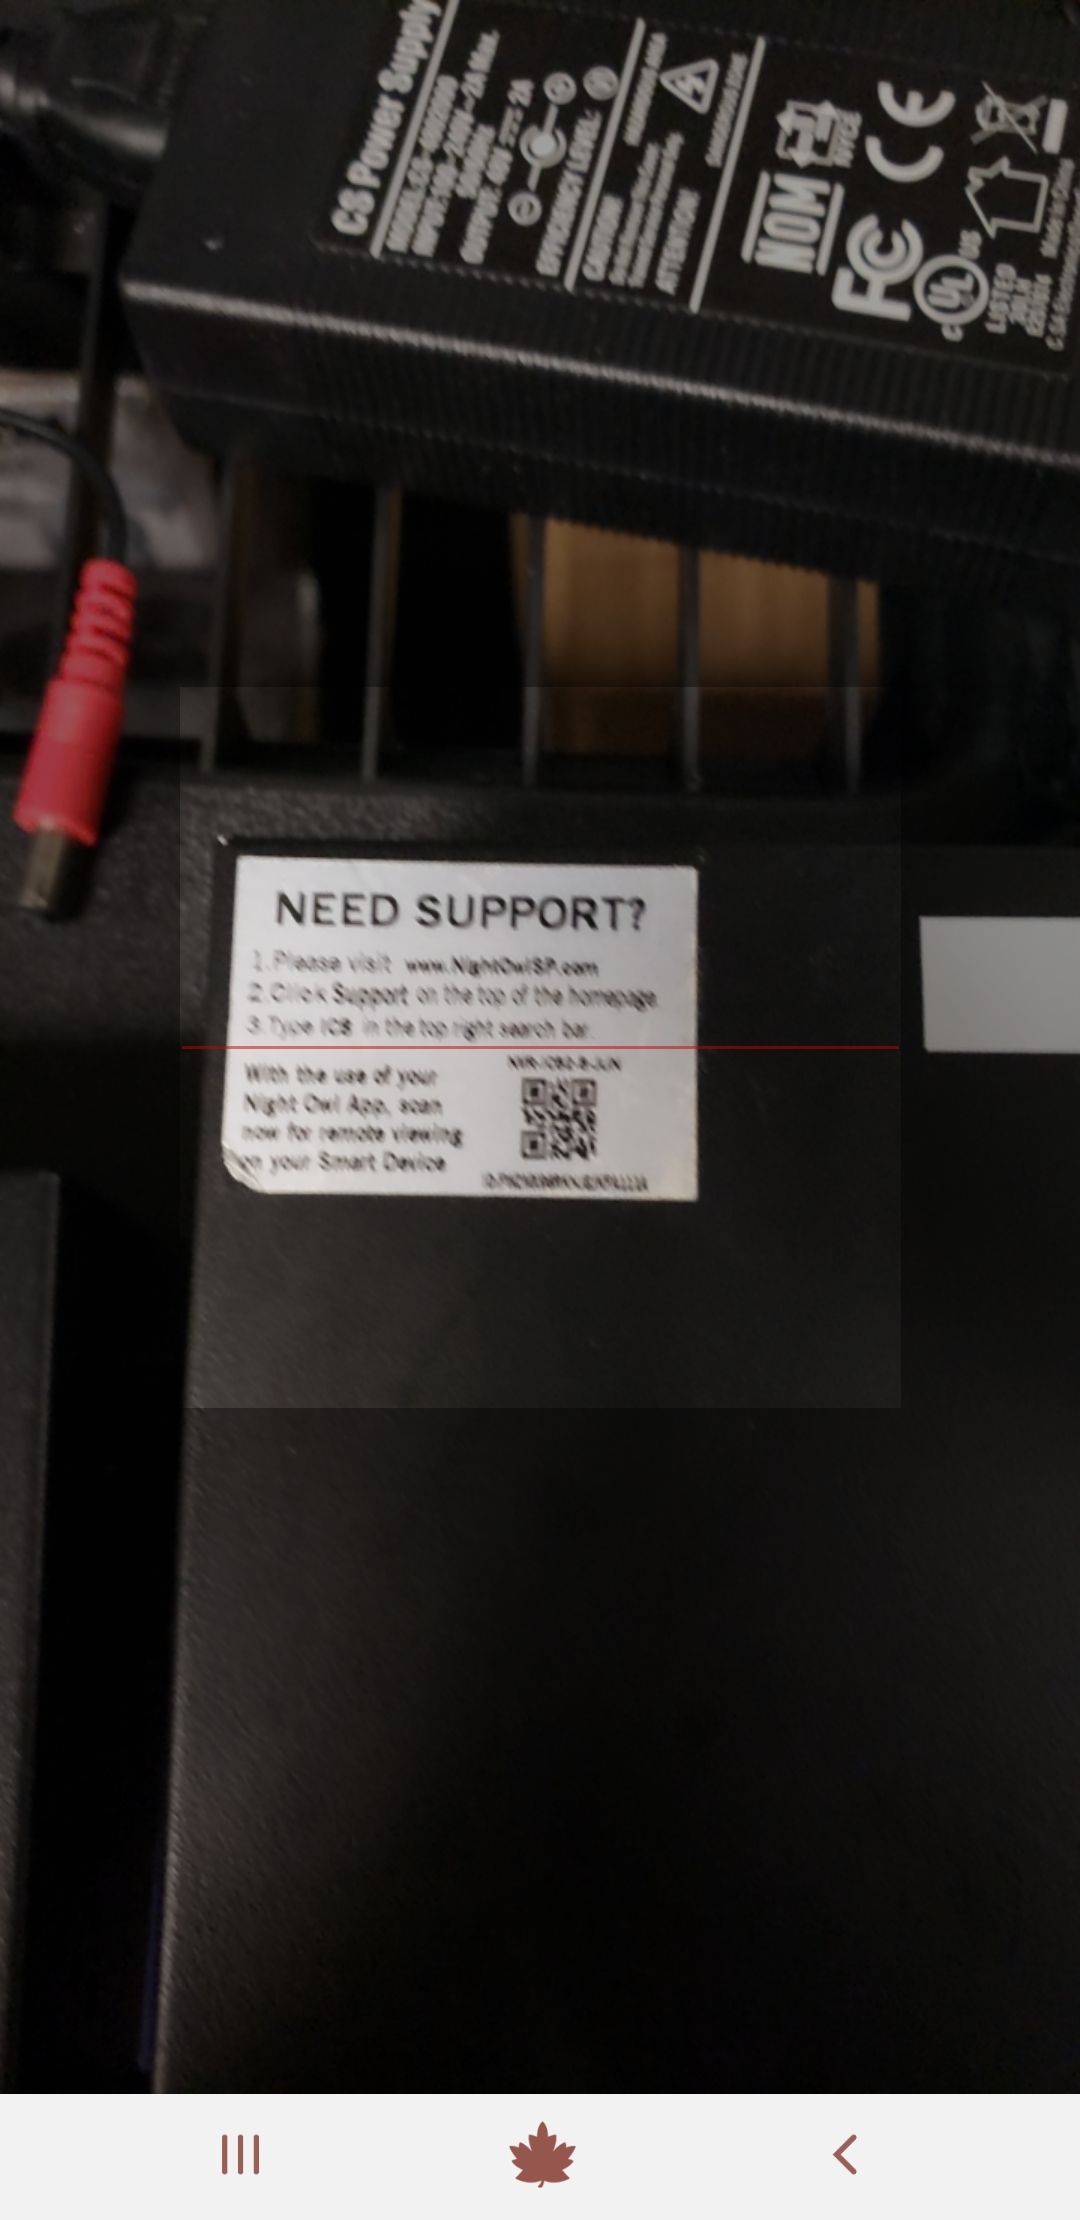
4. If your Smart Device or Recorder are not on the same network, or nothing populates, then tap “Add Manually” to perform a QR code scan.
|
|
Copy and paste the verification code into the Code field.
|
|
Copy and paste the verification code into the Code field.
|
|
5. Locate the UID number on the Recorder’s support sticker and confirm it matches the UID displayed in the App. Tap the UID that matches your Recorder’s UID.
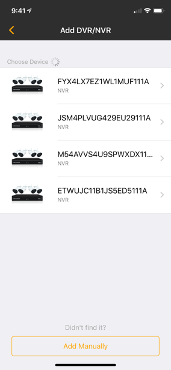
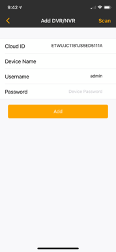
6. Name your device and enter the password used to log in to your Recorder. Tap “Add” to complete this process and begin live viewing your cameras.
NOTE: This is your Recorder’s password, not the App password.
b. Adding a Gateway (WG4 Series)
NOTE: Our Gateway has 4 wireless channels and can hold up to 4 compatible wireless devices.
(Click Here for a Short Video Tutorial)
Before proceeding, please ensure that your Gateway is connected to the Internet using the included Ethernet cable. Once connected, please follow the steps below:
1. Please log in to the App and tap “Add Device.”
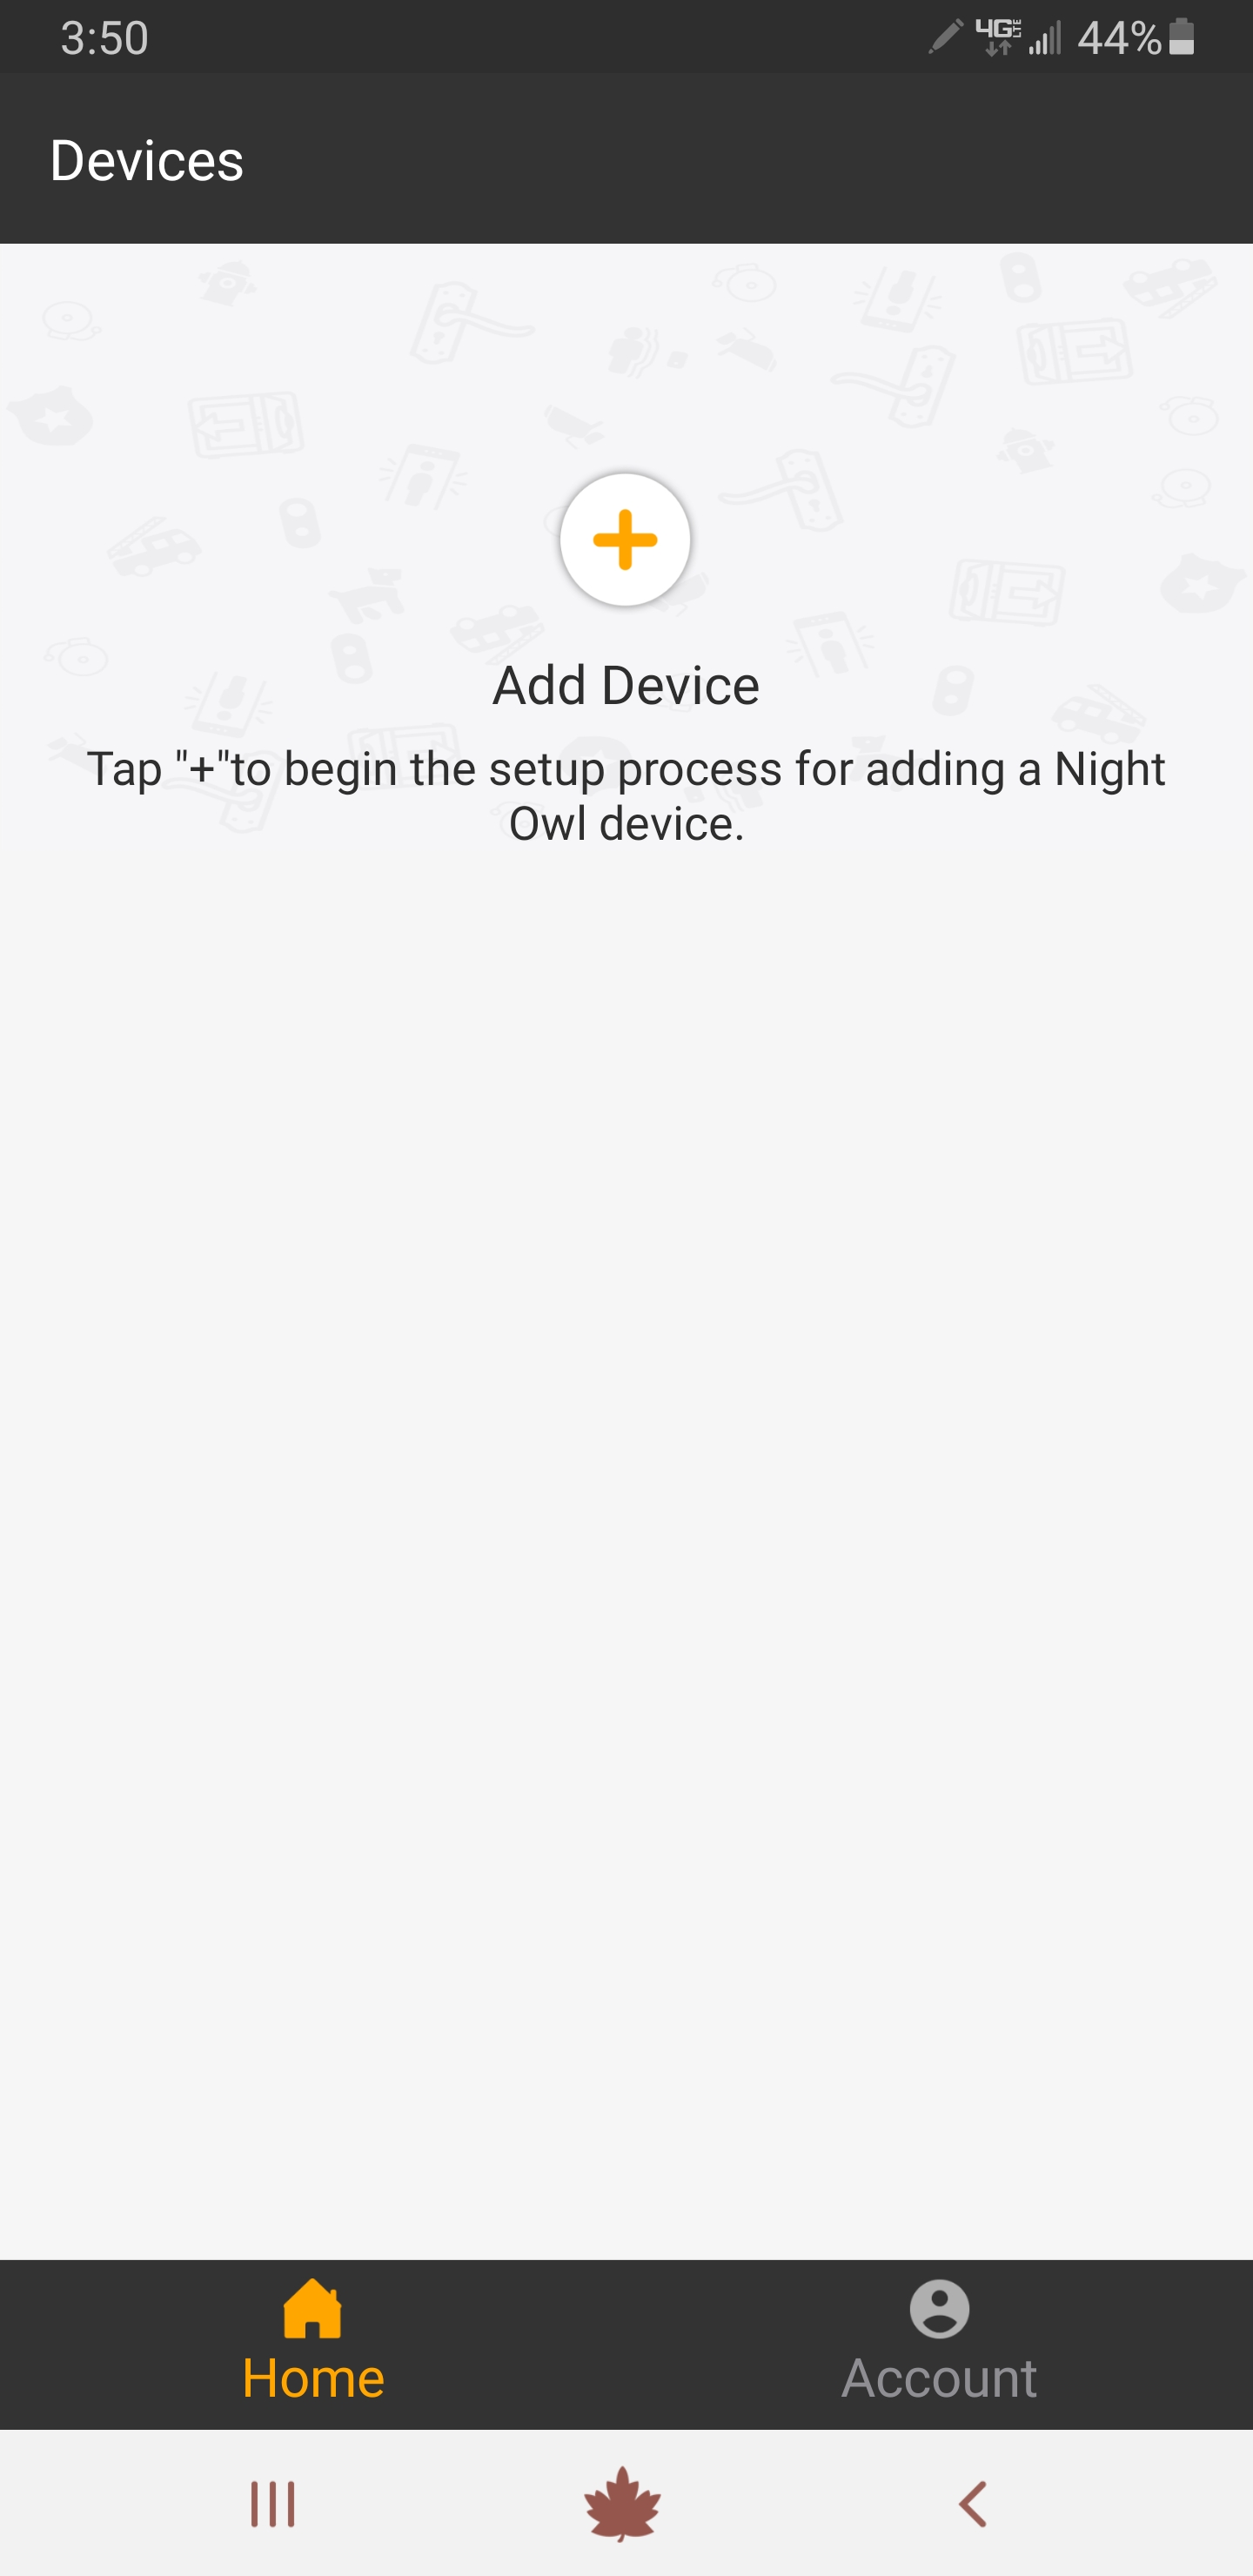
2. Tap “Gateway.”
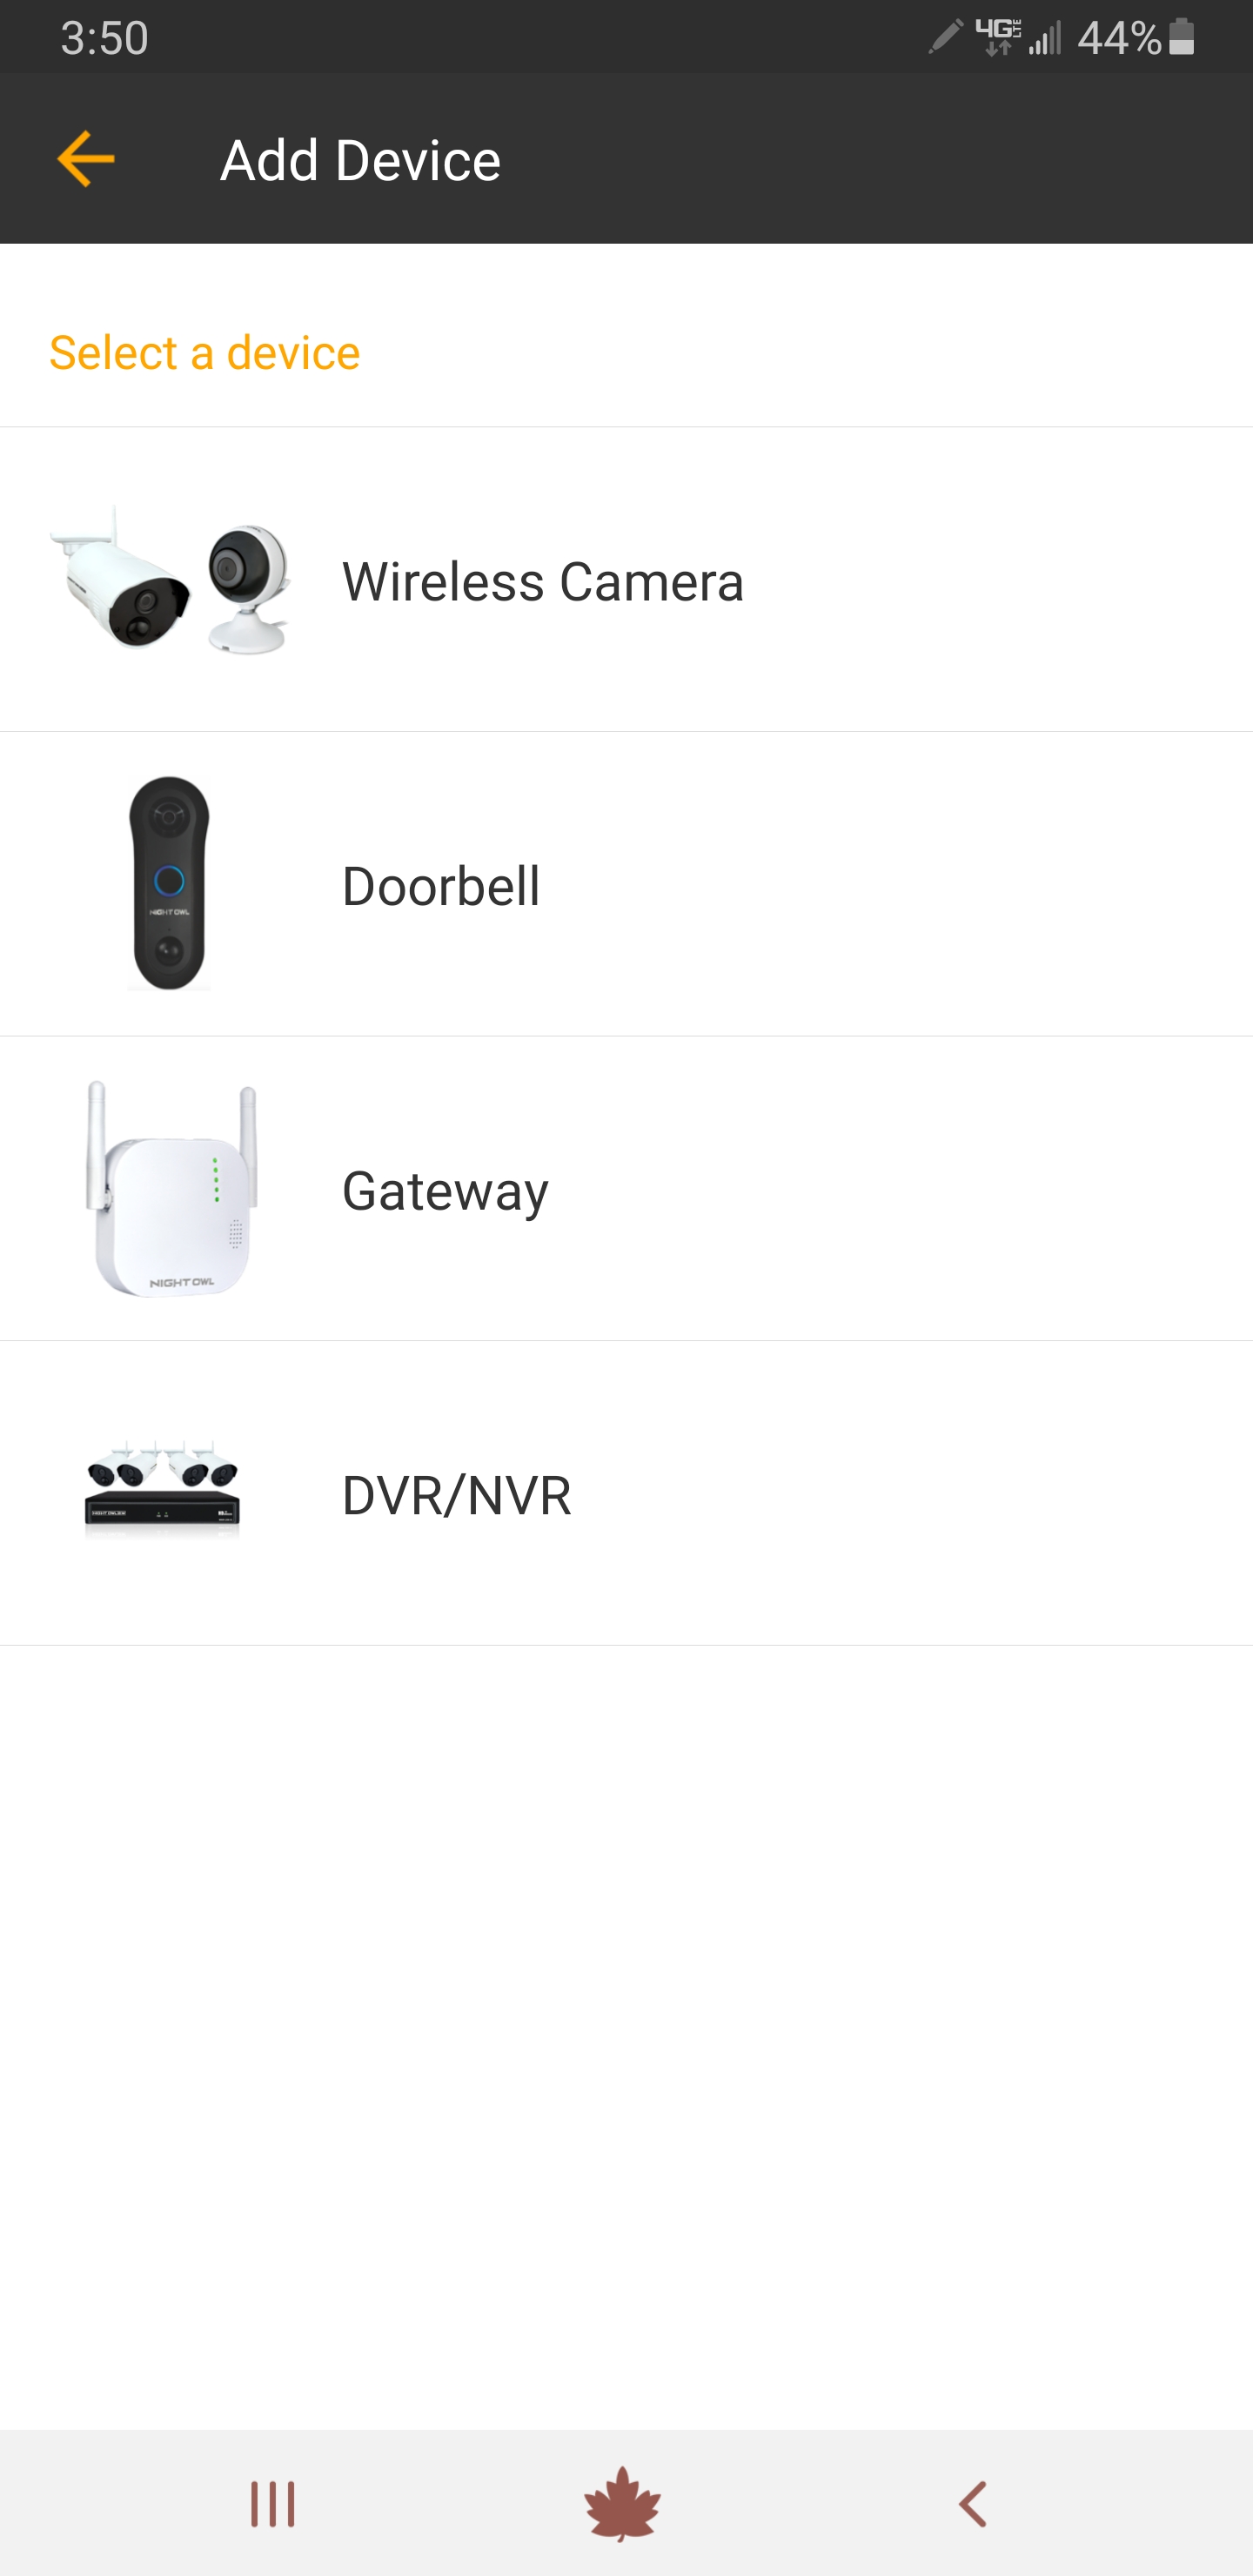
3. Read the onscreen instructions carefully. Ensure the Gateway and your Smart Device with the App are on the same network. Tap “Next” to continue.
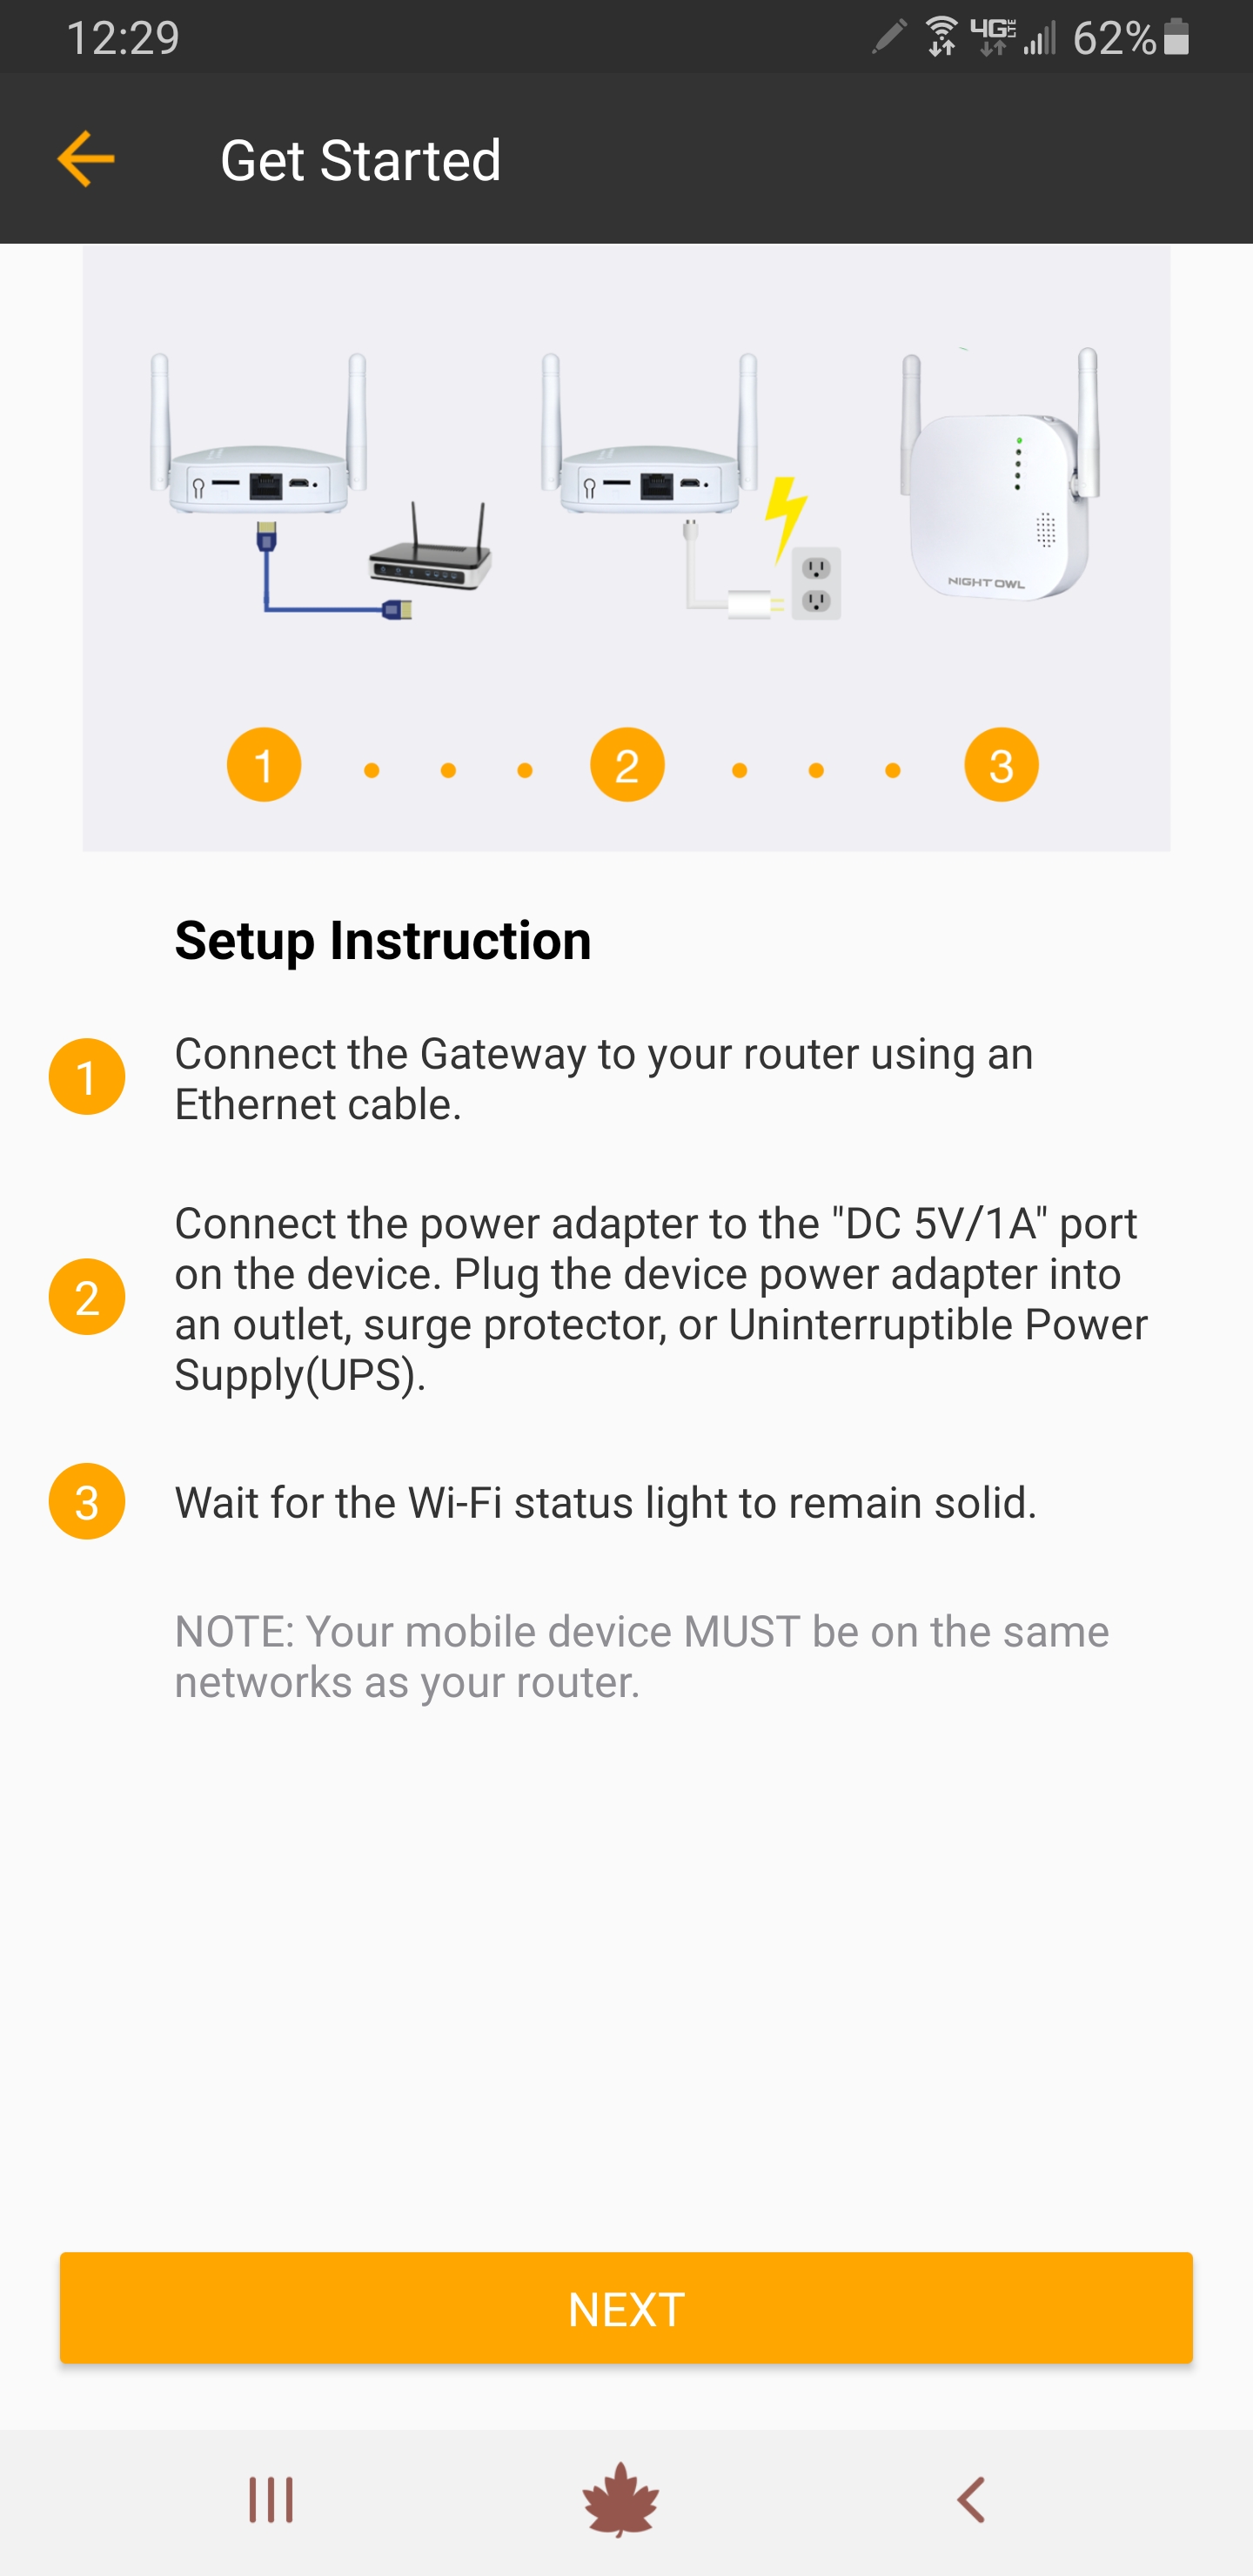
4. Now you will see the Gateway appear. Tap on it to continue adding.
NOTE: If the Gateway does not appear, it means the App could not locate it. Please view the setup instructions again and ensure the Gateway and your Smart Device with the App are on the same network.
|
|
Copy and paste the verification code into the Code field.
|
|
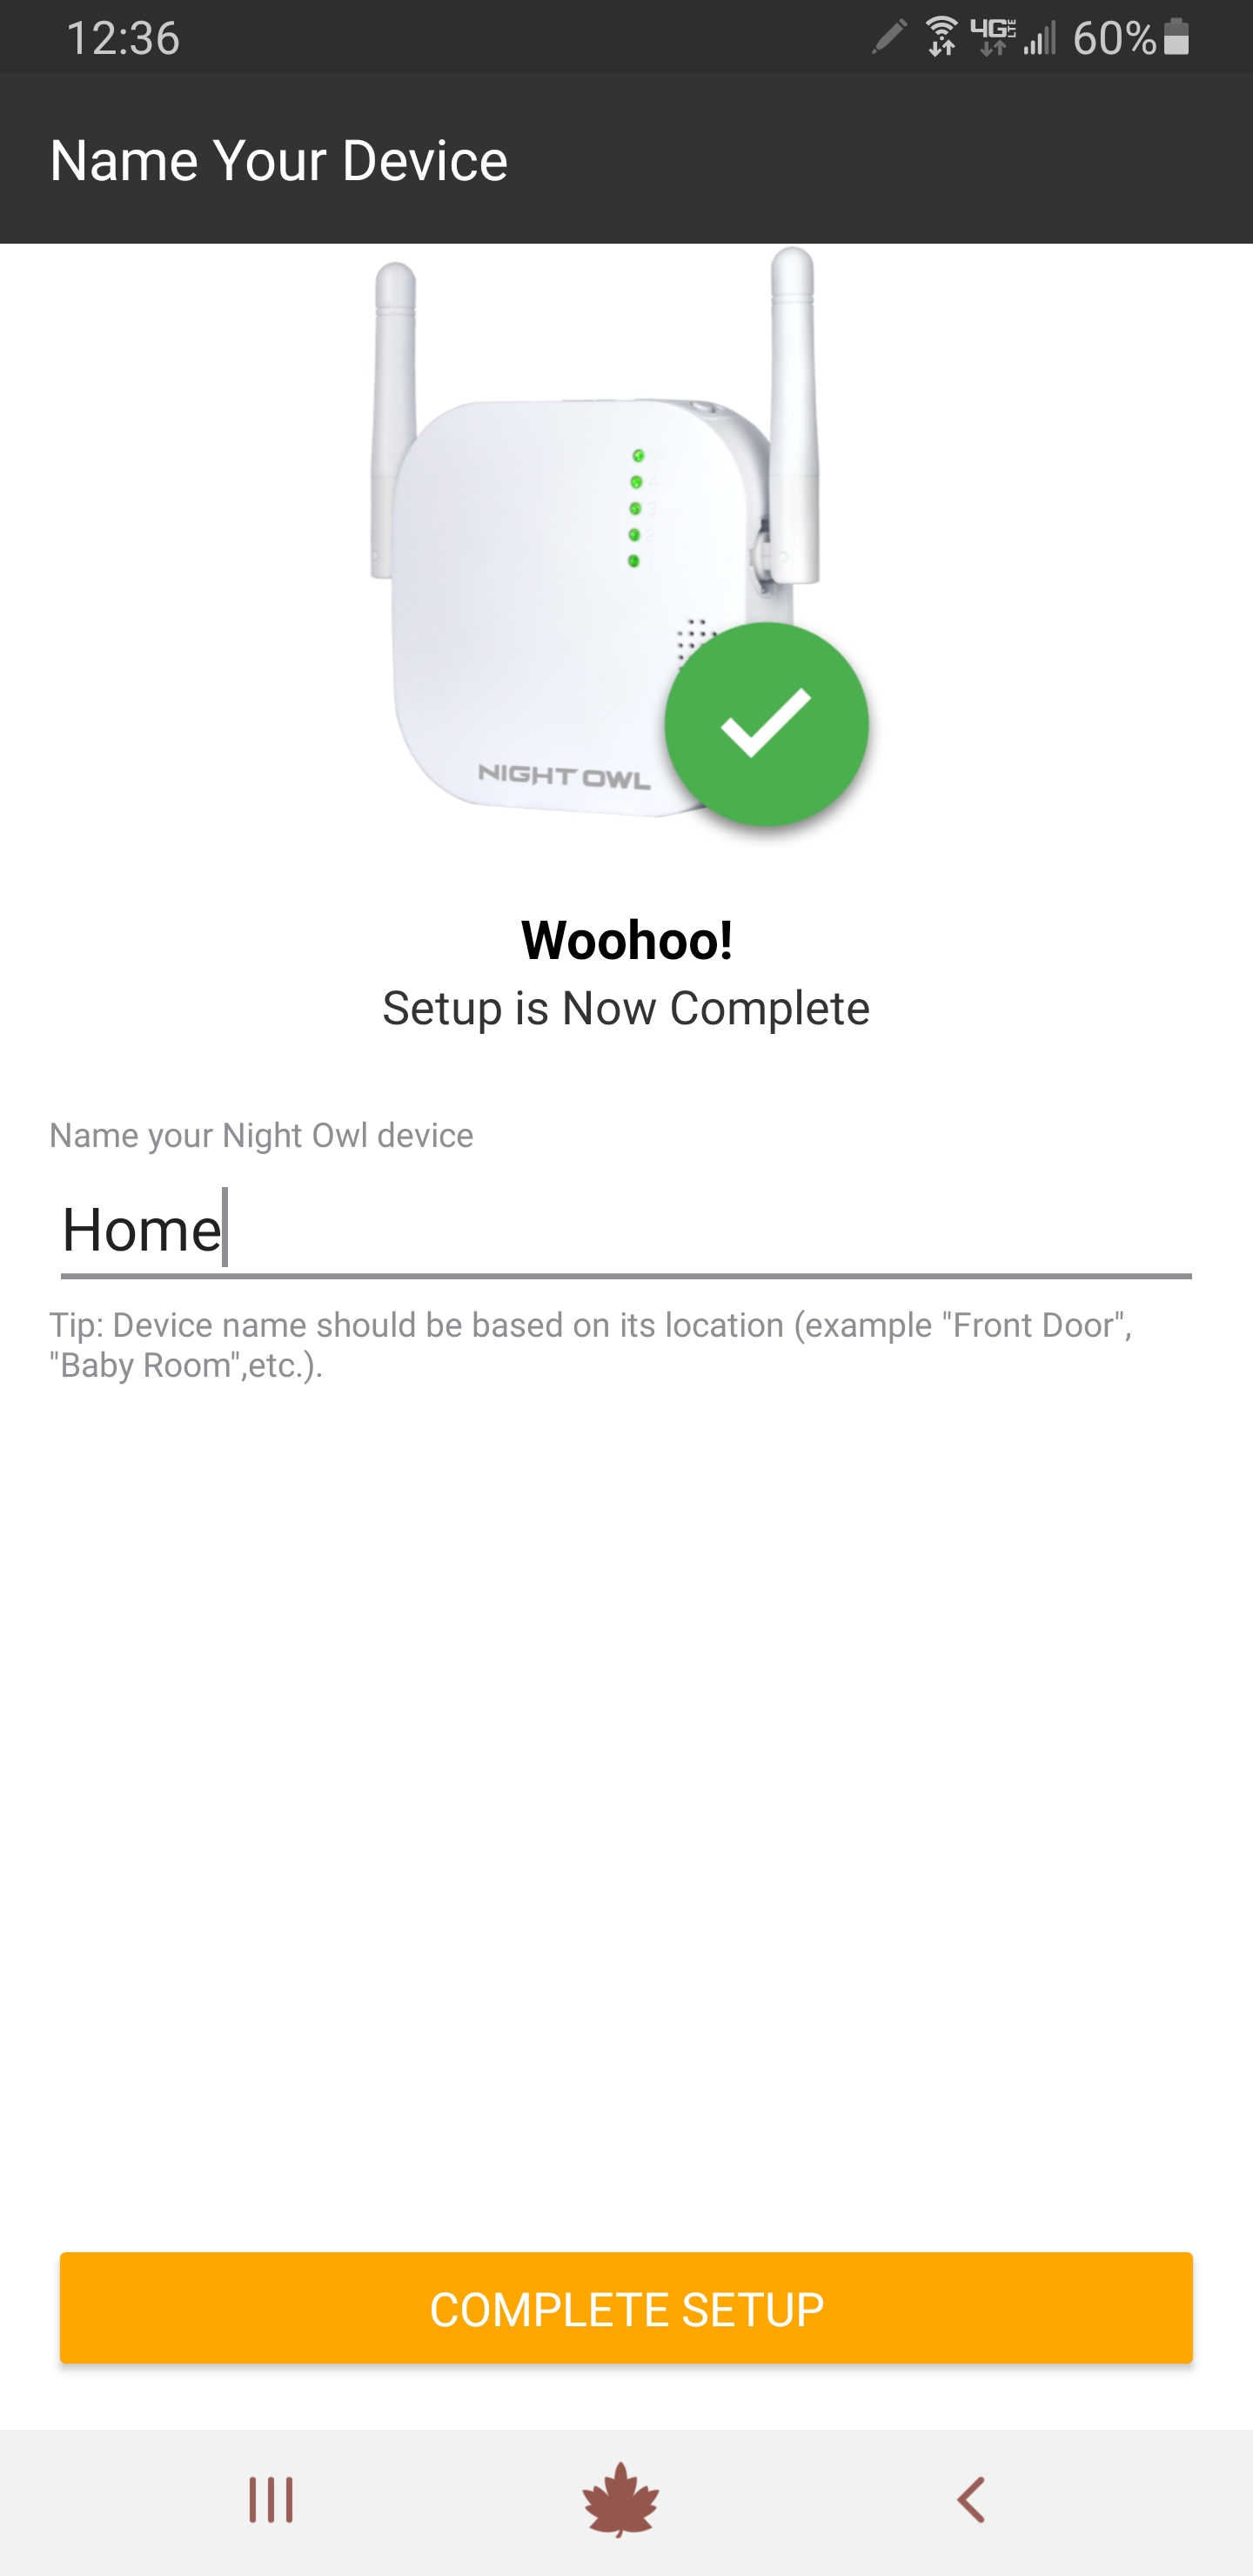
5. If adding was successful, the Gateway will say “Woohoo” and you will see this screen. Please name your device and then tap “Complete Setup.”
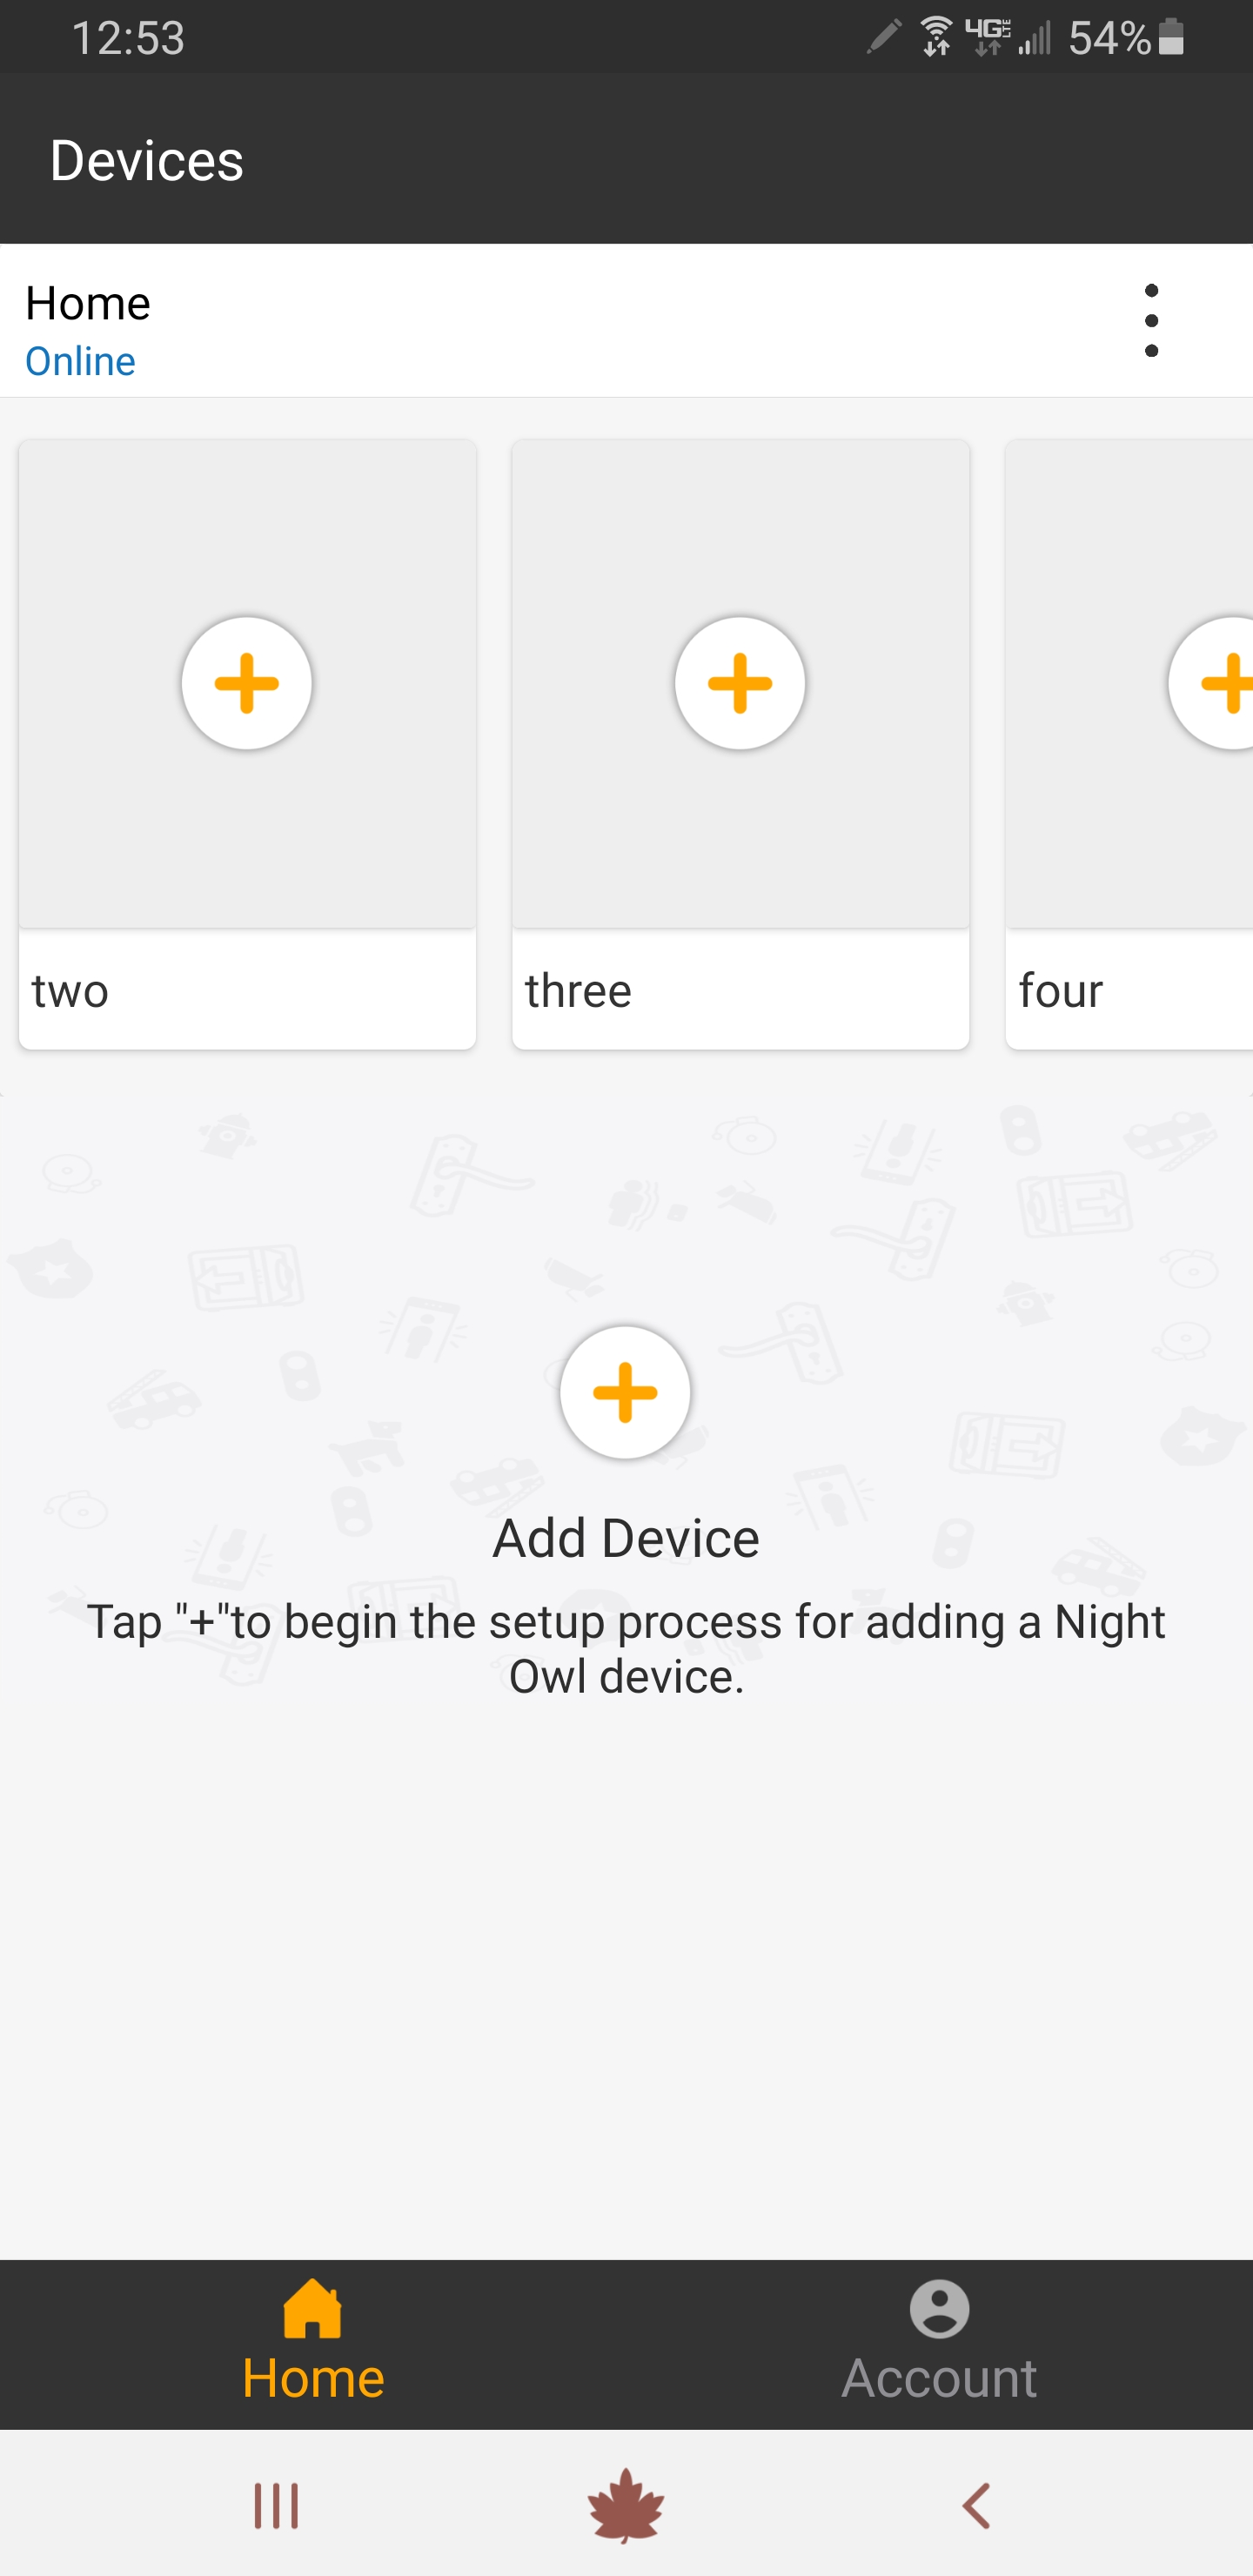
6. Now it’s time to add some compatible wireless devices. The Gateway can hold up to 4 total devices. Tap the “+” sign within the Gateway section to begin adding.
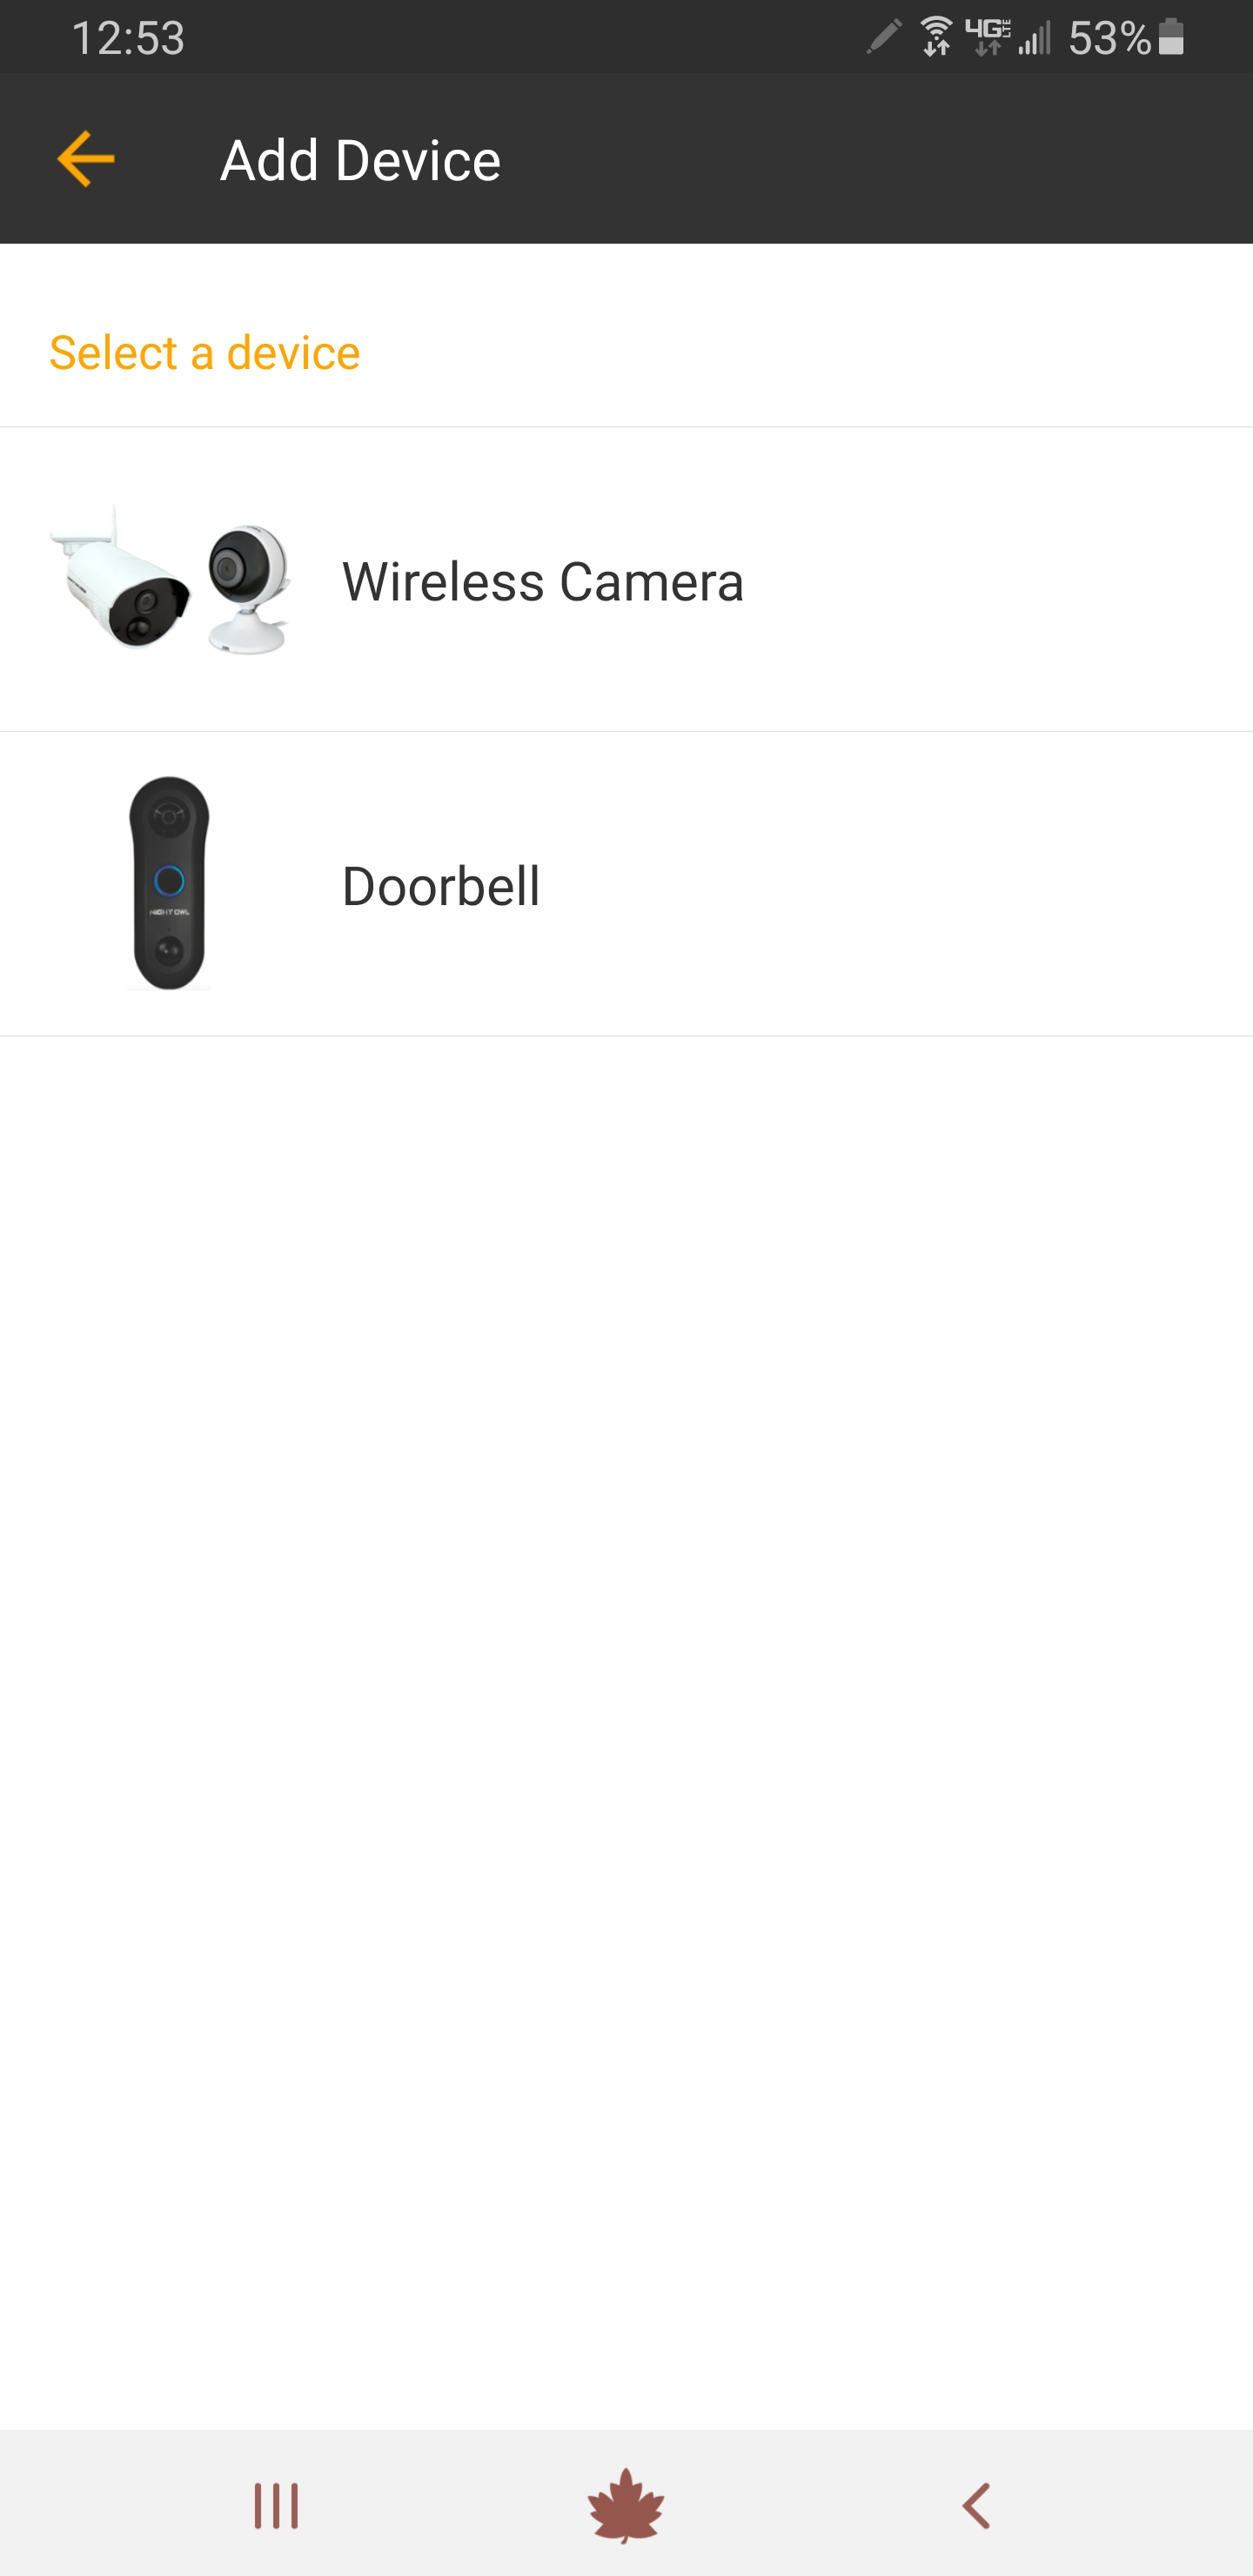
7. Select the type of device you will be adding.
8. The device you’re adding must be powered on and in pairing mode. Just as an example, we will be pairing an indoor wireless camera. Use the reset pin that came with your device, if necessary, to press the reset button and wait for the status light to begin flashing rapidly. This may take up to 3 minutes. Then tap “Yes, it is flashing” to continue.
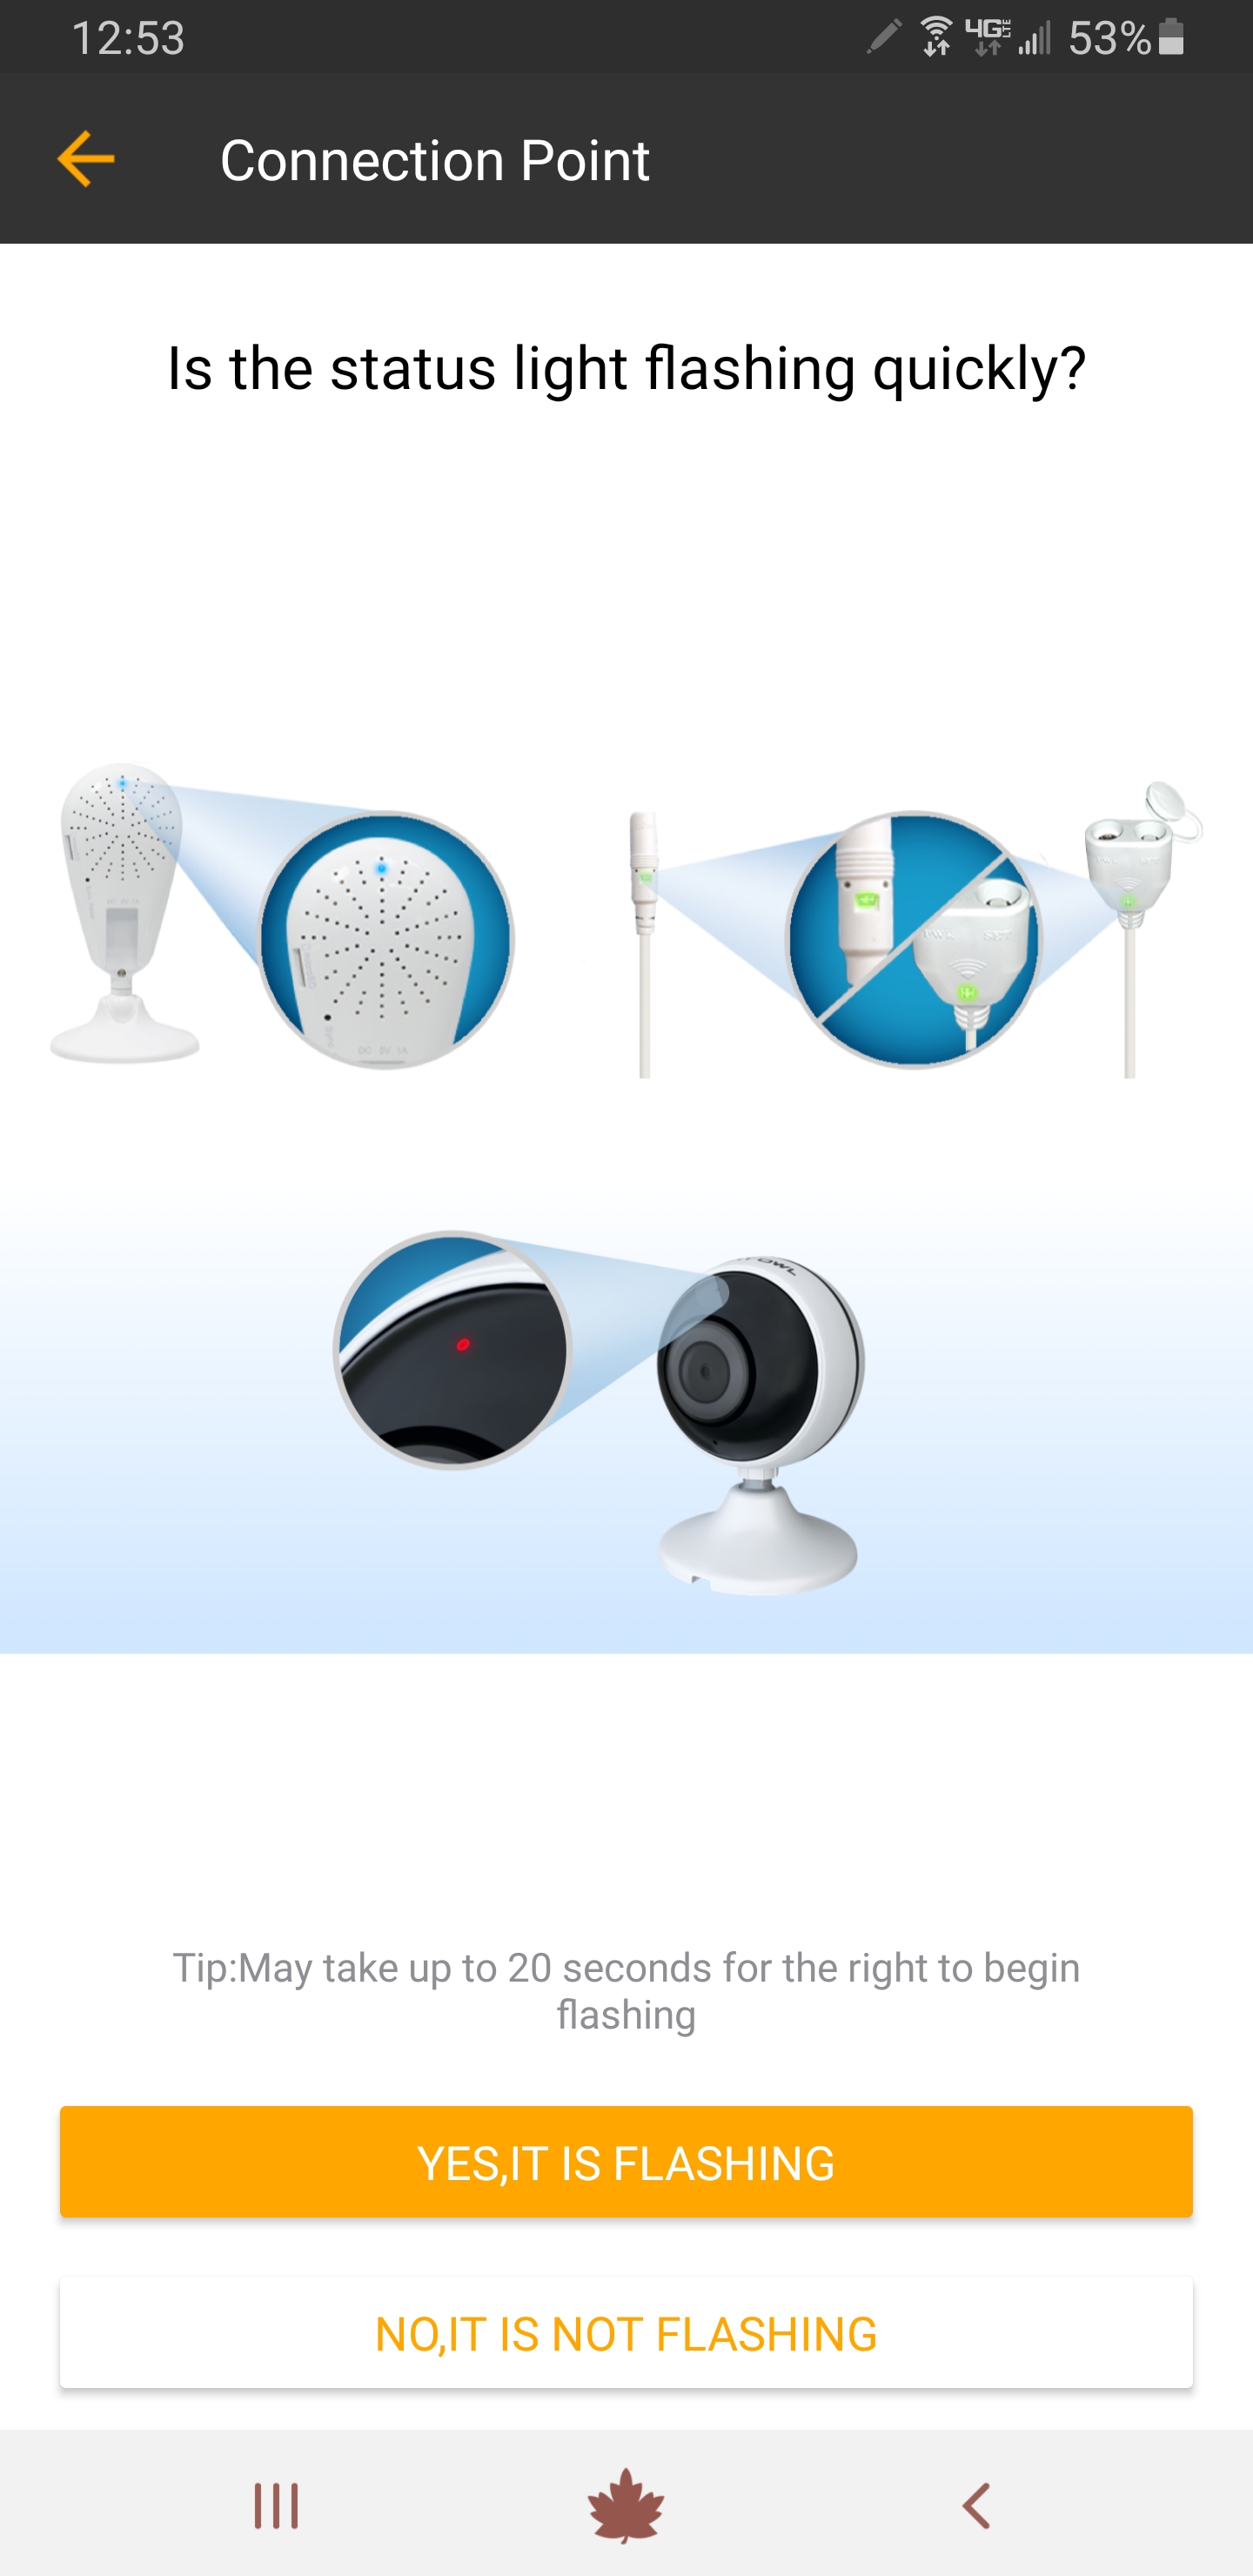
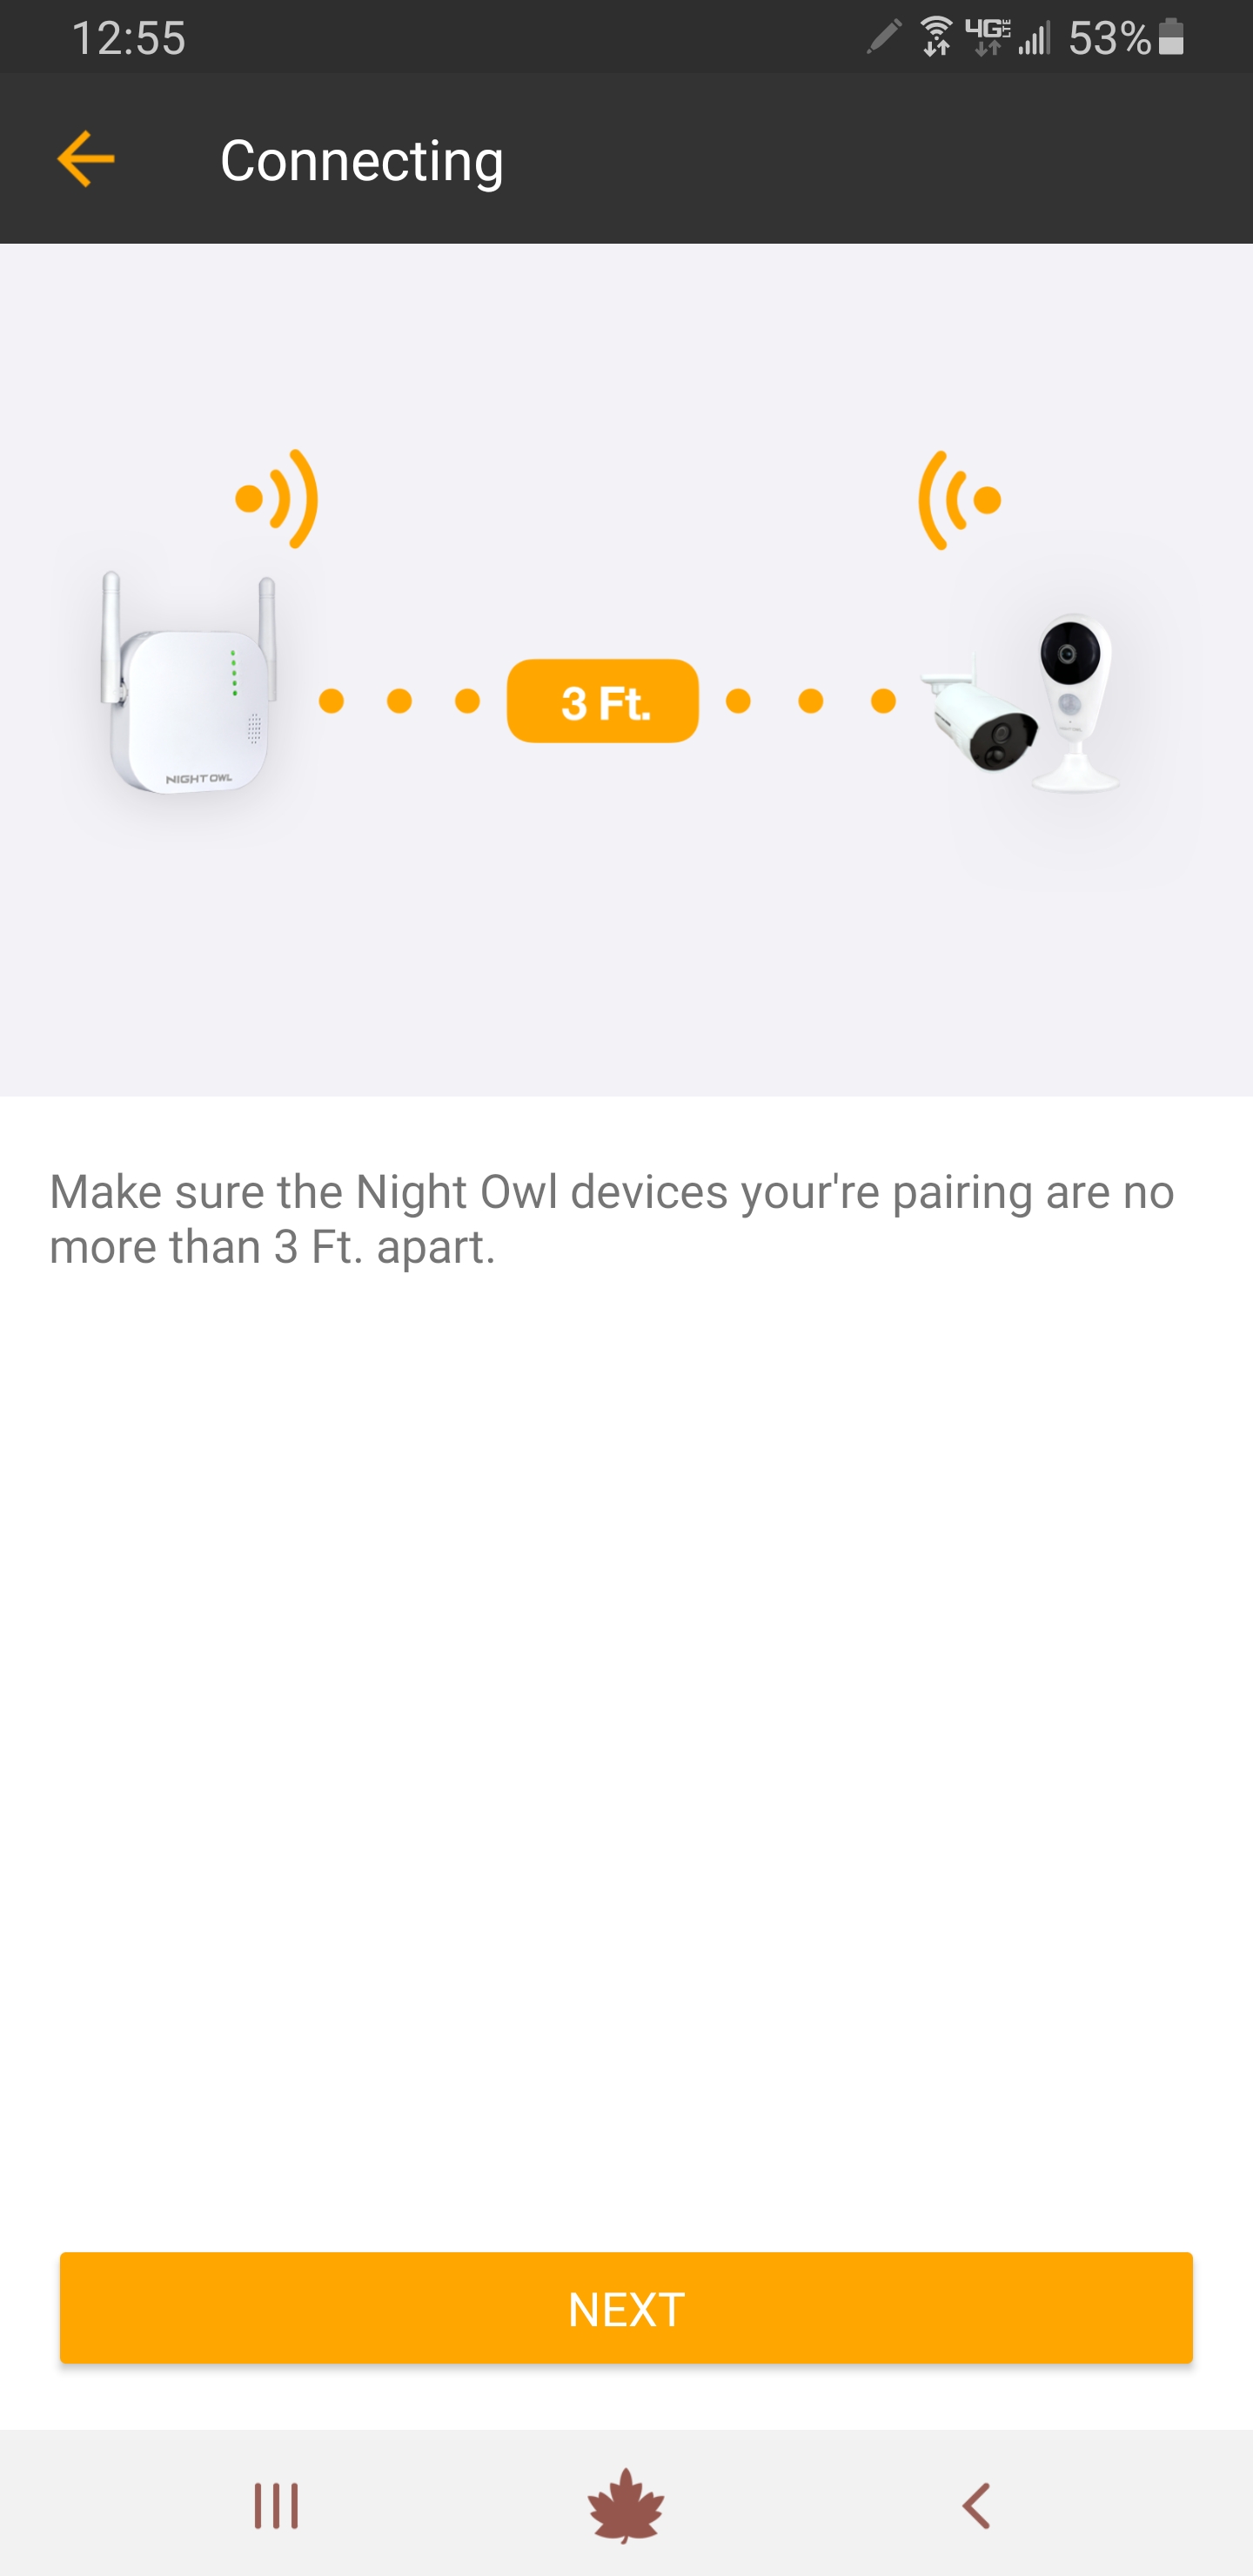
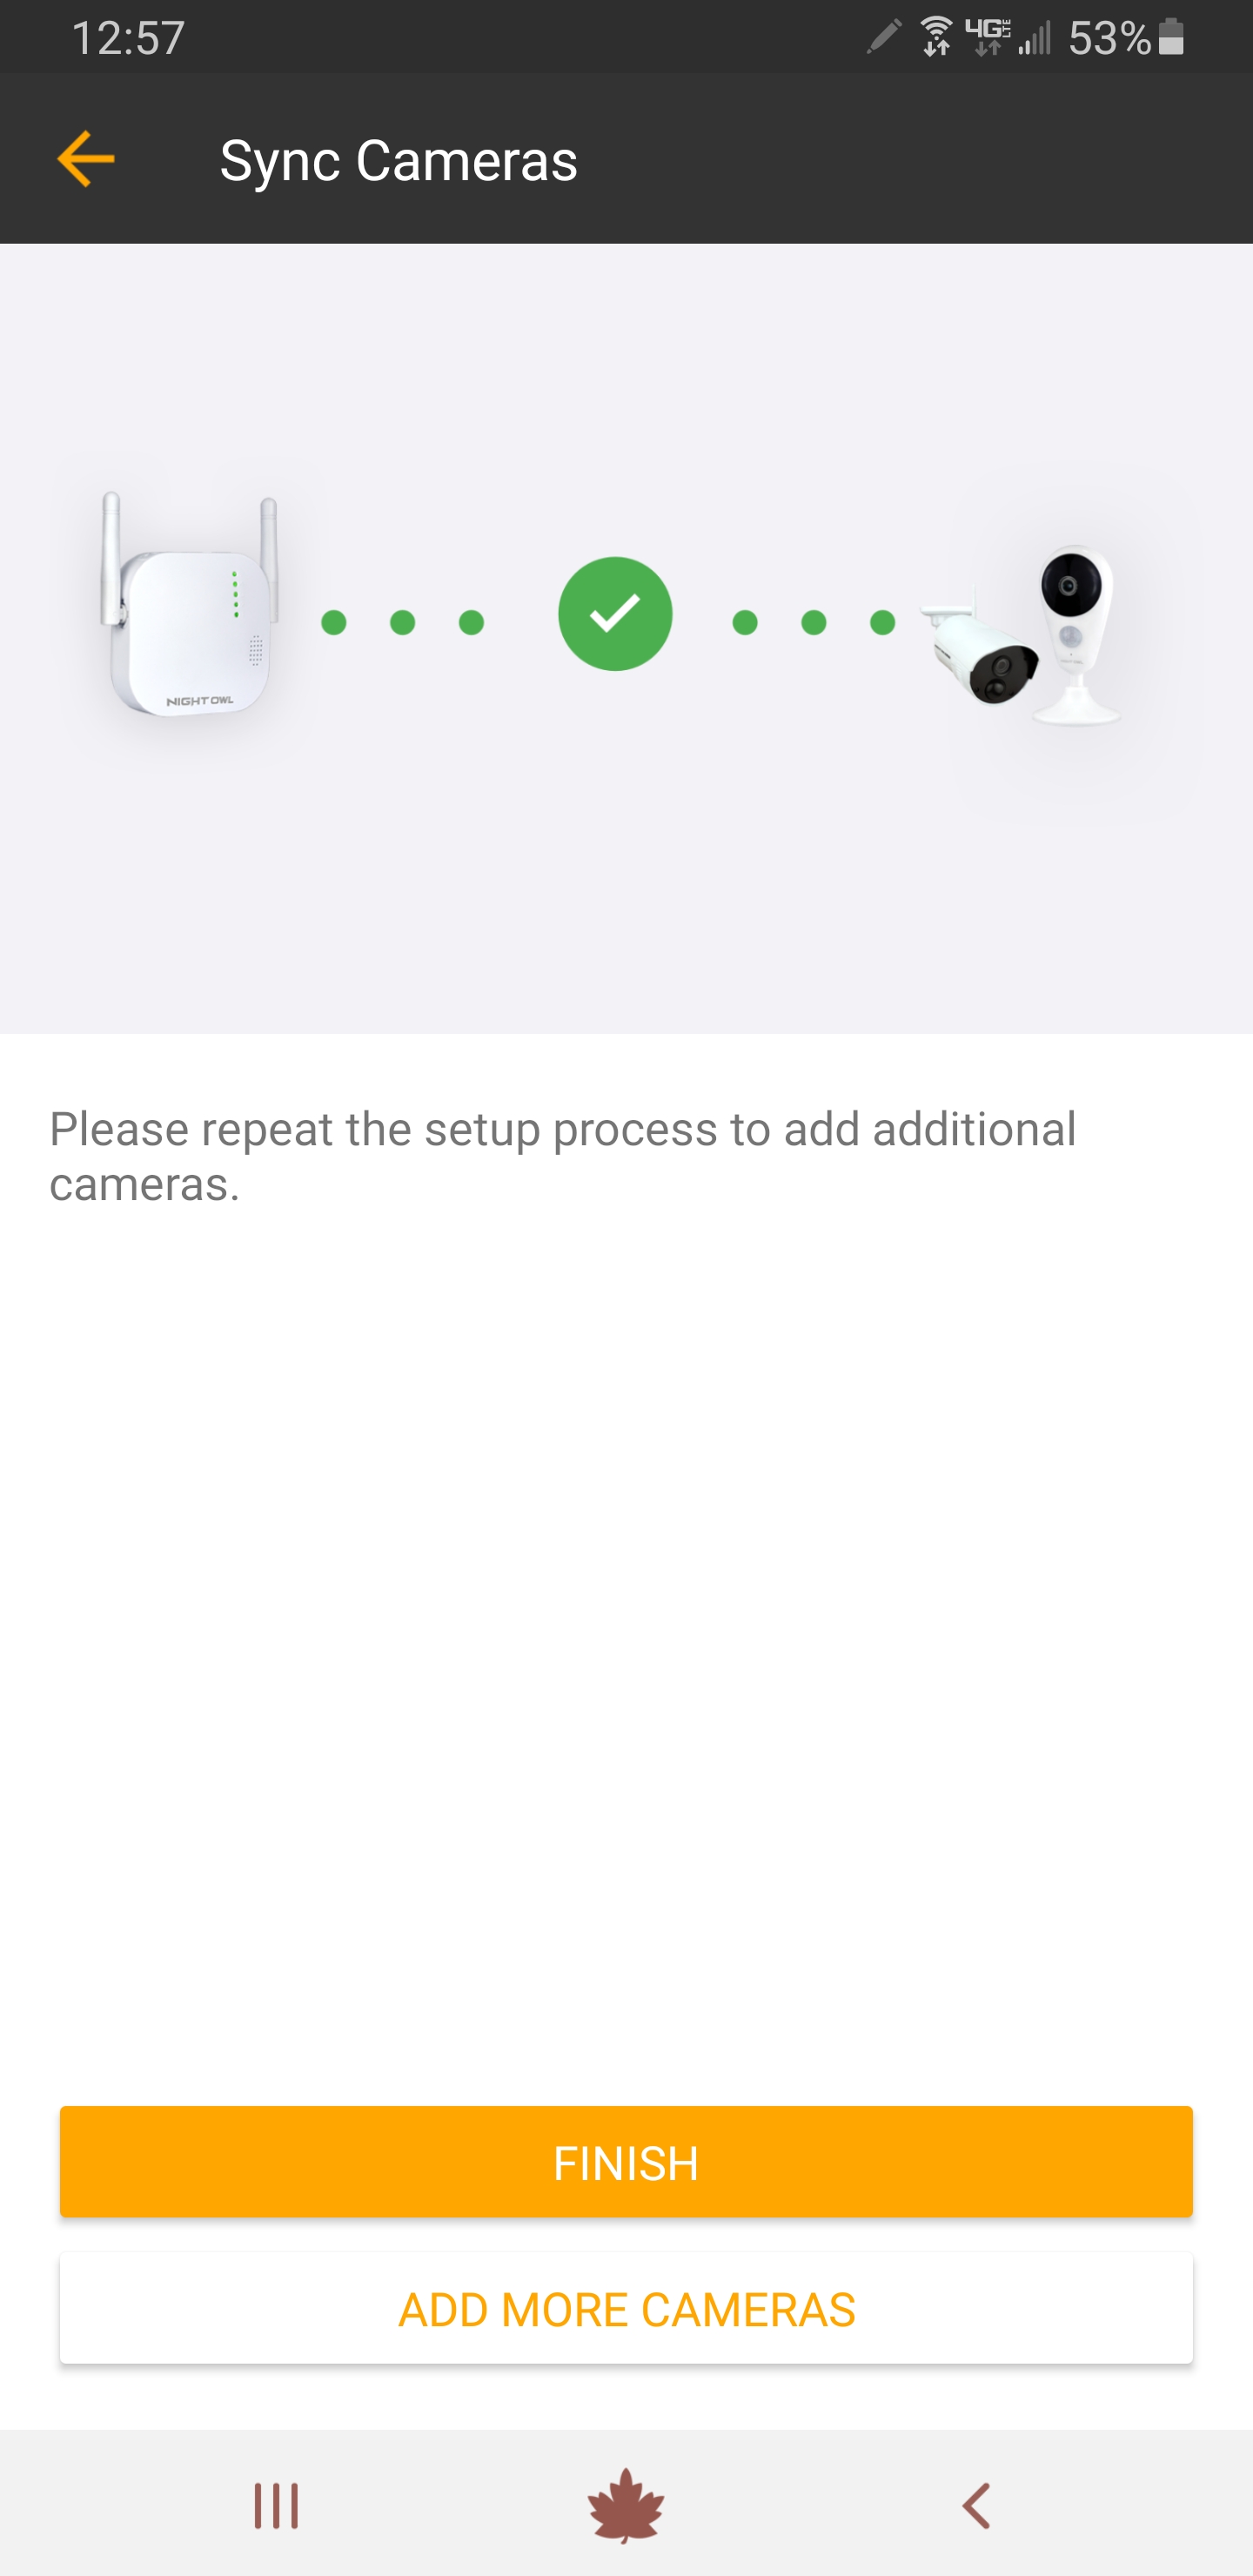
9. Now make sure the device you are adding and the Gateway are within 3 feet of each other and tap “Next.” Then tap “Finish” once synced.
|
|
Copy and paste the verification code into the Code field.
|
|
10. Press the Reset button on the back of your Gateway until you hear the Gateway say “I am pairing with the Night Owl device, please be patient.” Then tap “Next.”
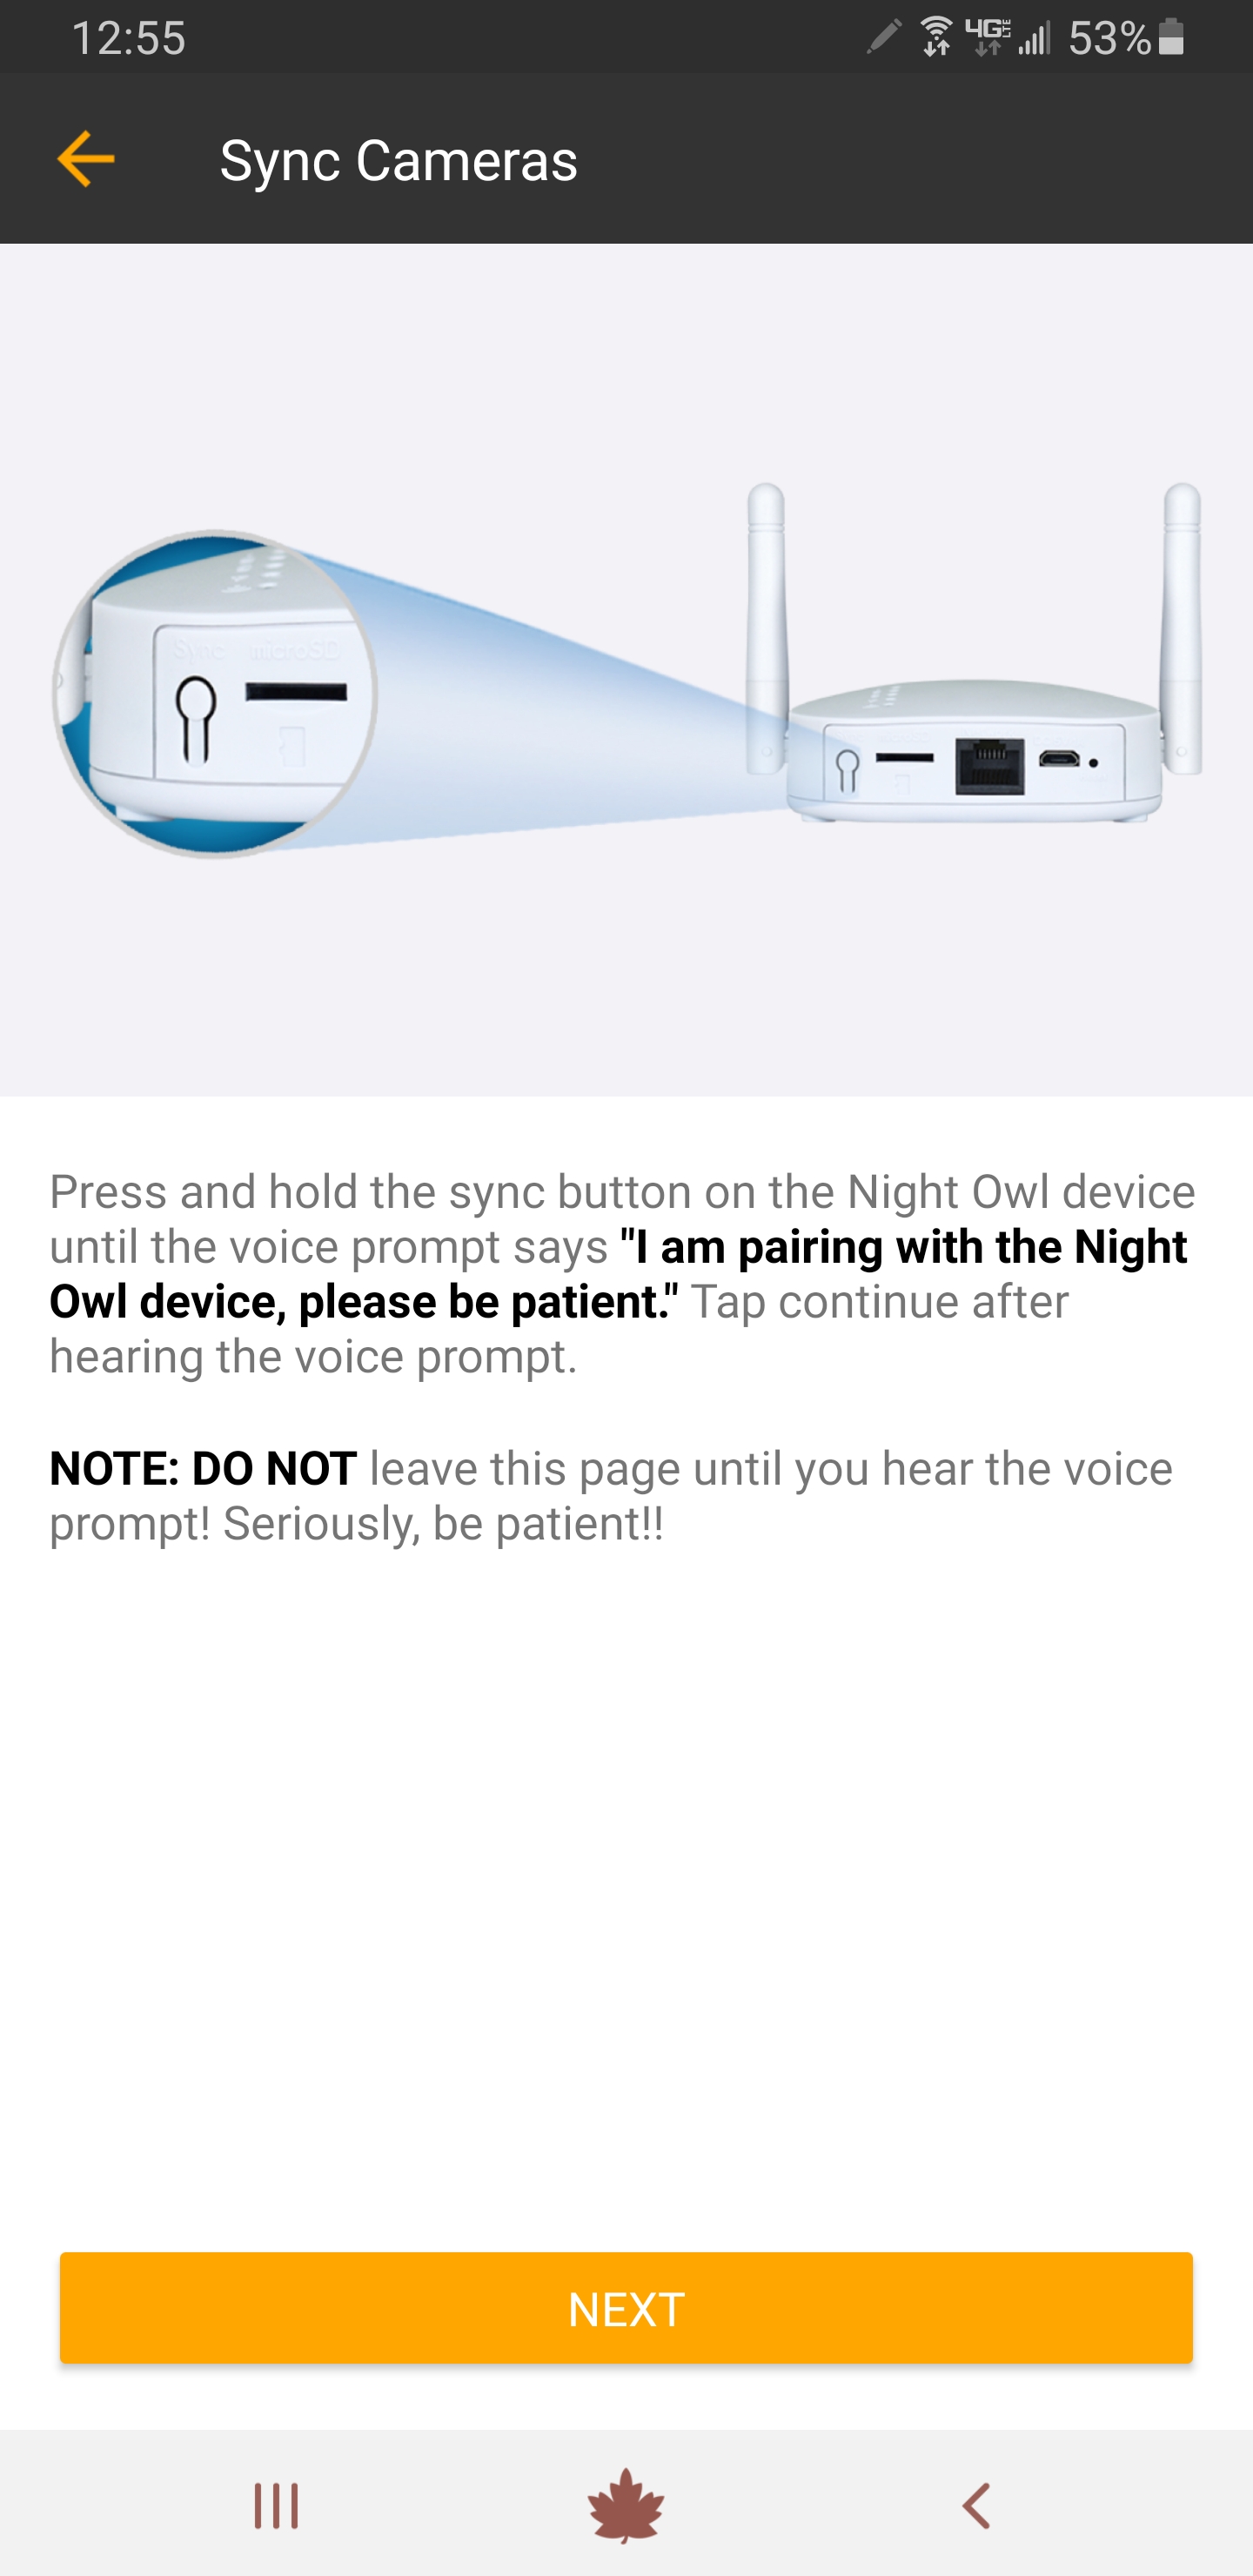
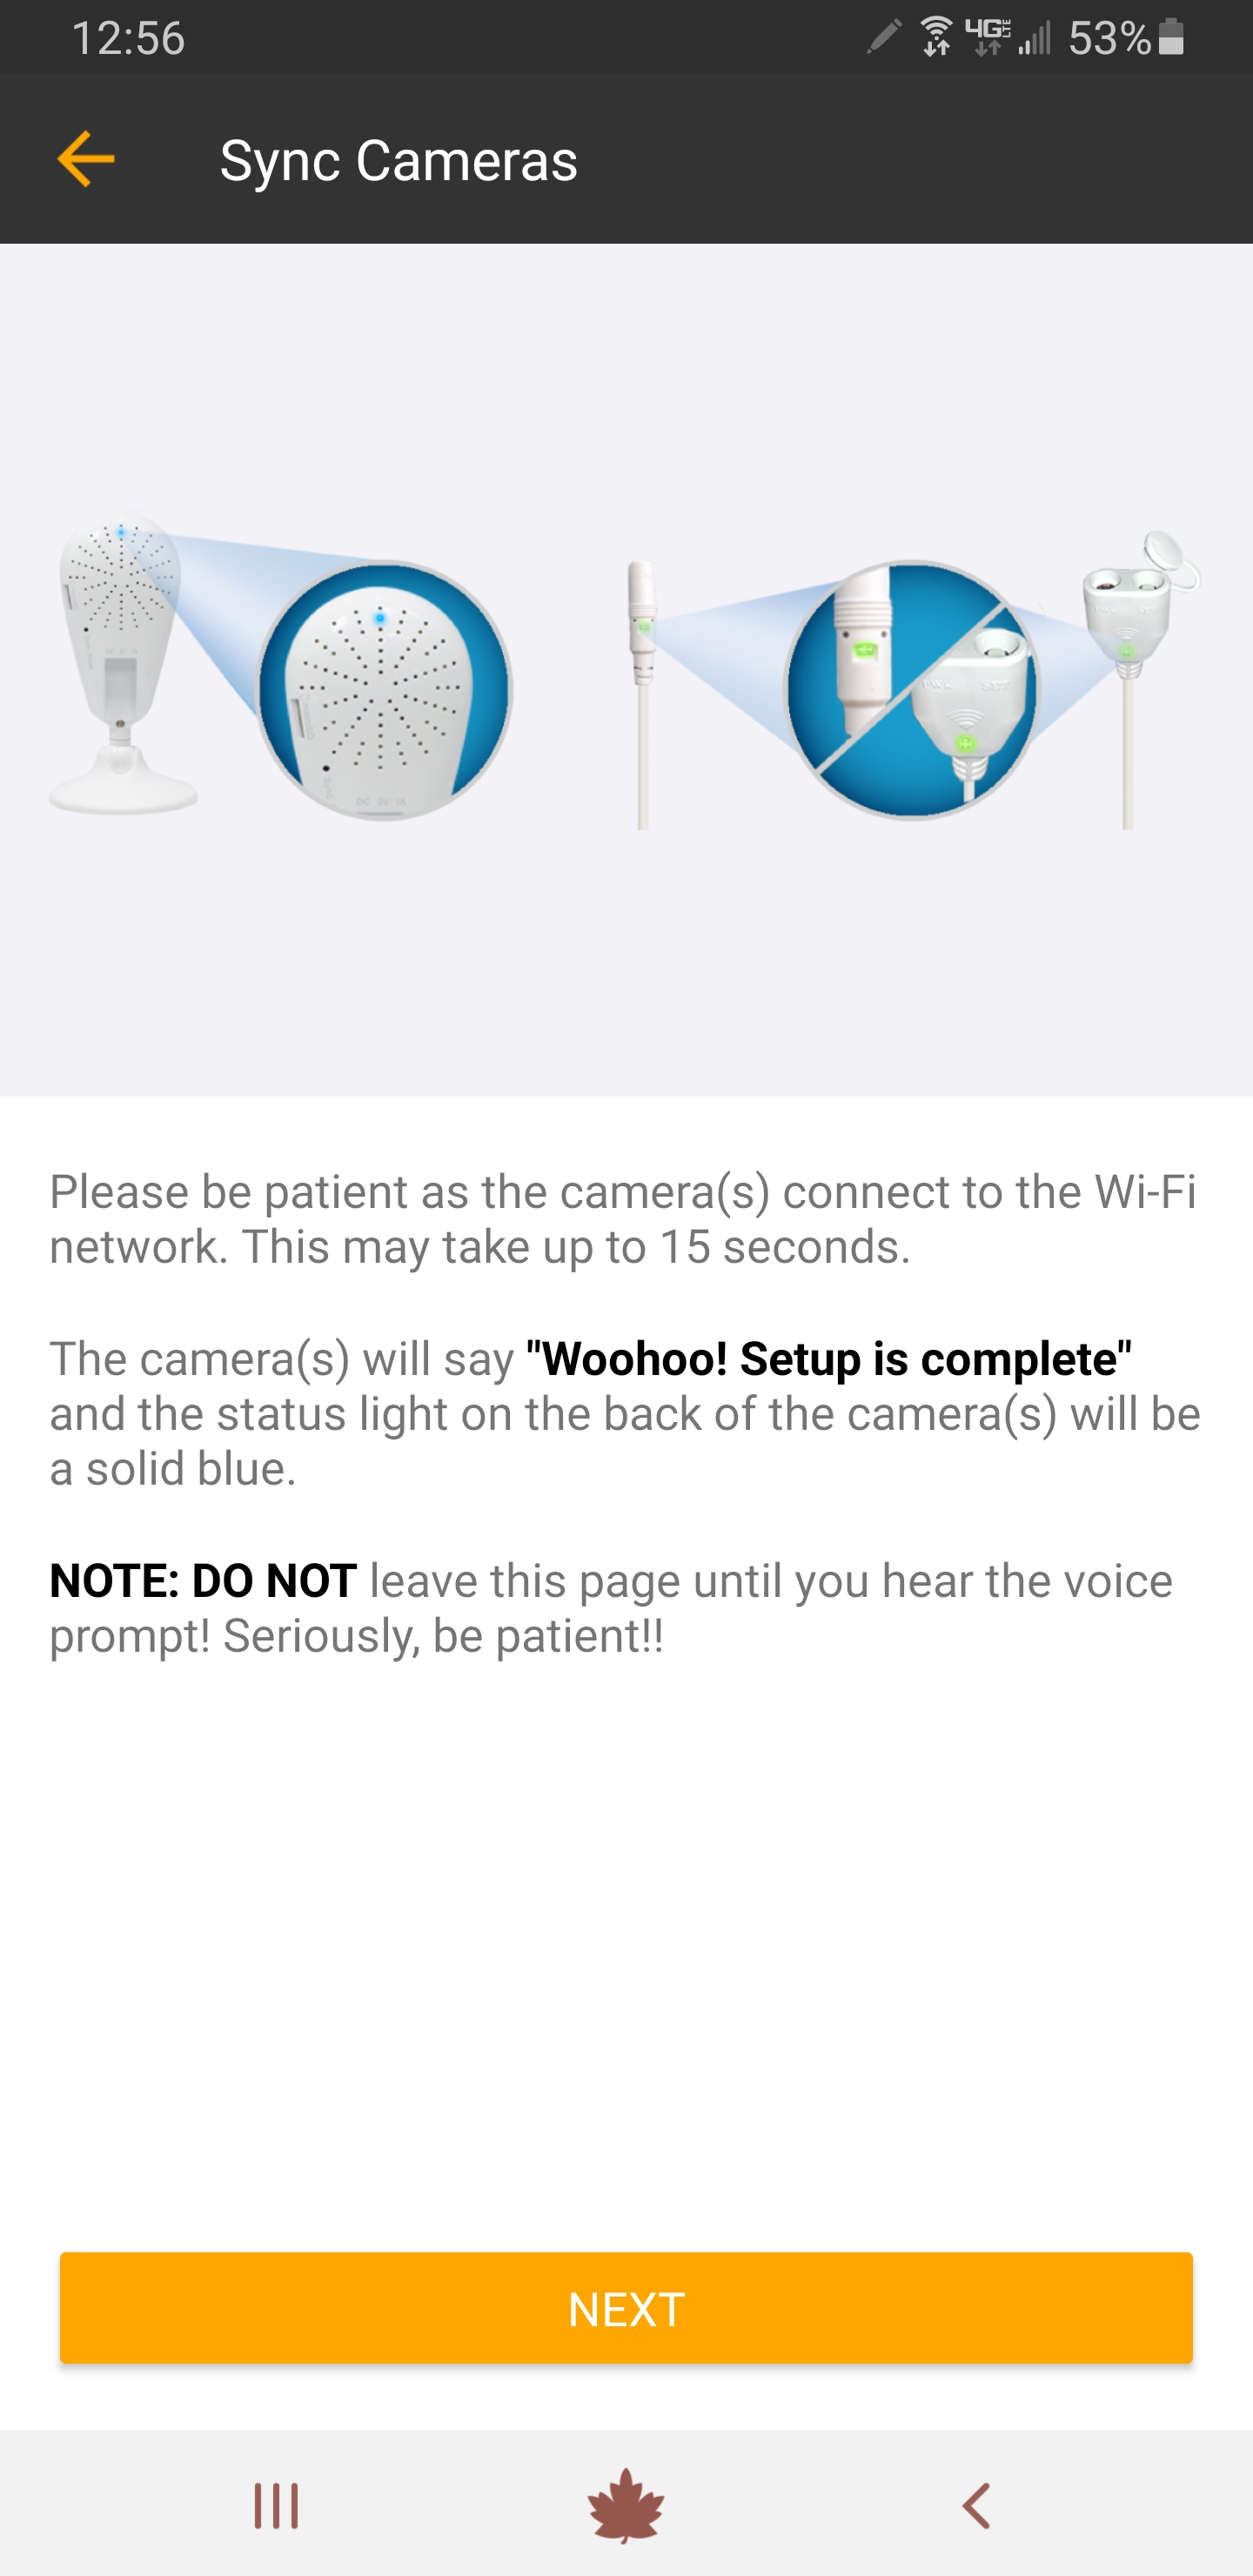
11. Wait for the device you are adding to the Gateway to say “Woohoo! Setup is Complete.” Then tap “Next.”
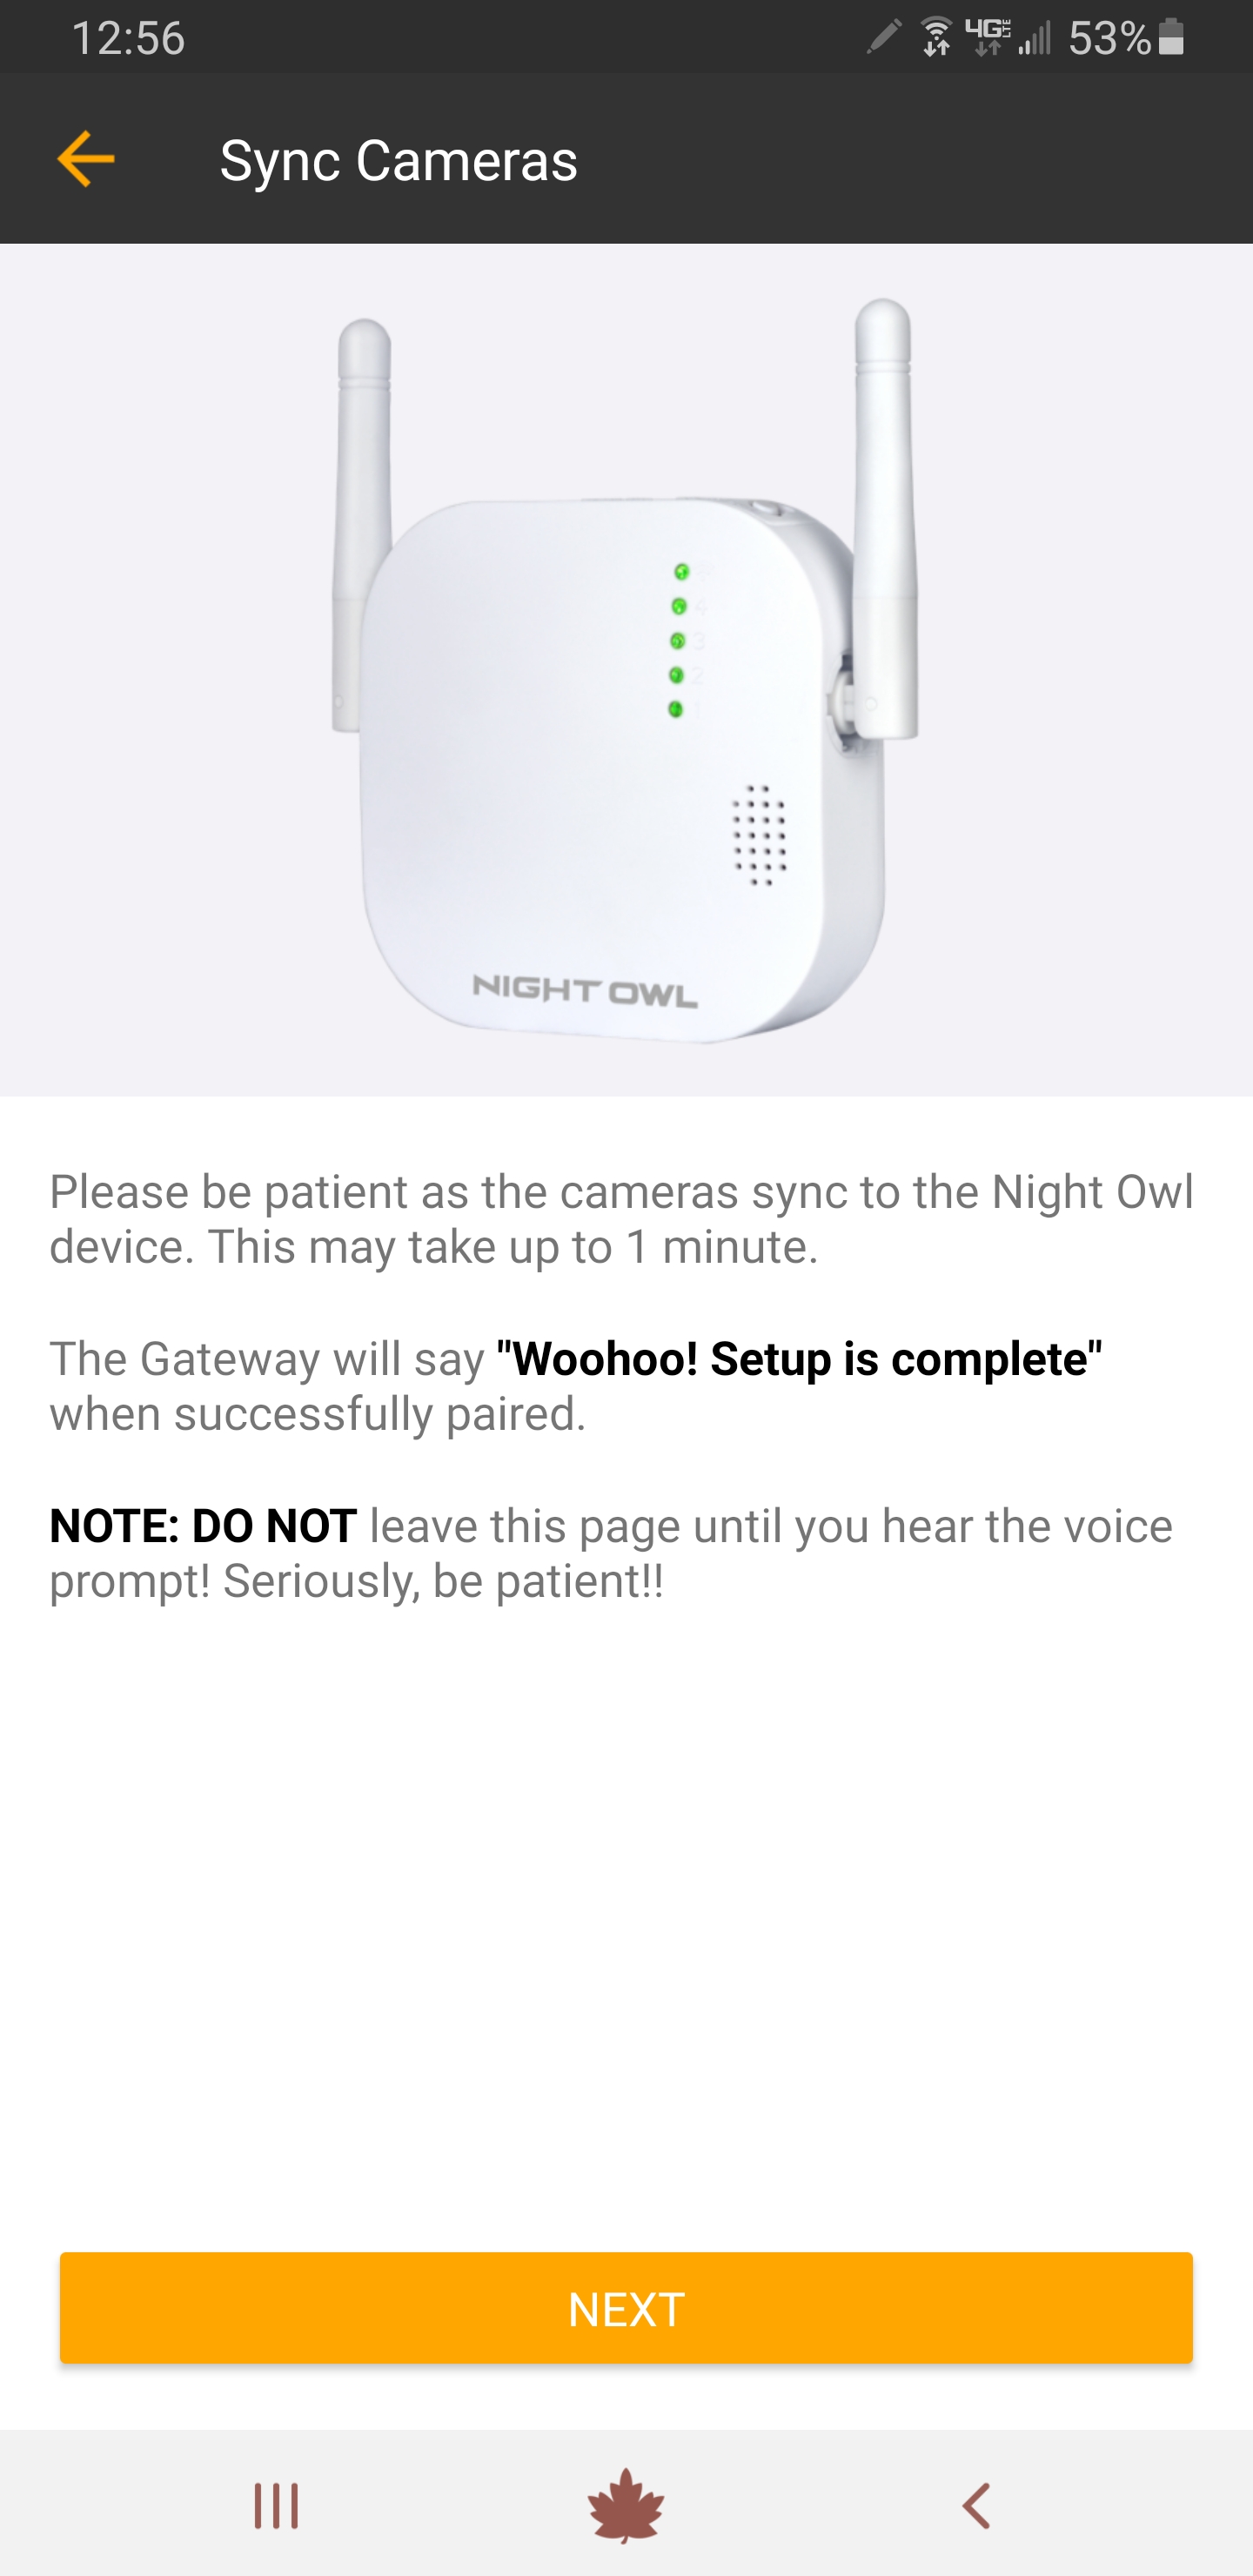
12. Wait for the Gateway to say “Woohoo! Setup is Complete.” Then tap “Next.”
13. You will now see the device you added appear in the Gateway section. Click on the device to begin live view.
|
|
|
|
c. Adding a Standalone IP Camera
(Click Here for a Short Video Tutorial )
Before proceeding, please ensure that your camera is powered on. Once powered on, please follow the steps below:
1. Please log in to the App and tap “Add Device.”
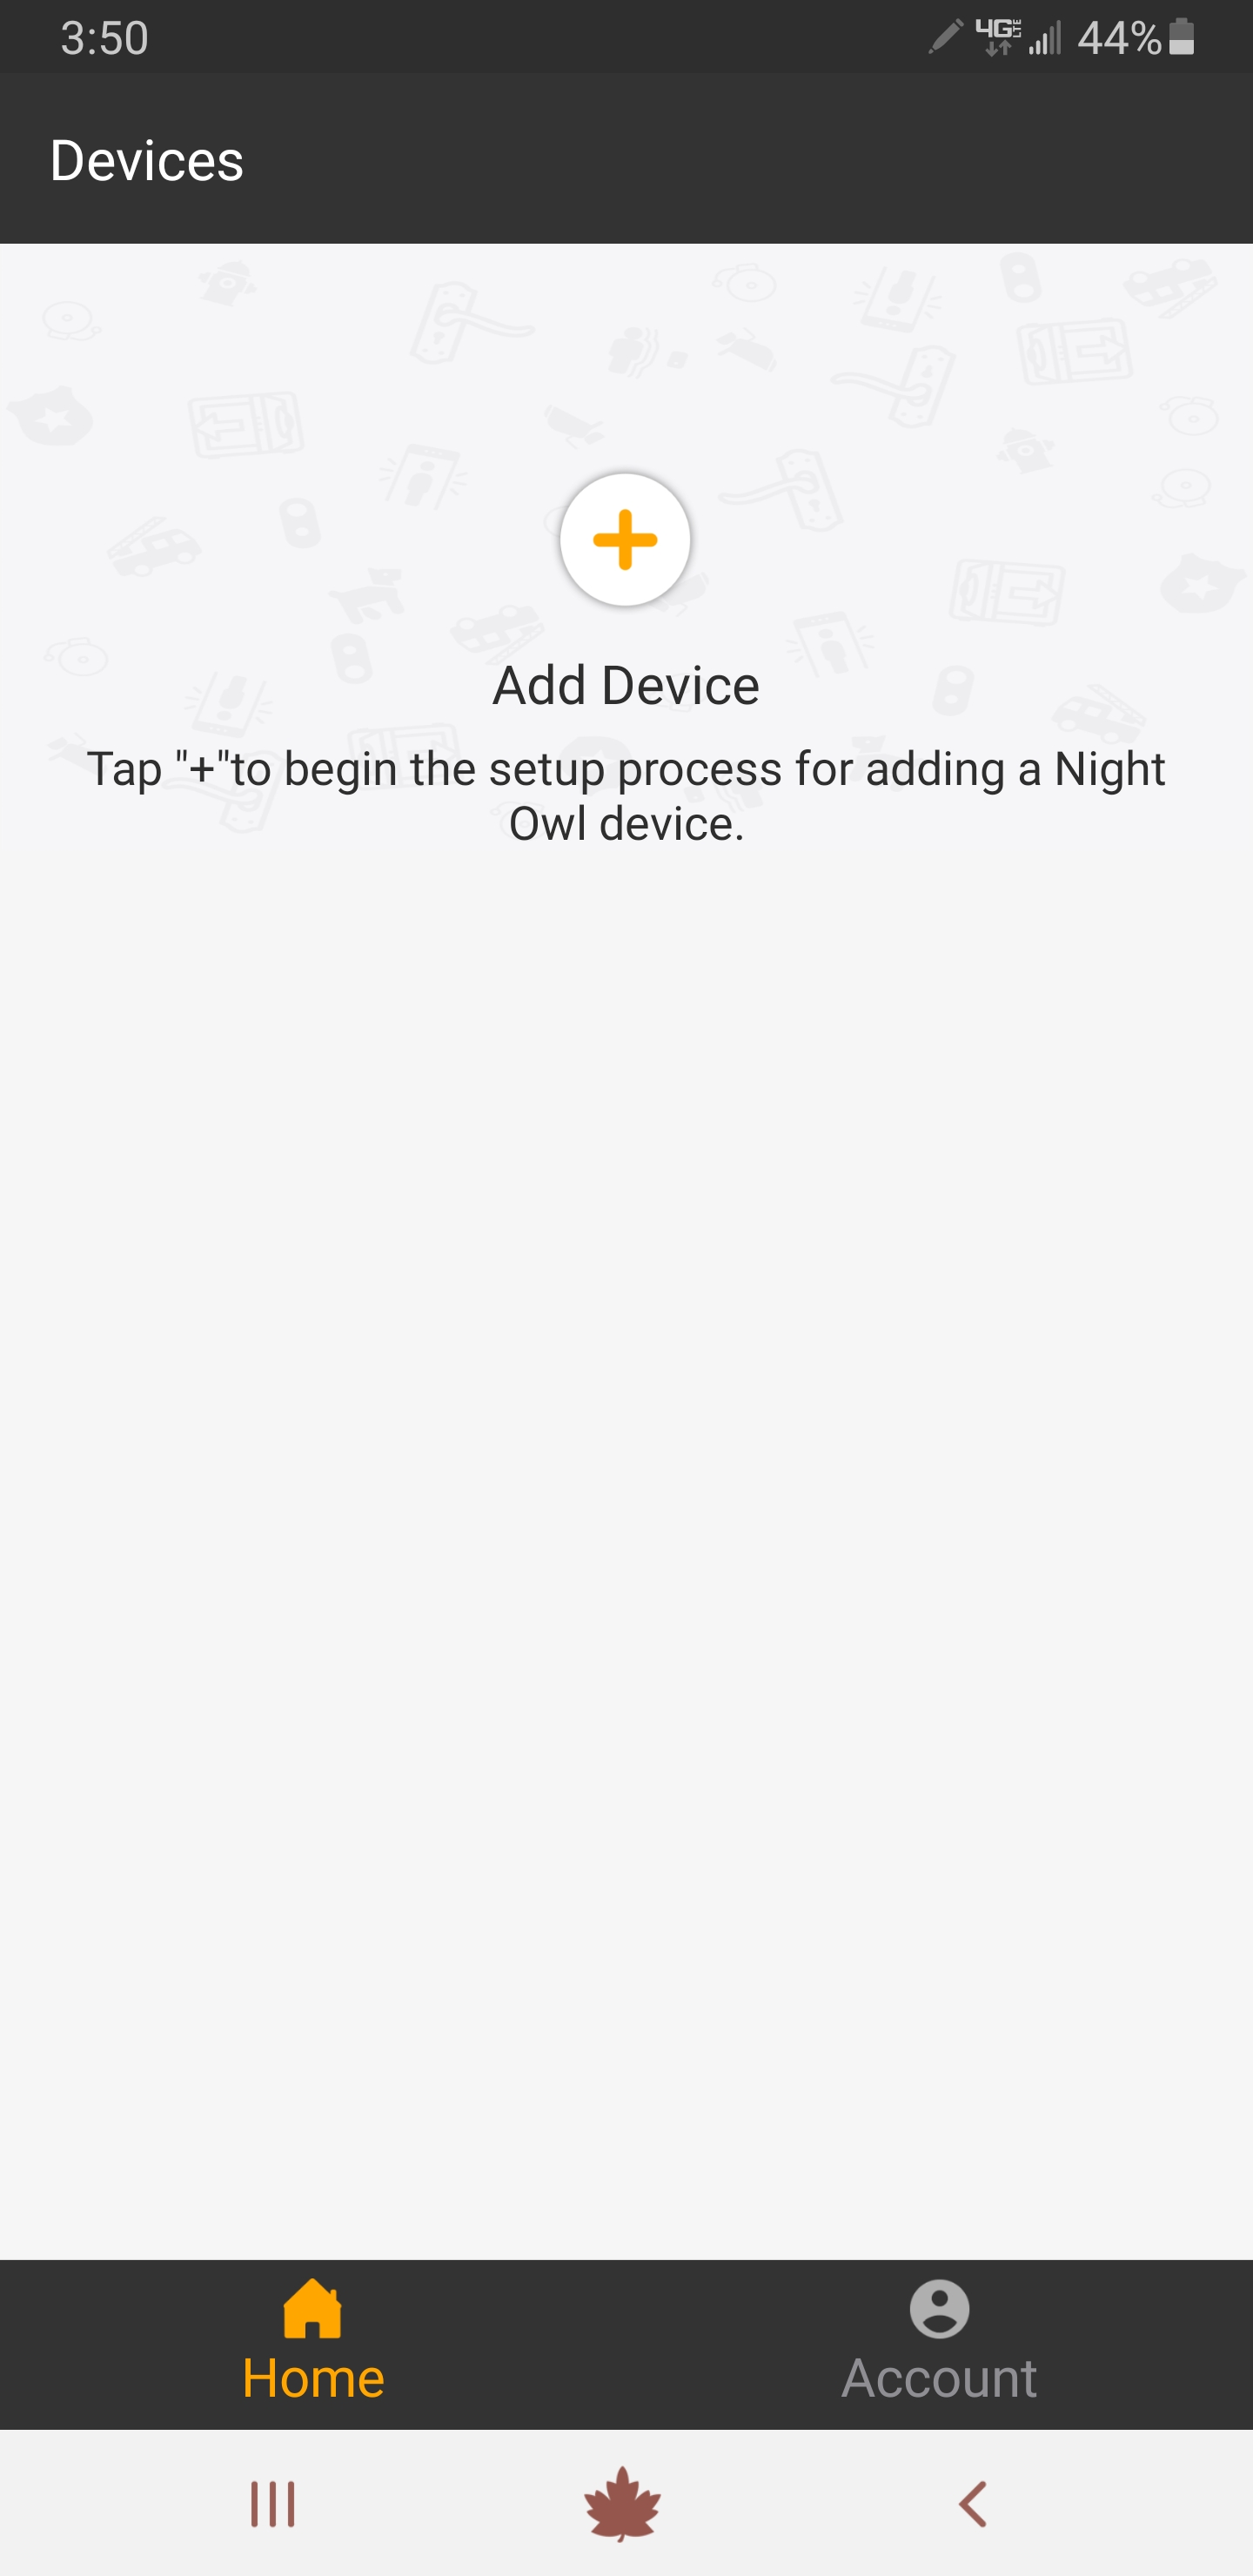
2. Tap “Wireless Camera.”
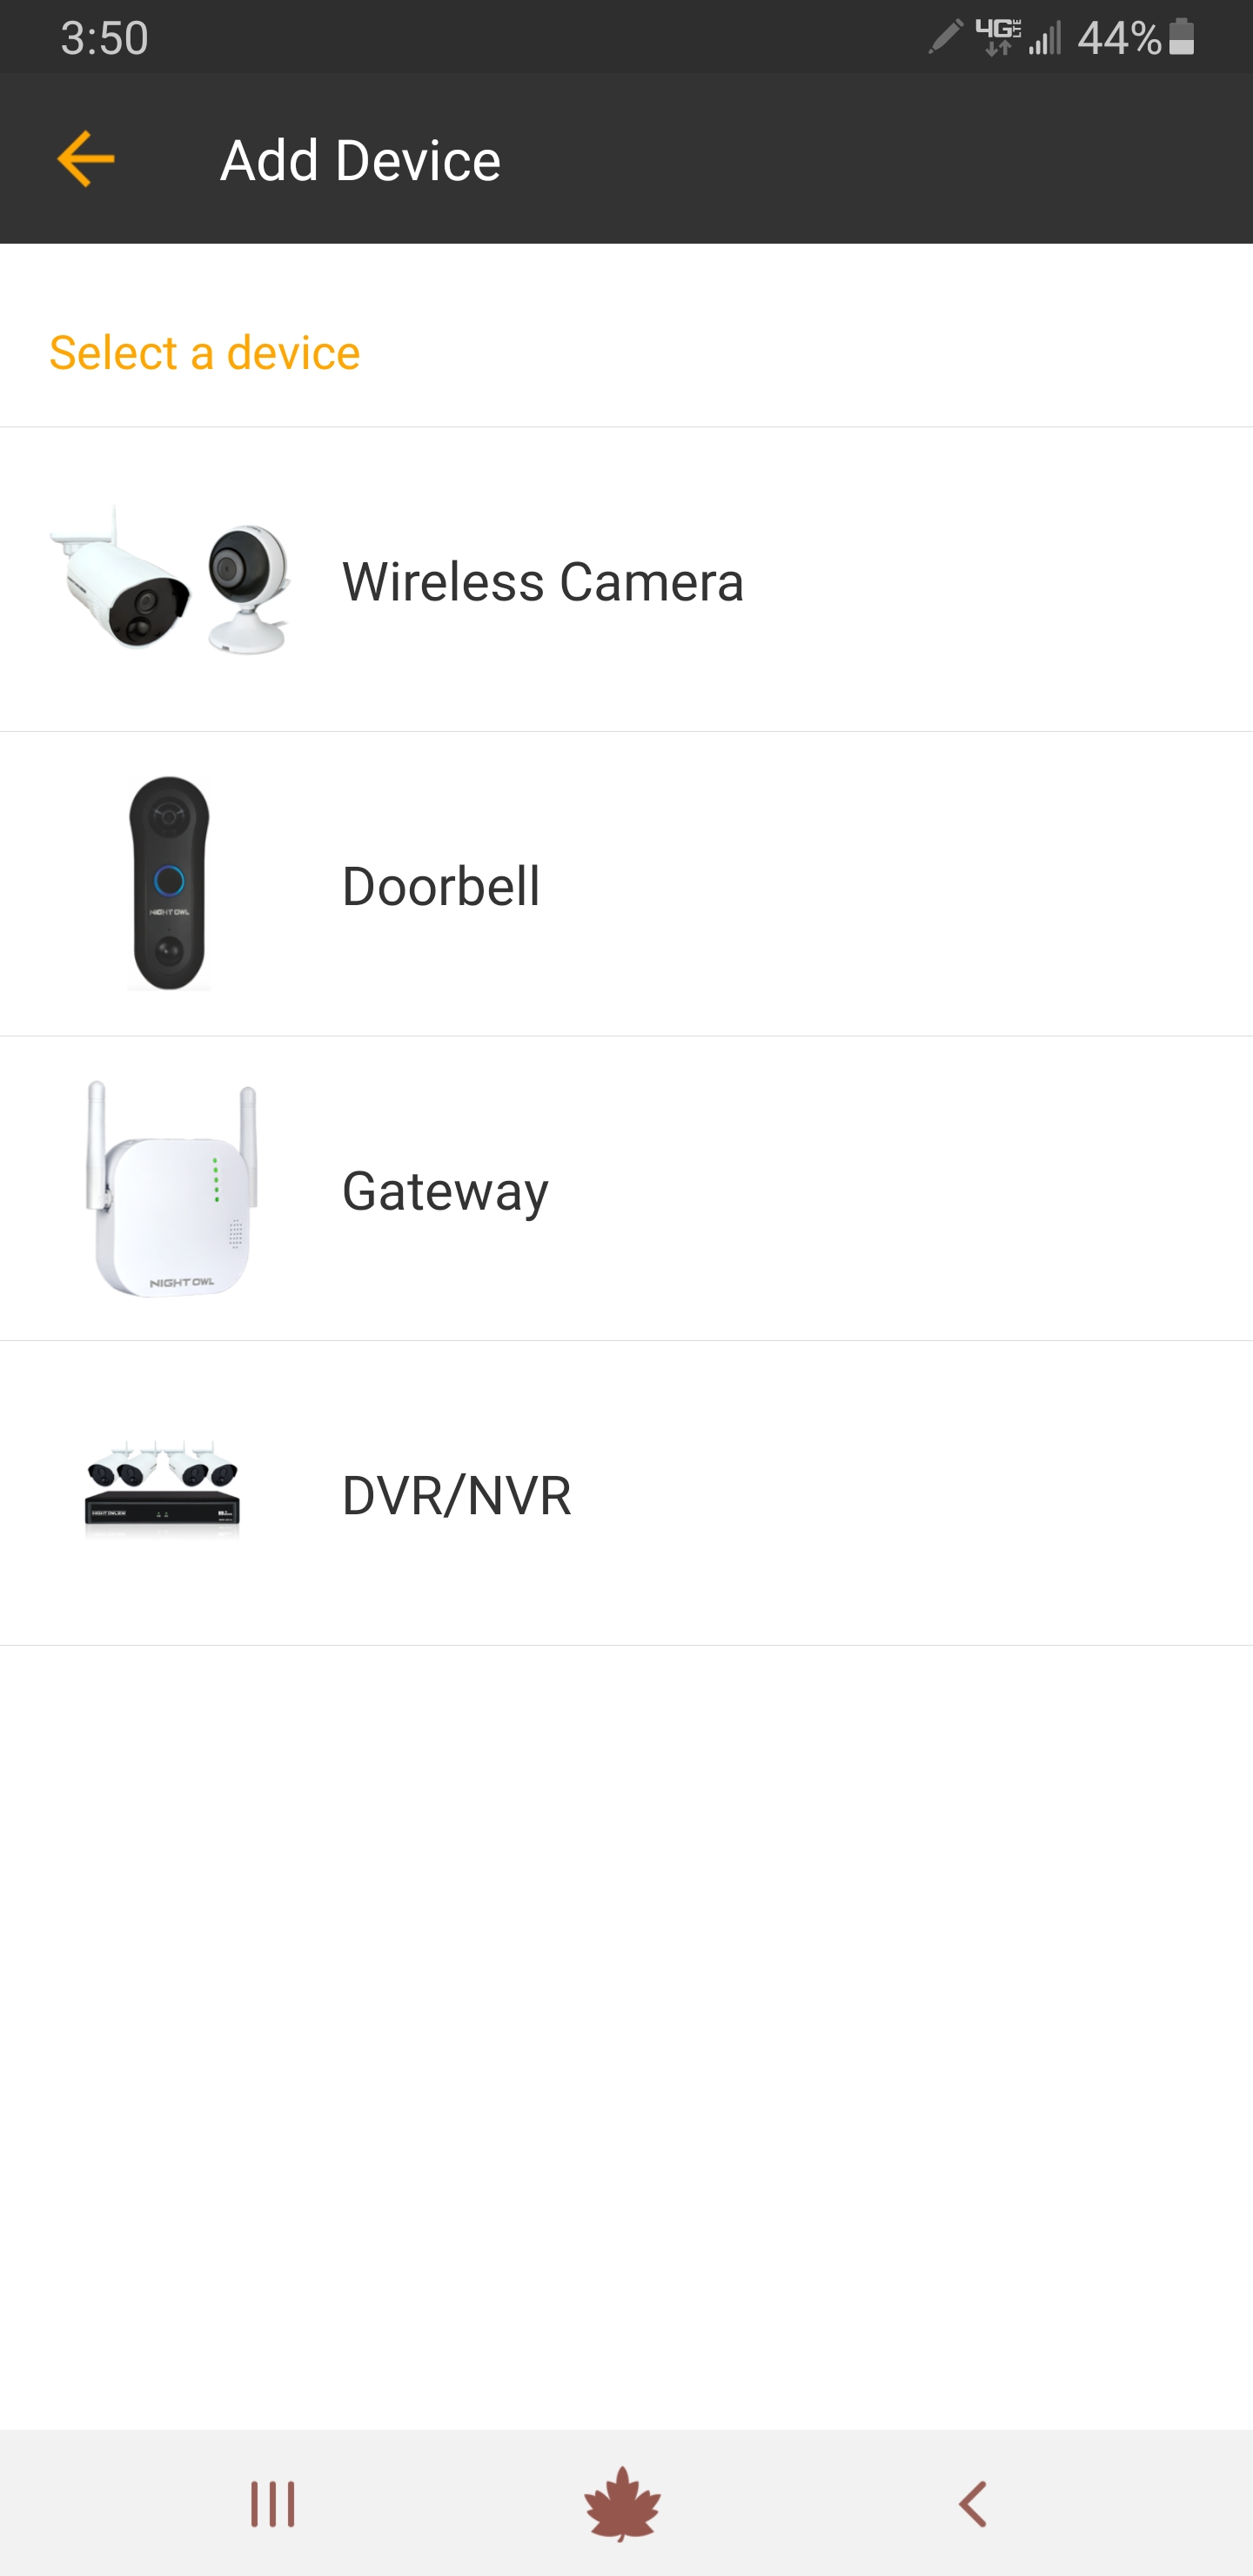
3. ANDROID users (for iOS users skip to Step 4)
i. To add the camera, you must disable Mobile Data in your Smart Device’s settings. To do so, go to Setting>>>Connections>>>Data Usage>>>Mobile. Tap “Next” to continue.
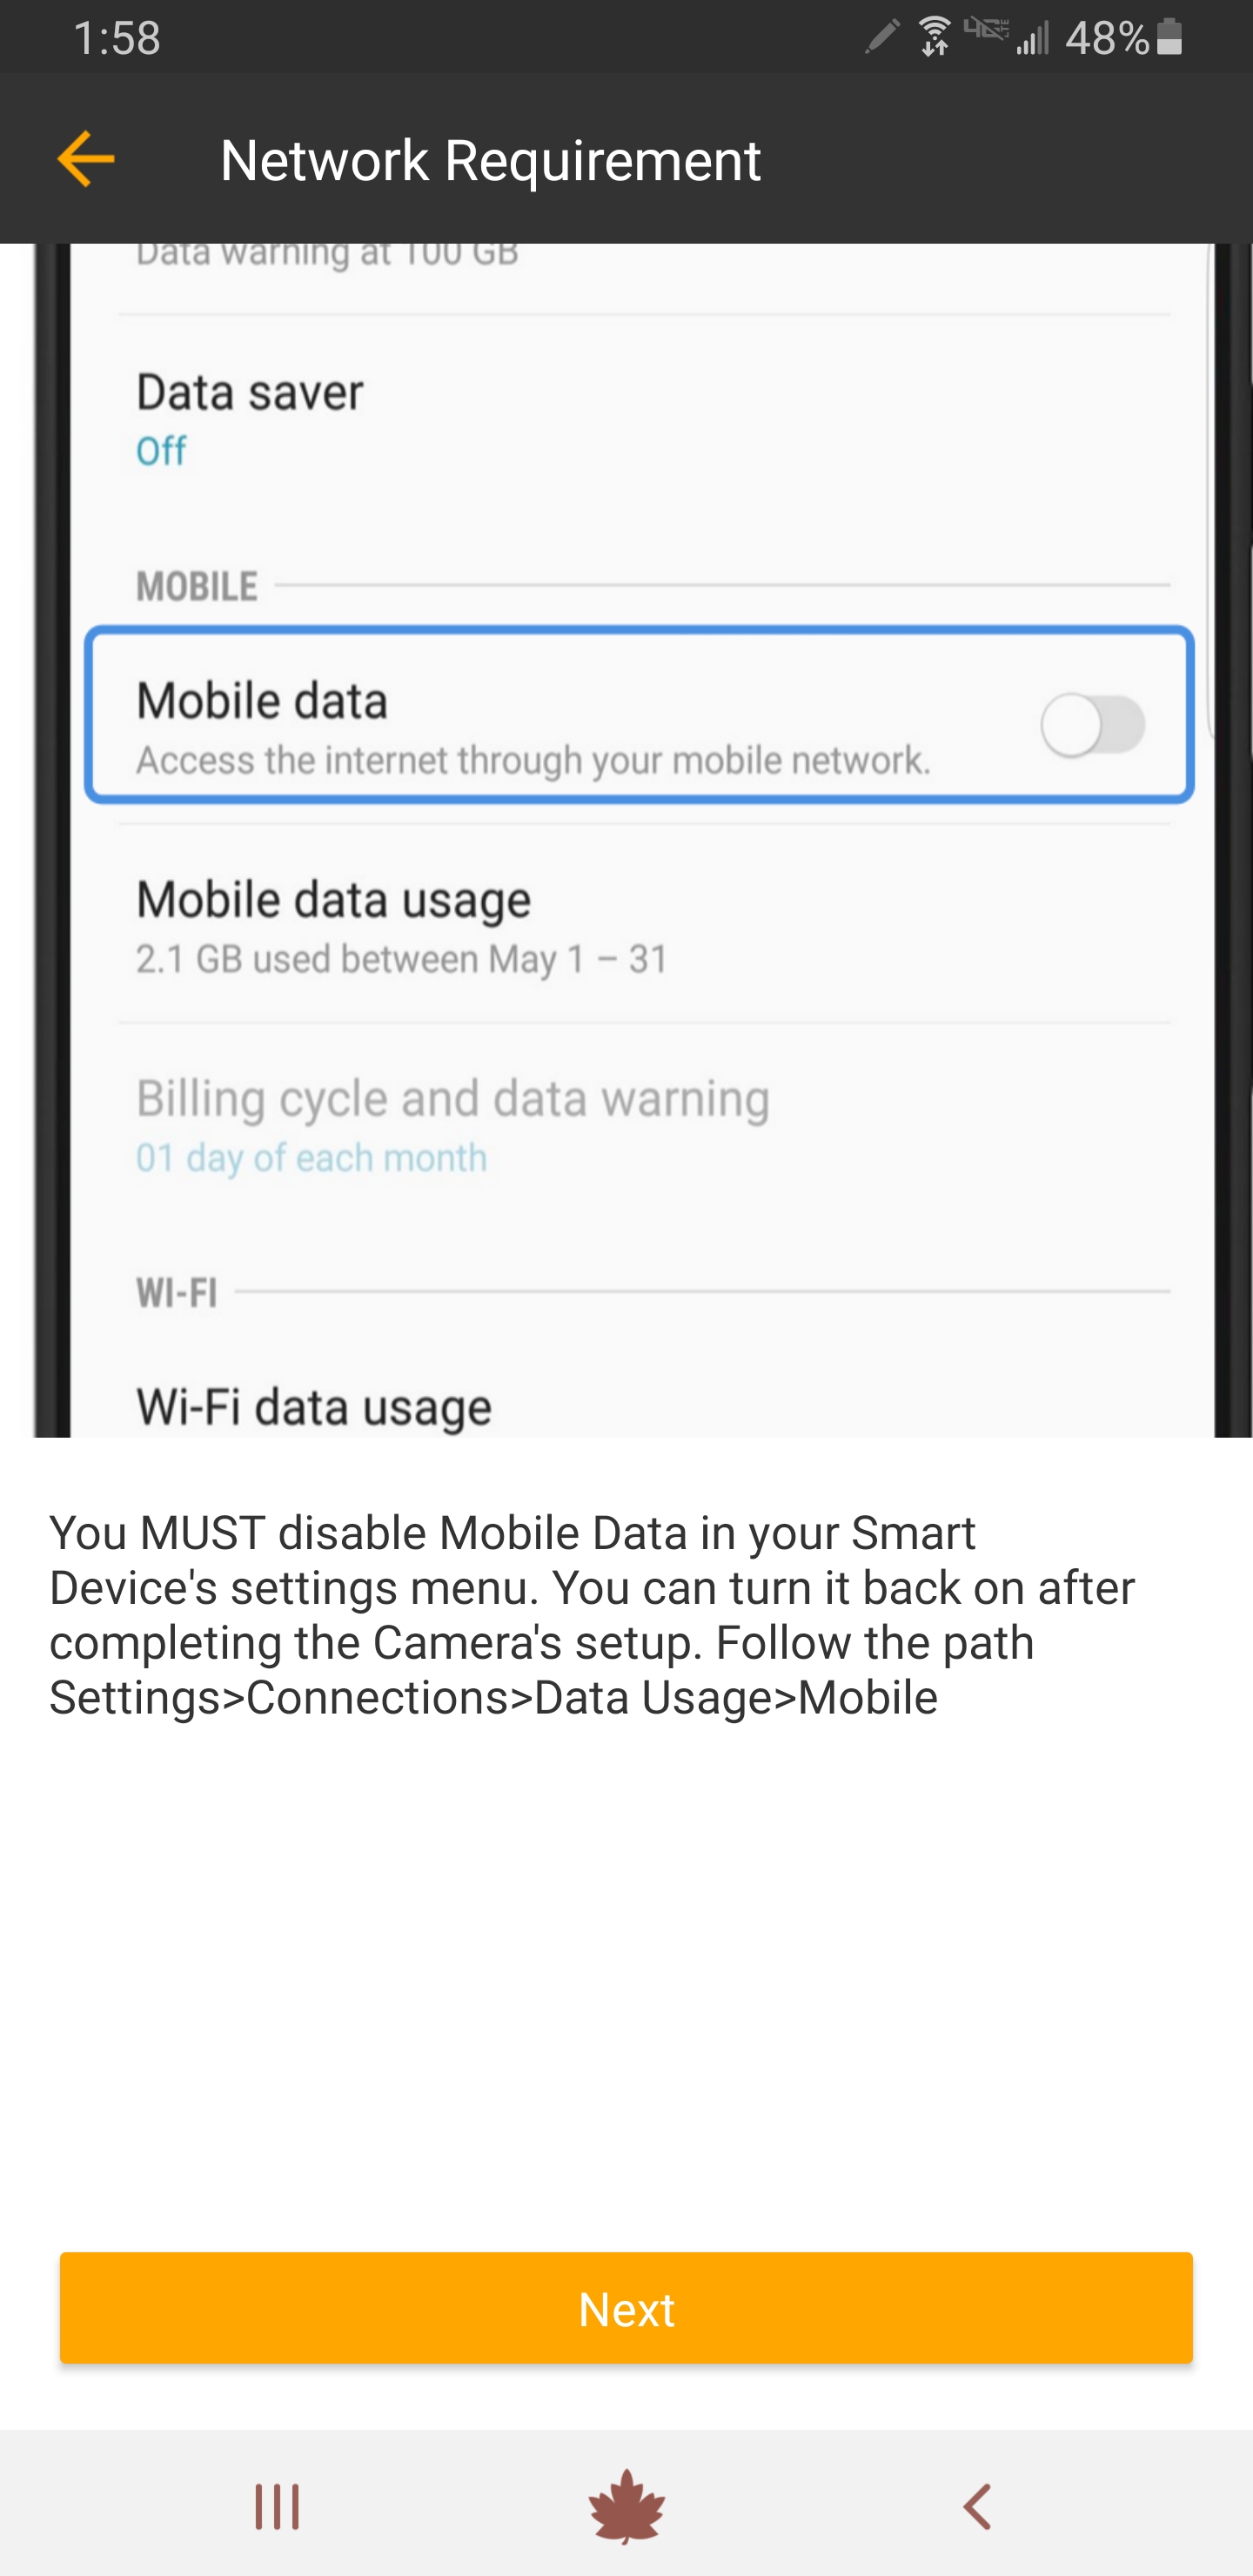
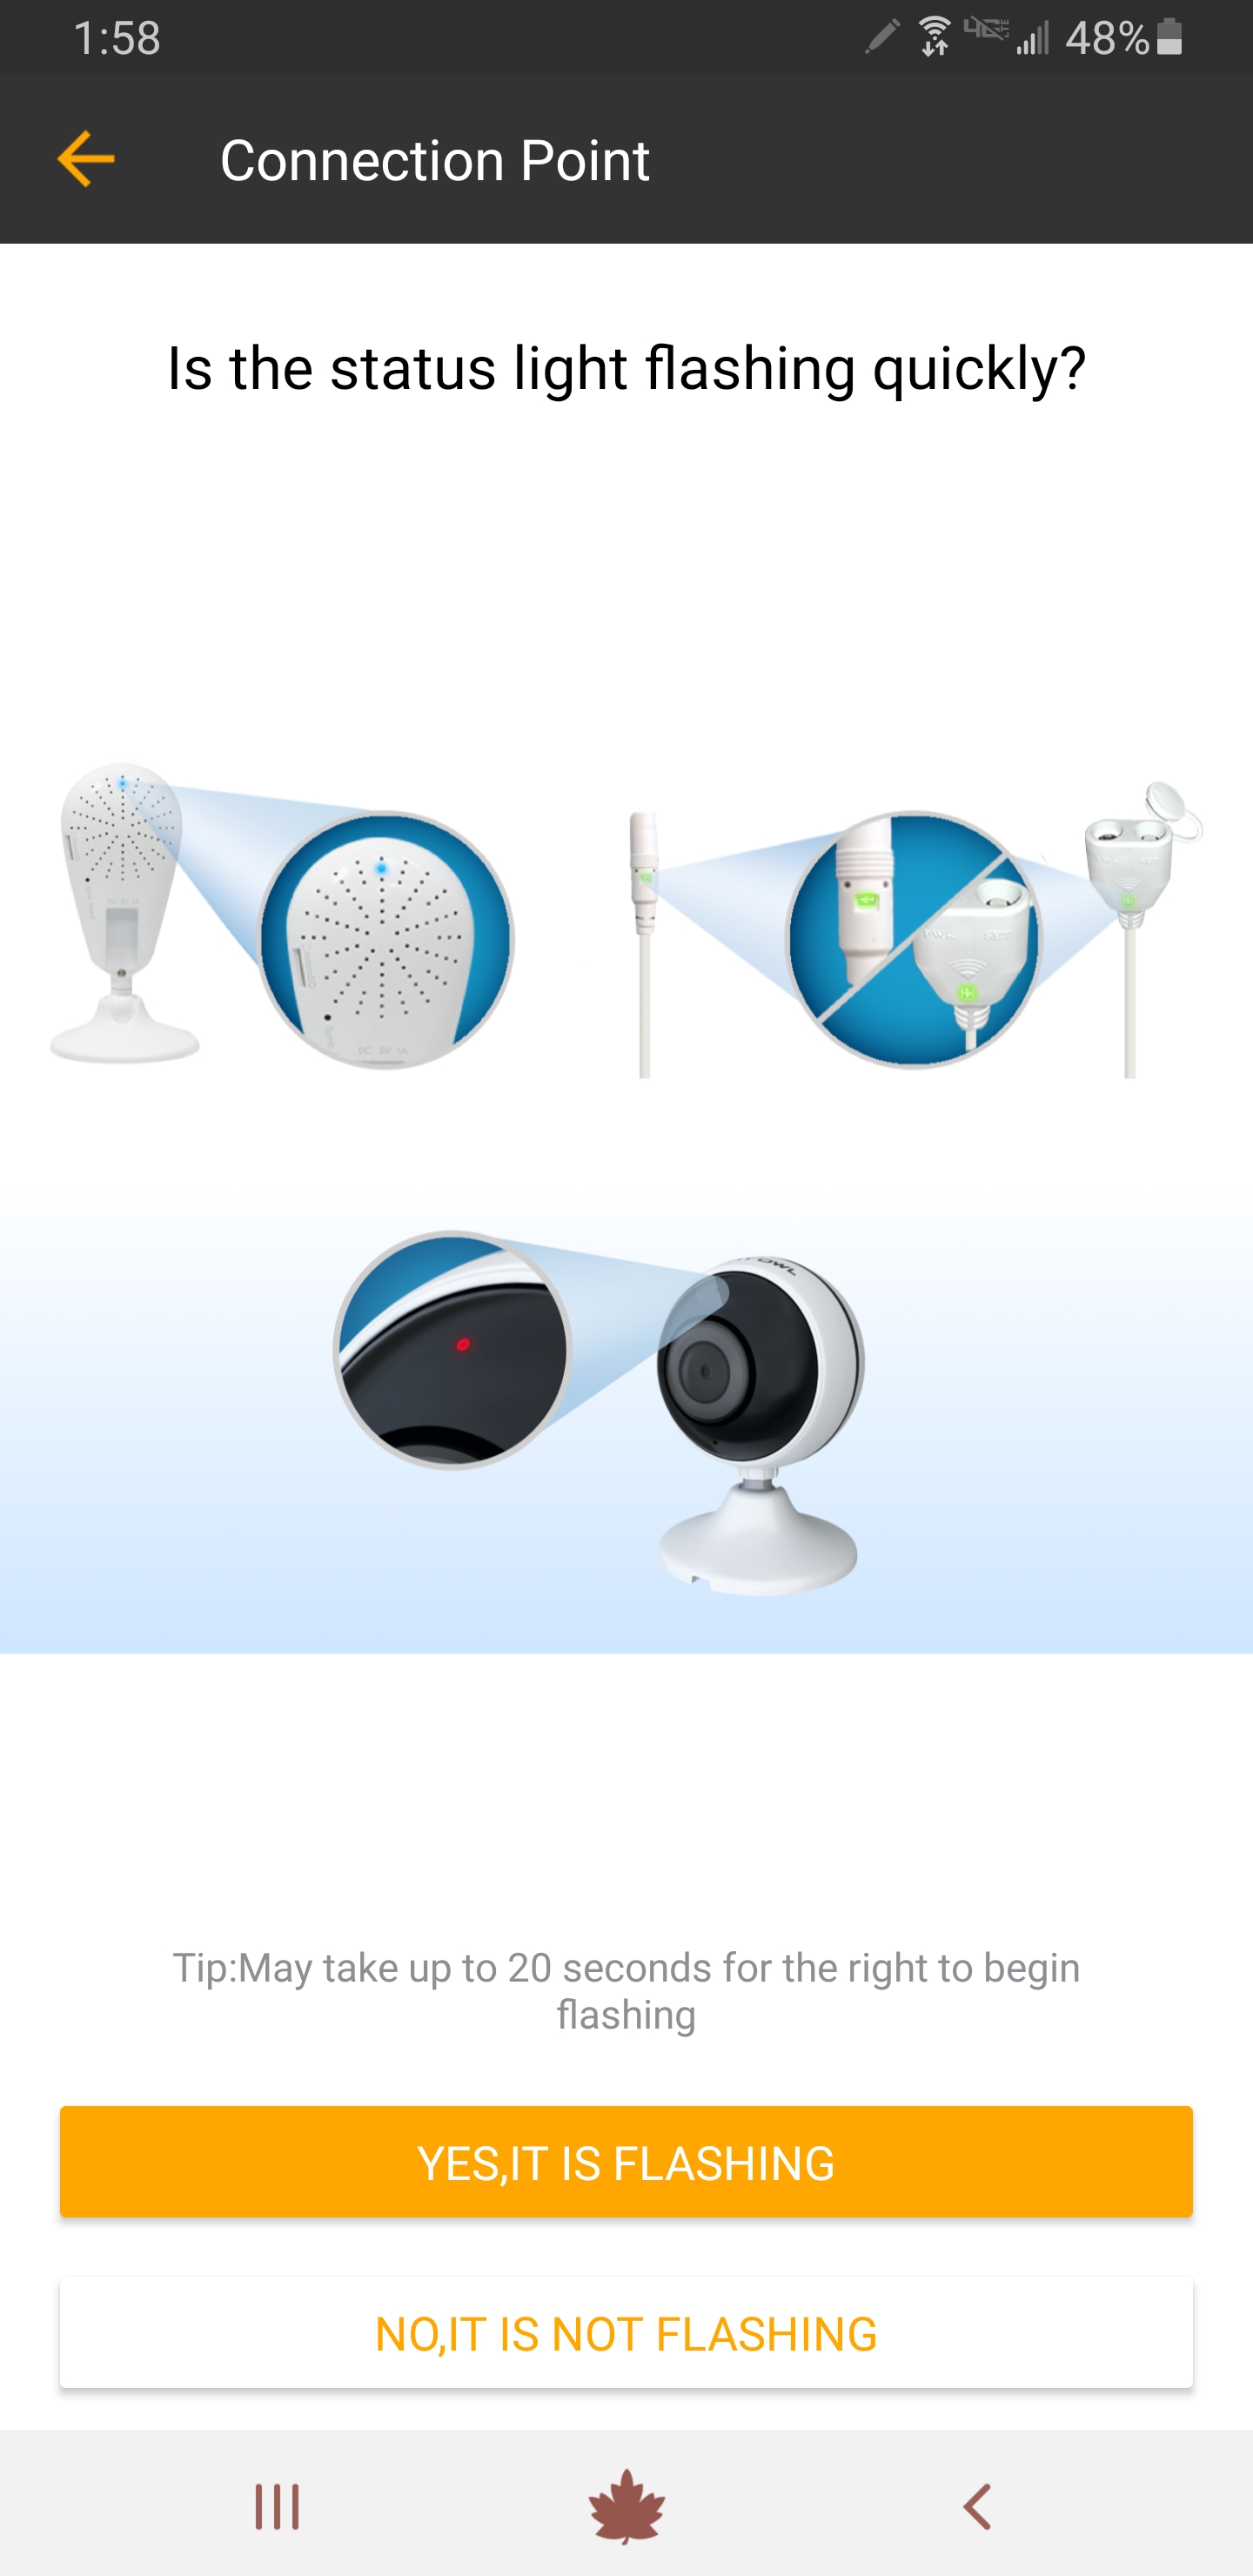
ii. After disabling Mobile Data, please ensure the device is in pairing mode and then tap “Yes, It Is Flashing” to continue. If the device’s status light is not flashing rapidly, please press the device’s reset button using the provided reset pin.
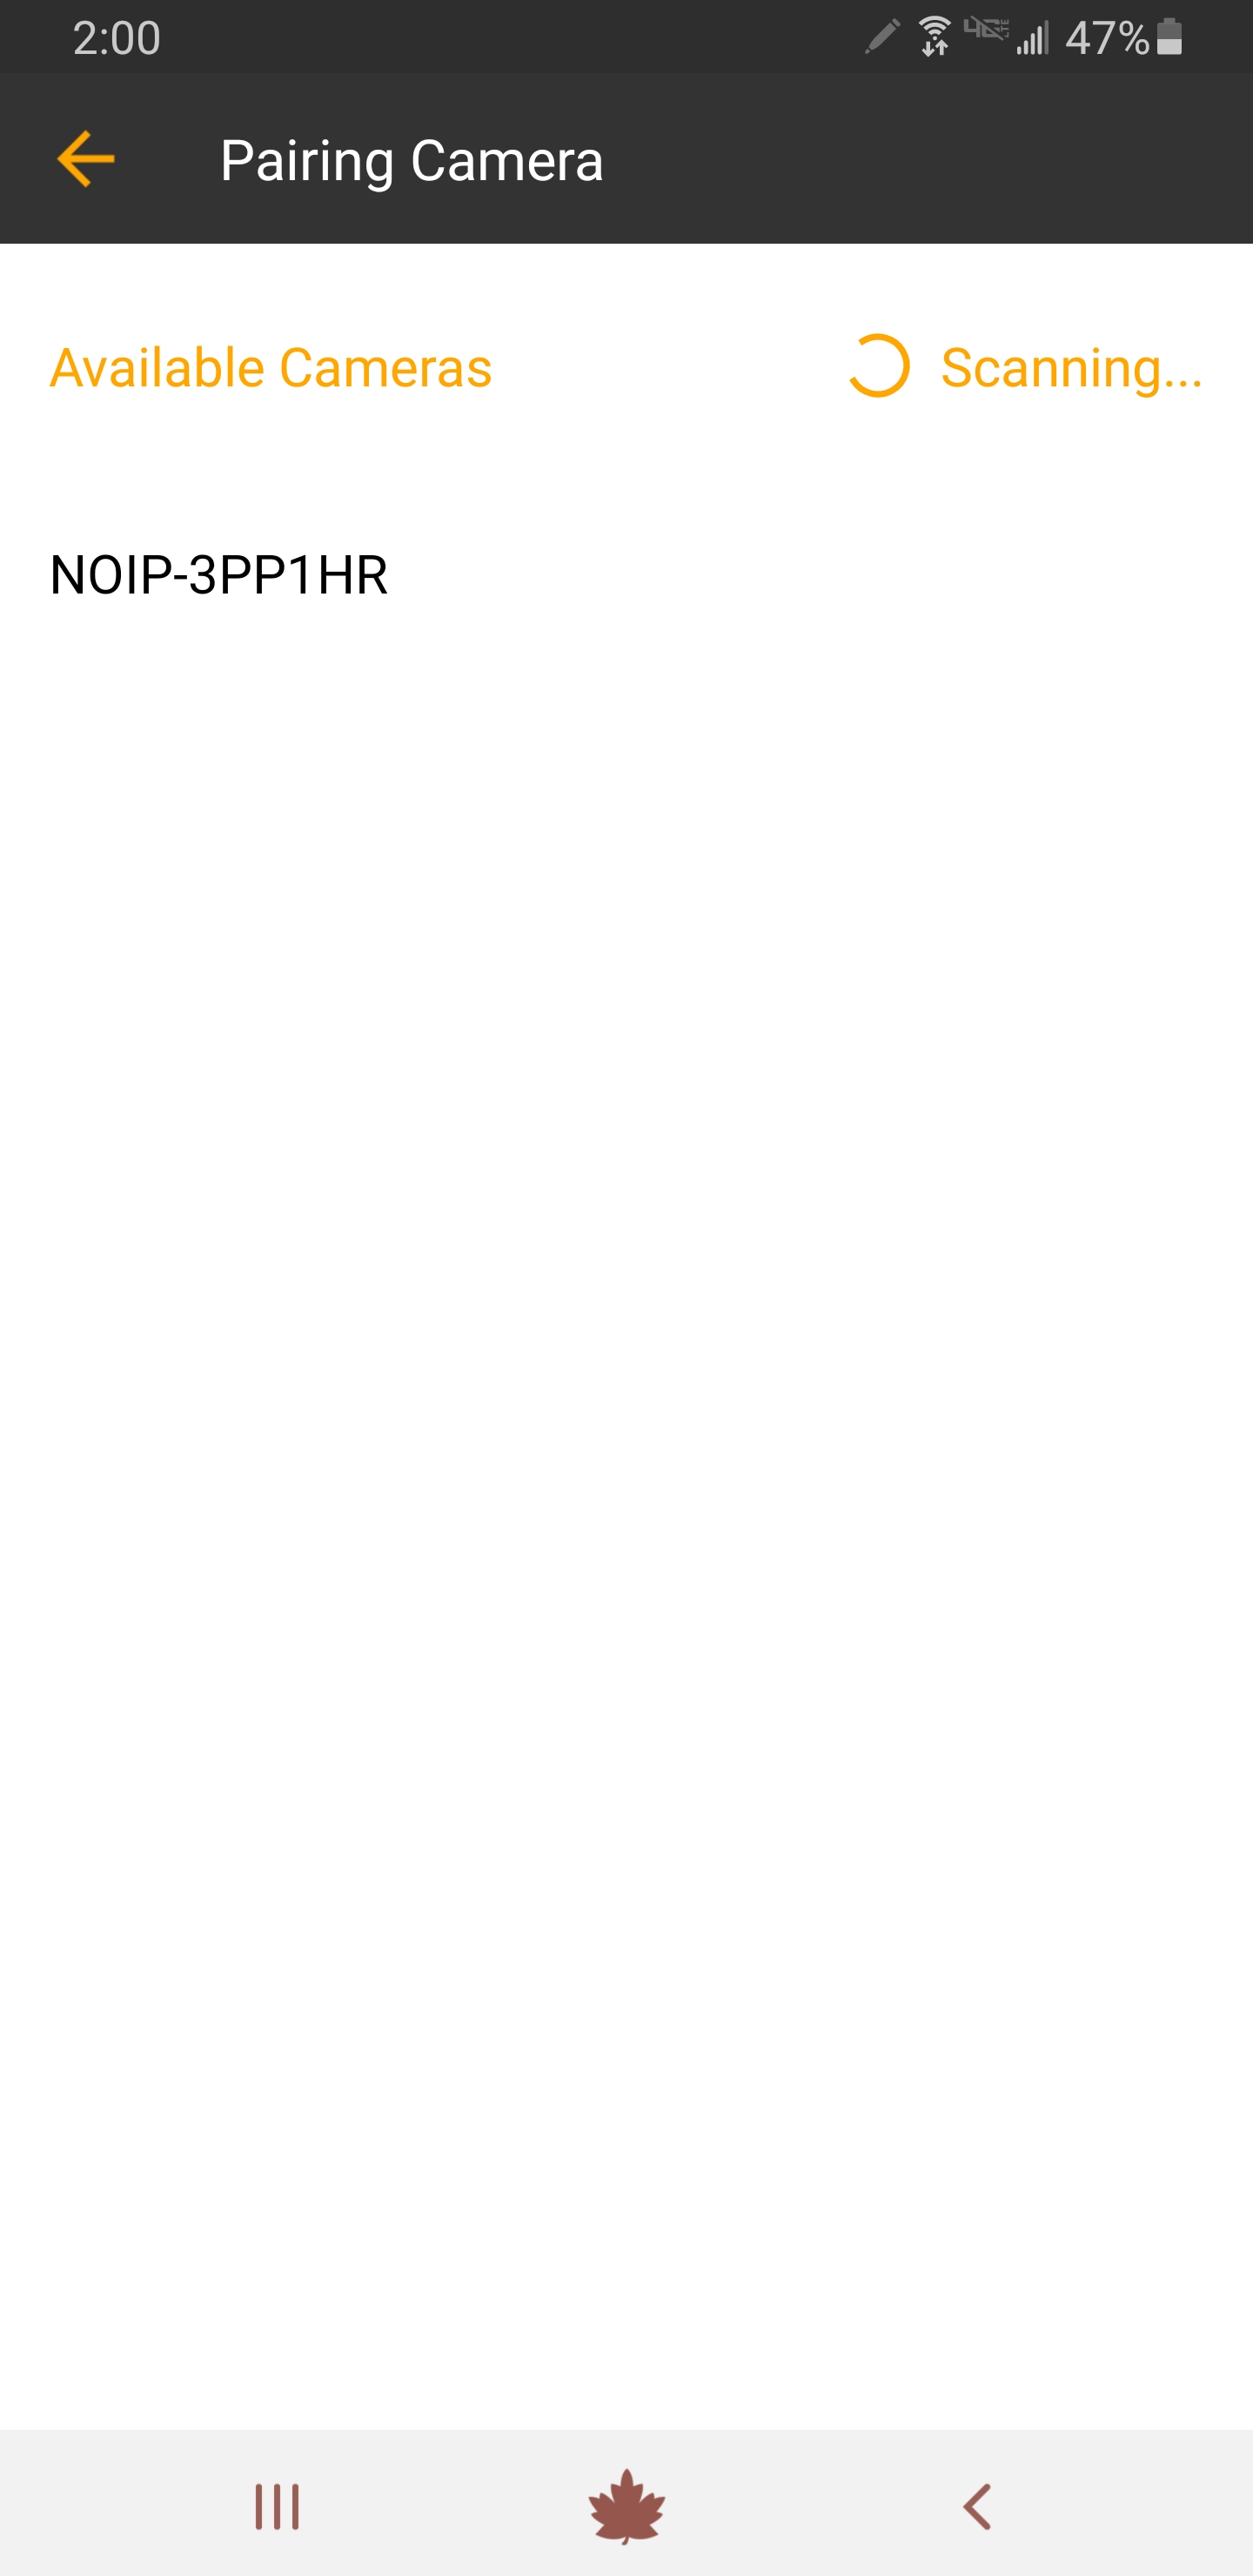
iii. The App will now search for available standalone cameras to connect to. Please tap your device from the list.
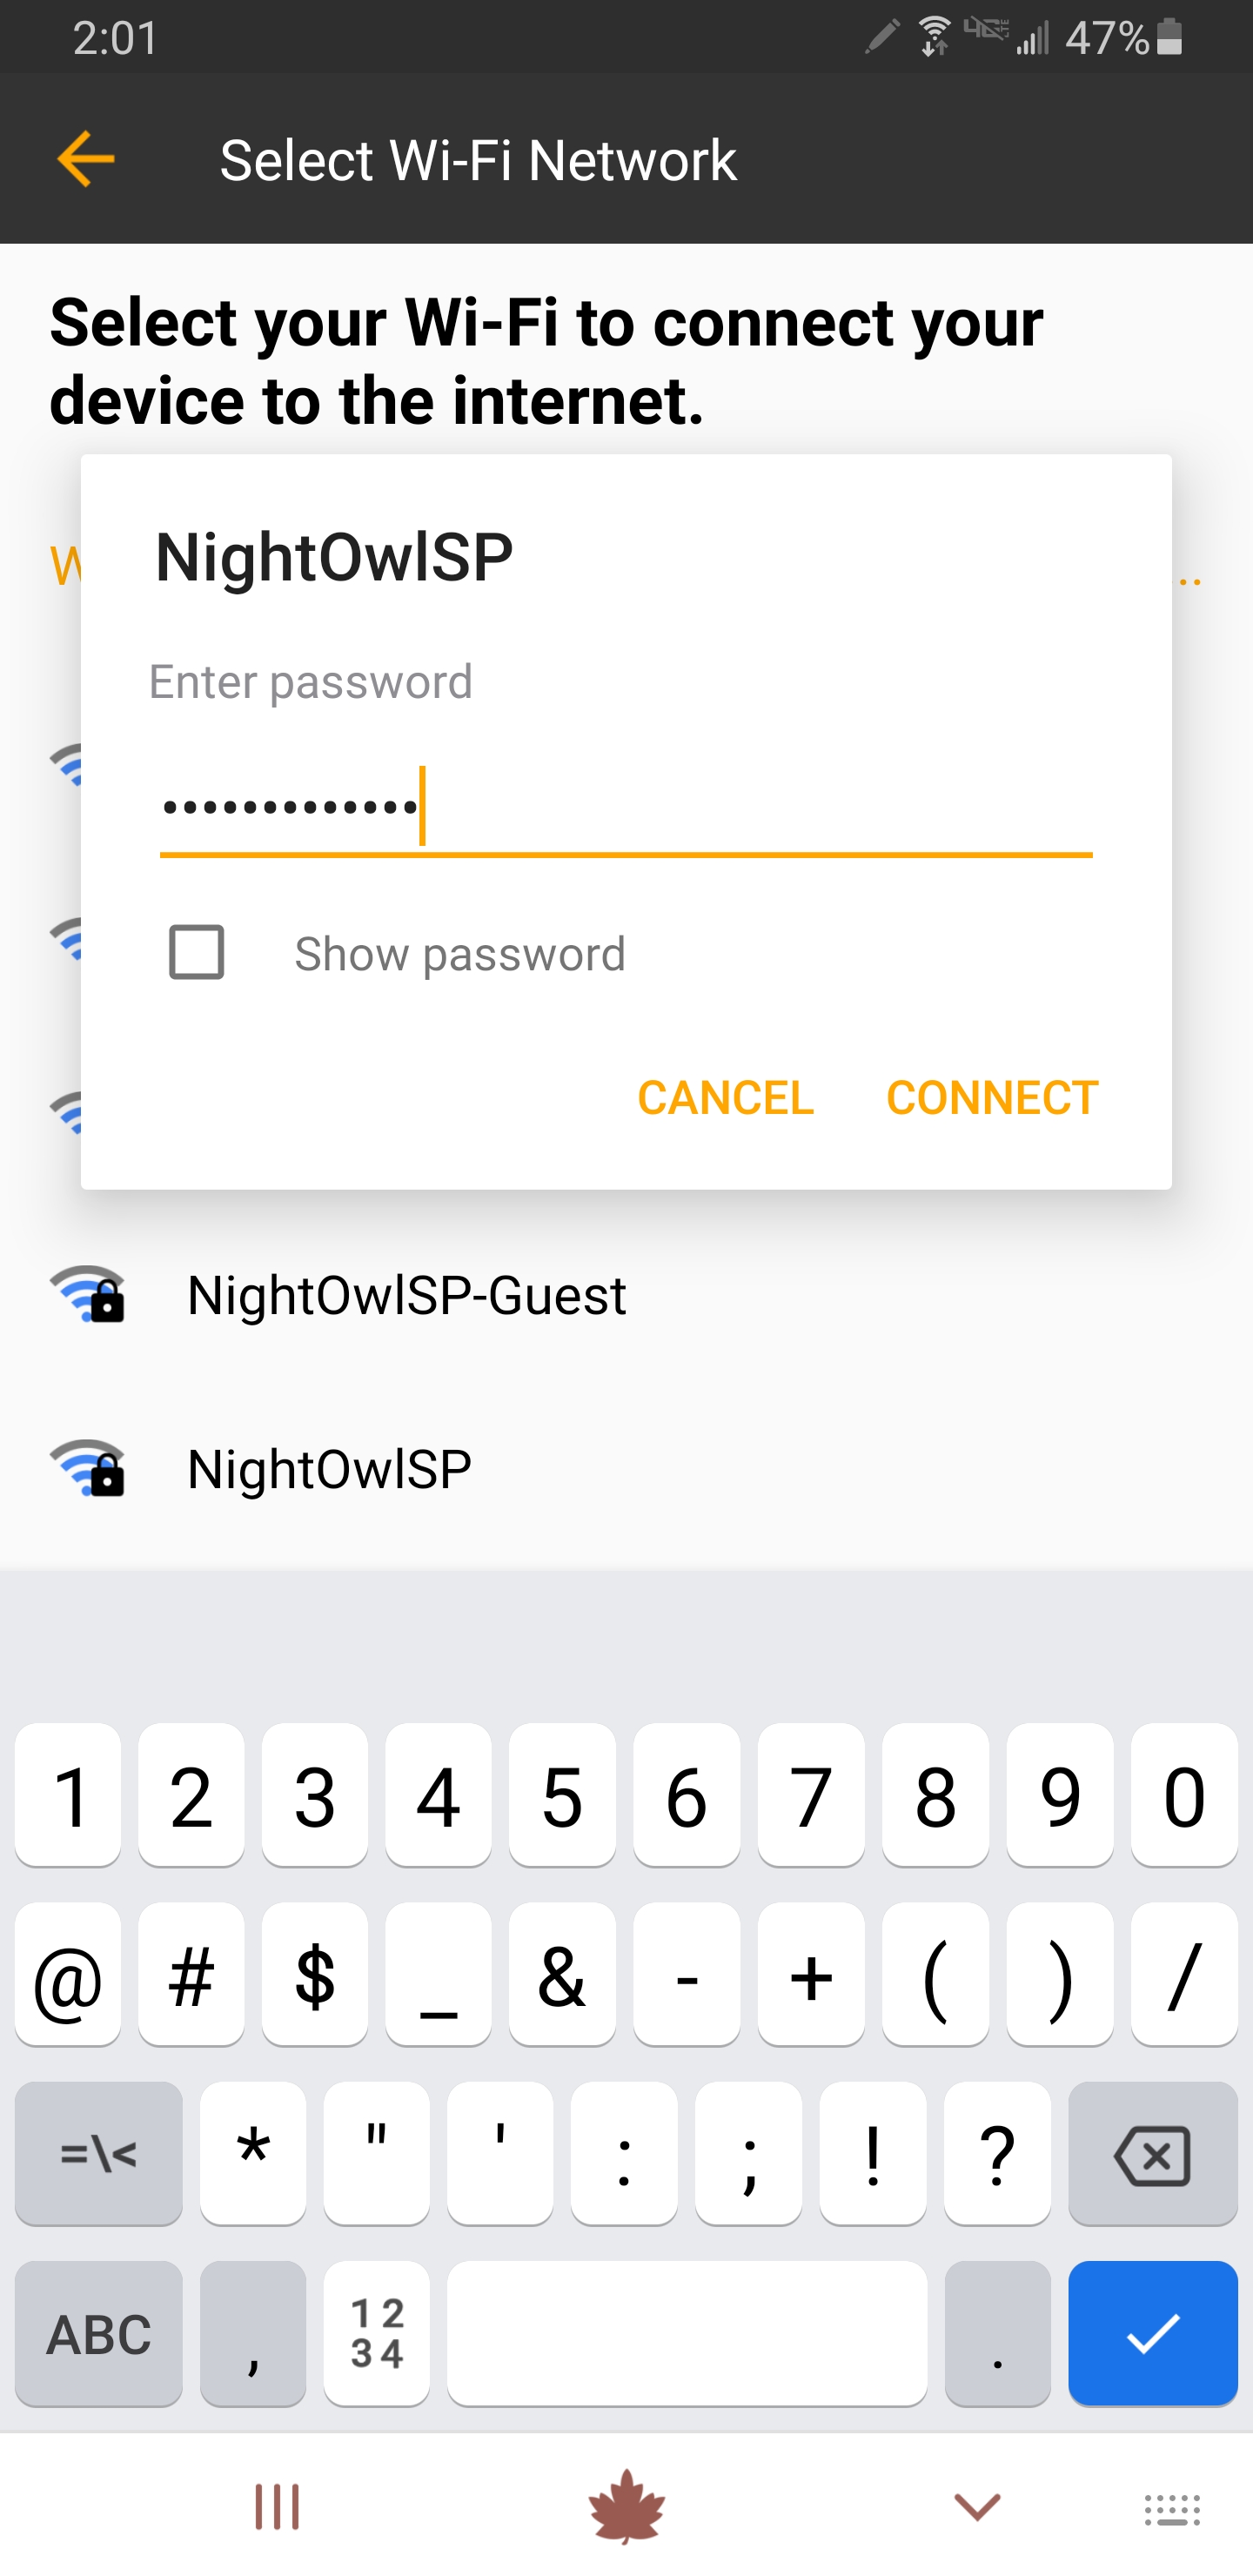
iv. Next, please select your Wi-Fi Network and enter your Network’s password if prompted. Then tap “Connect.”
4. iOS users (Android users can skip to Step 5)
i. Leave the App and launch the iOS device’s Settings.
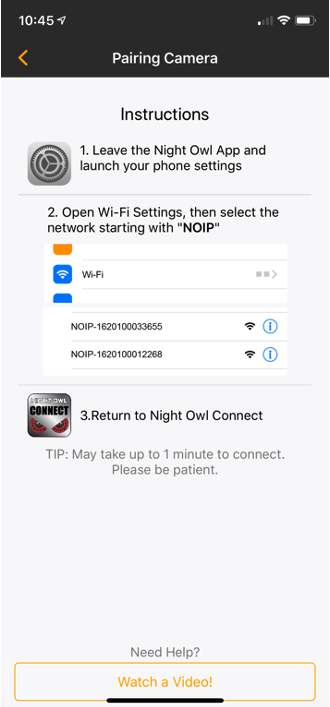
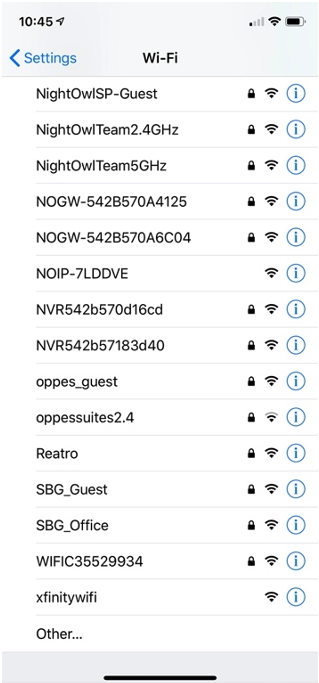
ii. Select Wi-Fi and tap on the network starting with “NOIP.”
iii. After selecting the camera’s network, return to the Night Owl Connect App to continue connecting the camera.
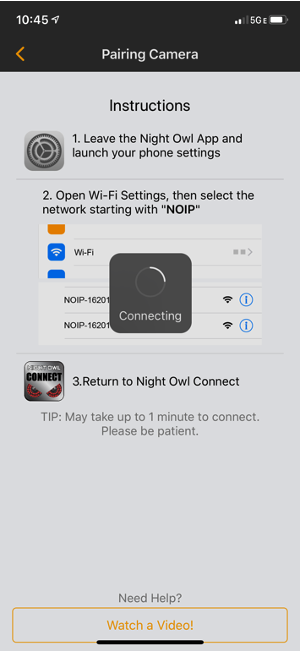
iv. Please select your Wi-Fi Network and enter your Network’s password if prompted. Then tap “Connect.”

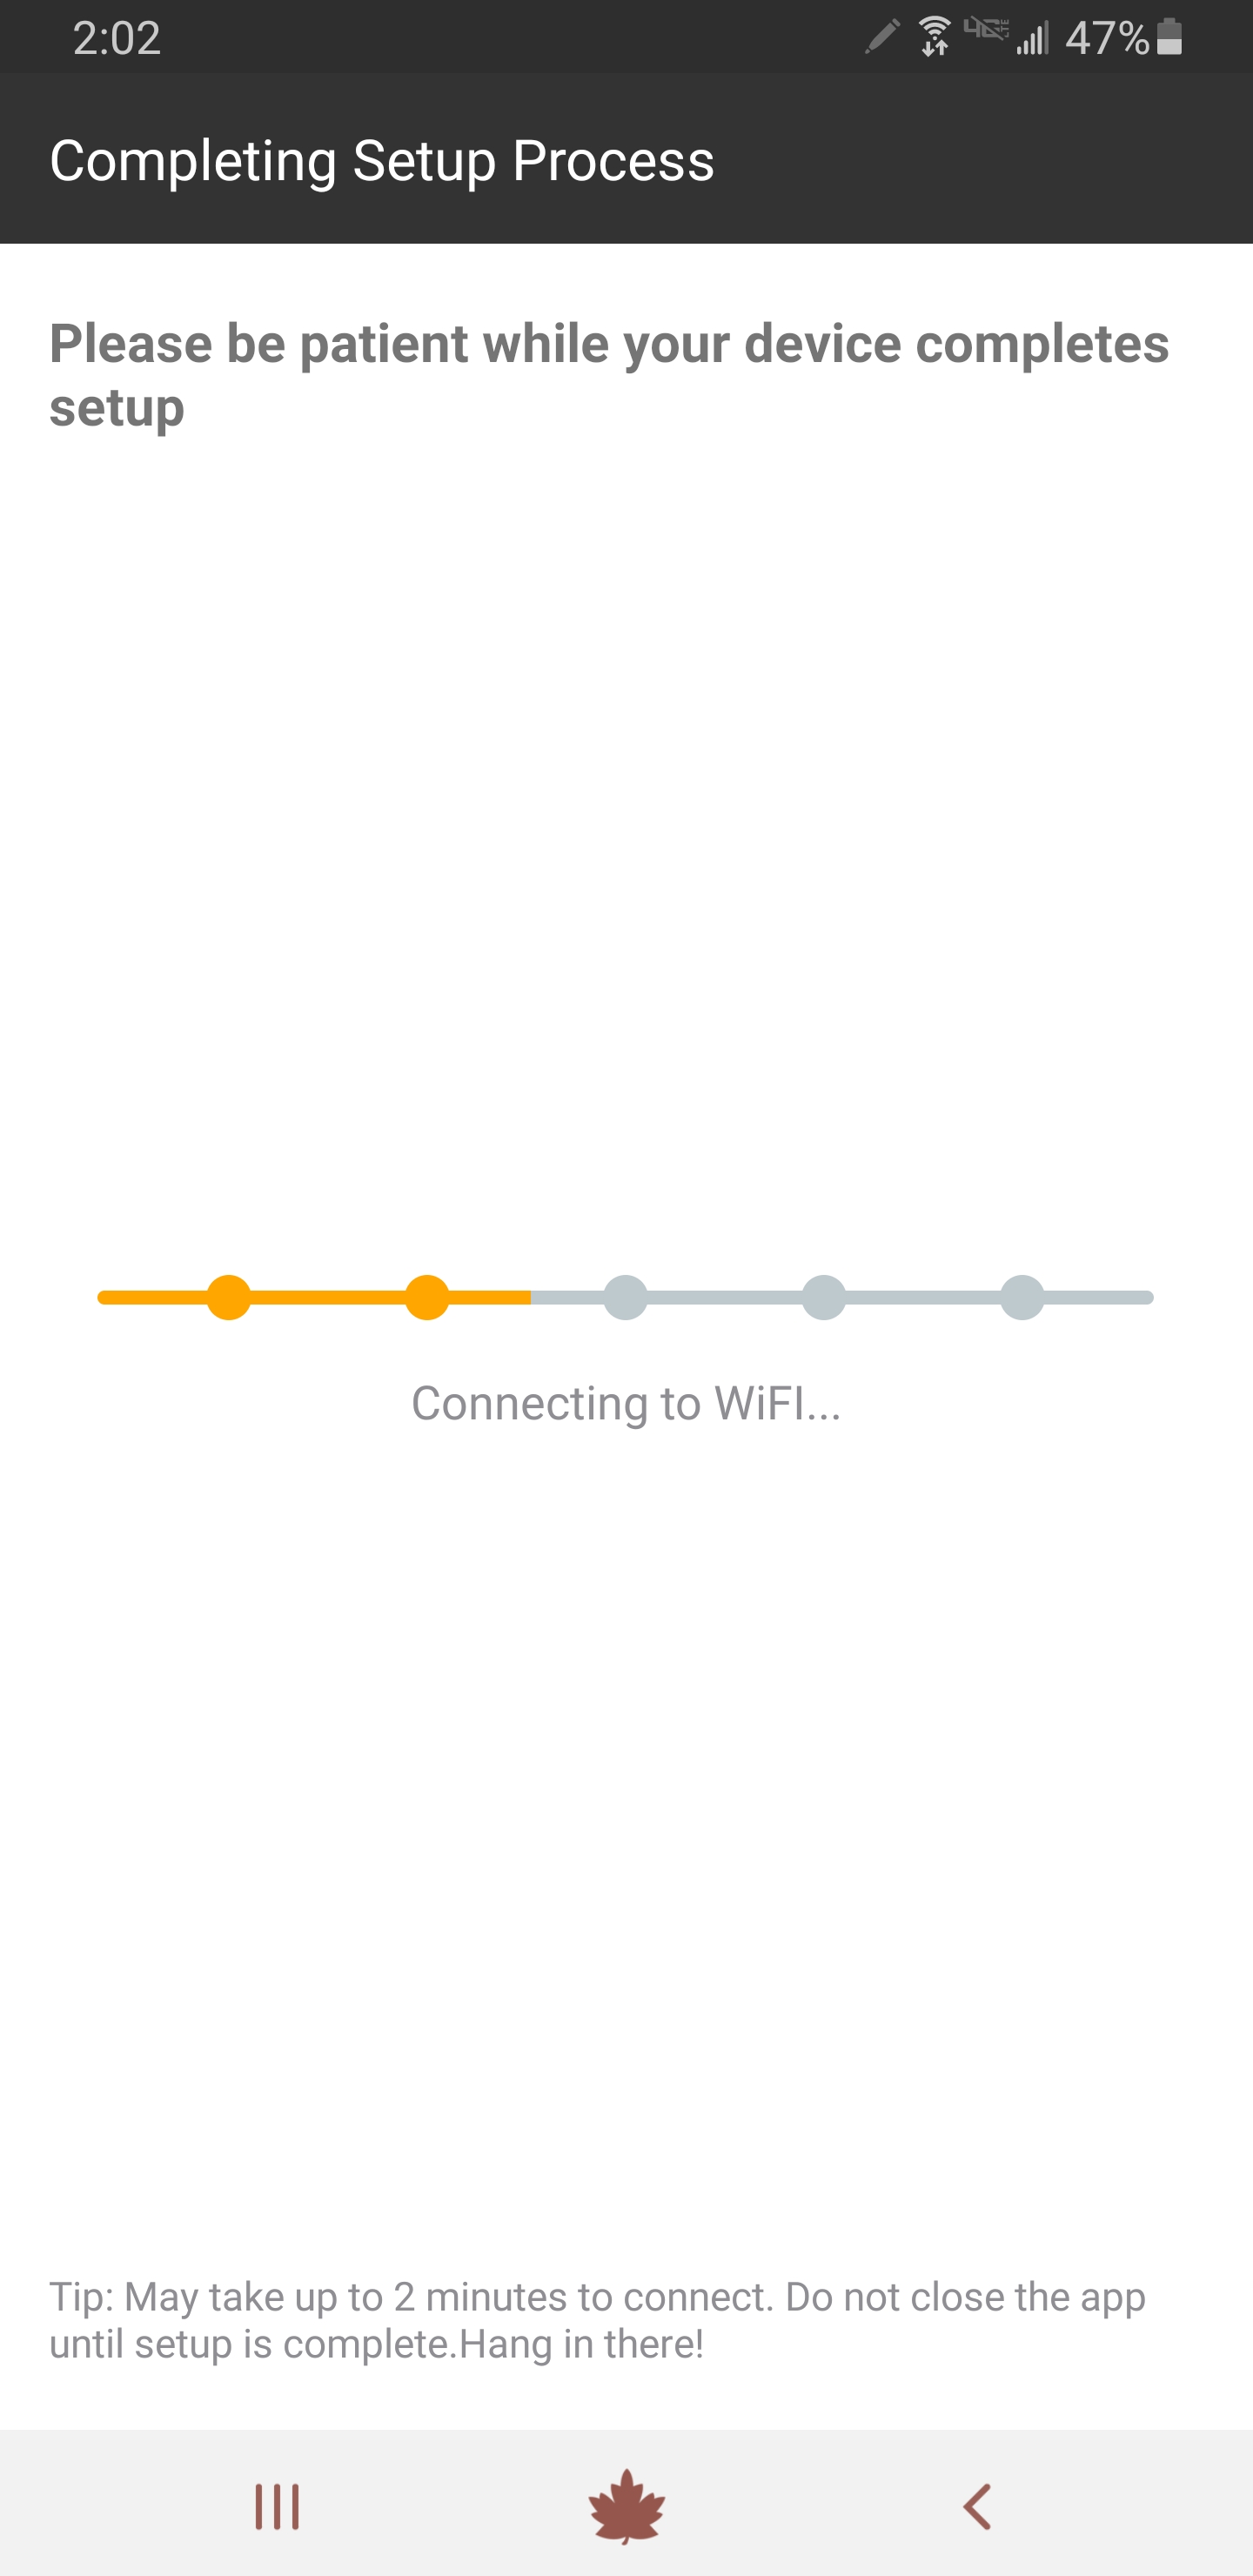
5. Please be patient as the App completes the setup of your standalone camera.
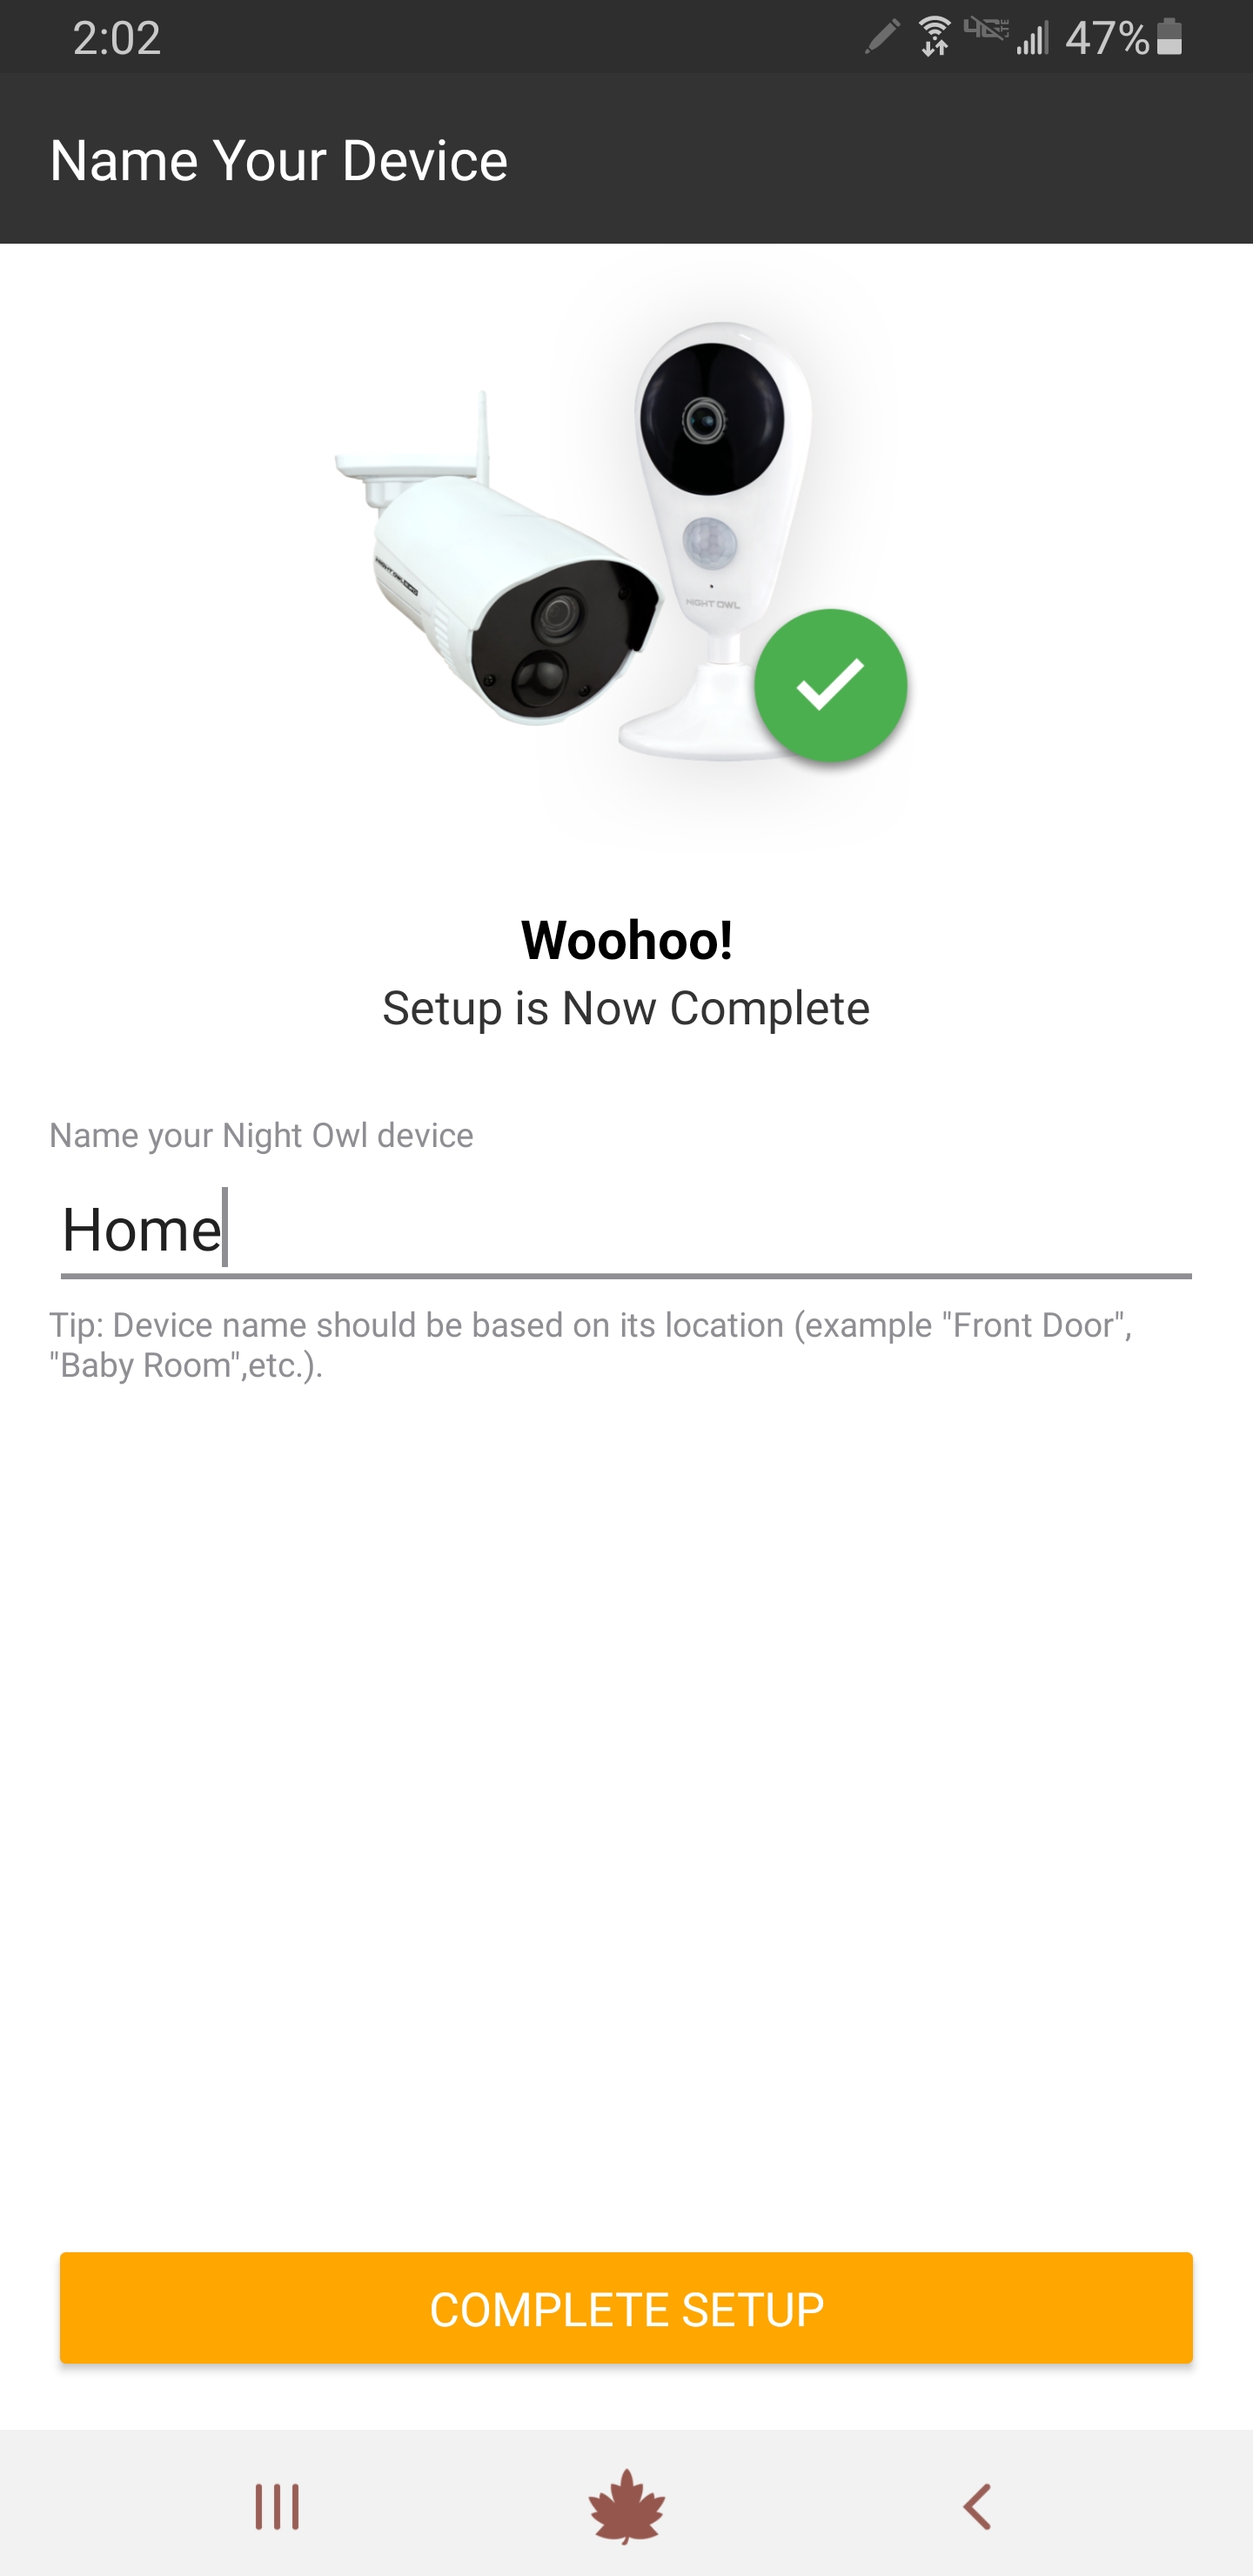
6. Once setup is complete, your camera will say “Woohoo! Setup is now complete.” Name your device and then tap “Complete Setup.”
NOTE: See Section 1(F) for Troubleshooting if the camera does not connect.
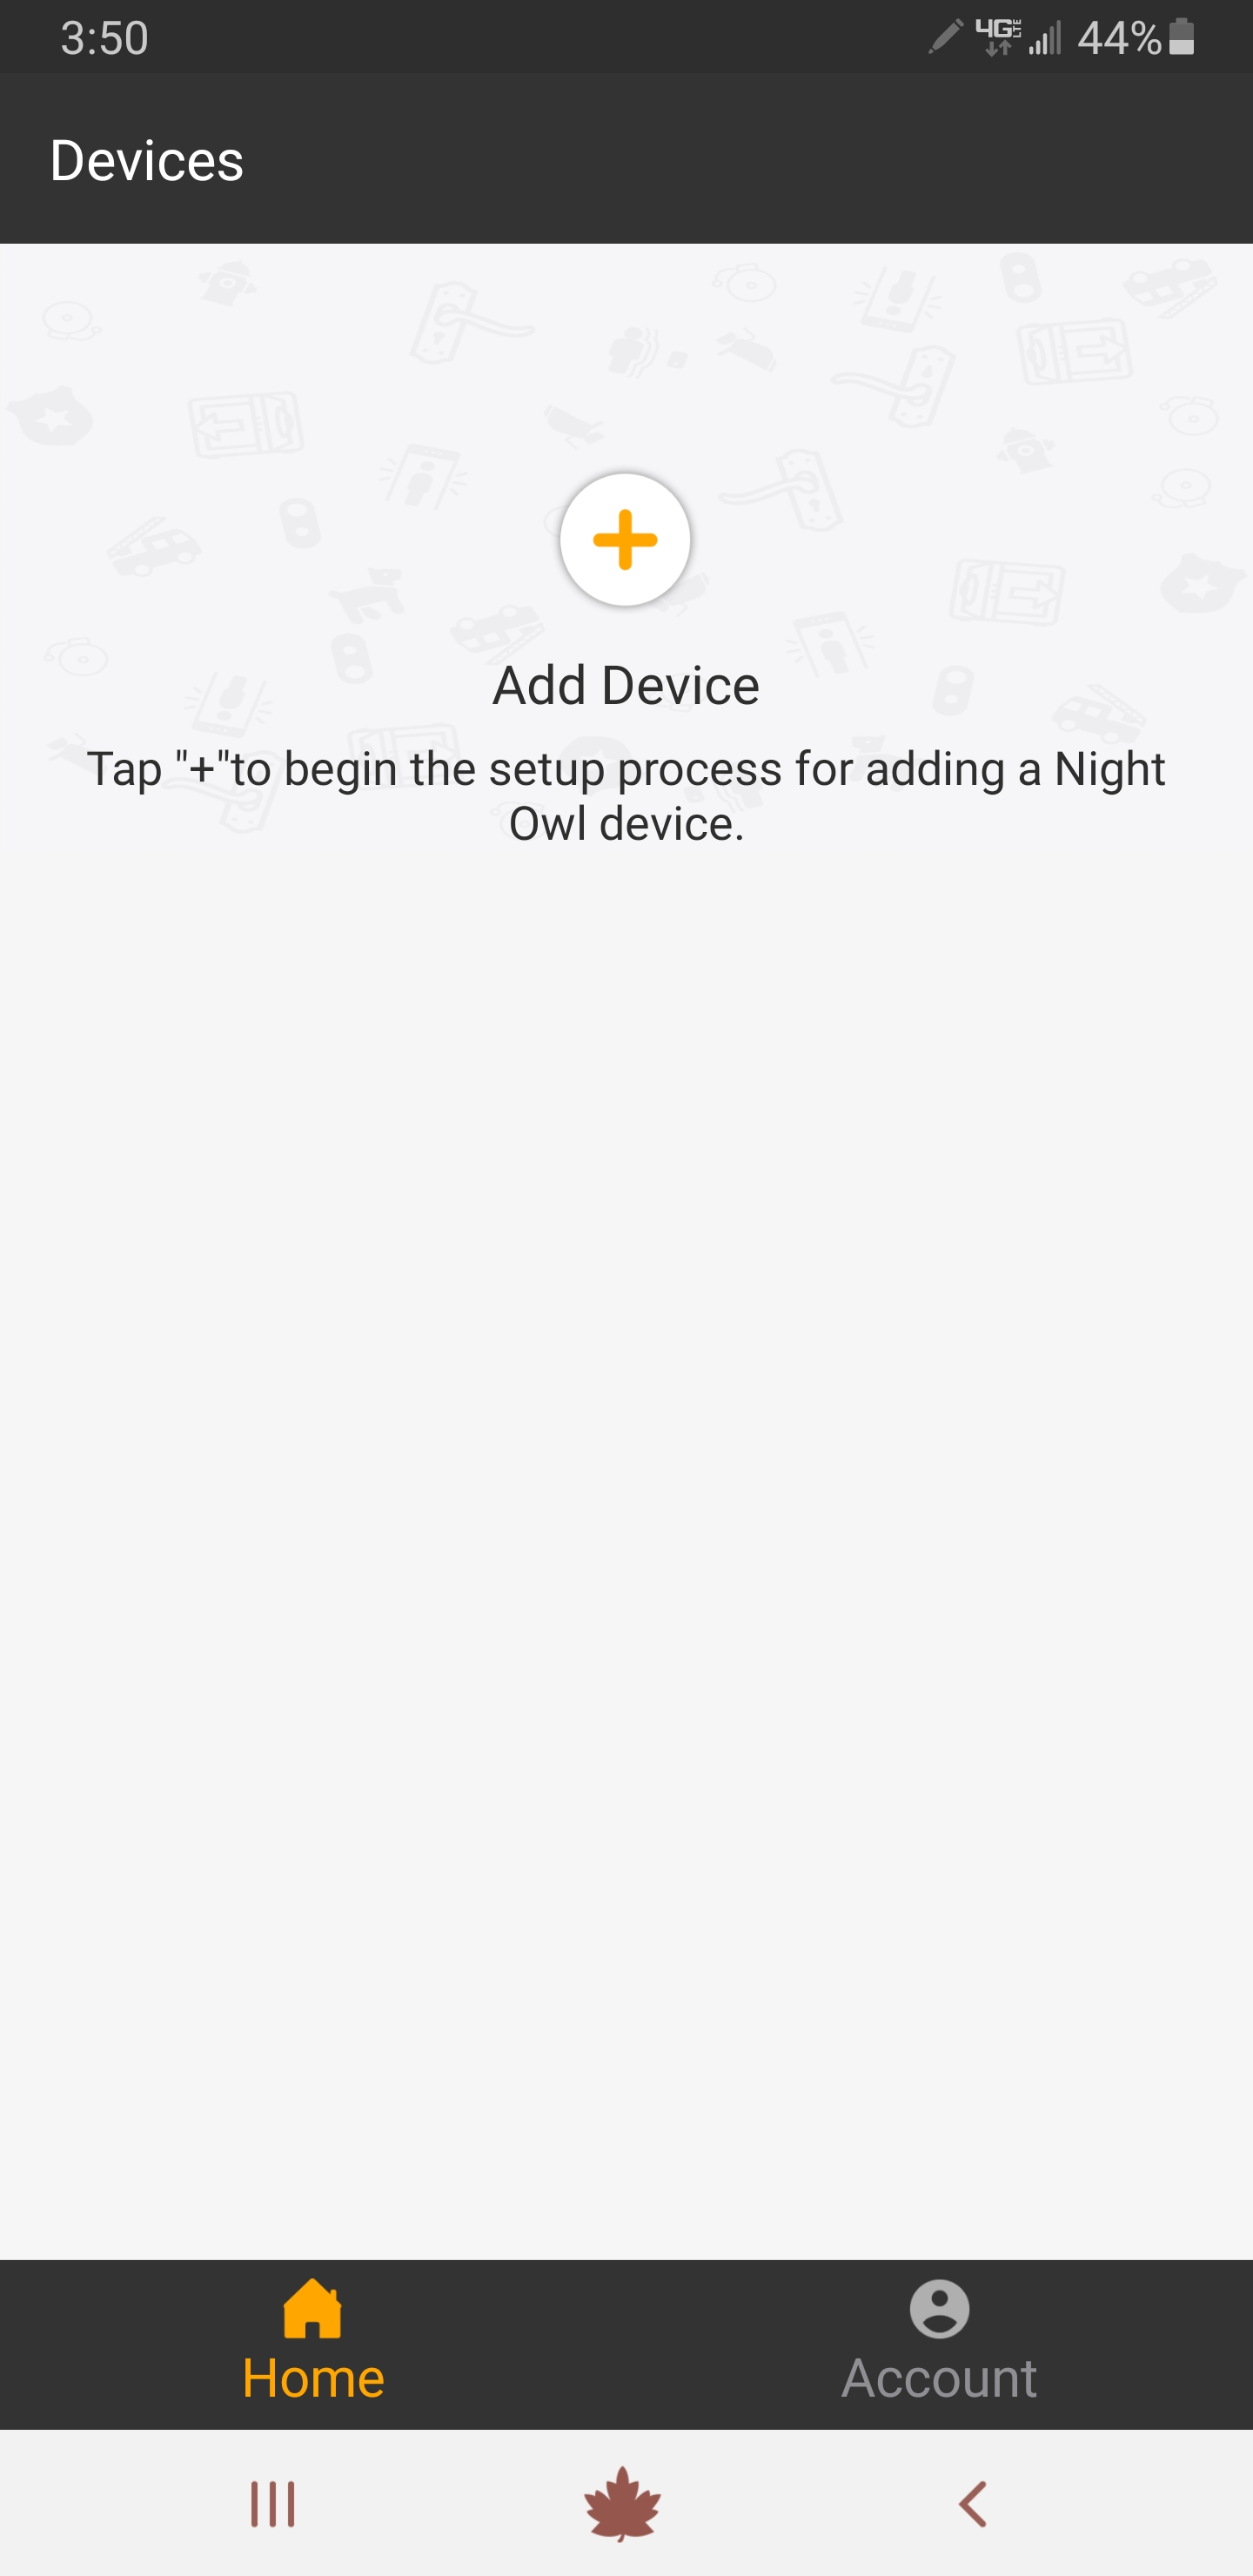
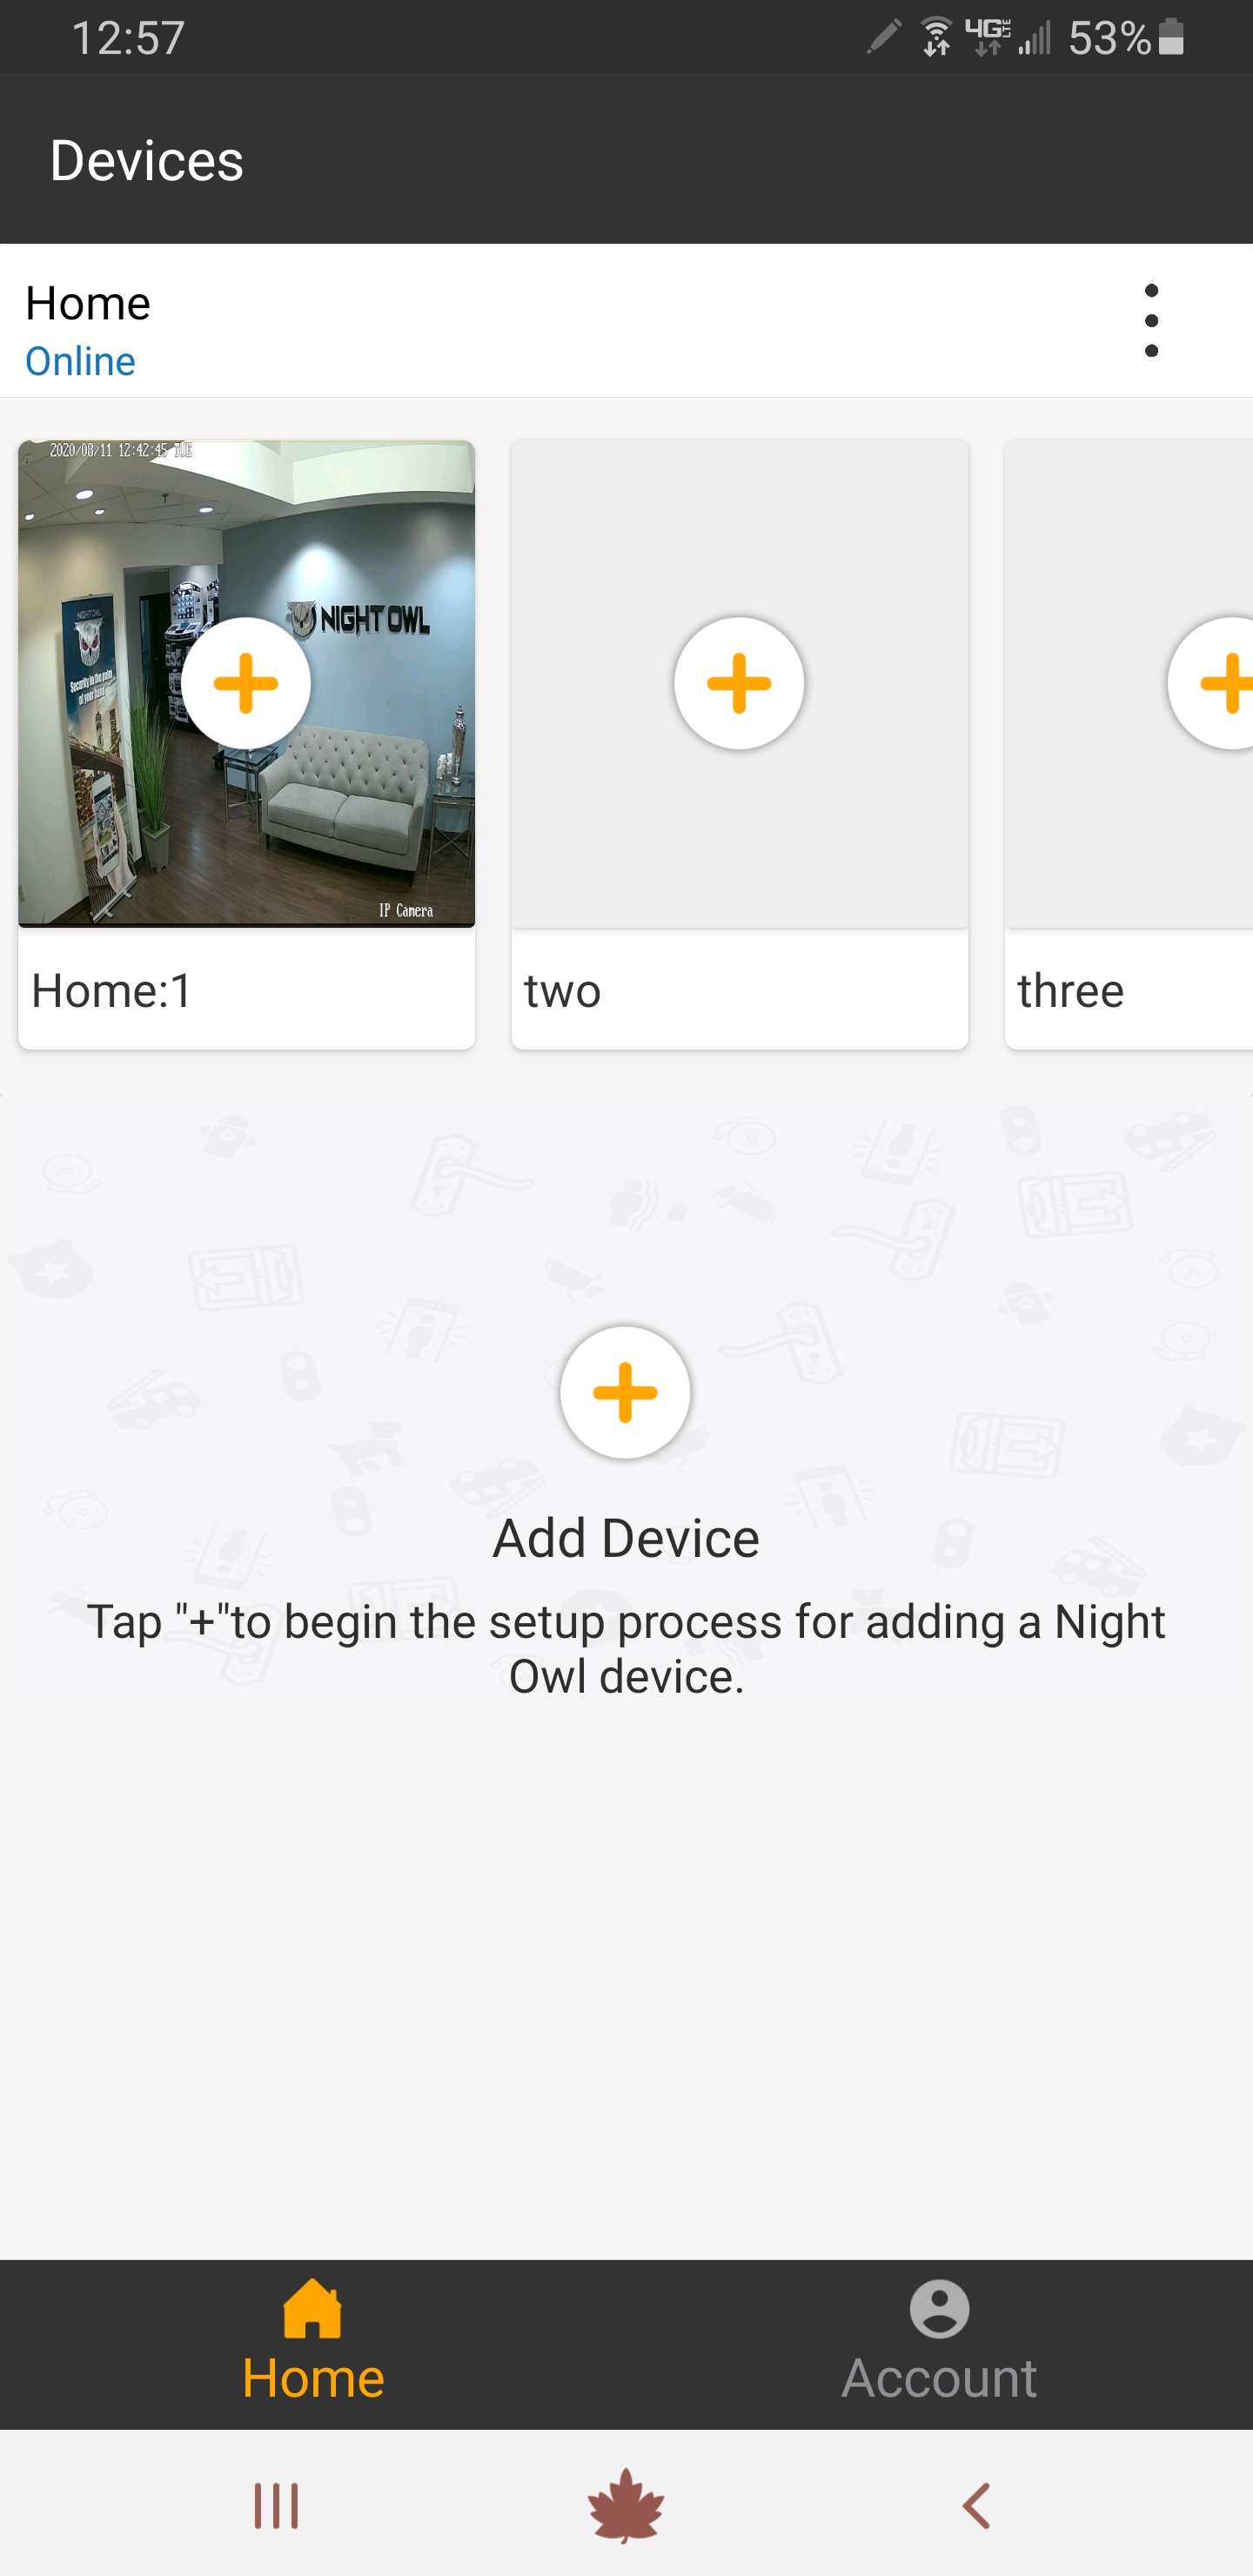
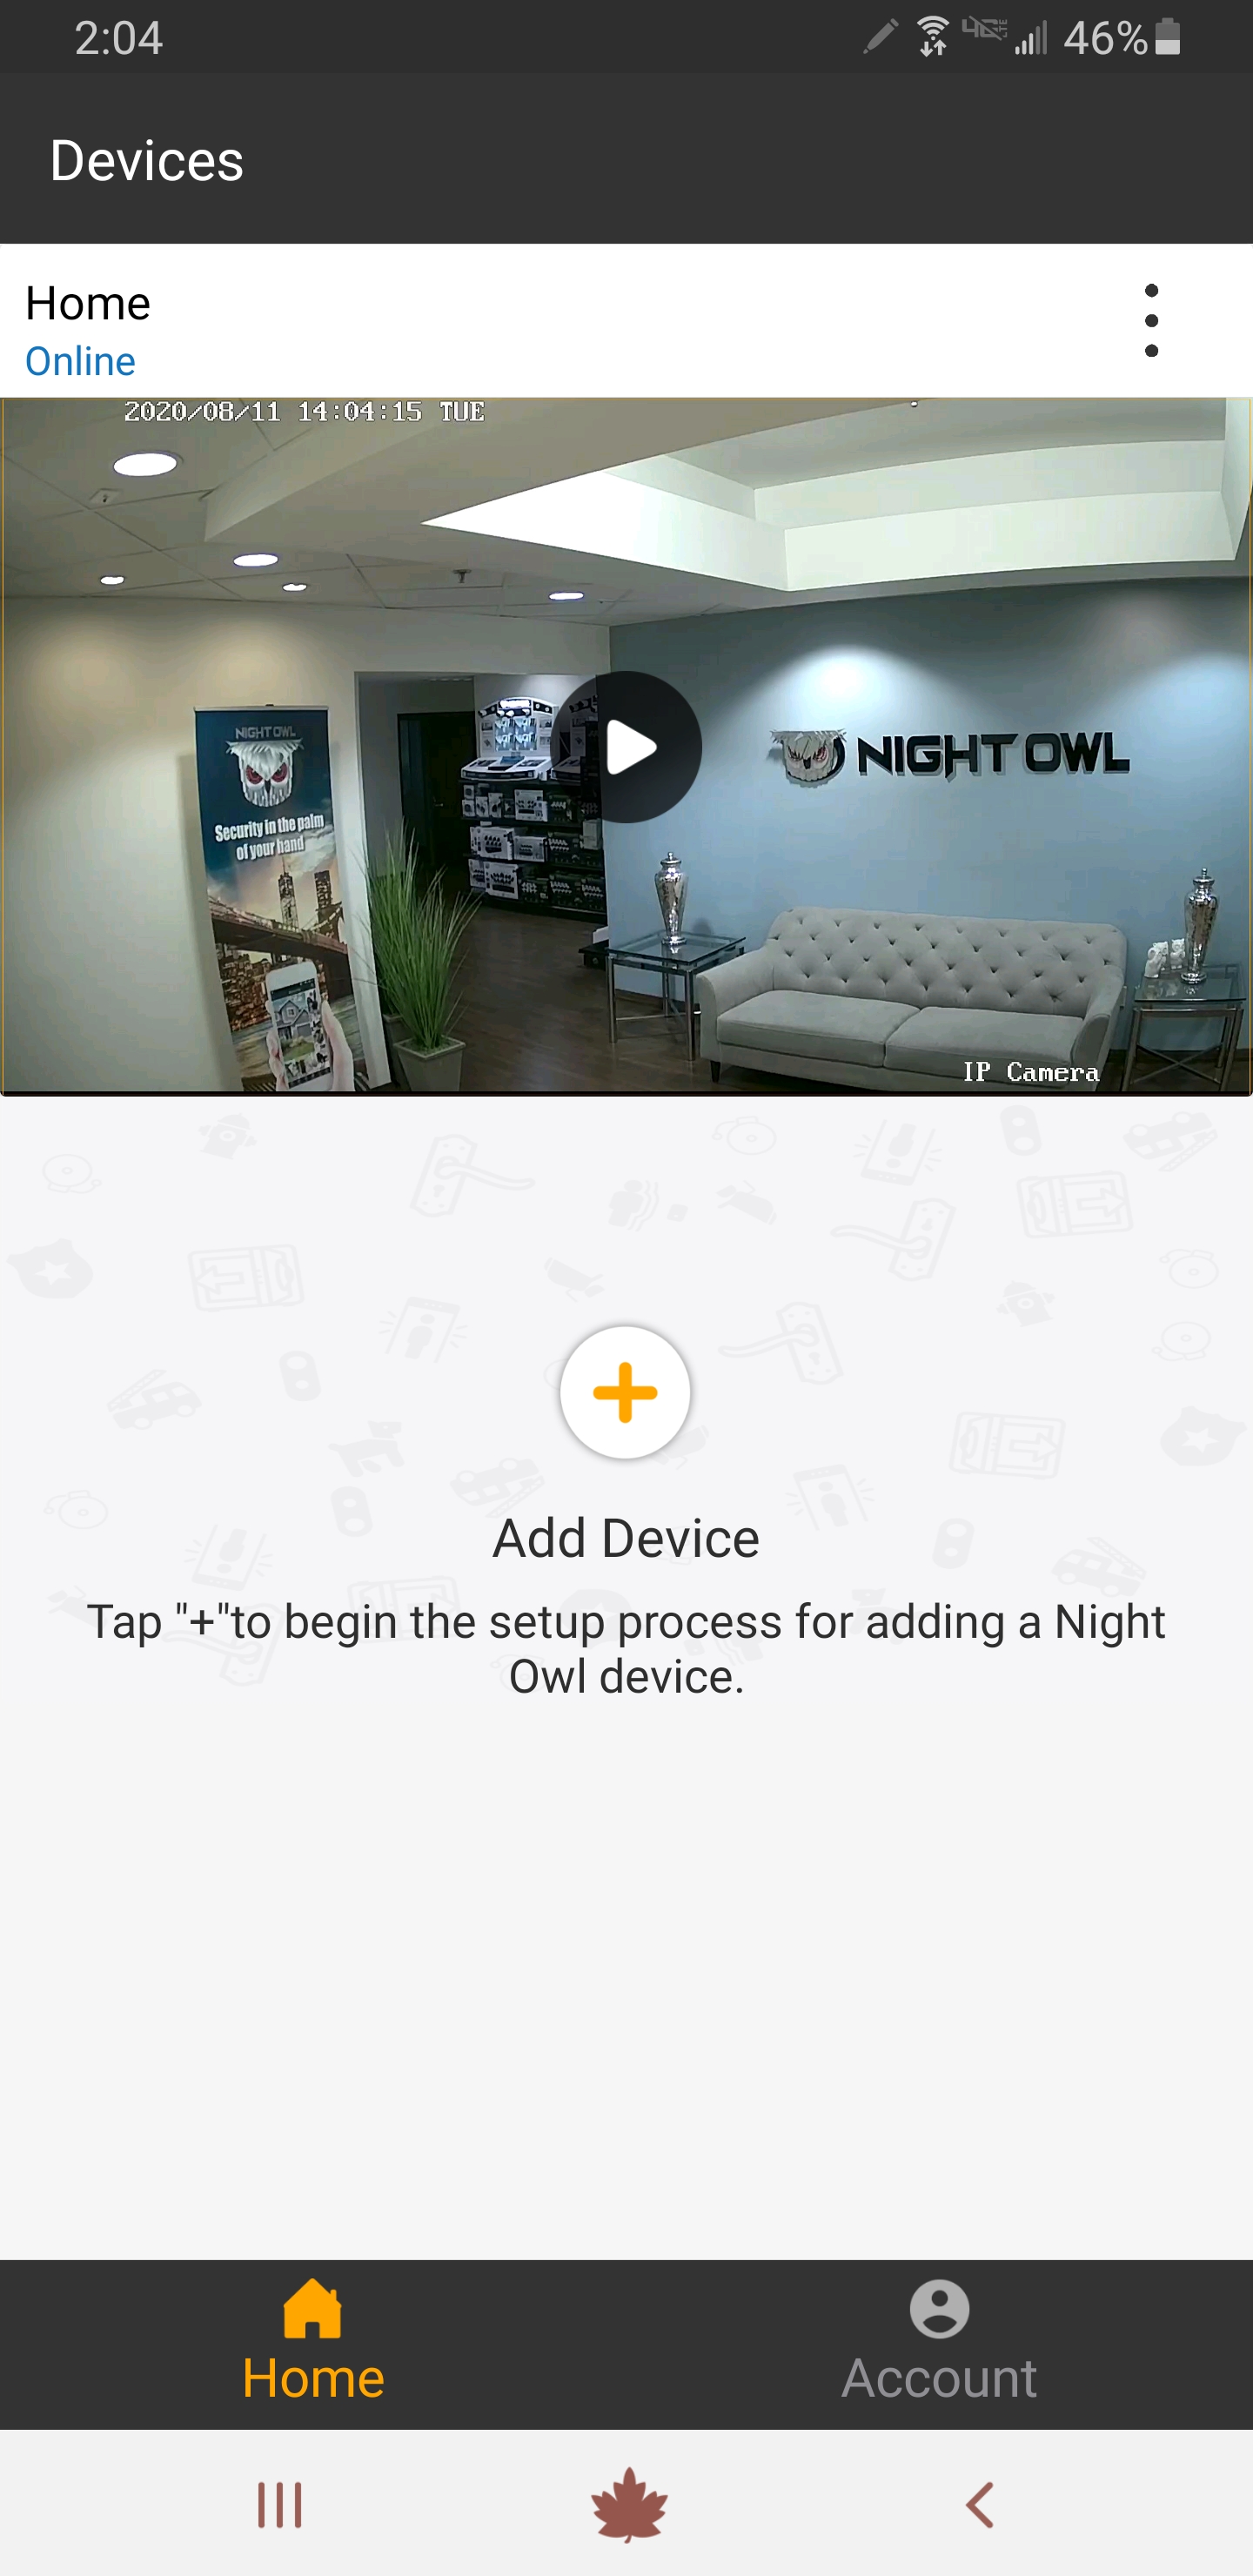
7. Once setup is complete, you will see your camera’s live view image on the main screen of the App. Tap the Play button to begin viewing your camera.
|
|
Copy and paste the verification code into the Code field.
|
|
(Click Here for a Short Video Tutorial)
Before beginning, please make sure that your doorbell is connected to the provided USB charging cable and in pairing mode. If you need more information, please refer to the doorbell Quick Setup Guide at the following link:
1. Please log in to the App and tap “Add Device.”
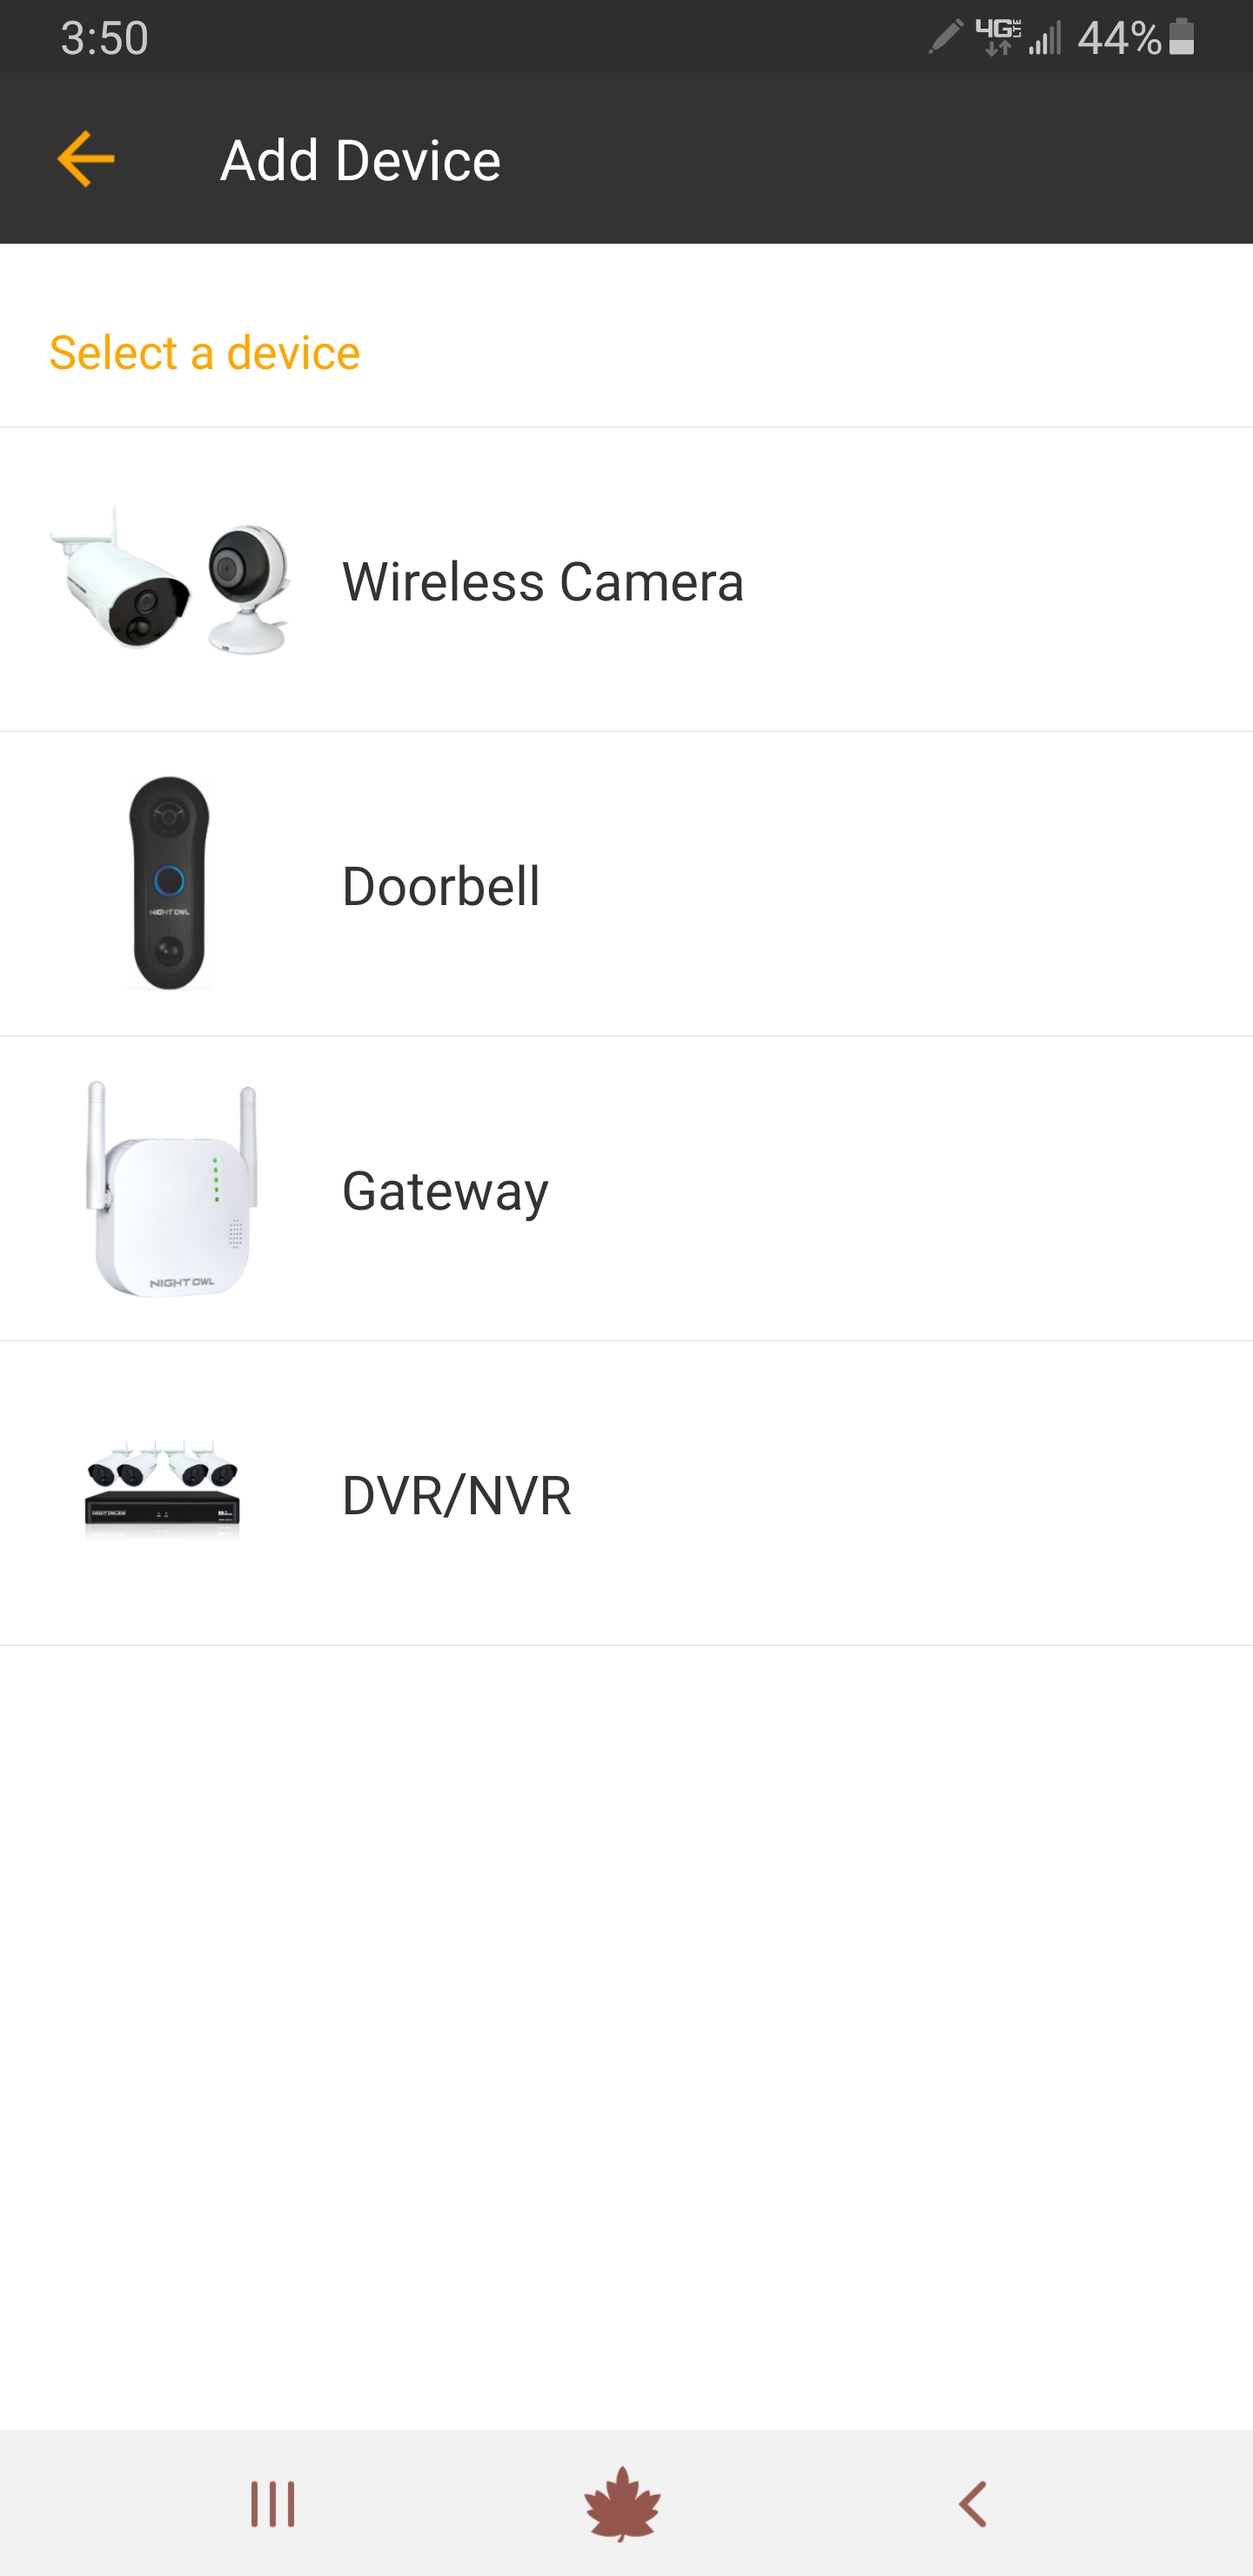
2. Tap “Doorbell.”
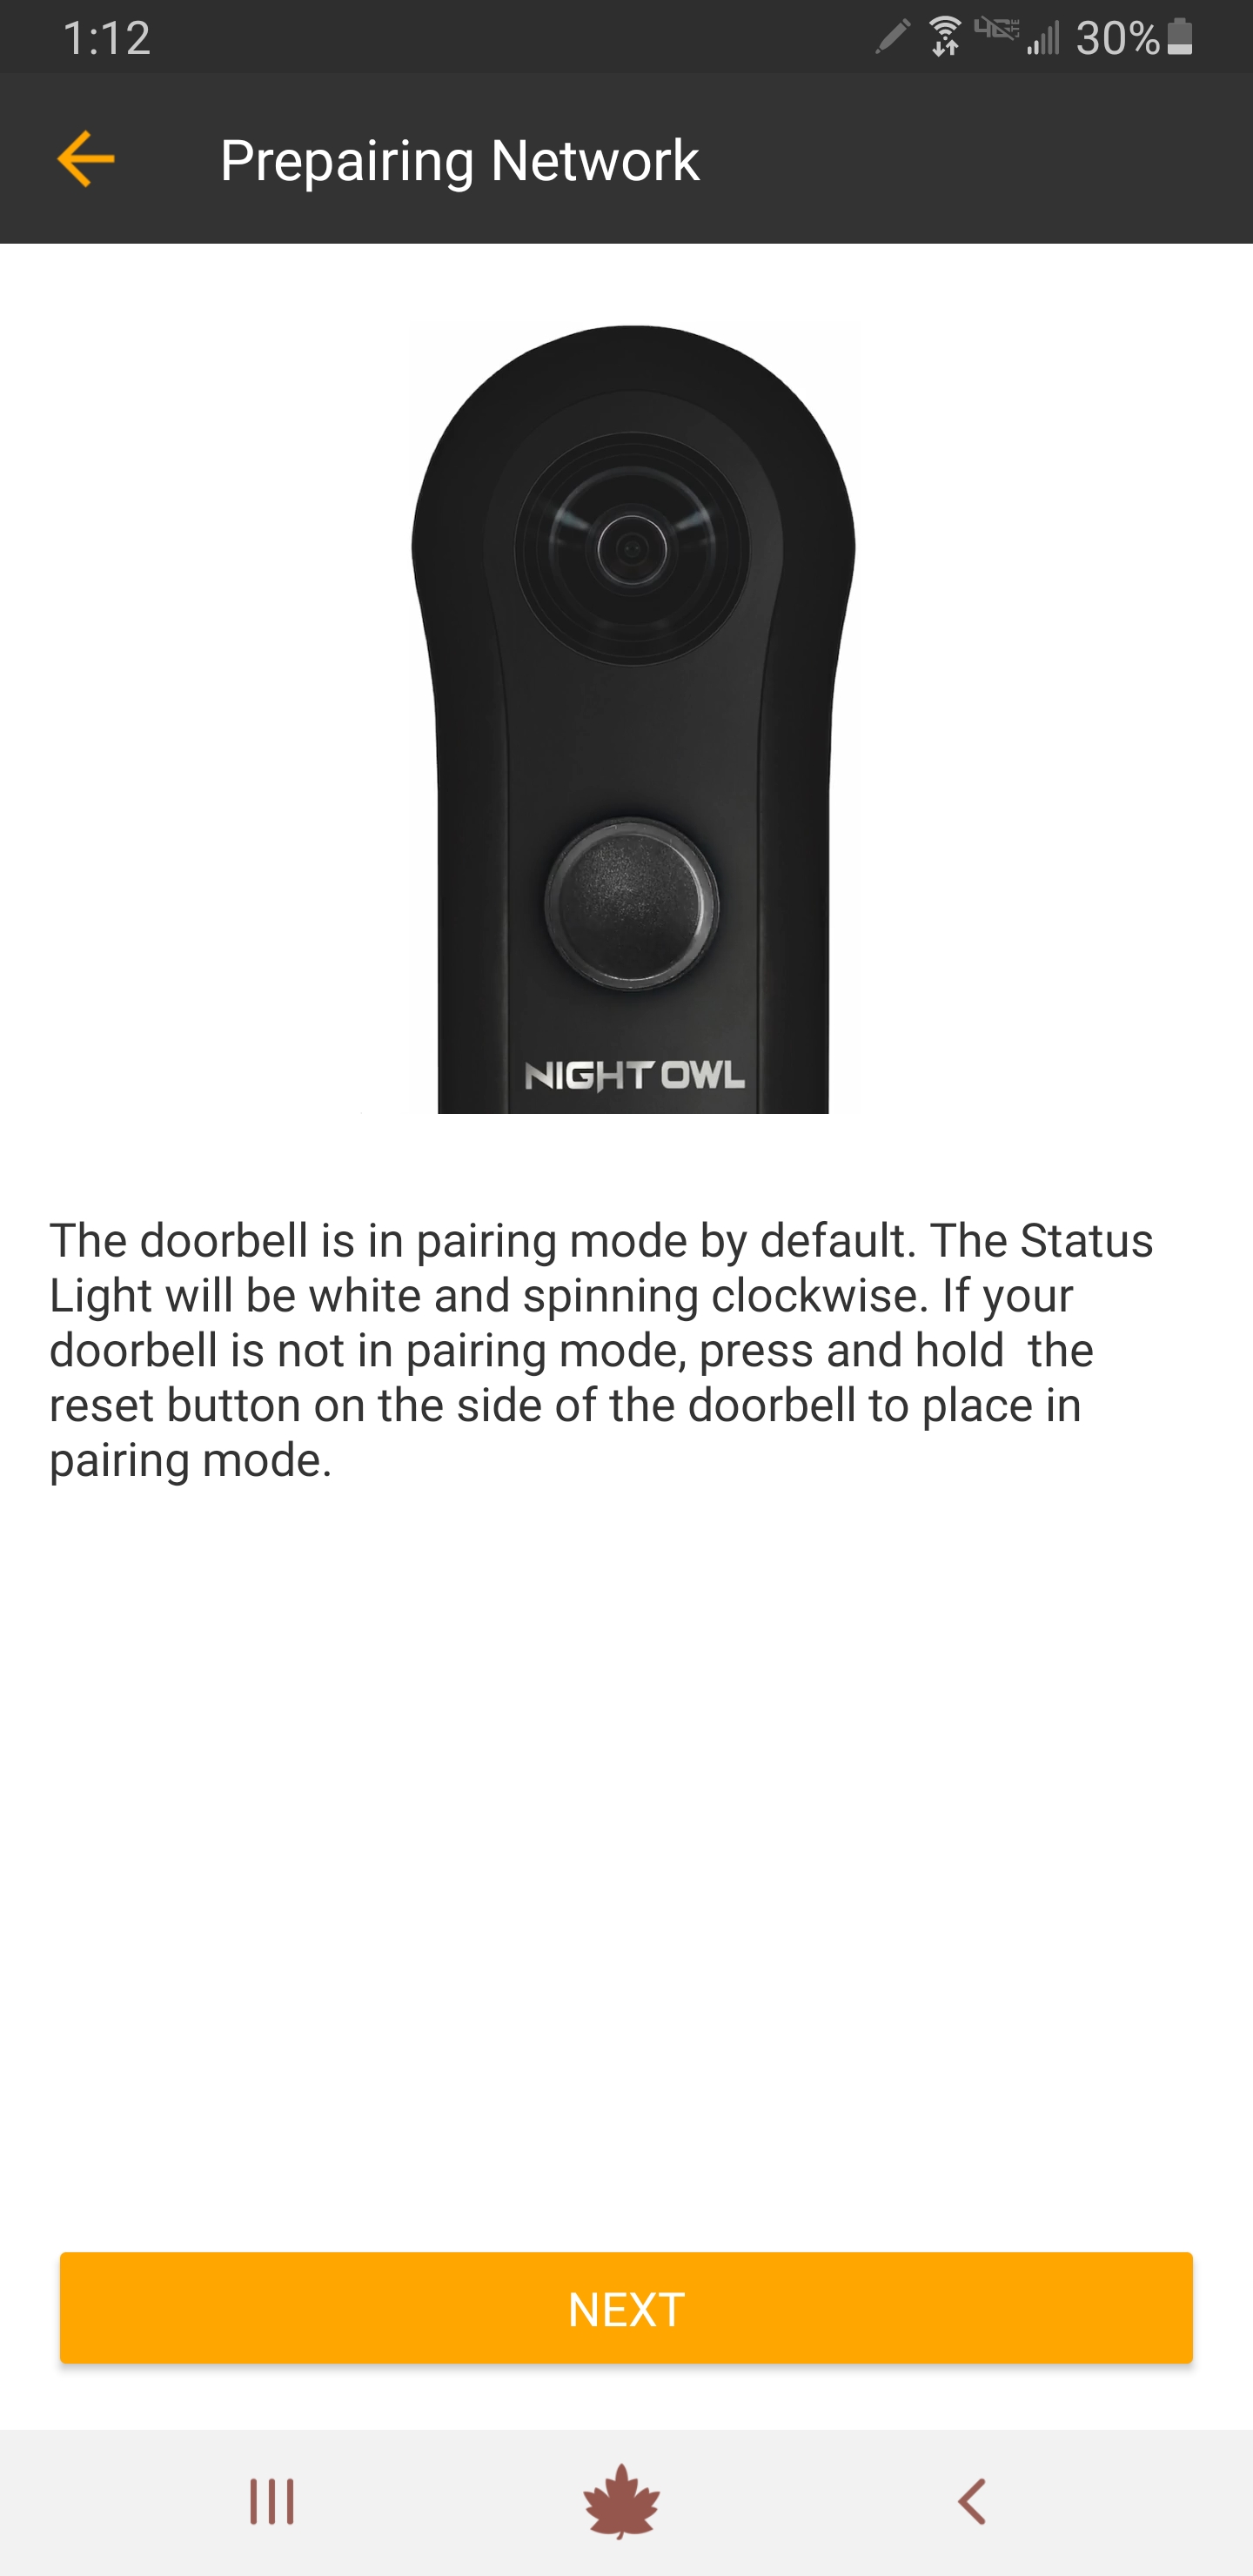
3. Please ensure the doorbell is powered on and in pairing mode. The white lights on the front of the doorbell will spin when it is in pairing mode. If it is not in pairing mode, please press the reset button on the side of the doorbell. Tap “Next” to continue.
4. iOS users (Android users can skip to Step 5)
i. Leave the App and launch the iOS device’s Settings.
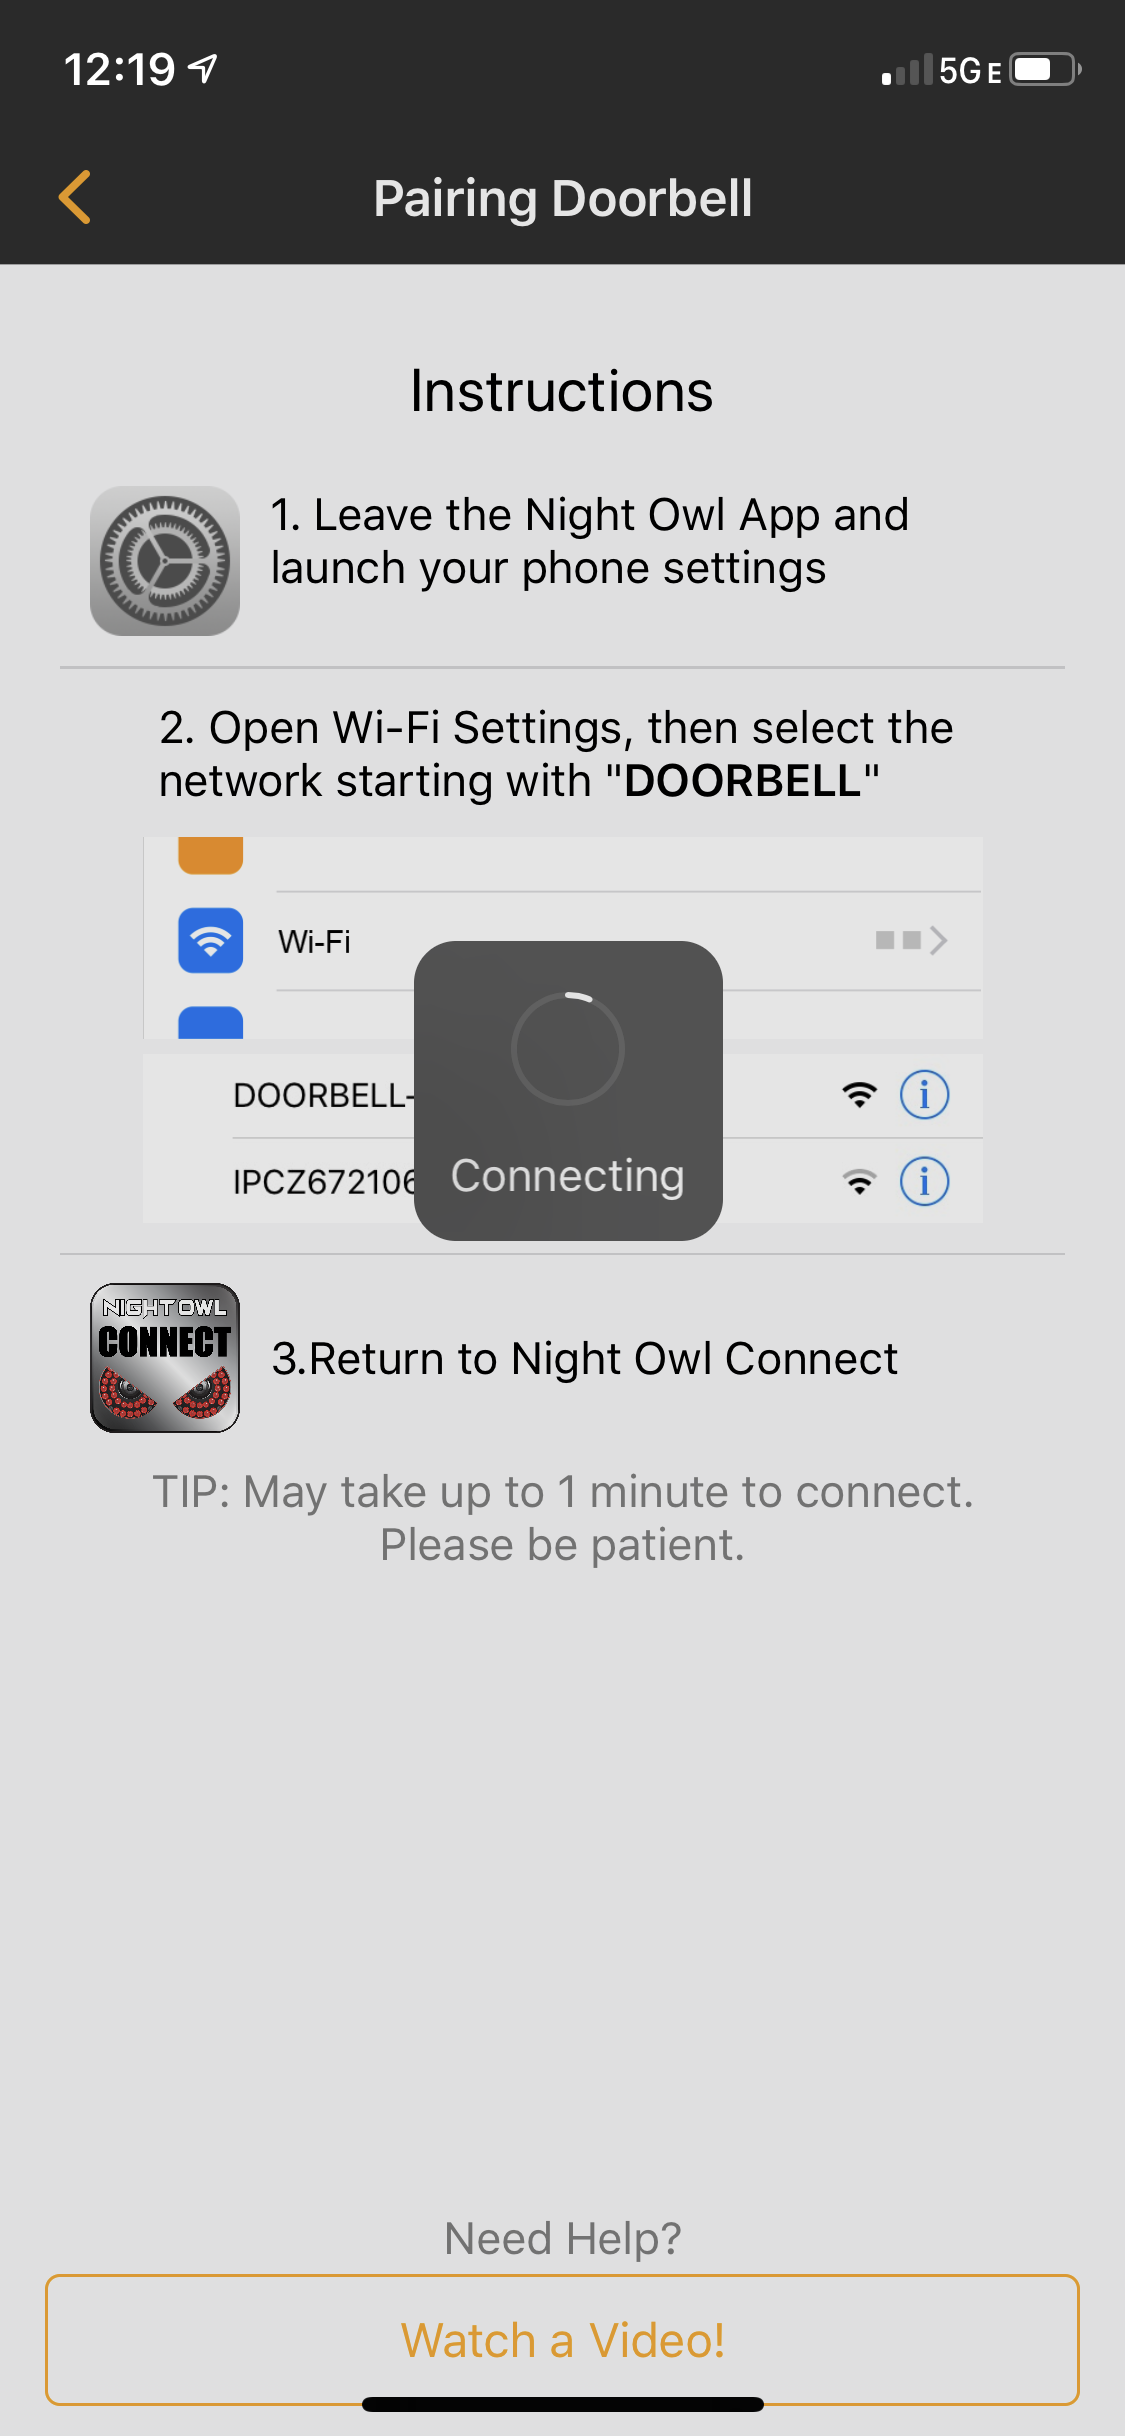
ii. Select Wi-Fi and locate the network starting with “Doorbell” on the list. Connect the device to the Doorbell Wi-Fi network.
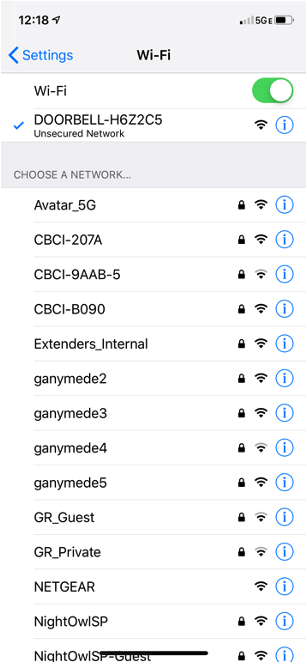
iii. Please return to the Night Owl Connect App to continue setup.

5. ANDROID users (for iOS users skip to Step 6)
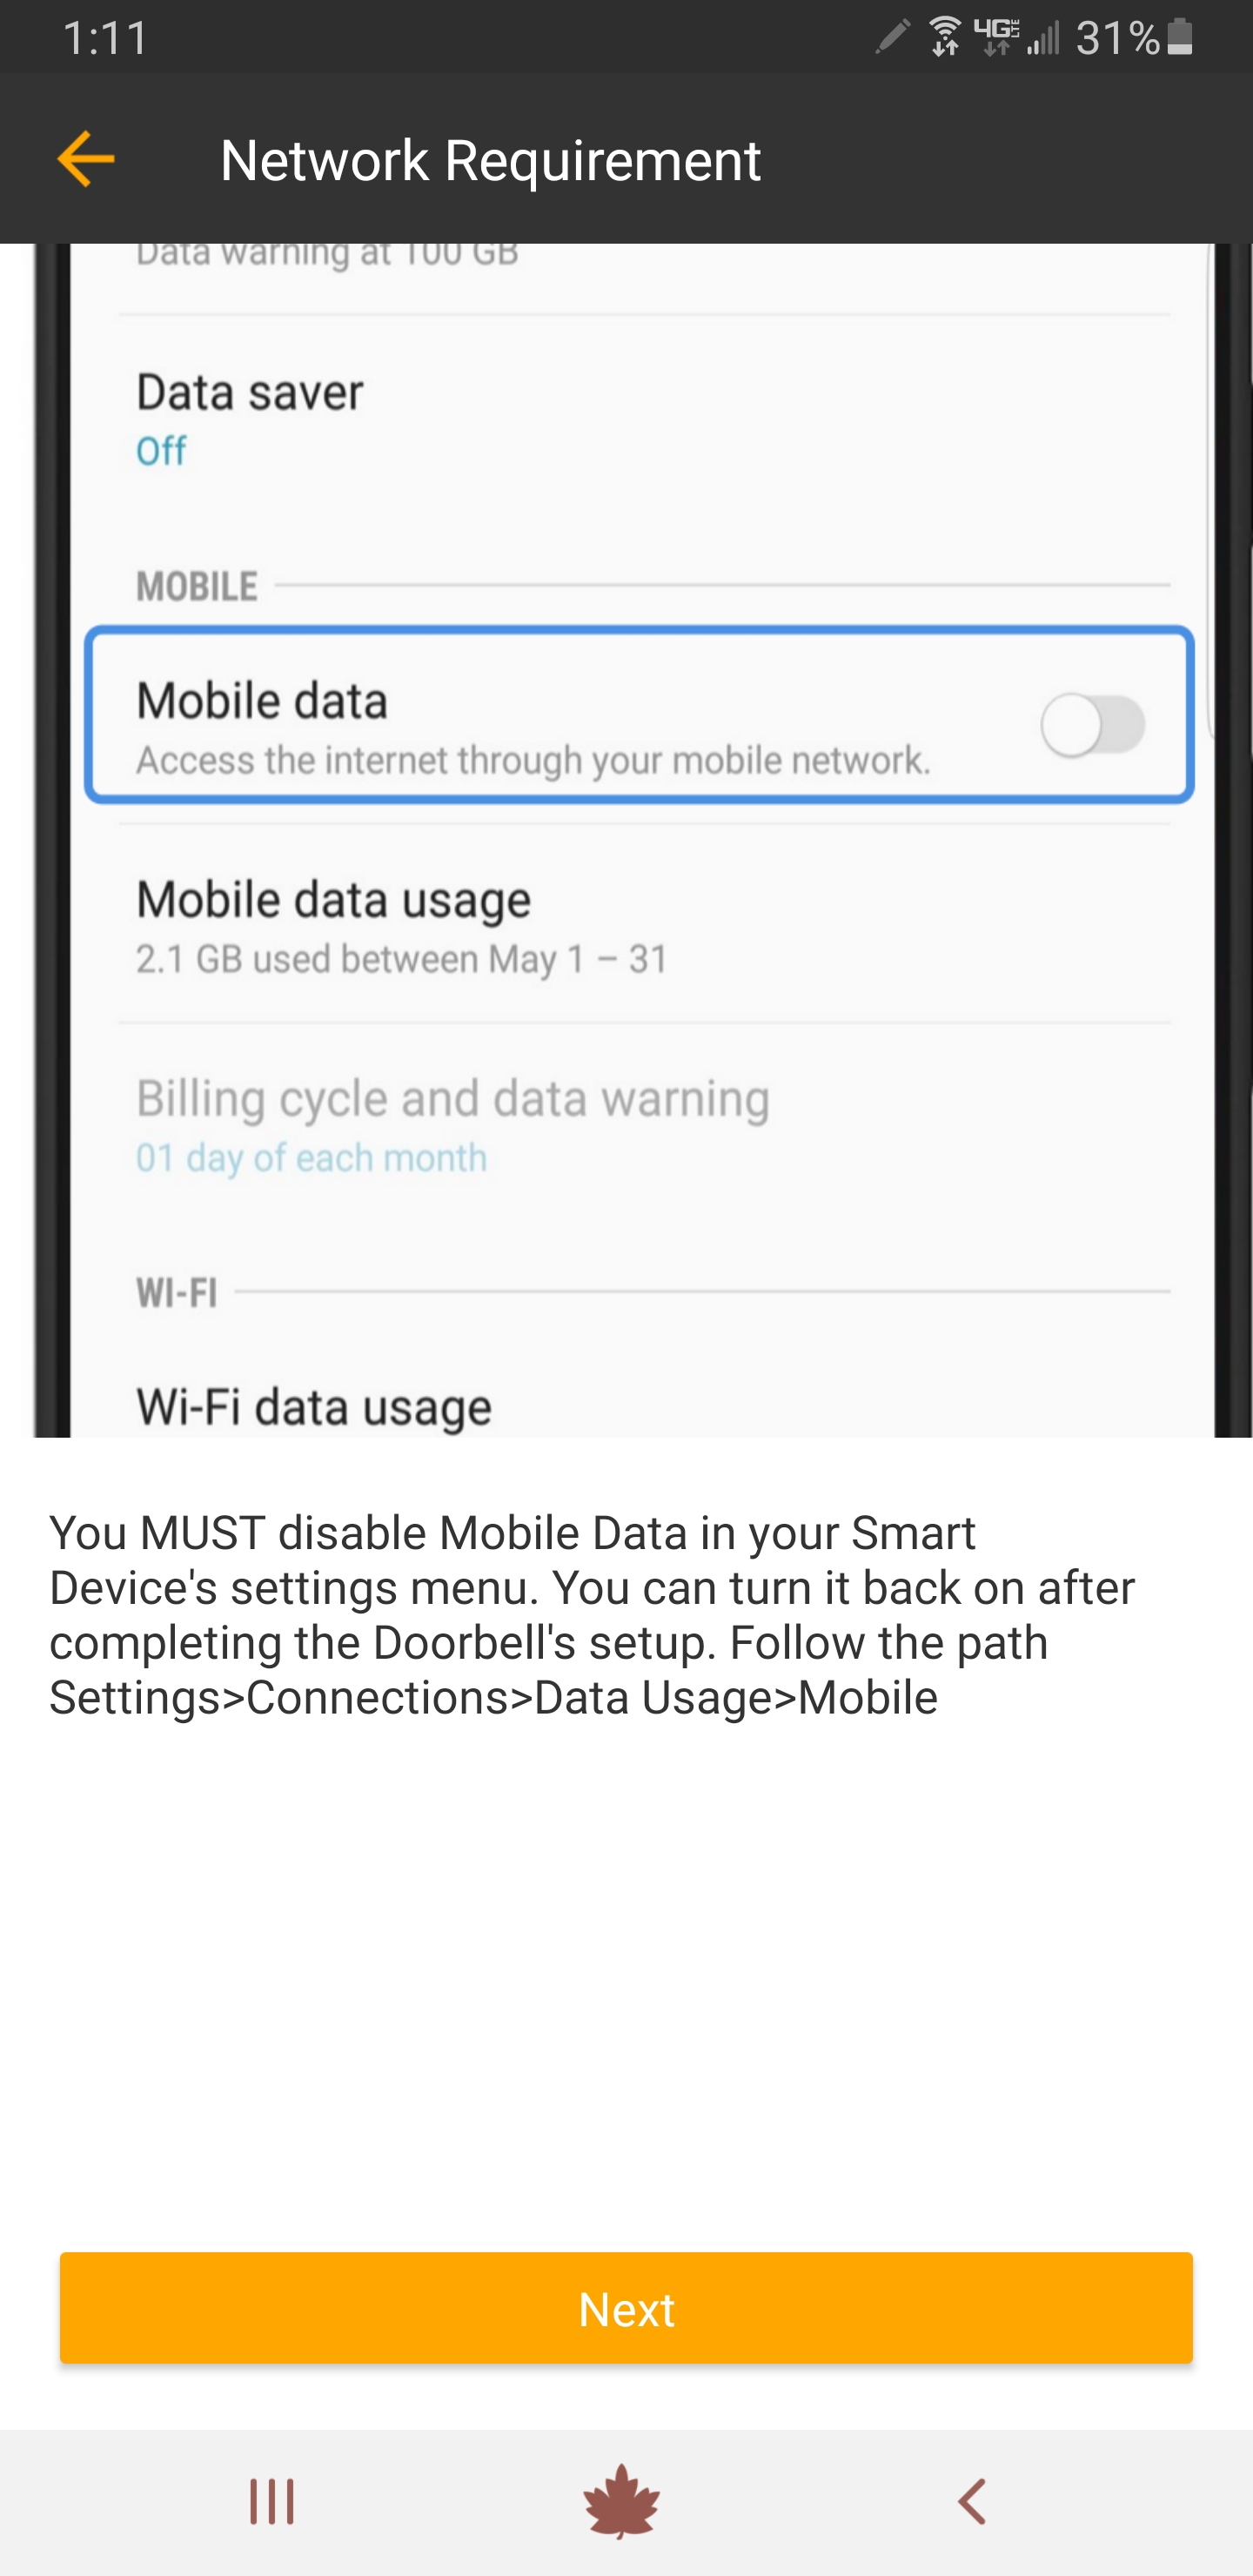
i. To add the camera, you must disable Mobile Data in your Smart Device’s settings. To do so, go to Settings>>>Connections>>>Data Usage>>>Mobile. Tap “Next” to continue.
ii. The App will begin scanning for available doorbells. Please tap on your doorbell once it appears.
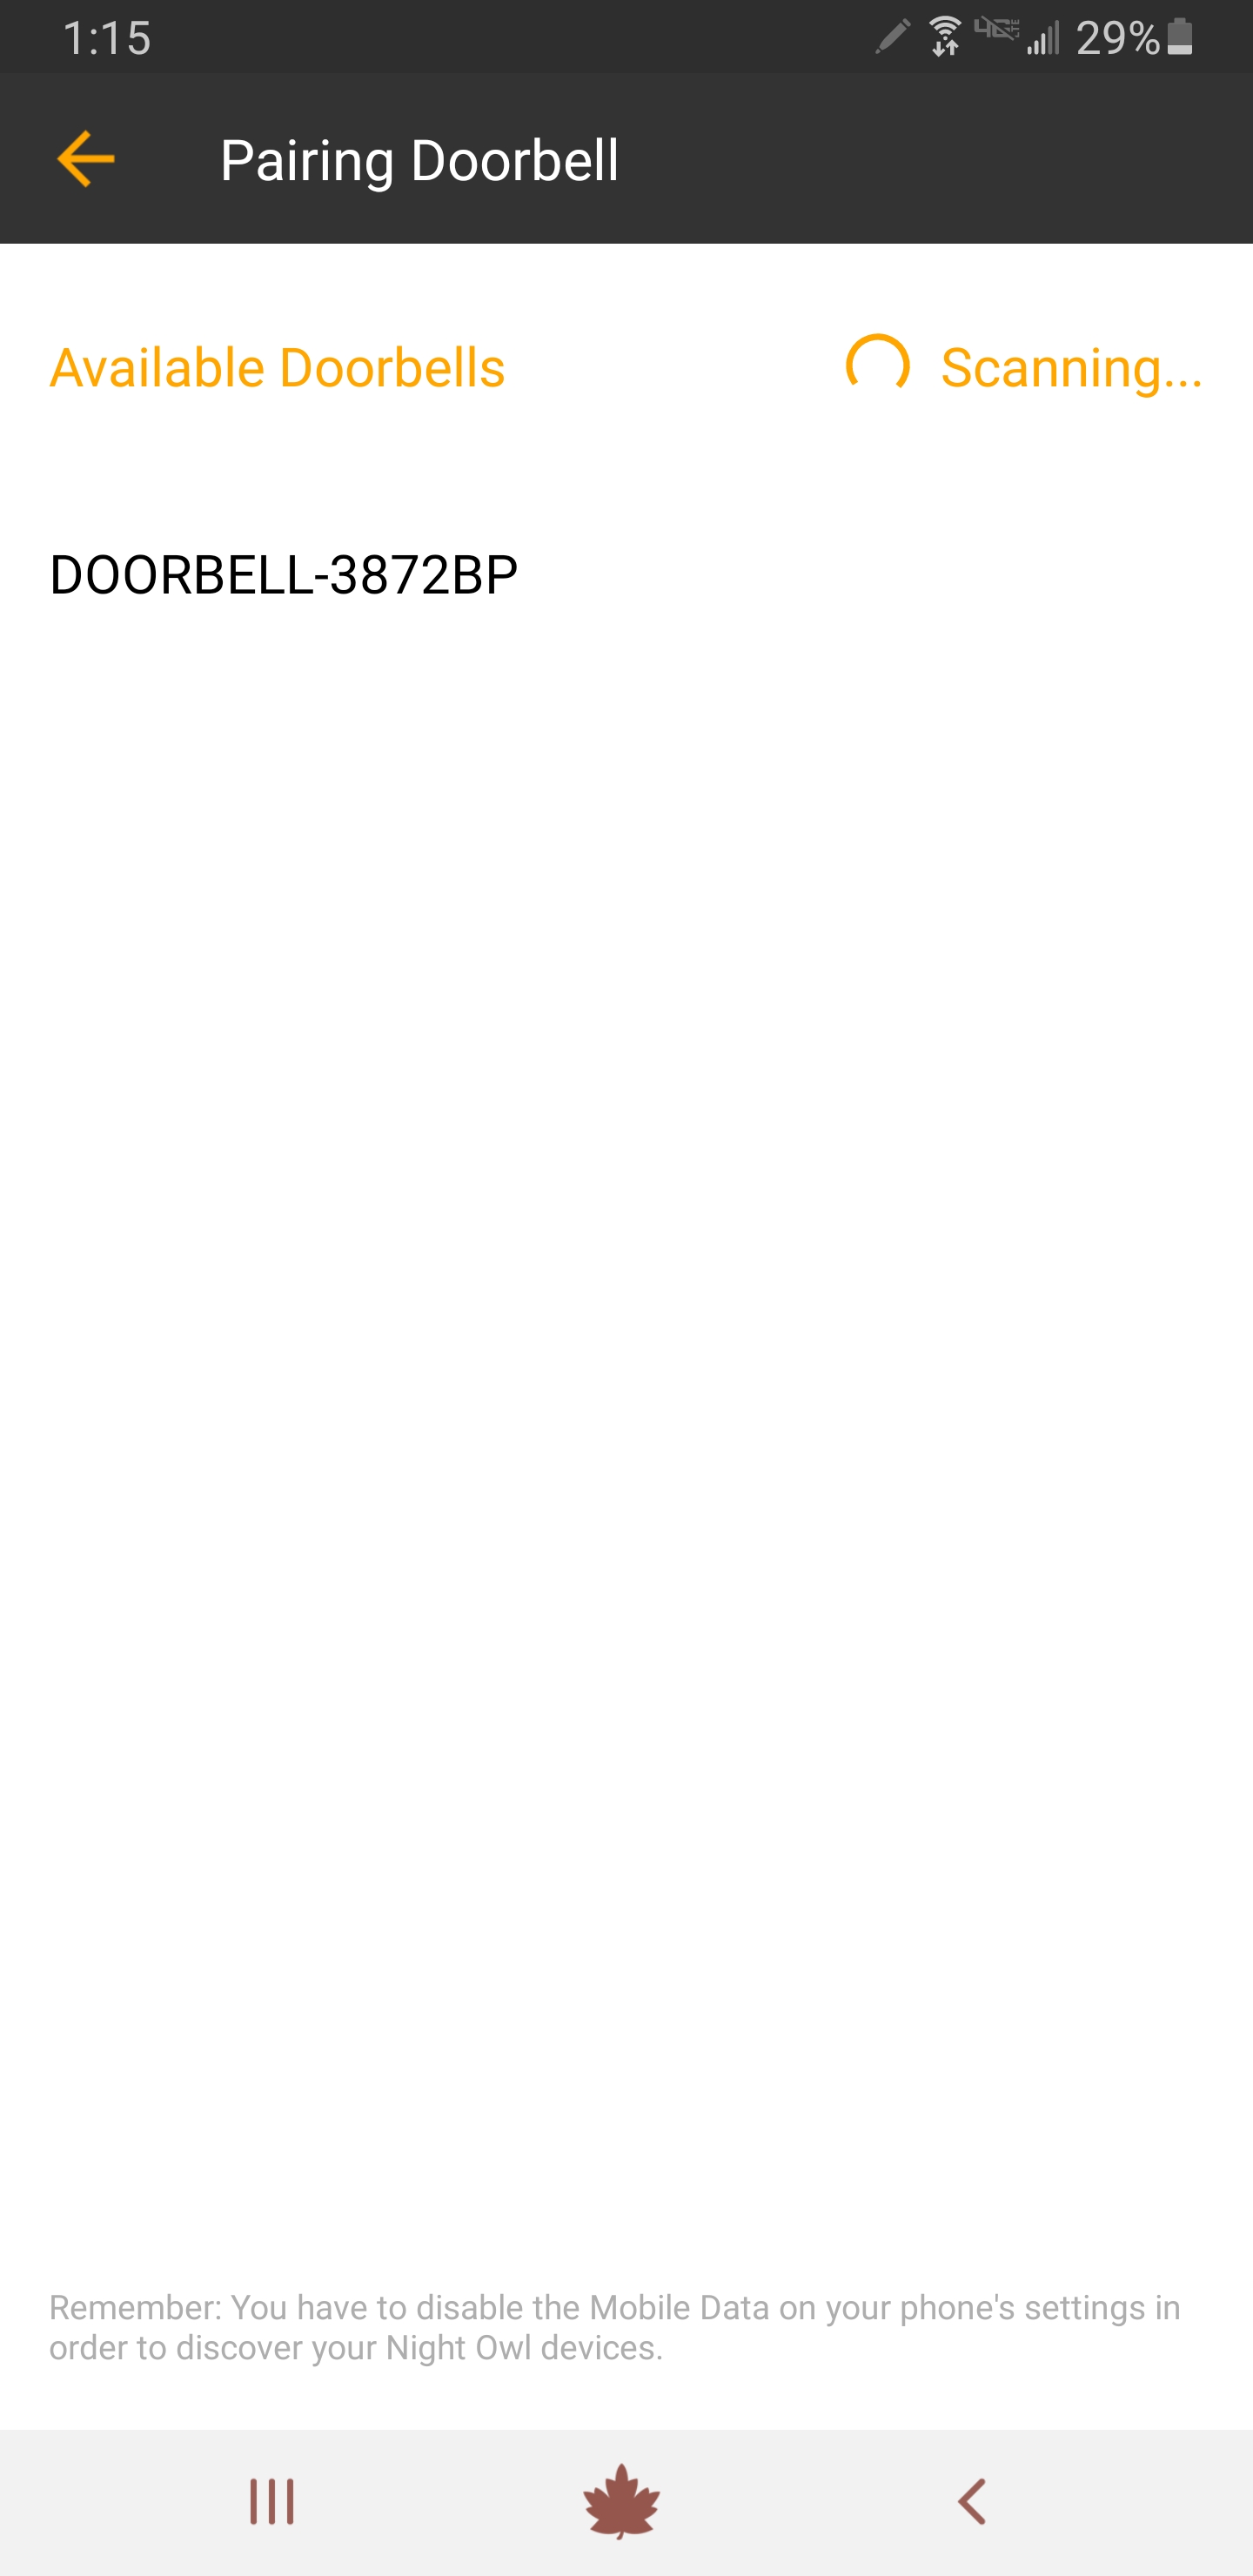
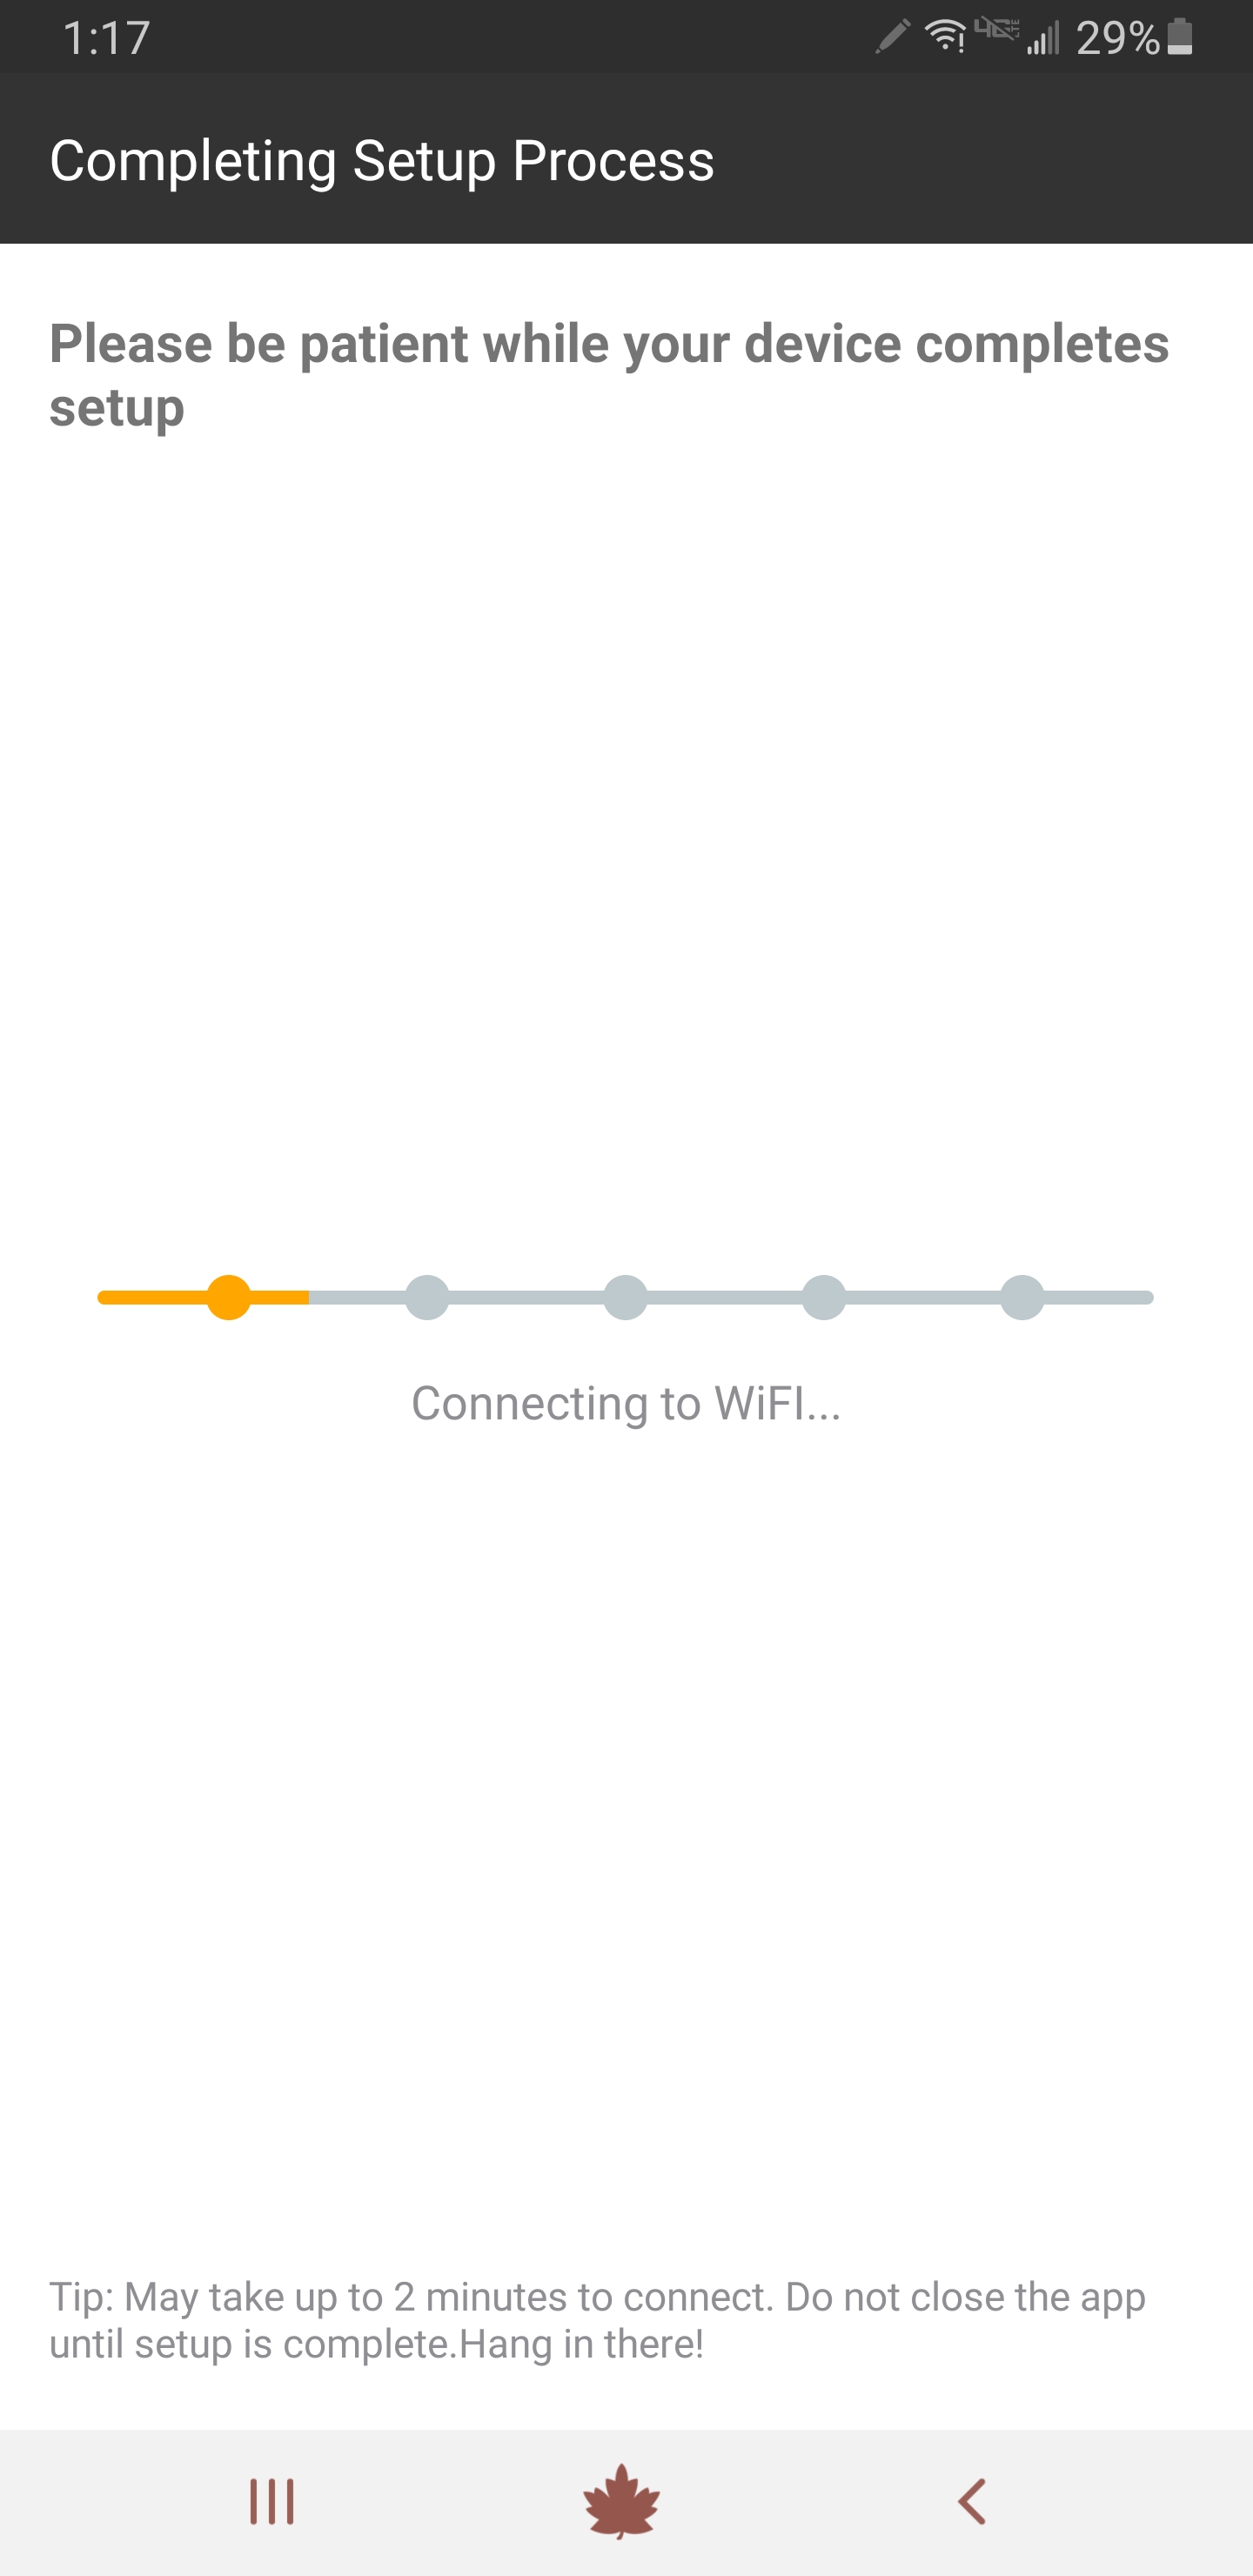
6. Please be patient as the App completes the setup process.
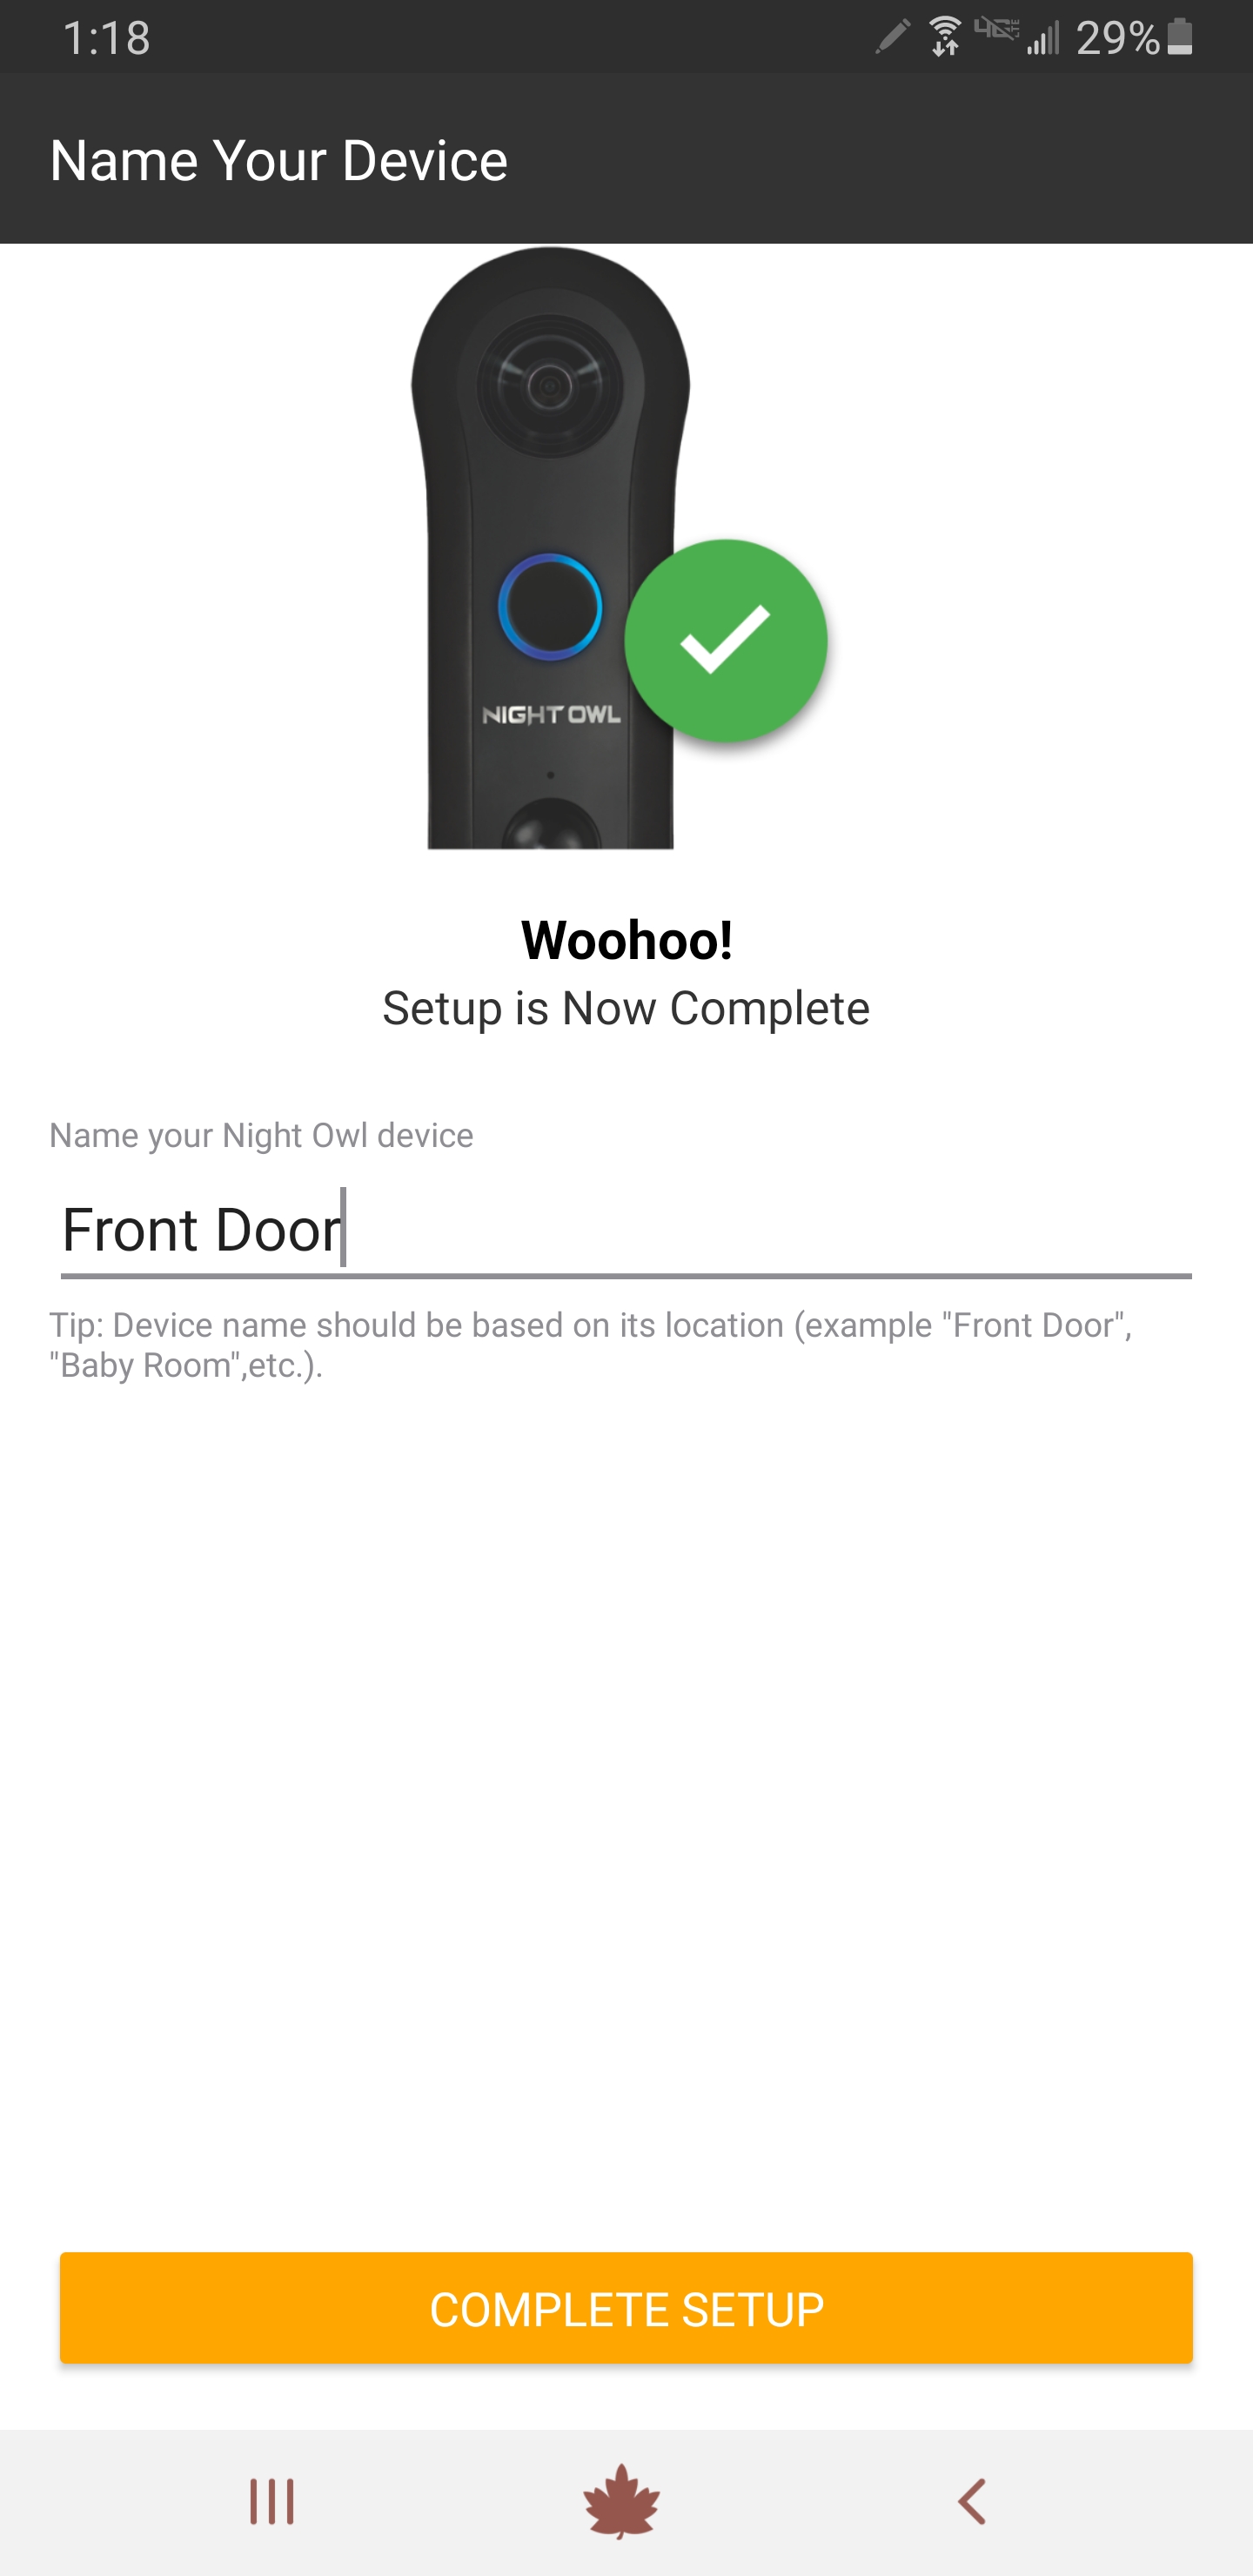
7. Once setup is complete, you will see the screen below. Please name your doorbell and tap “Complete Setup.”
NOTE: See Section 1(F) for Troubleshooting if the doorbell does not connect.
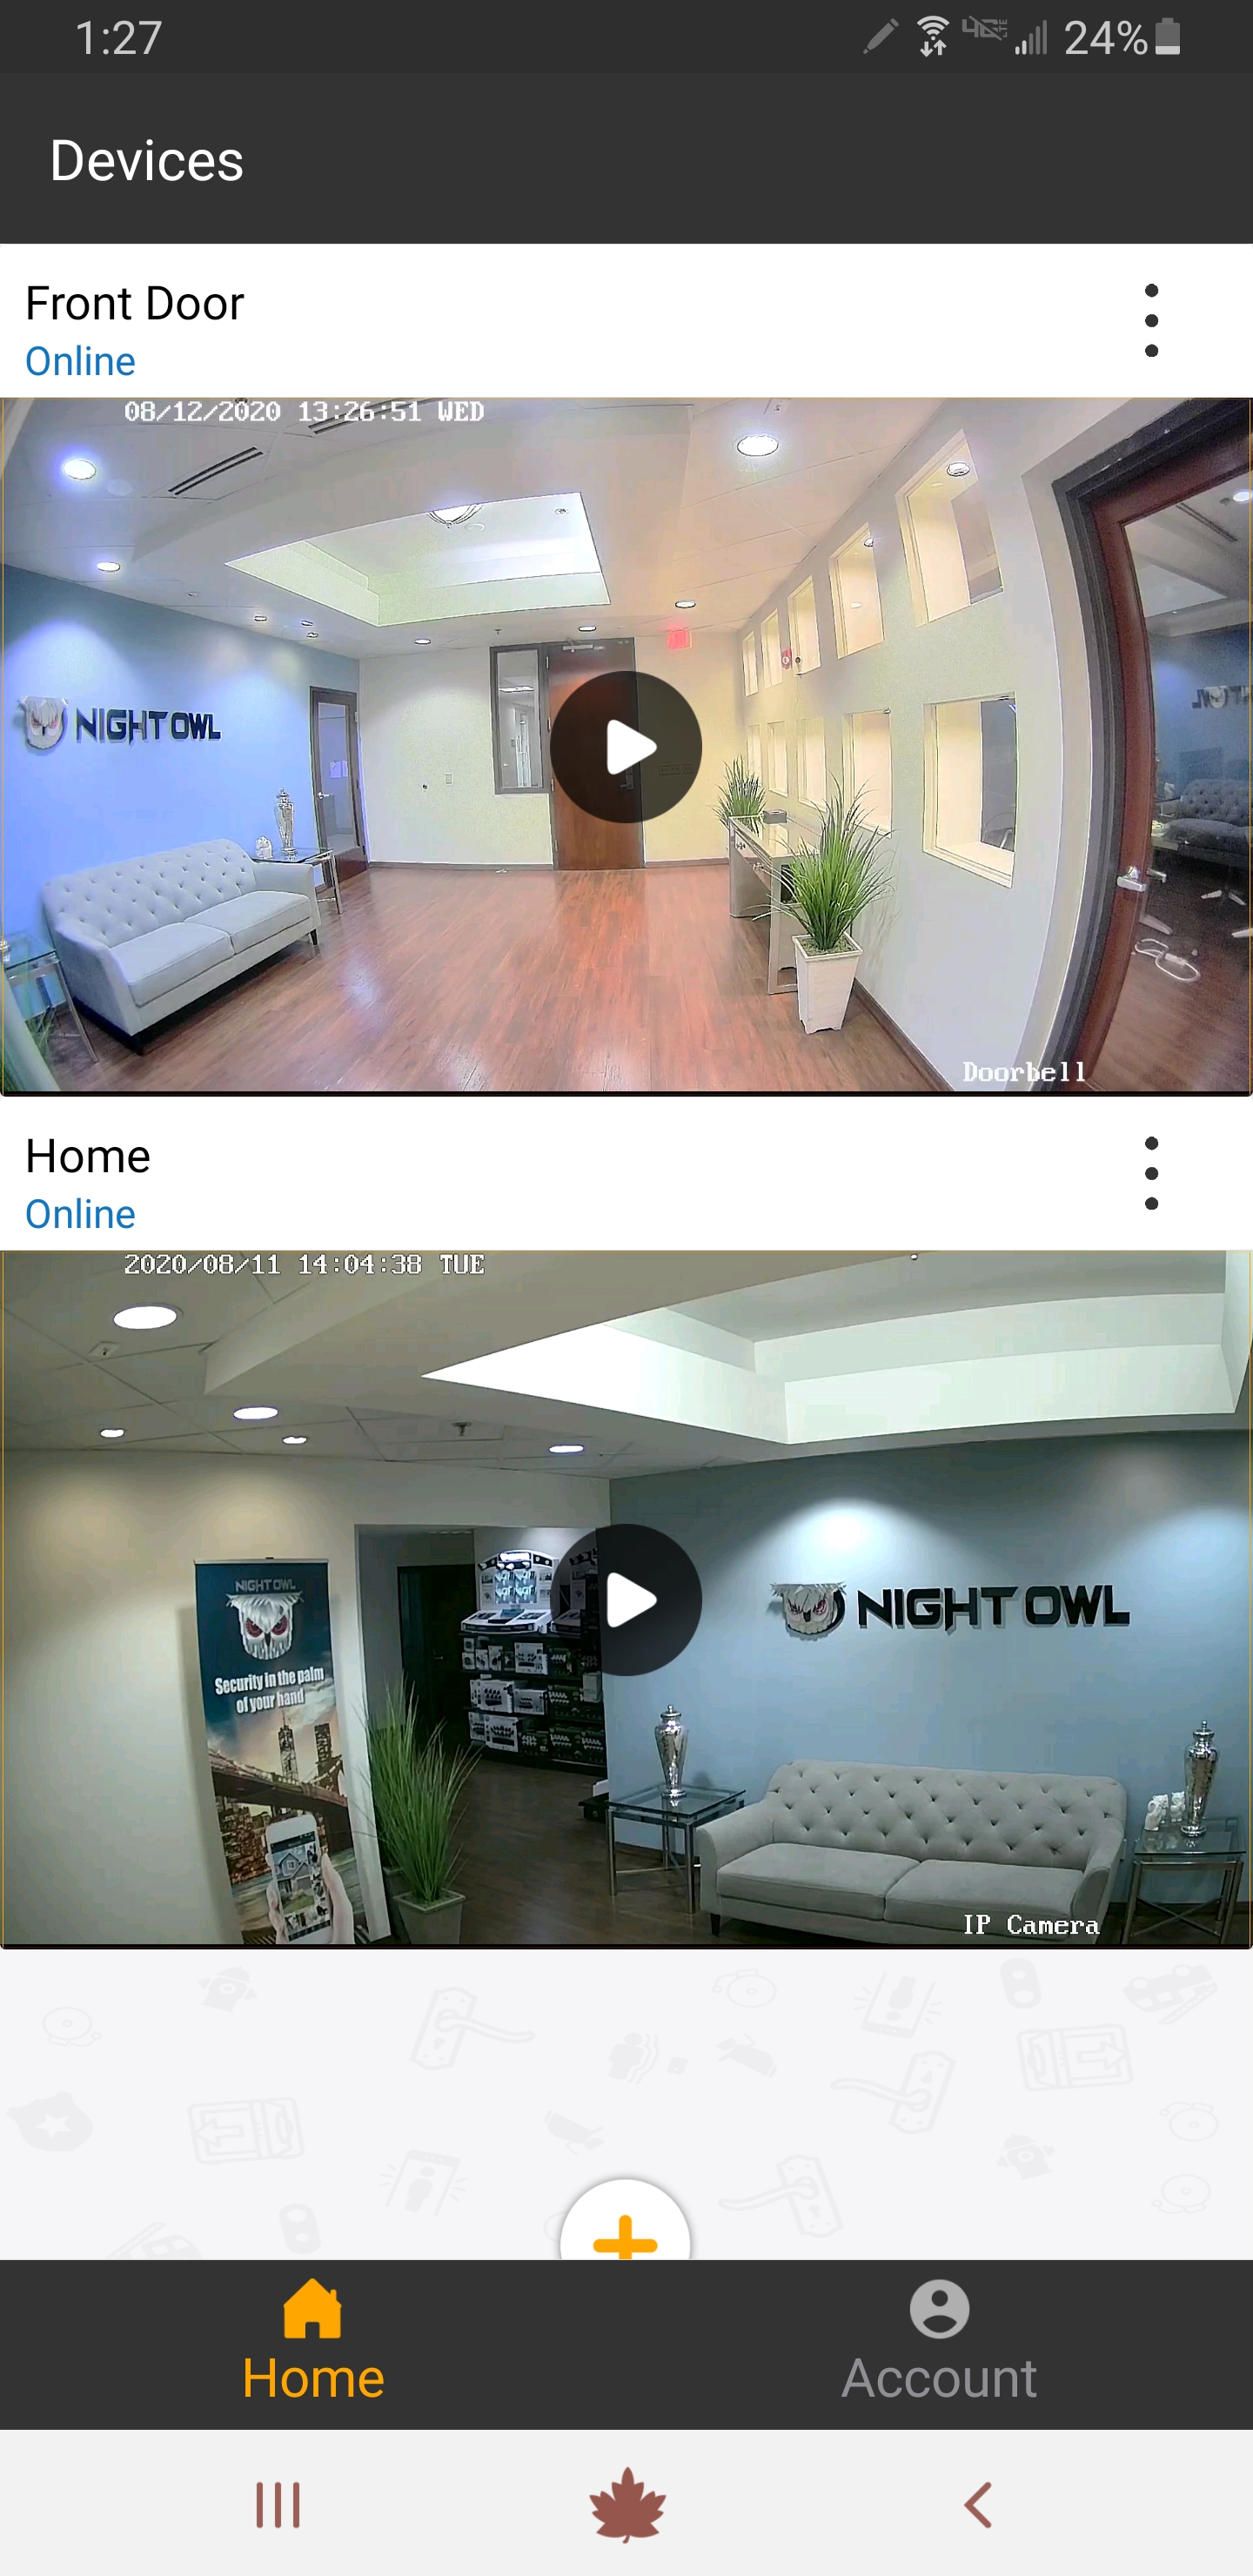
8. You will now see your doorbell on the App’s main screen. Tap the Play icon to being live viewing your doorbell’s camera.
|
|
Copy and paste the verification code into the Code field.
|
|
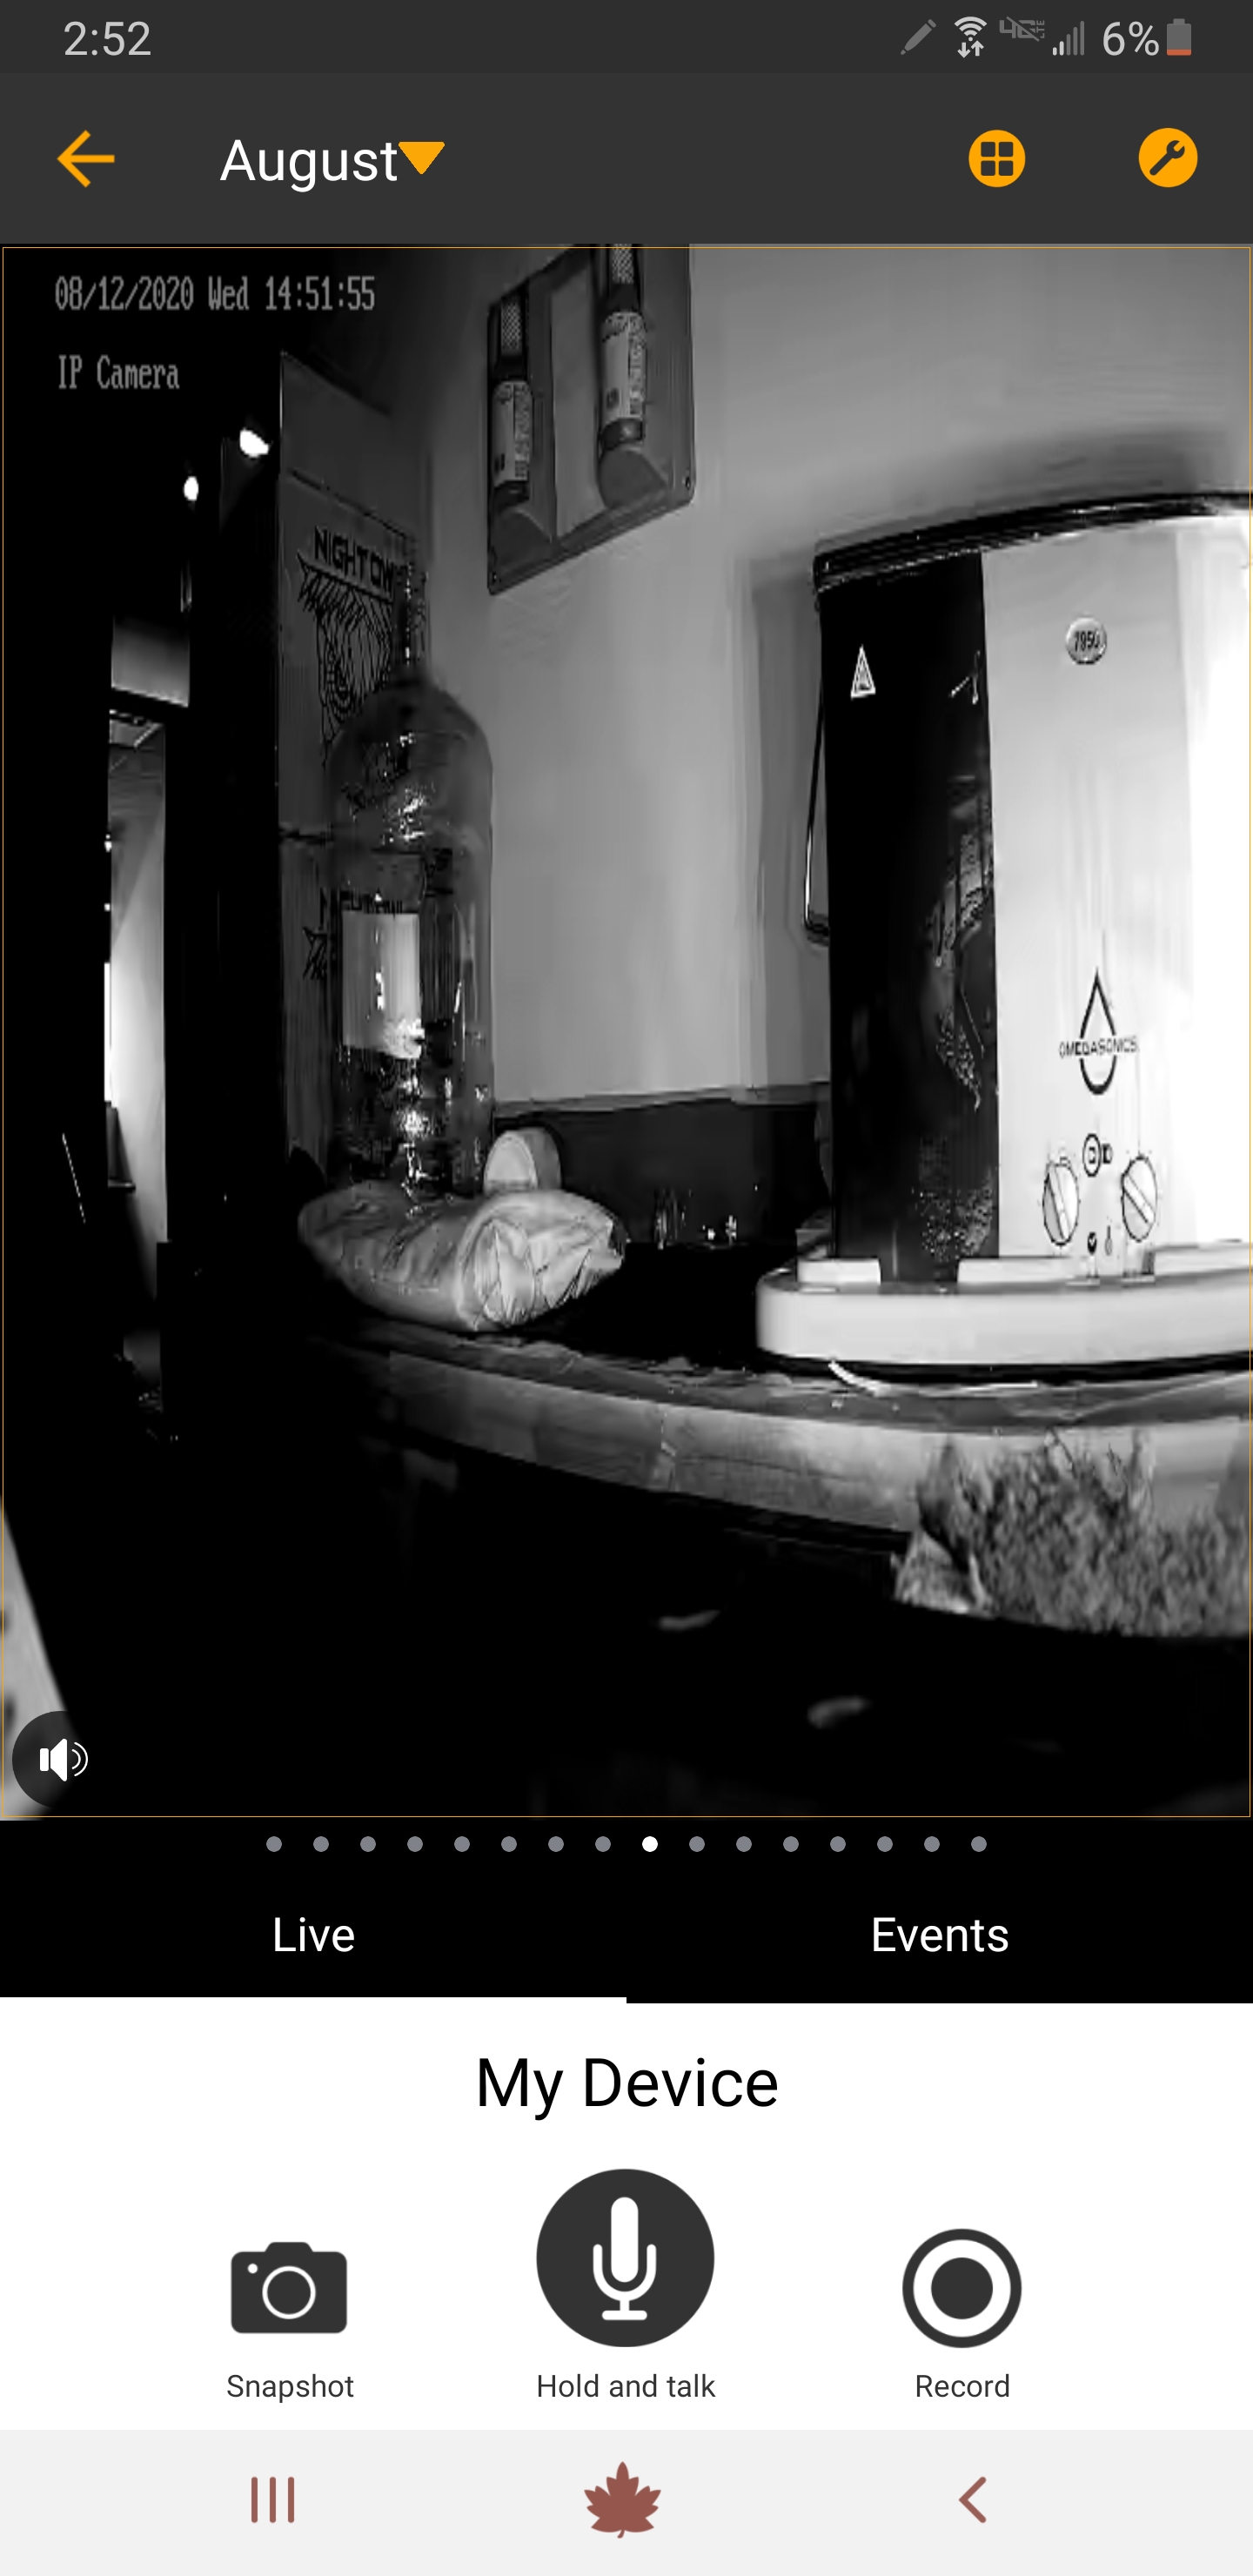
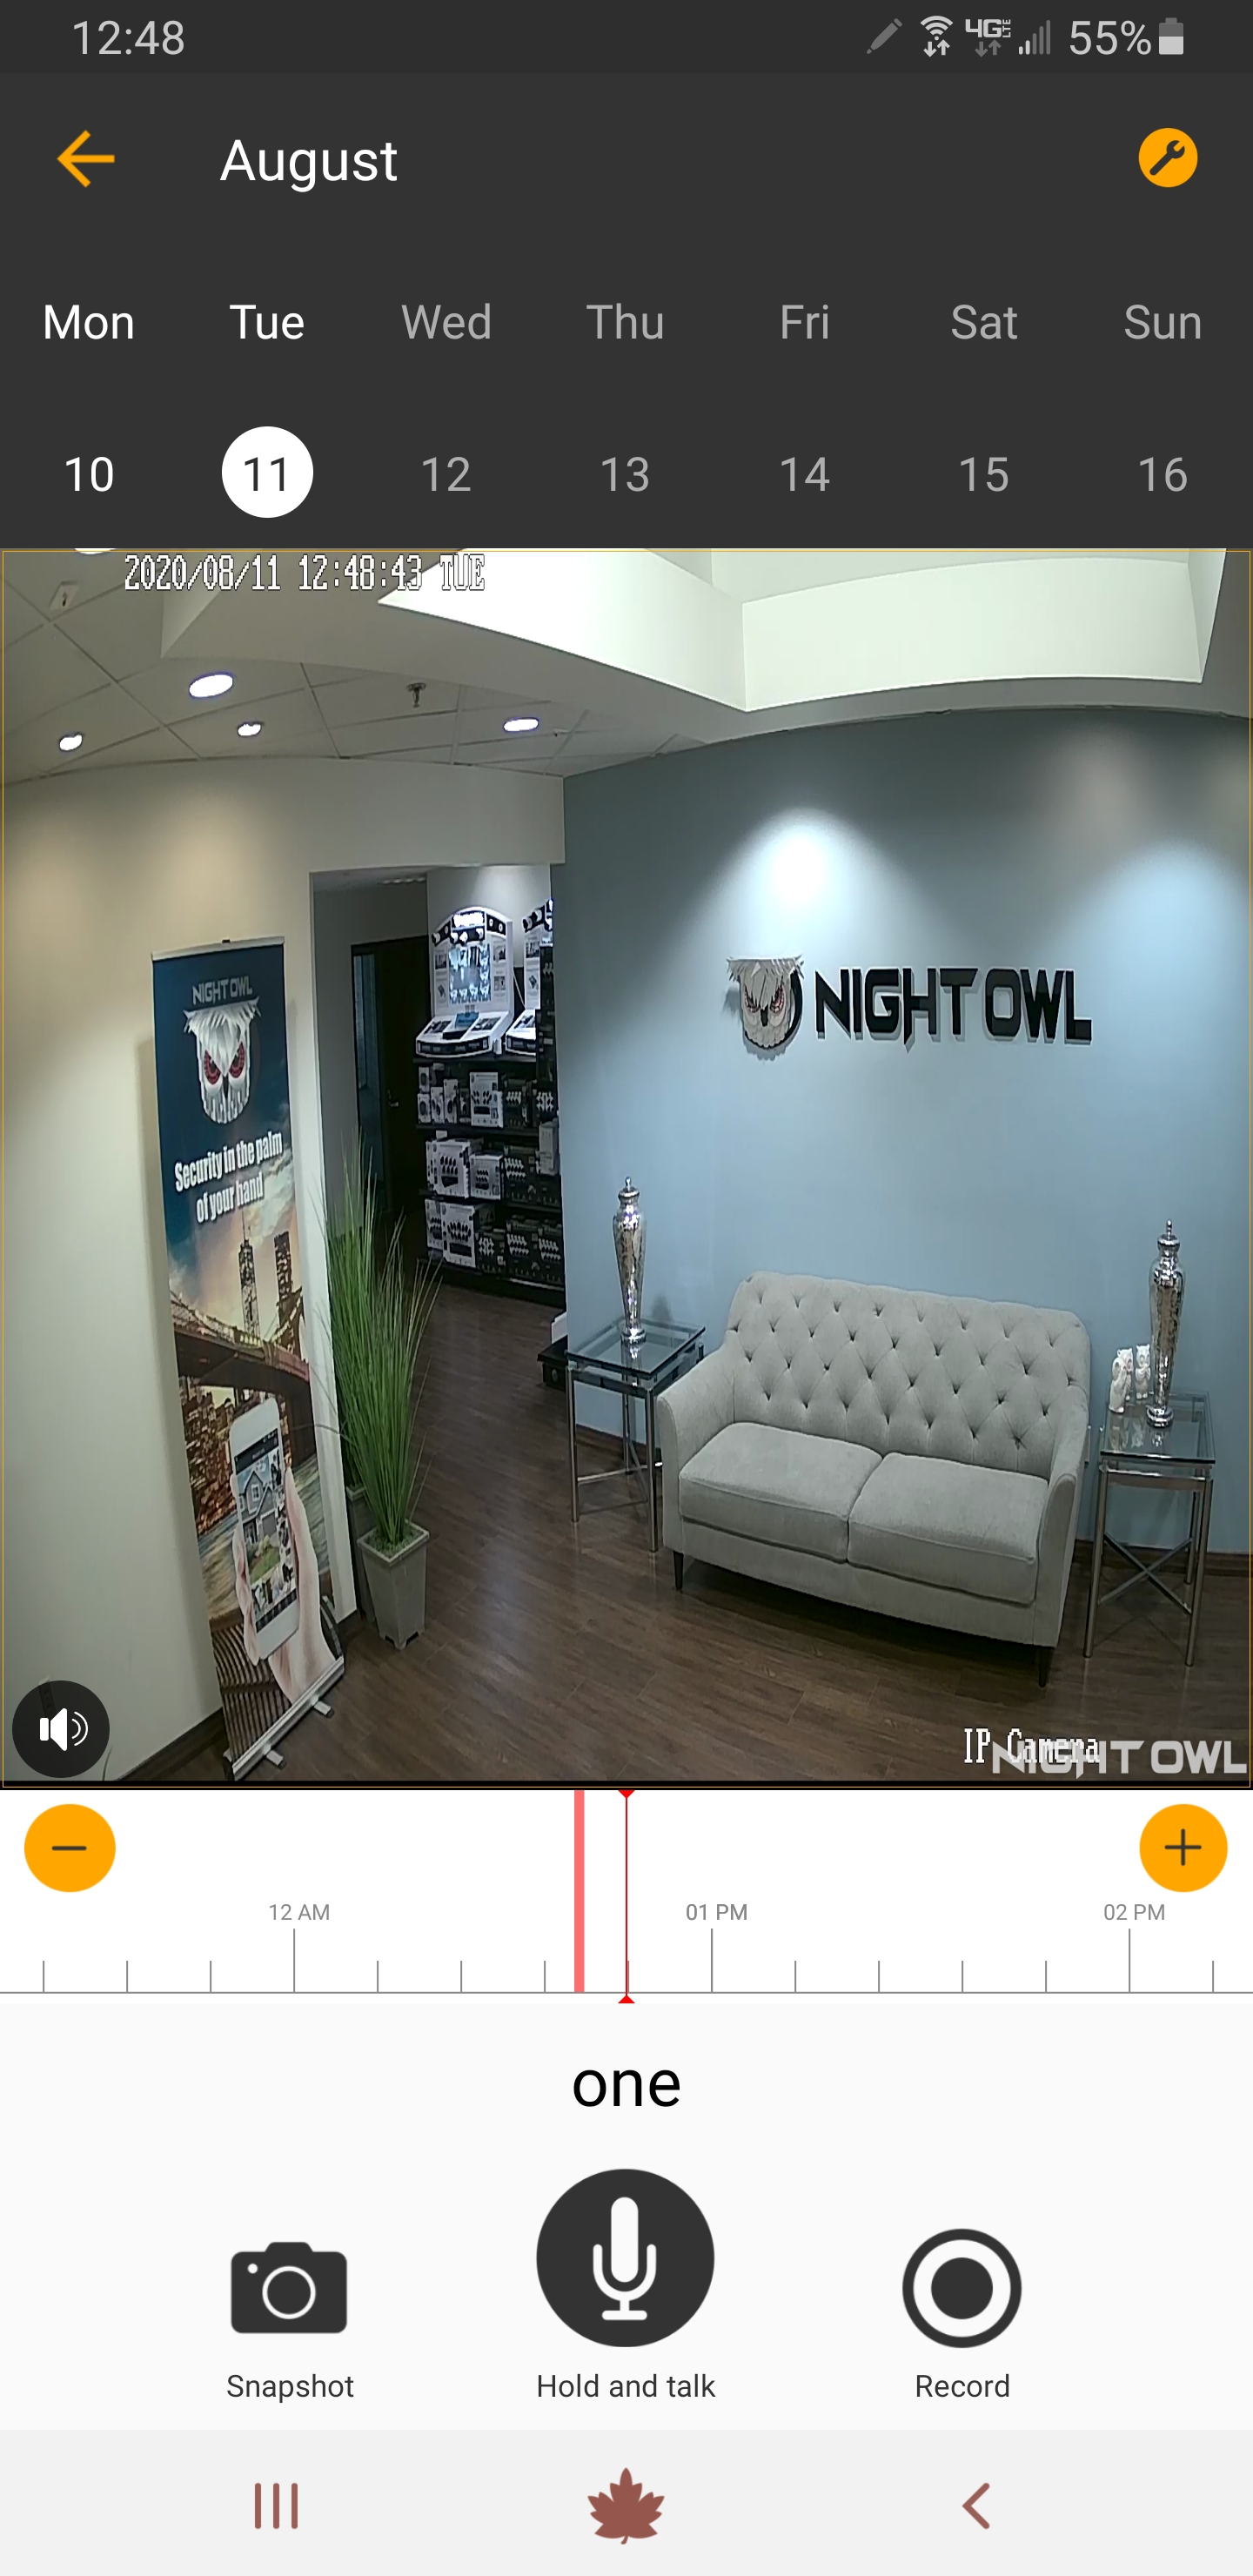
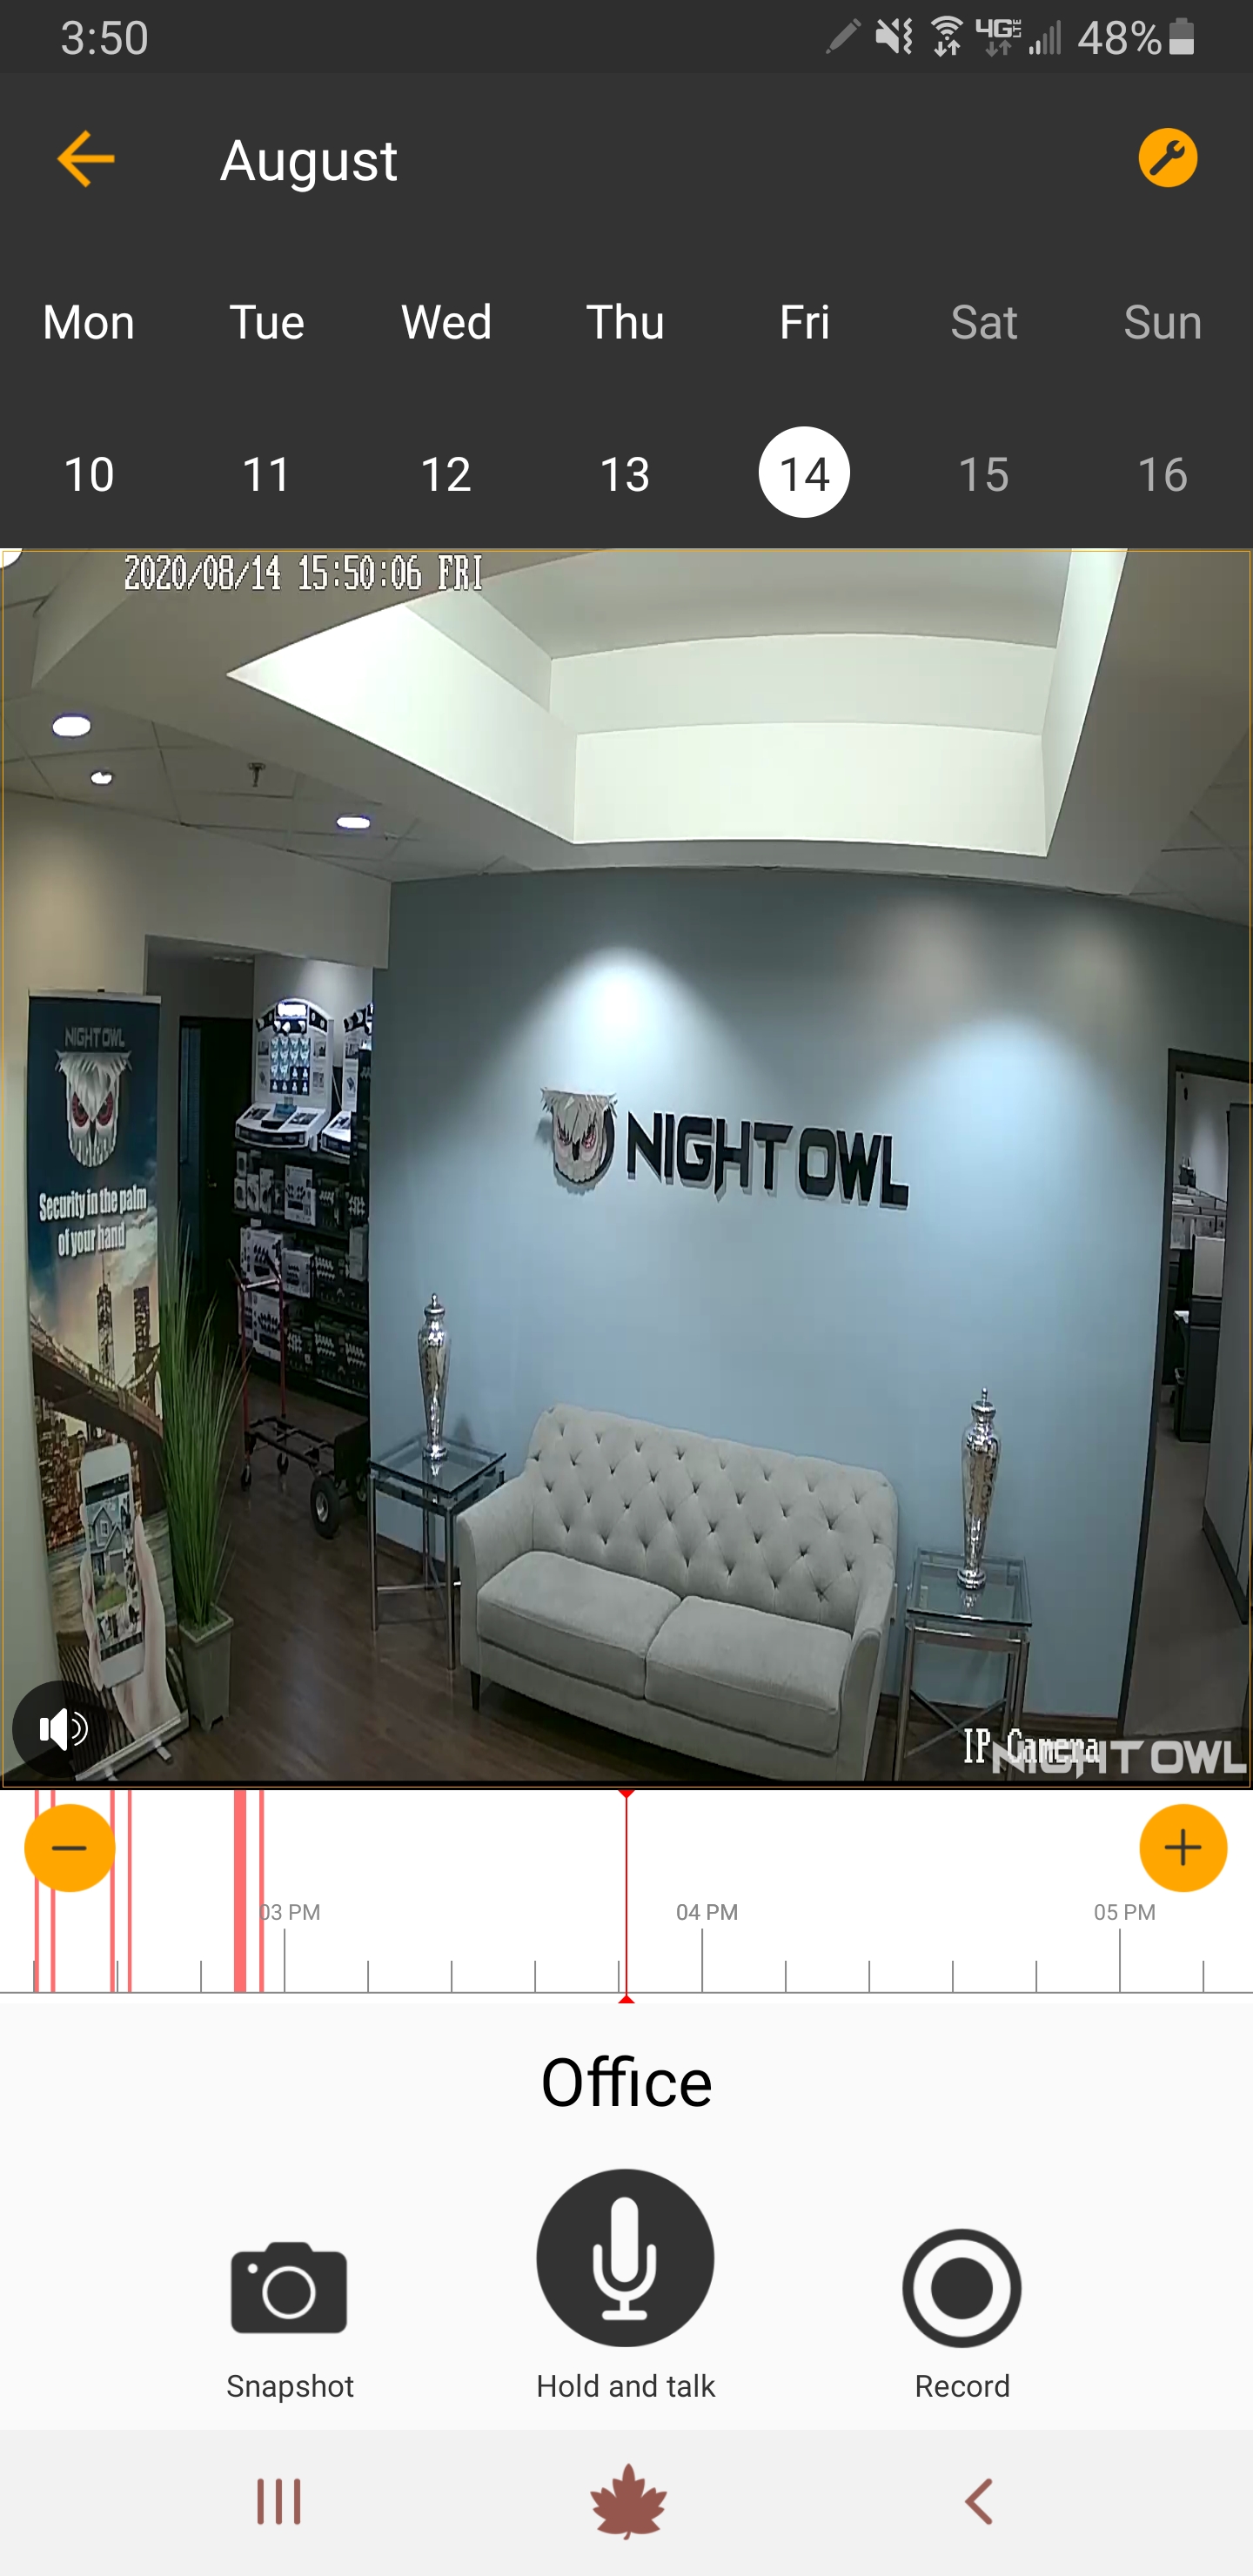
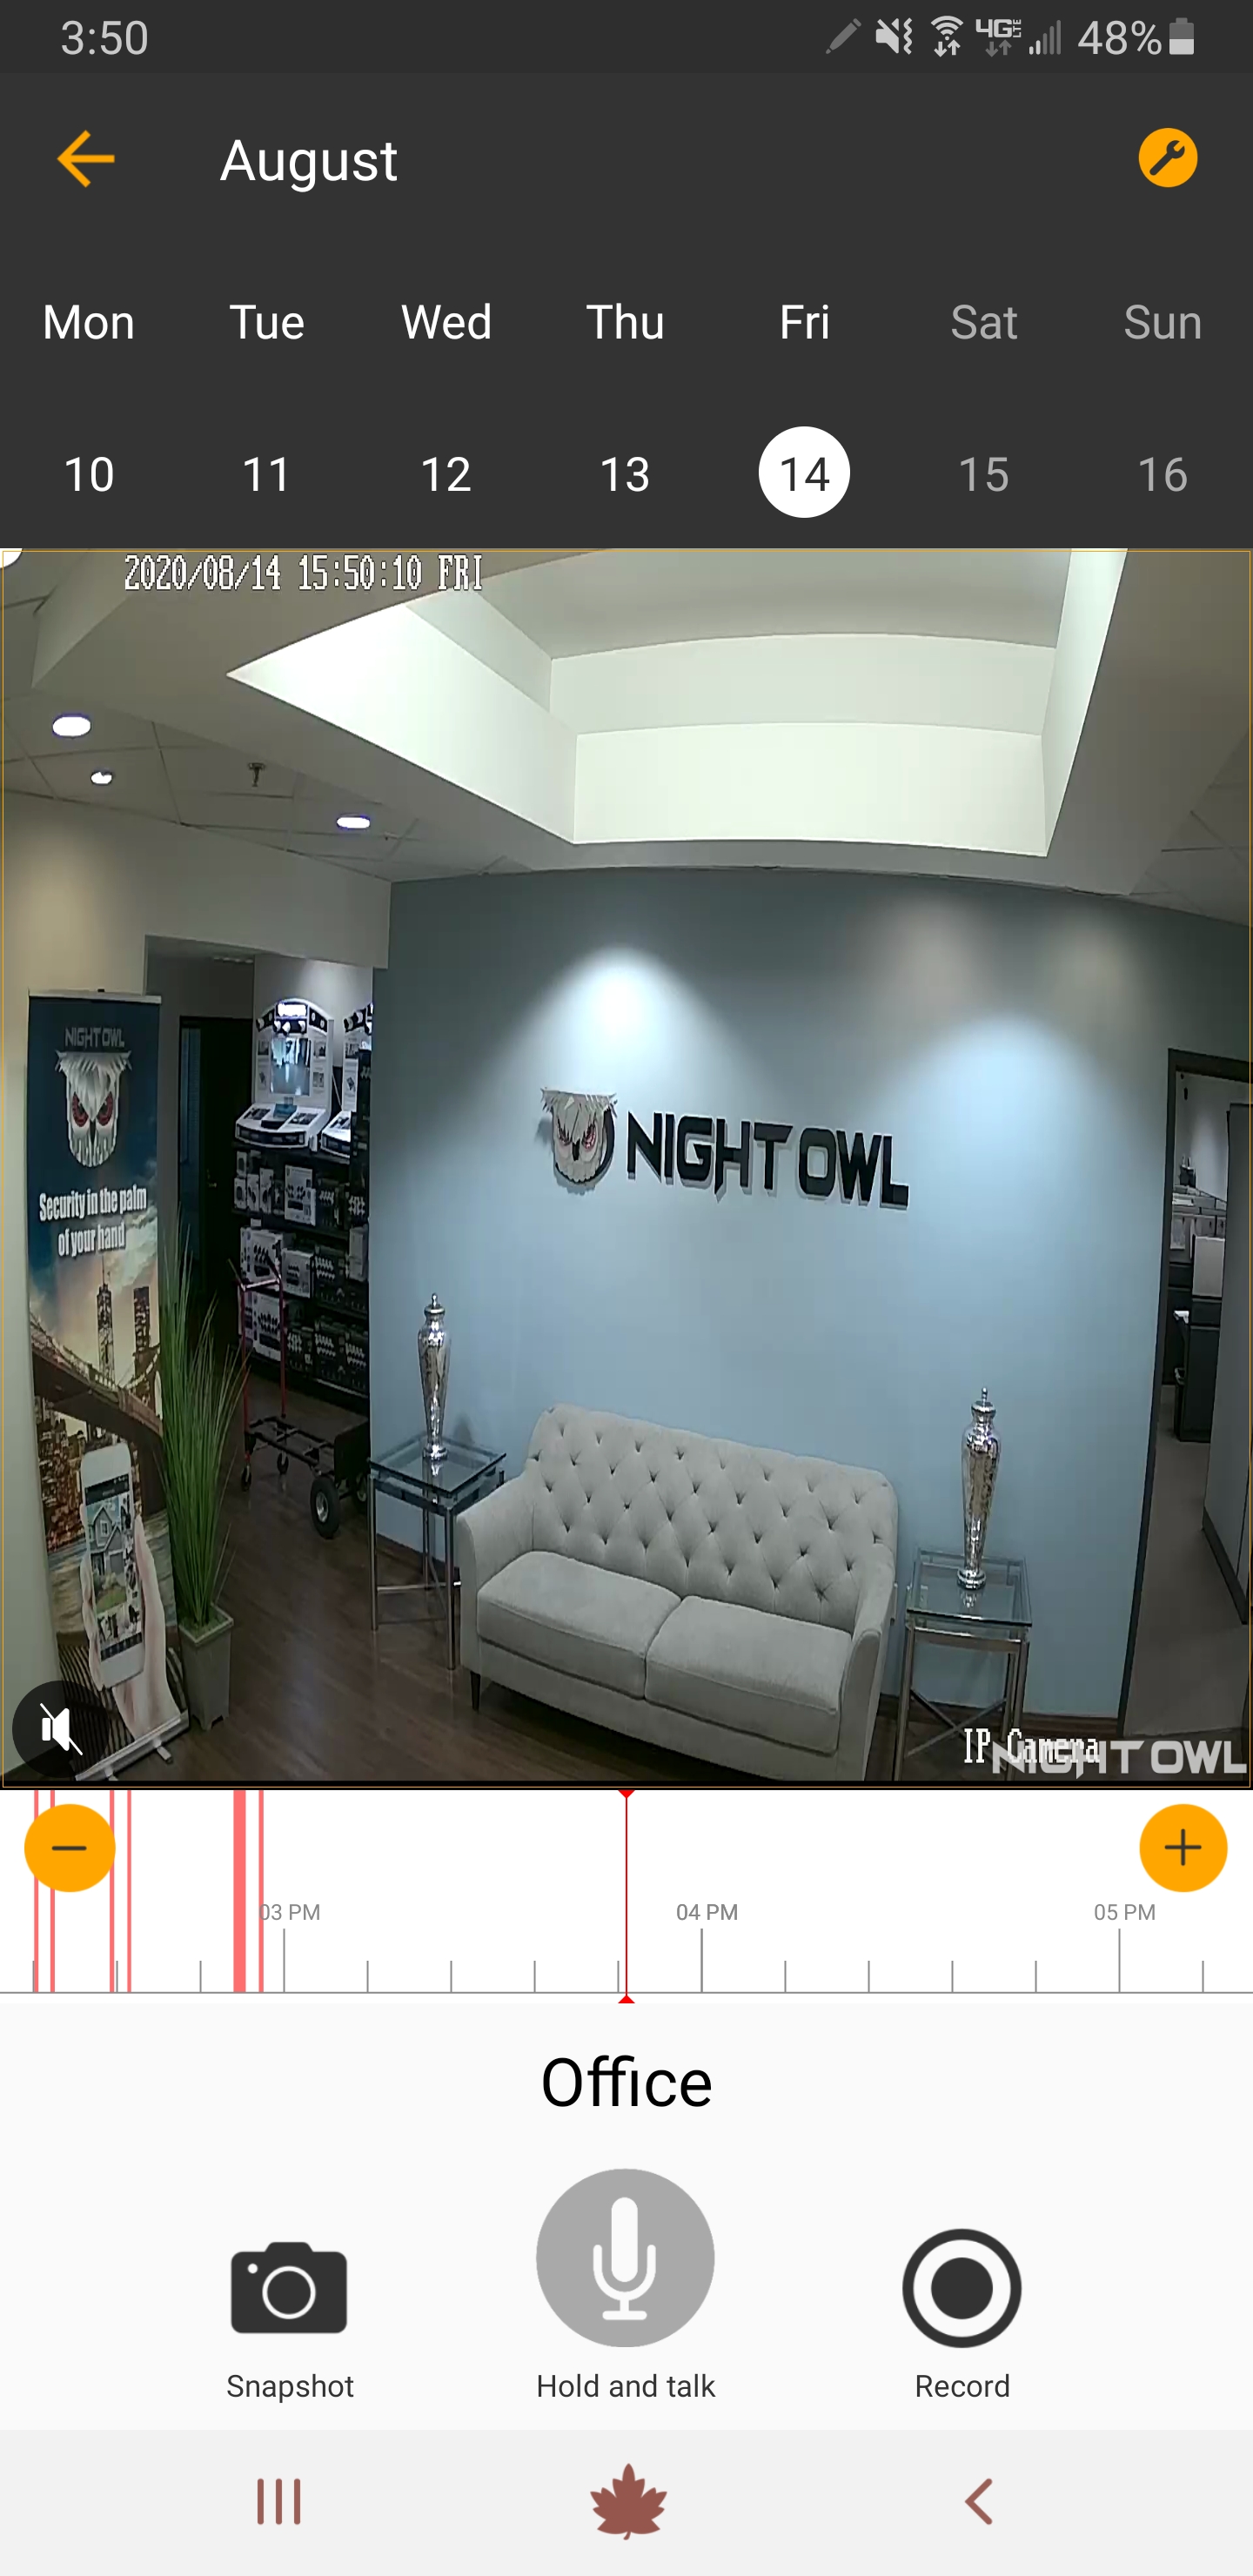
You can live view your camera’s feed with the Night Owl Connect App. Below is a brief overview of the live view screen and features.
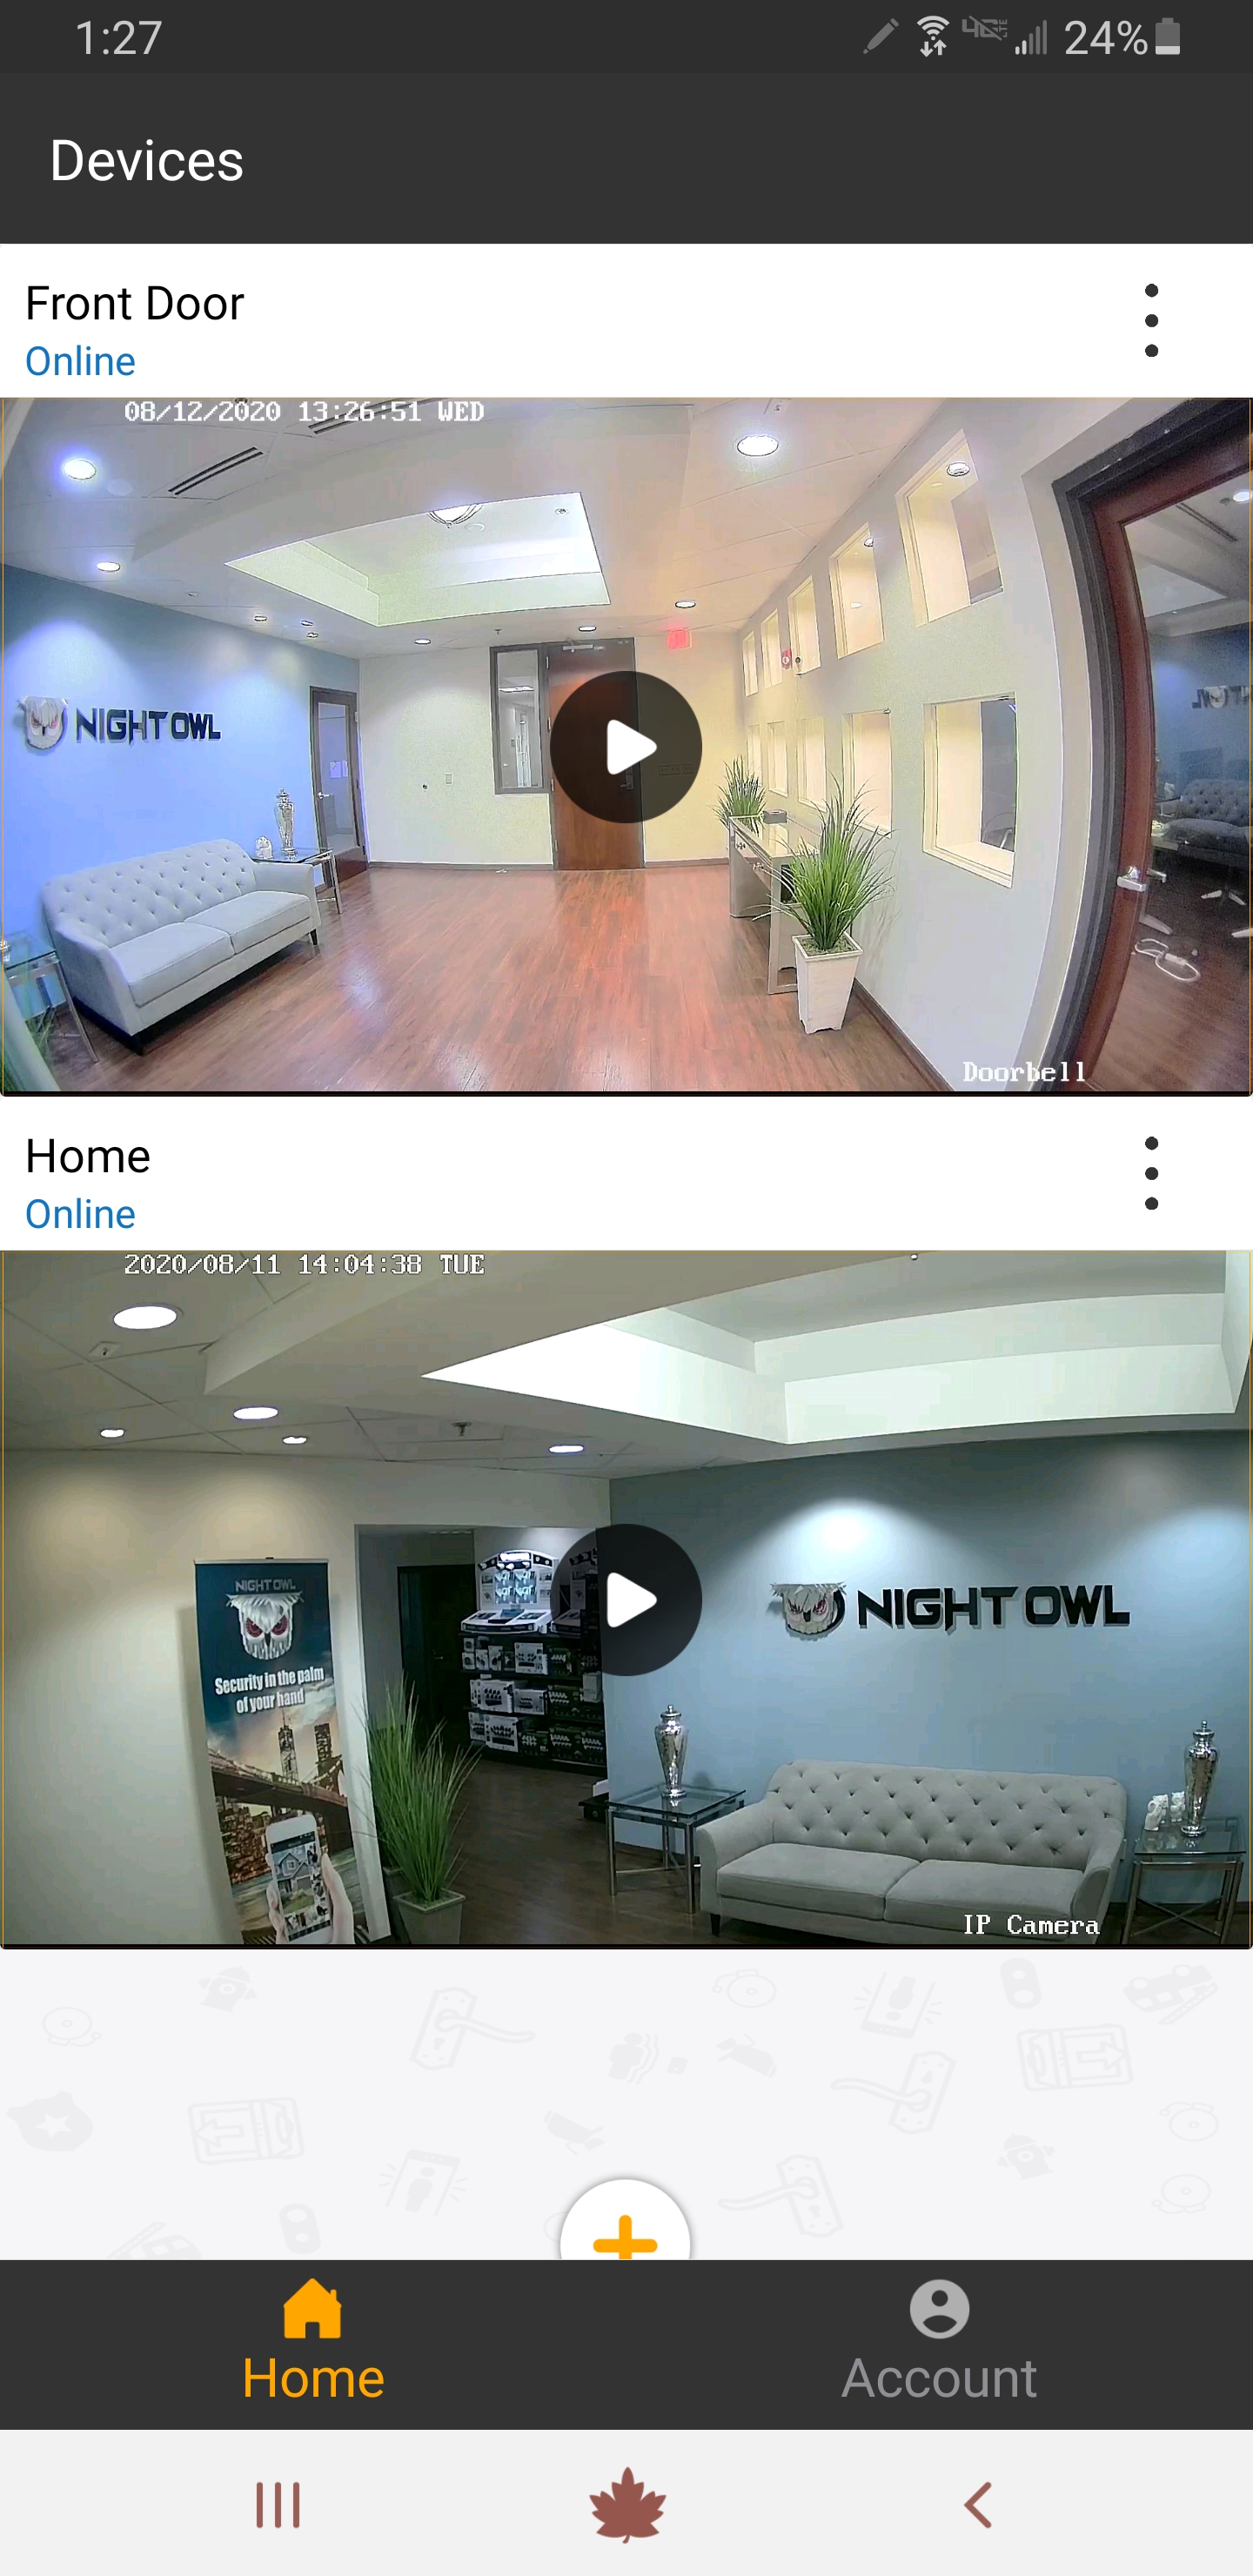
i. From the App’s main screen, tap the Play button for the device you want to live view.
NOTE: Your device must be connected to the Internet and show Online for live view.
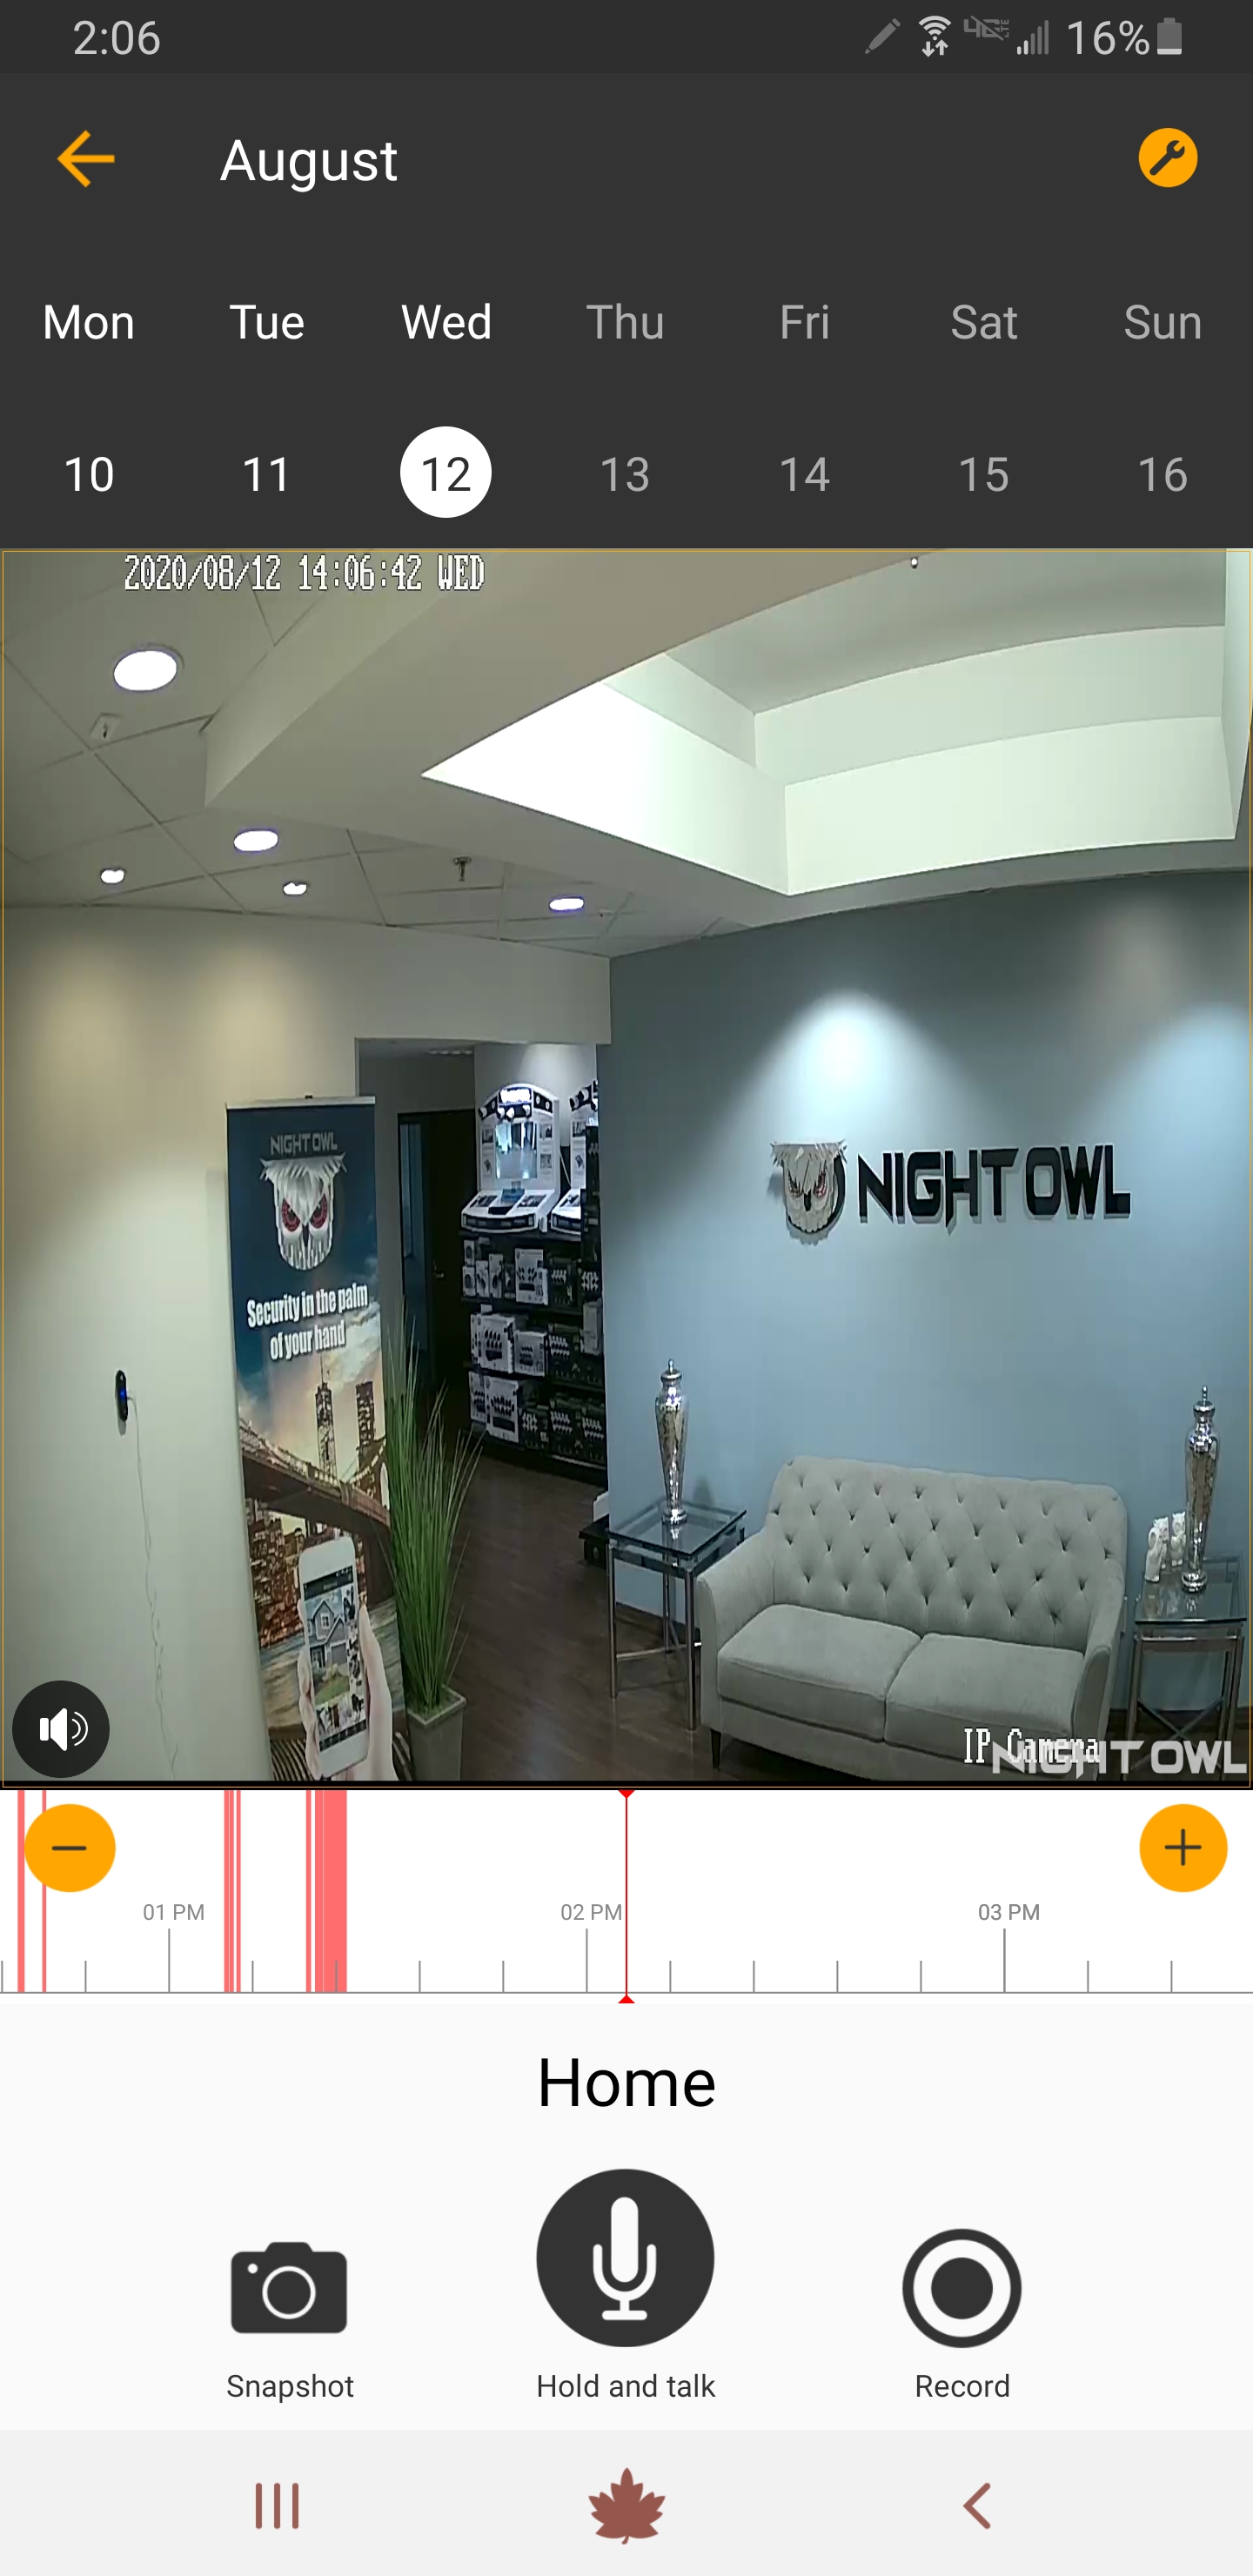
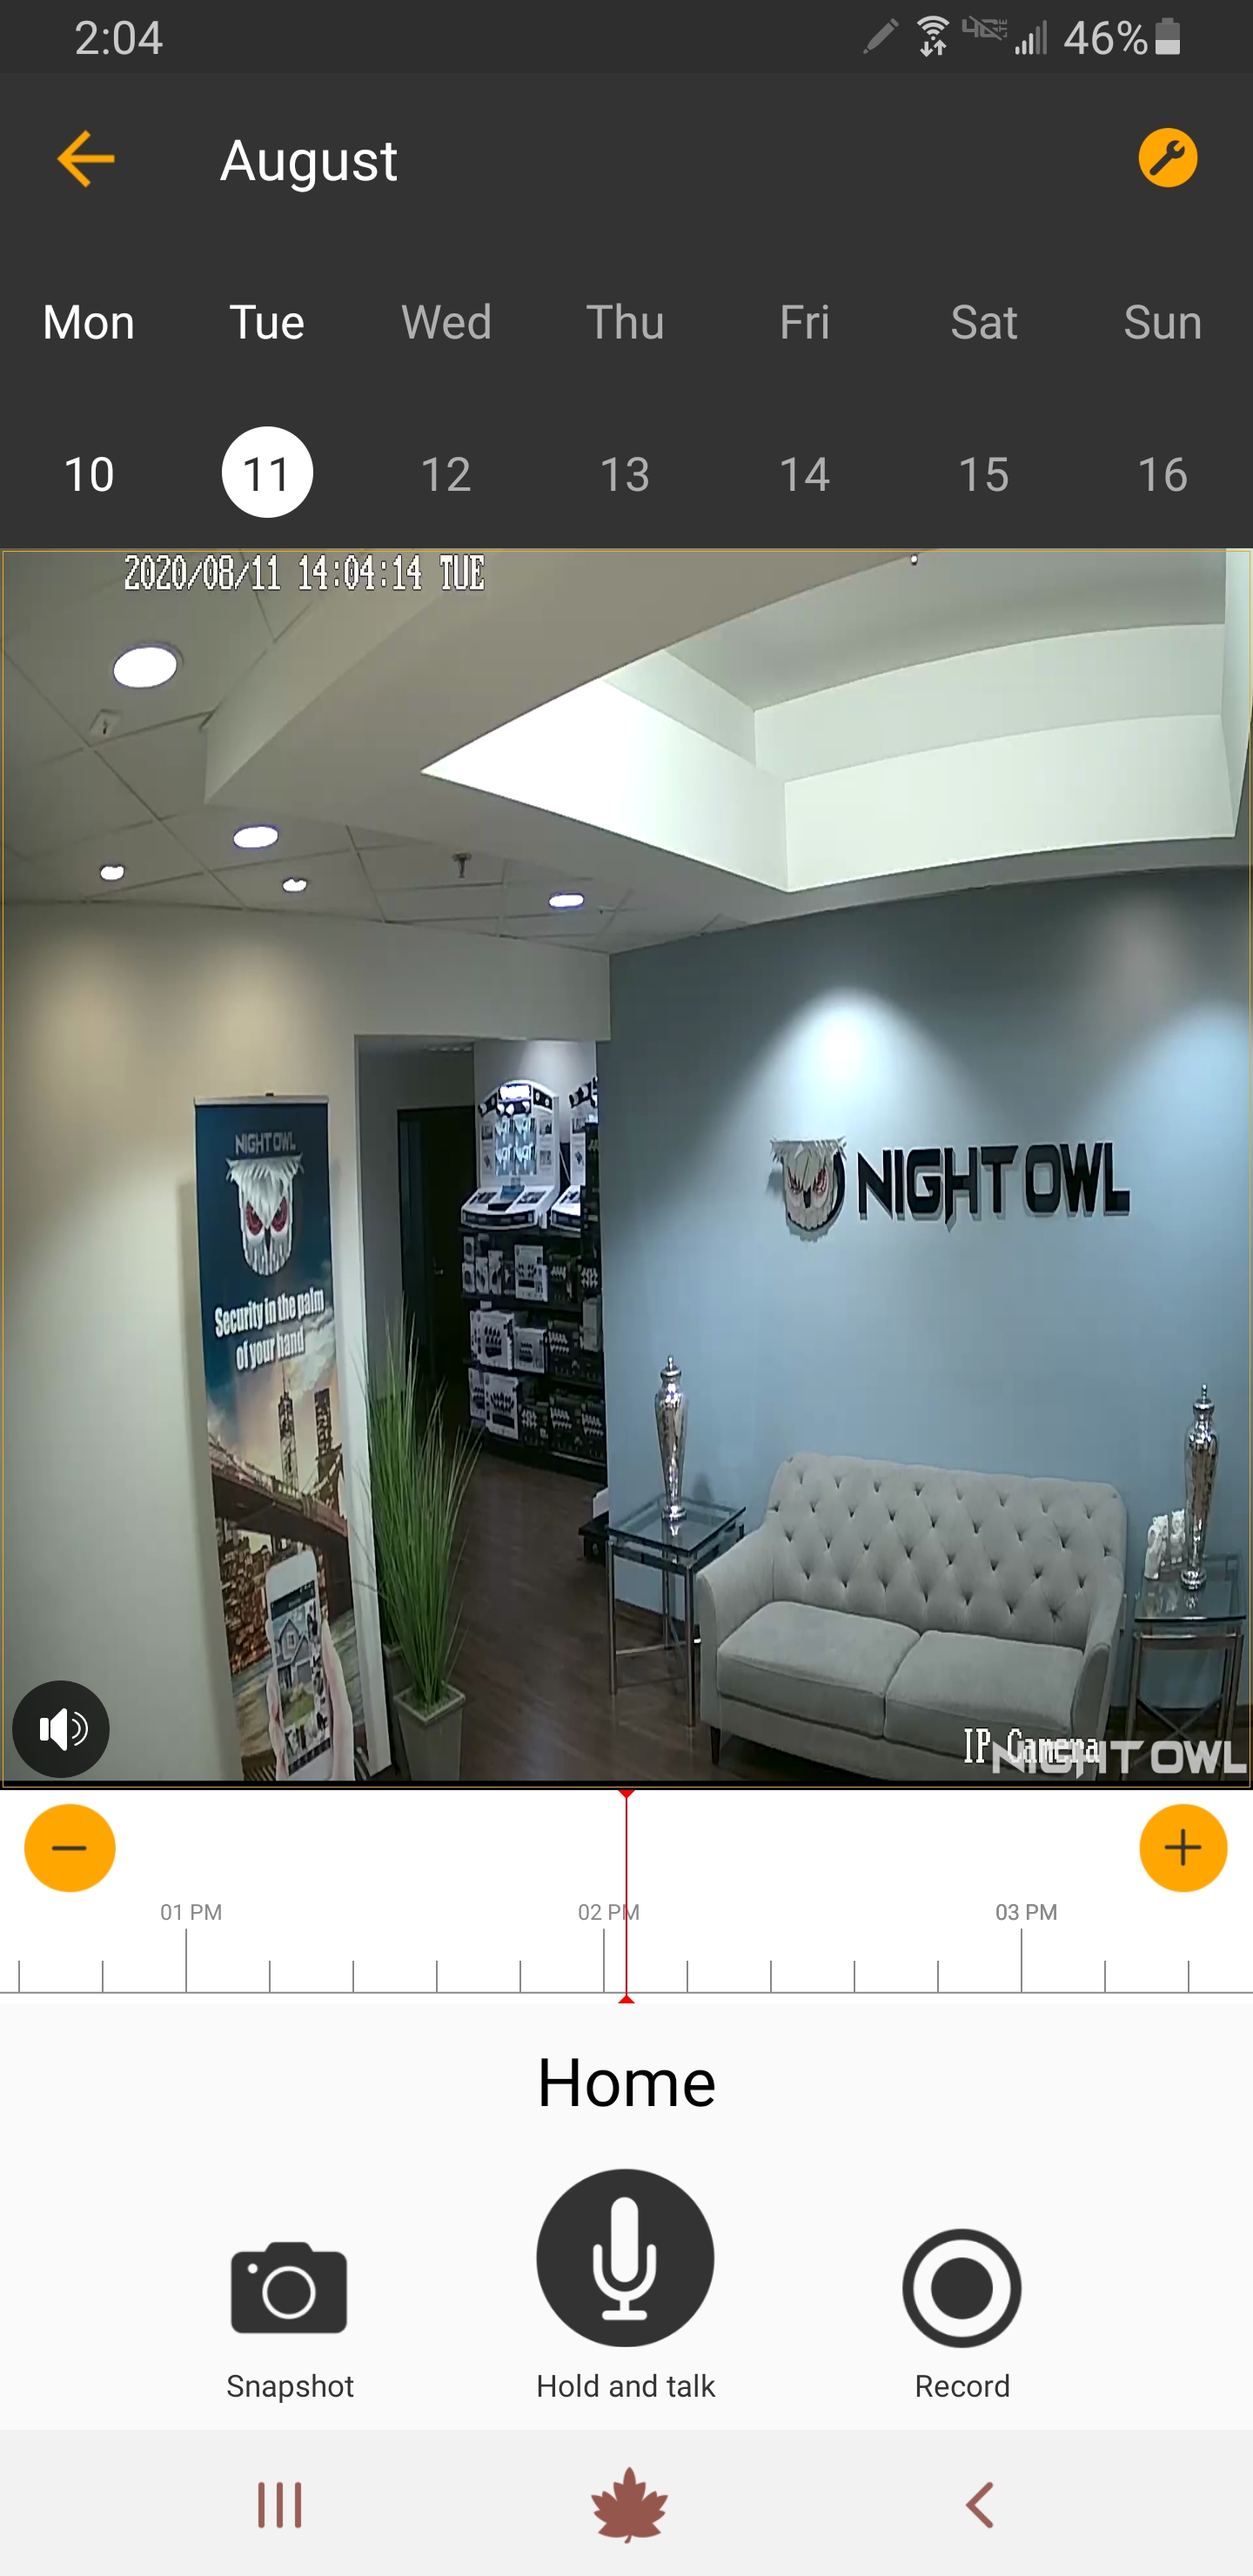
ii. You should now see your camera’s live view.
Note: We are showing the live view for a standalone camera.
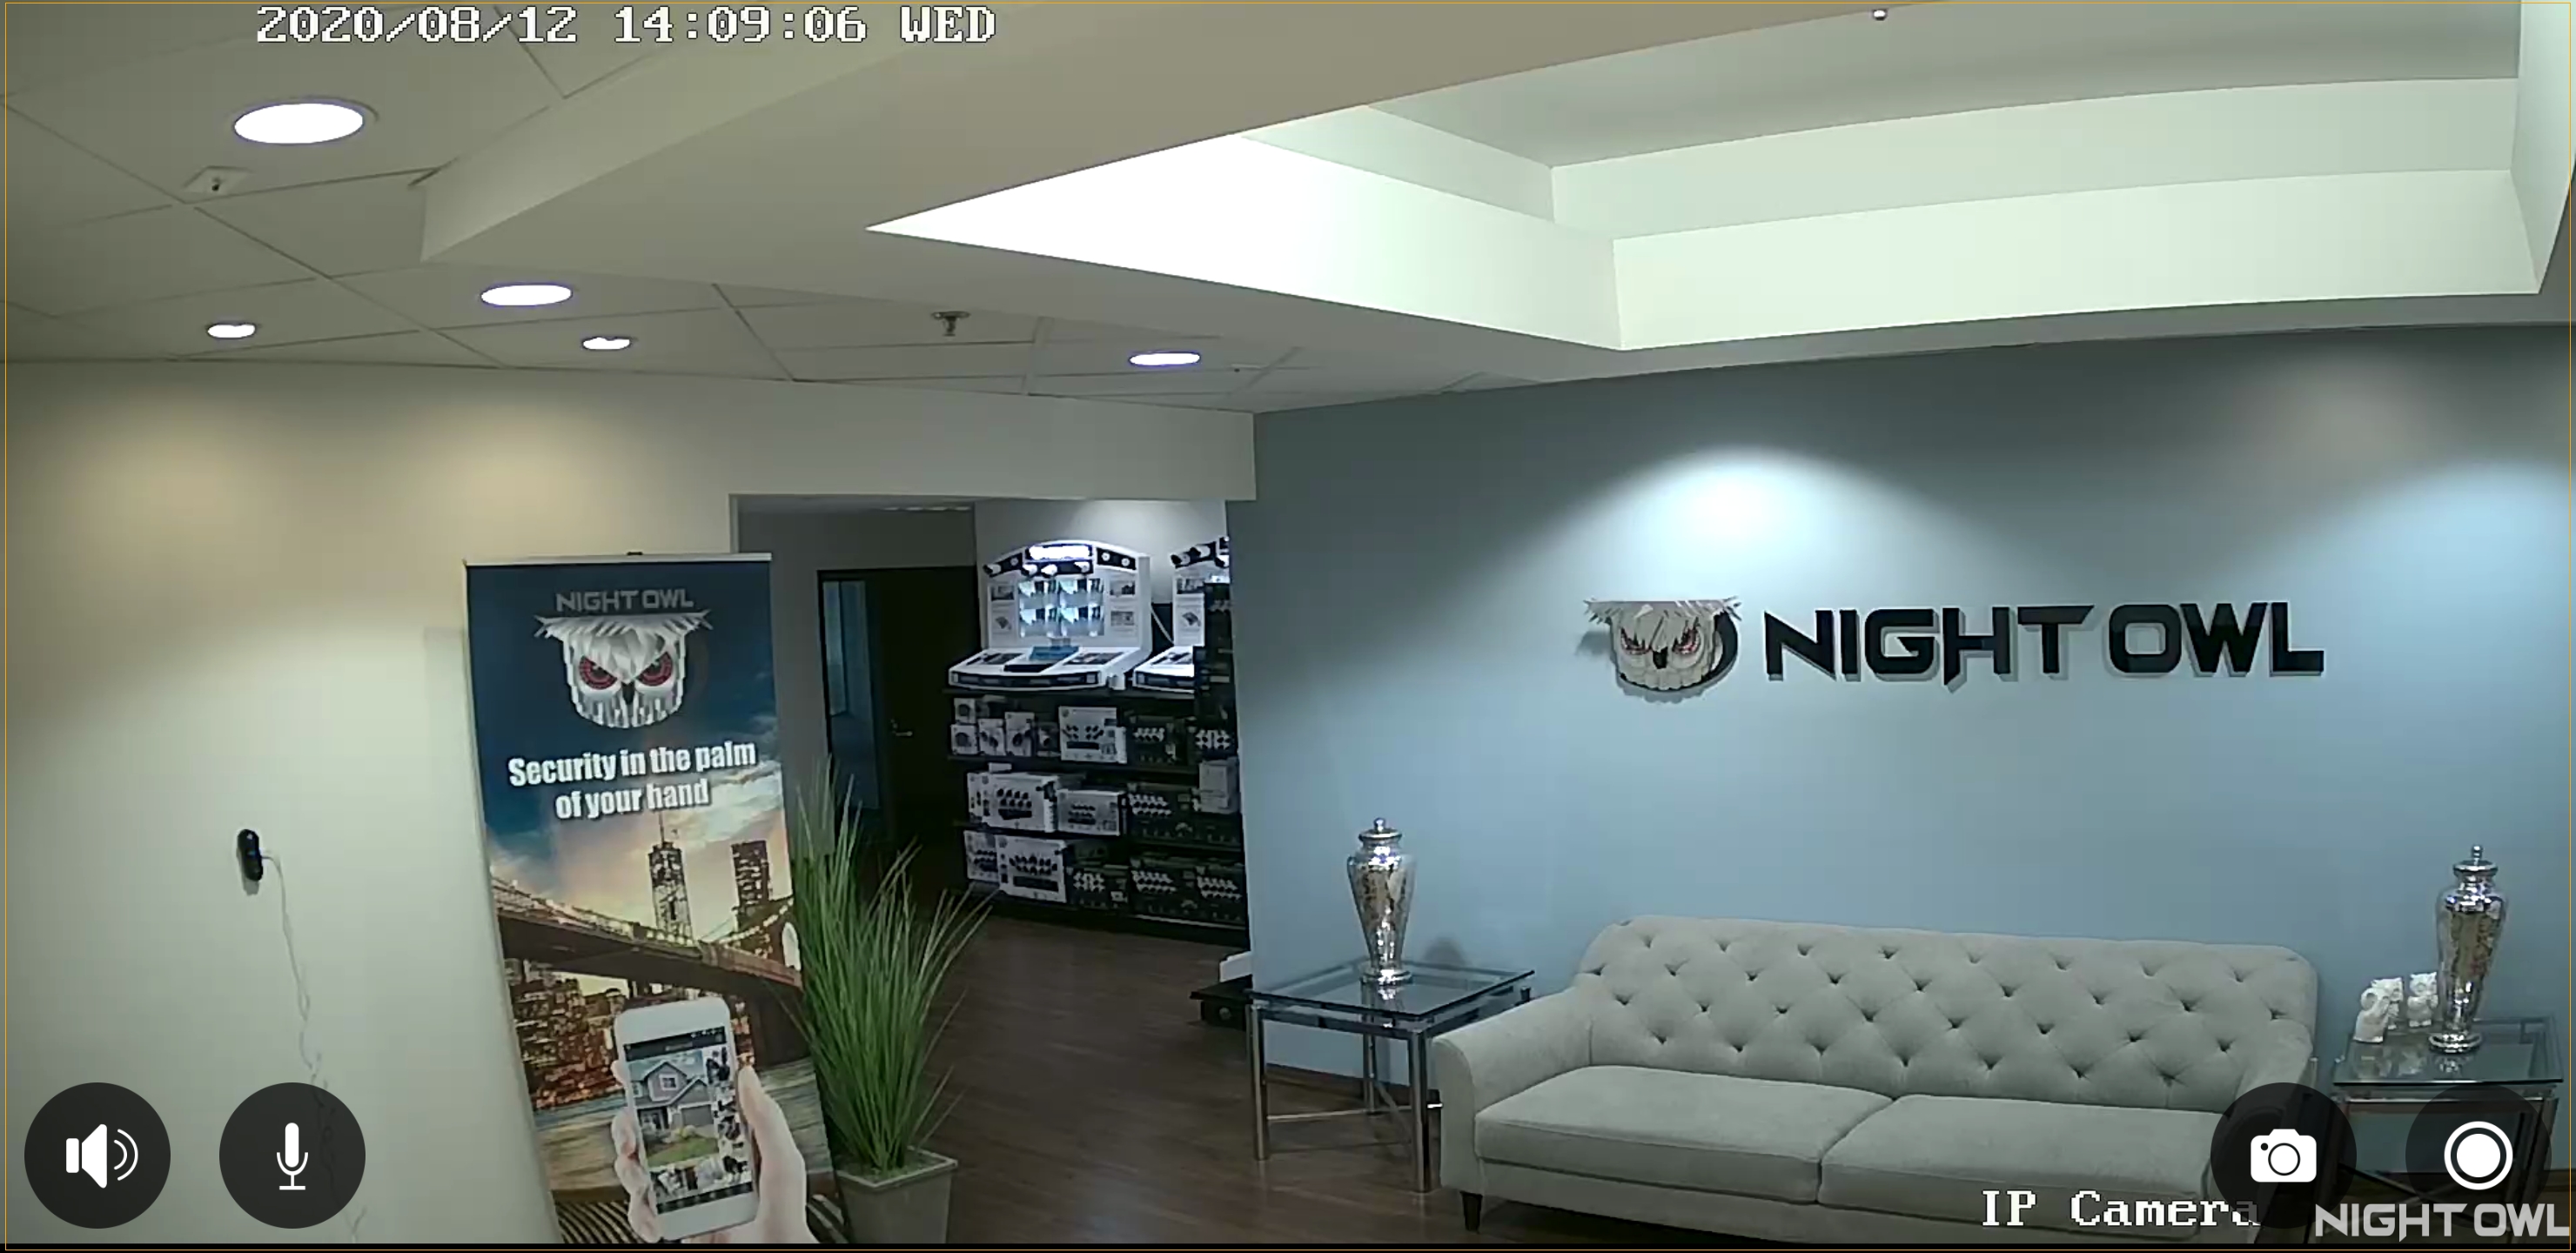
iii. You can switch the view to landscape mode by turning your Smart Device sideways.
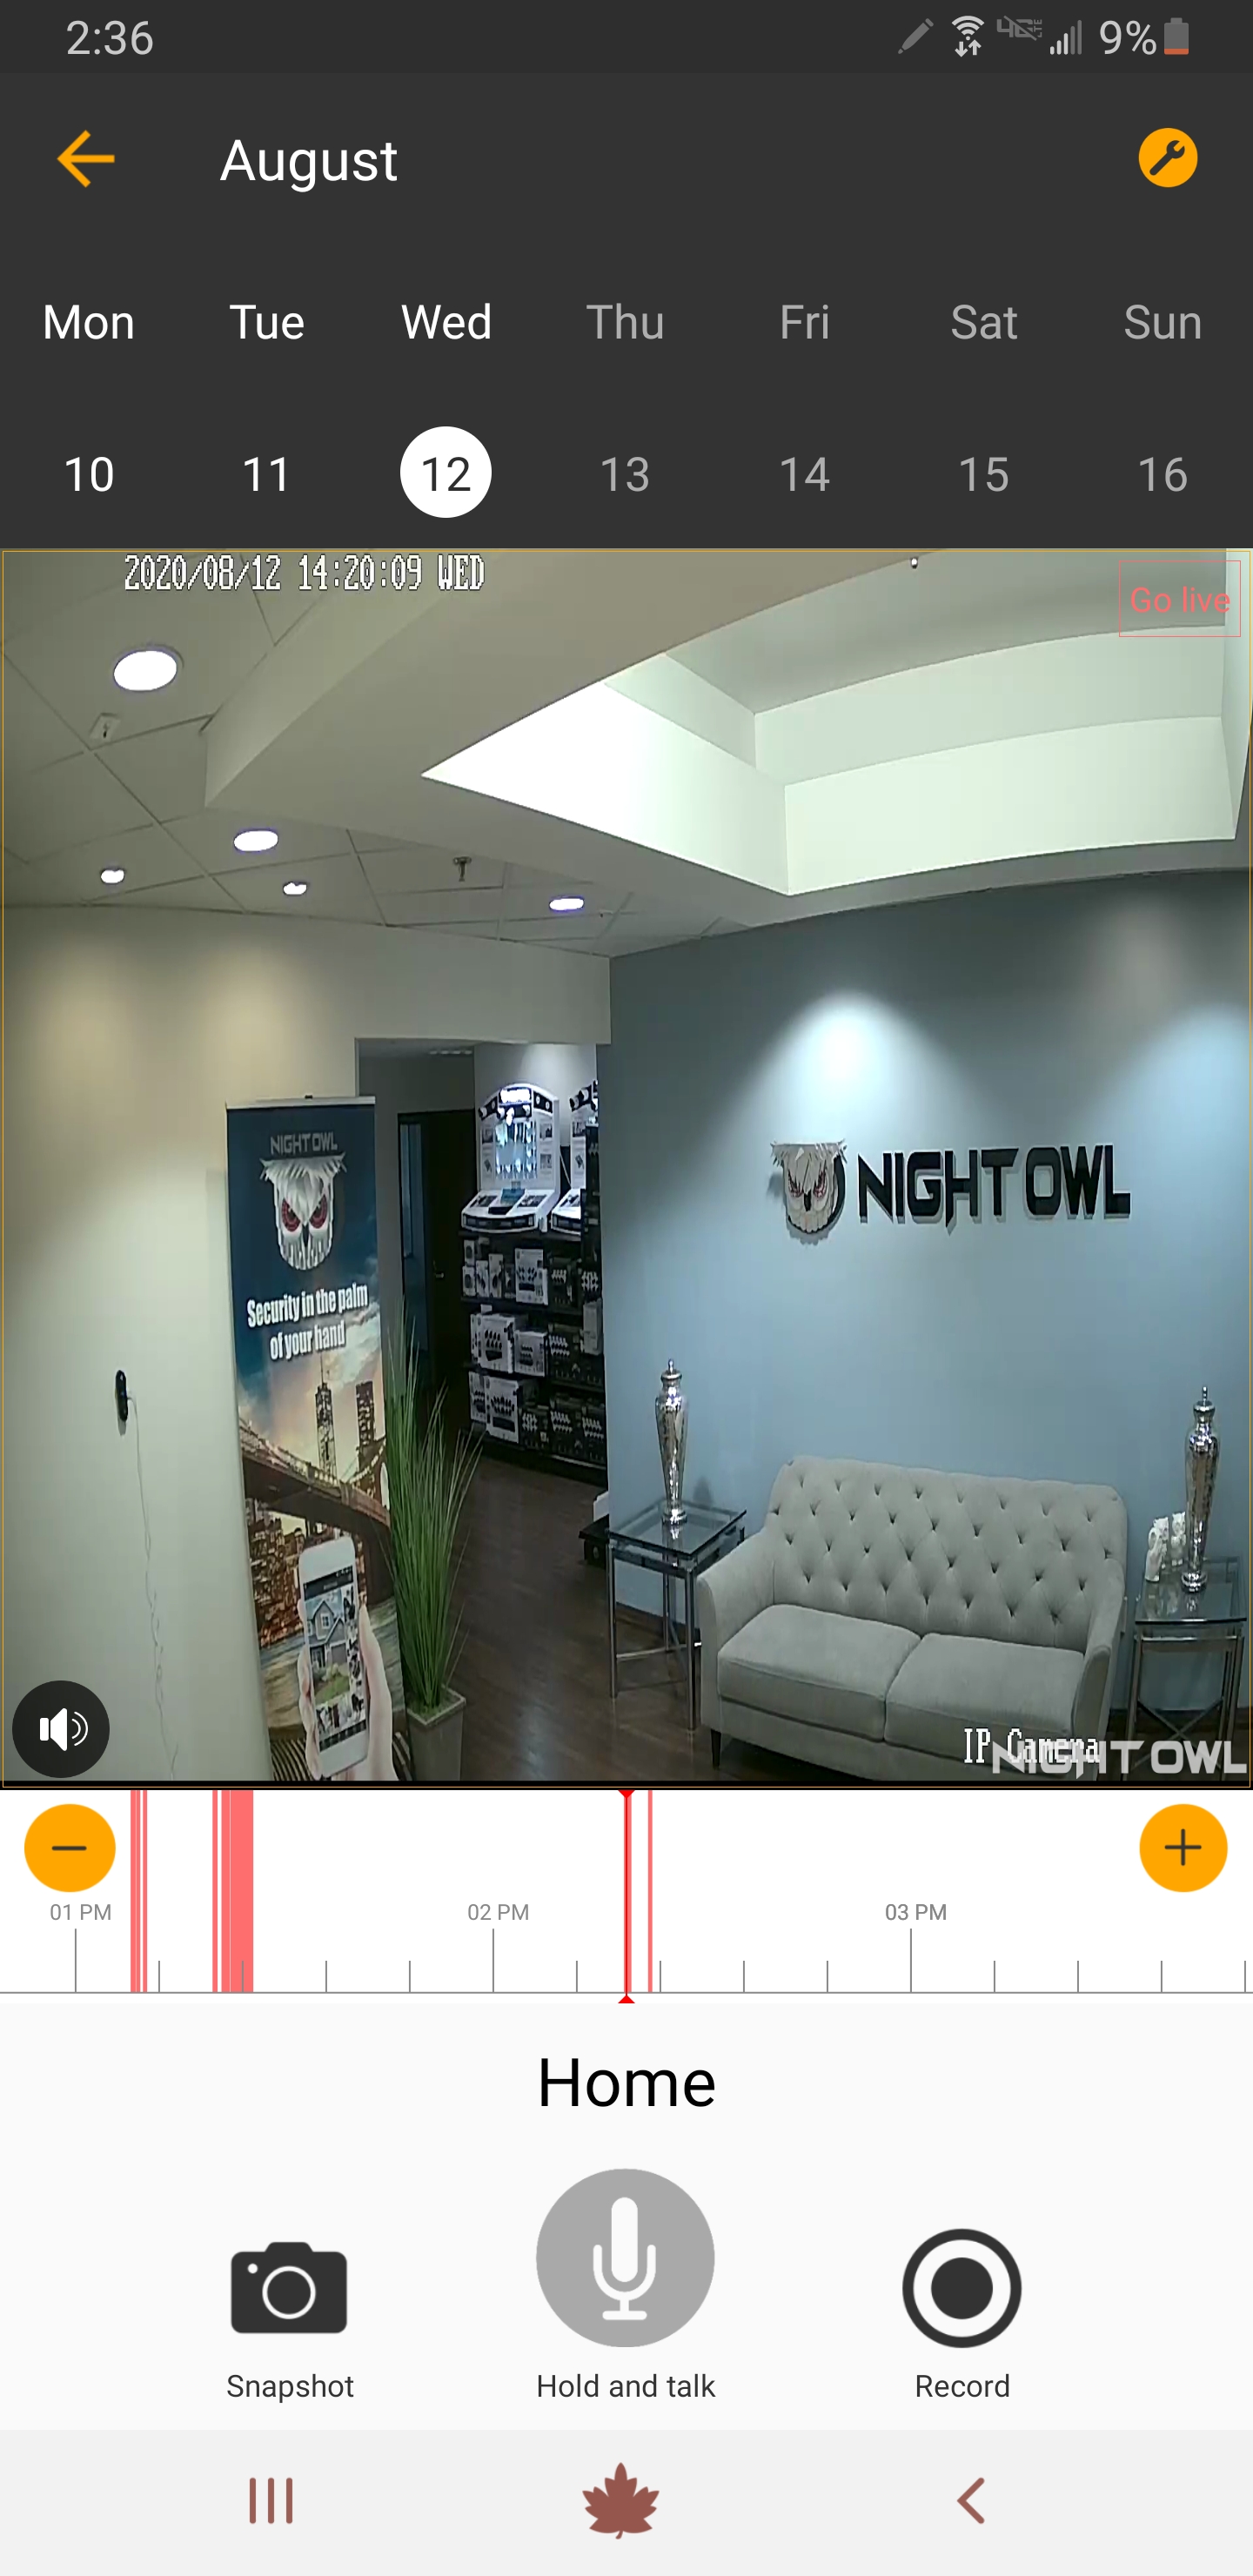
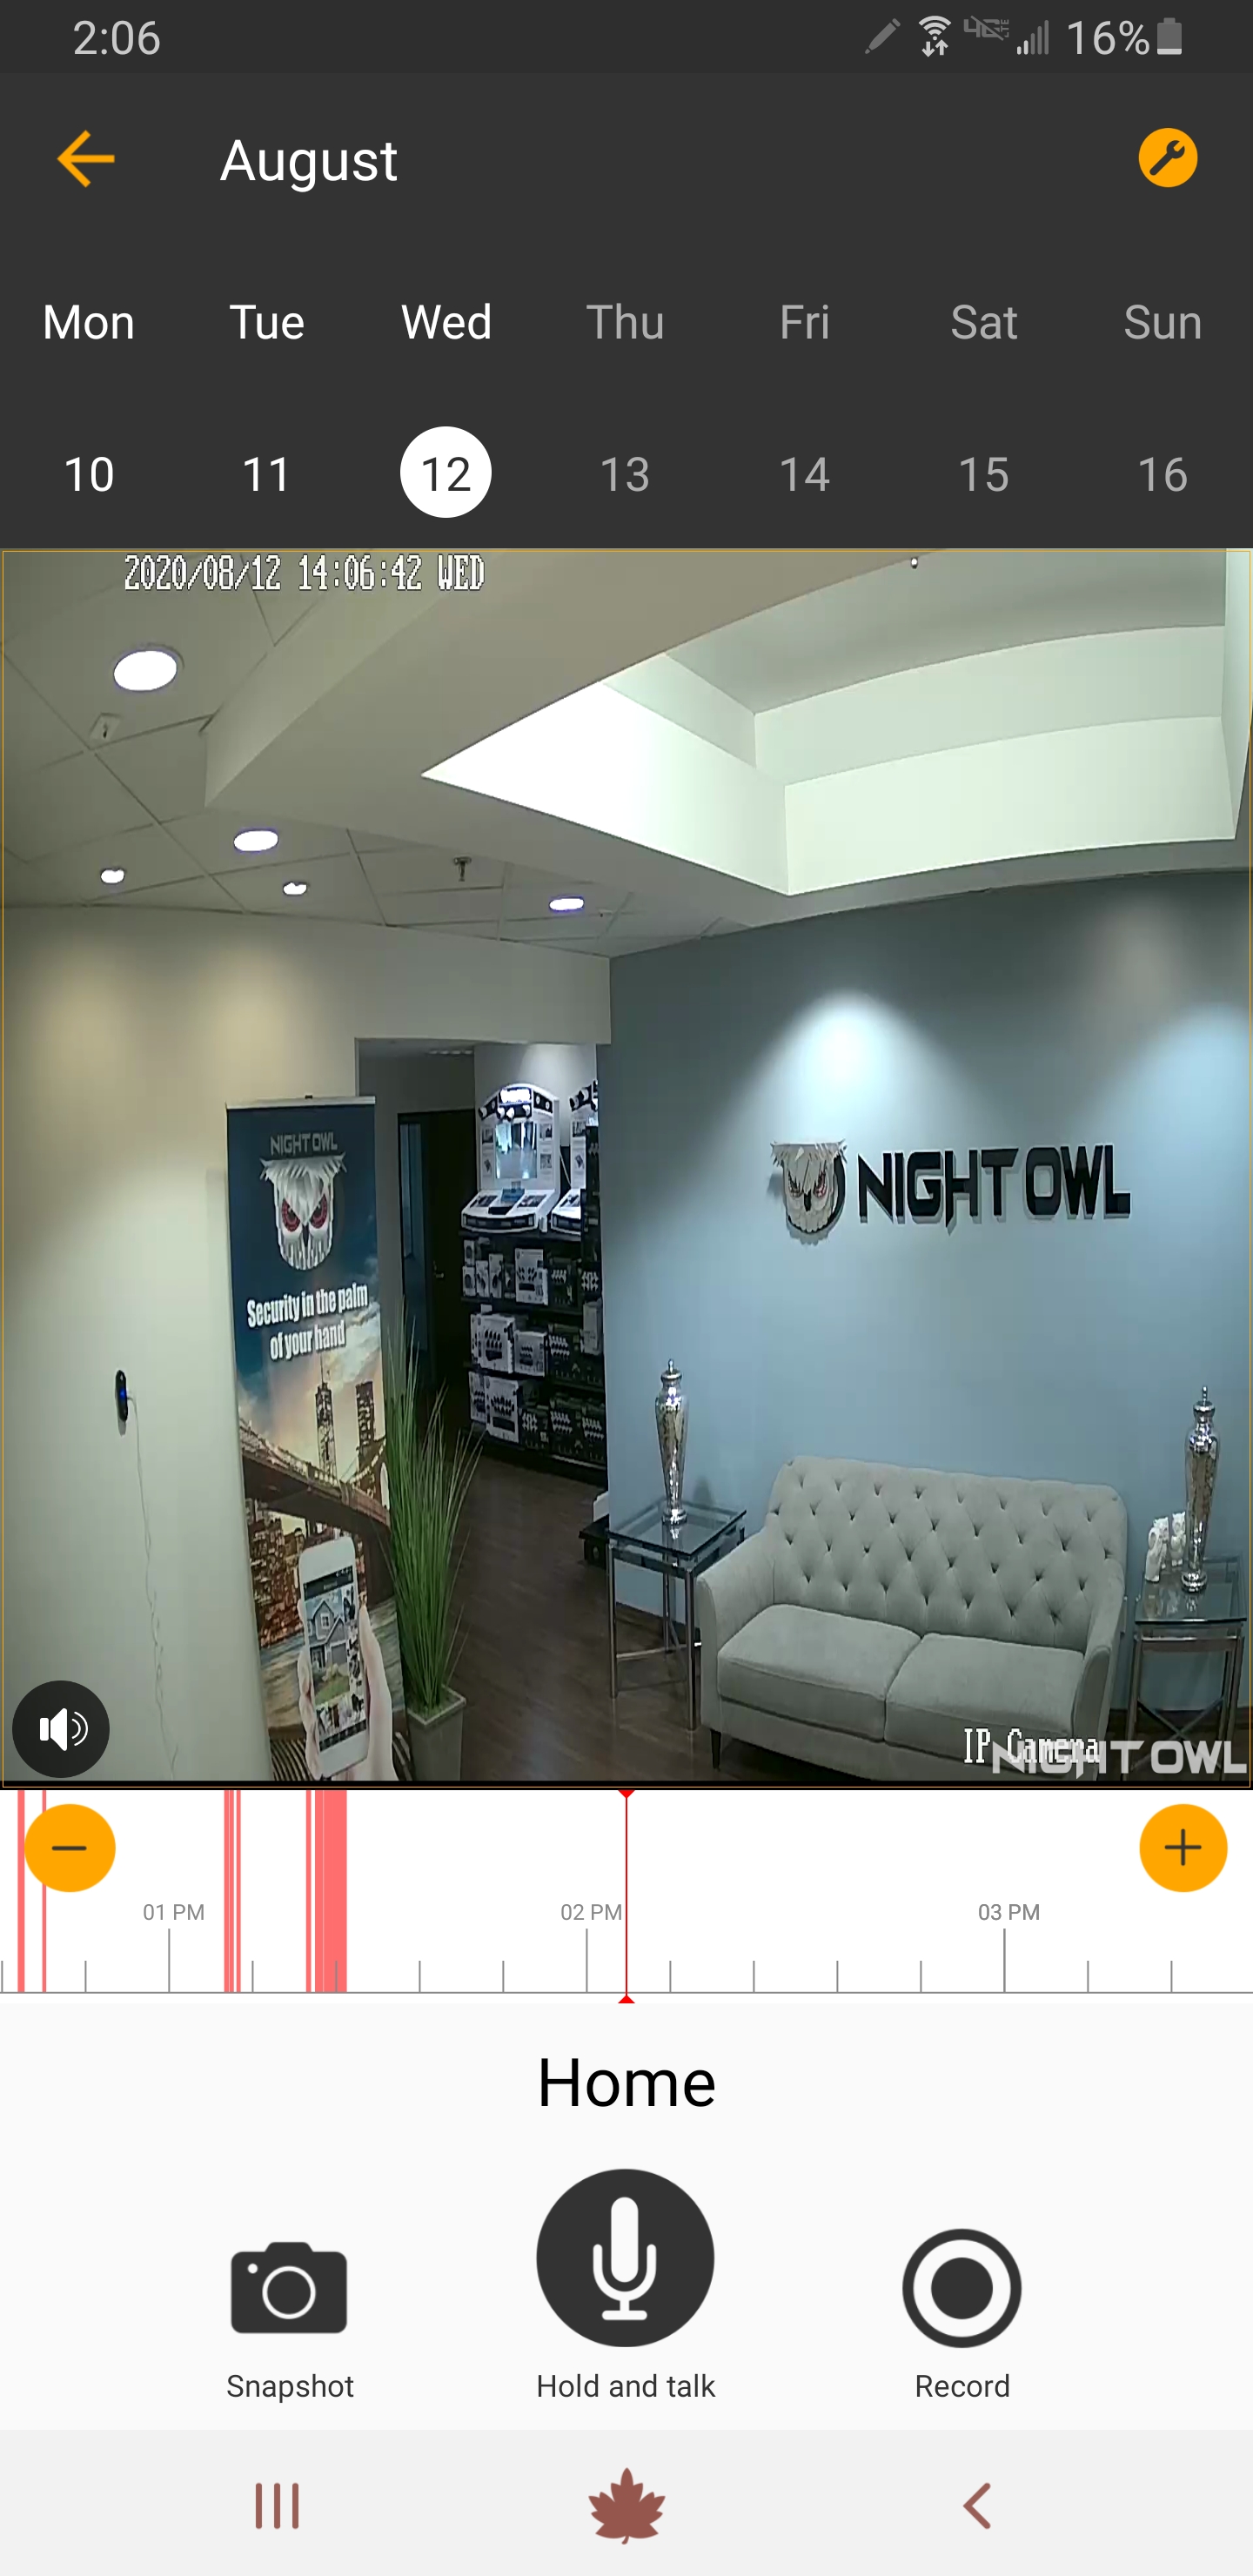
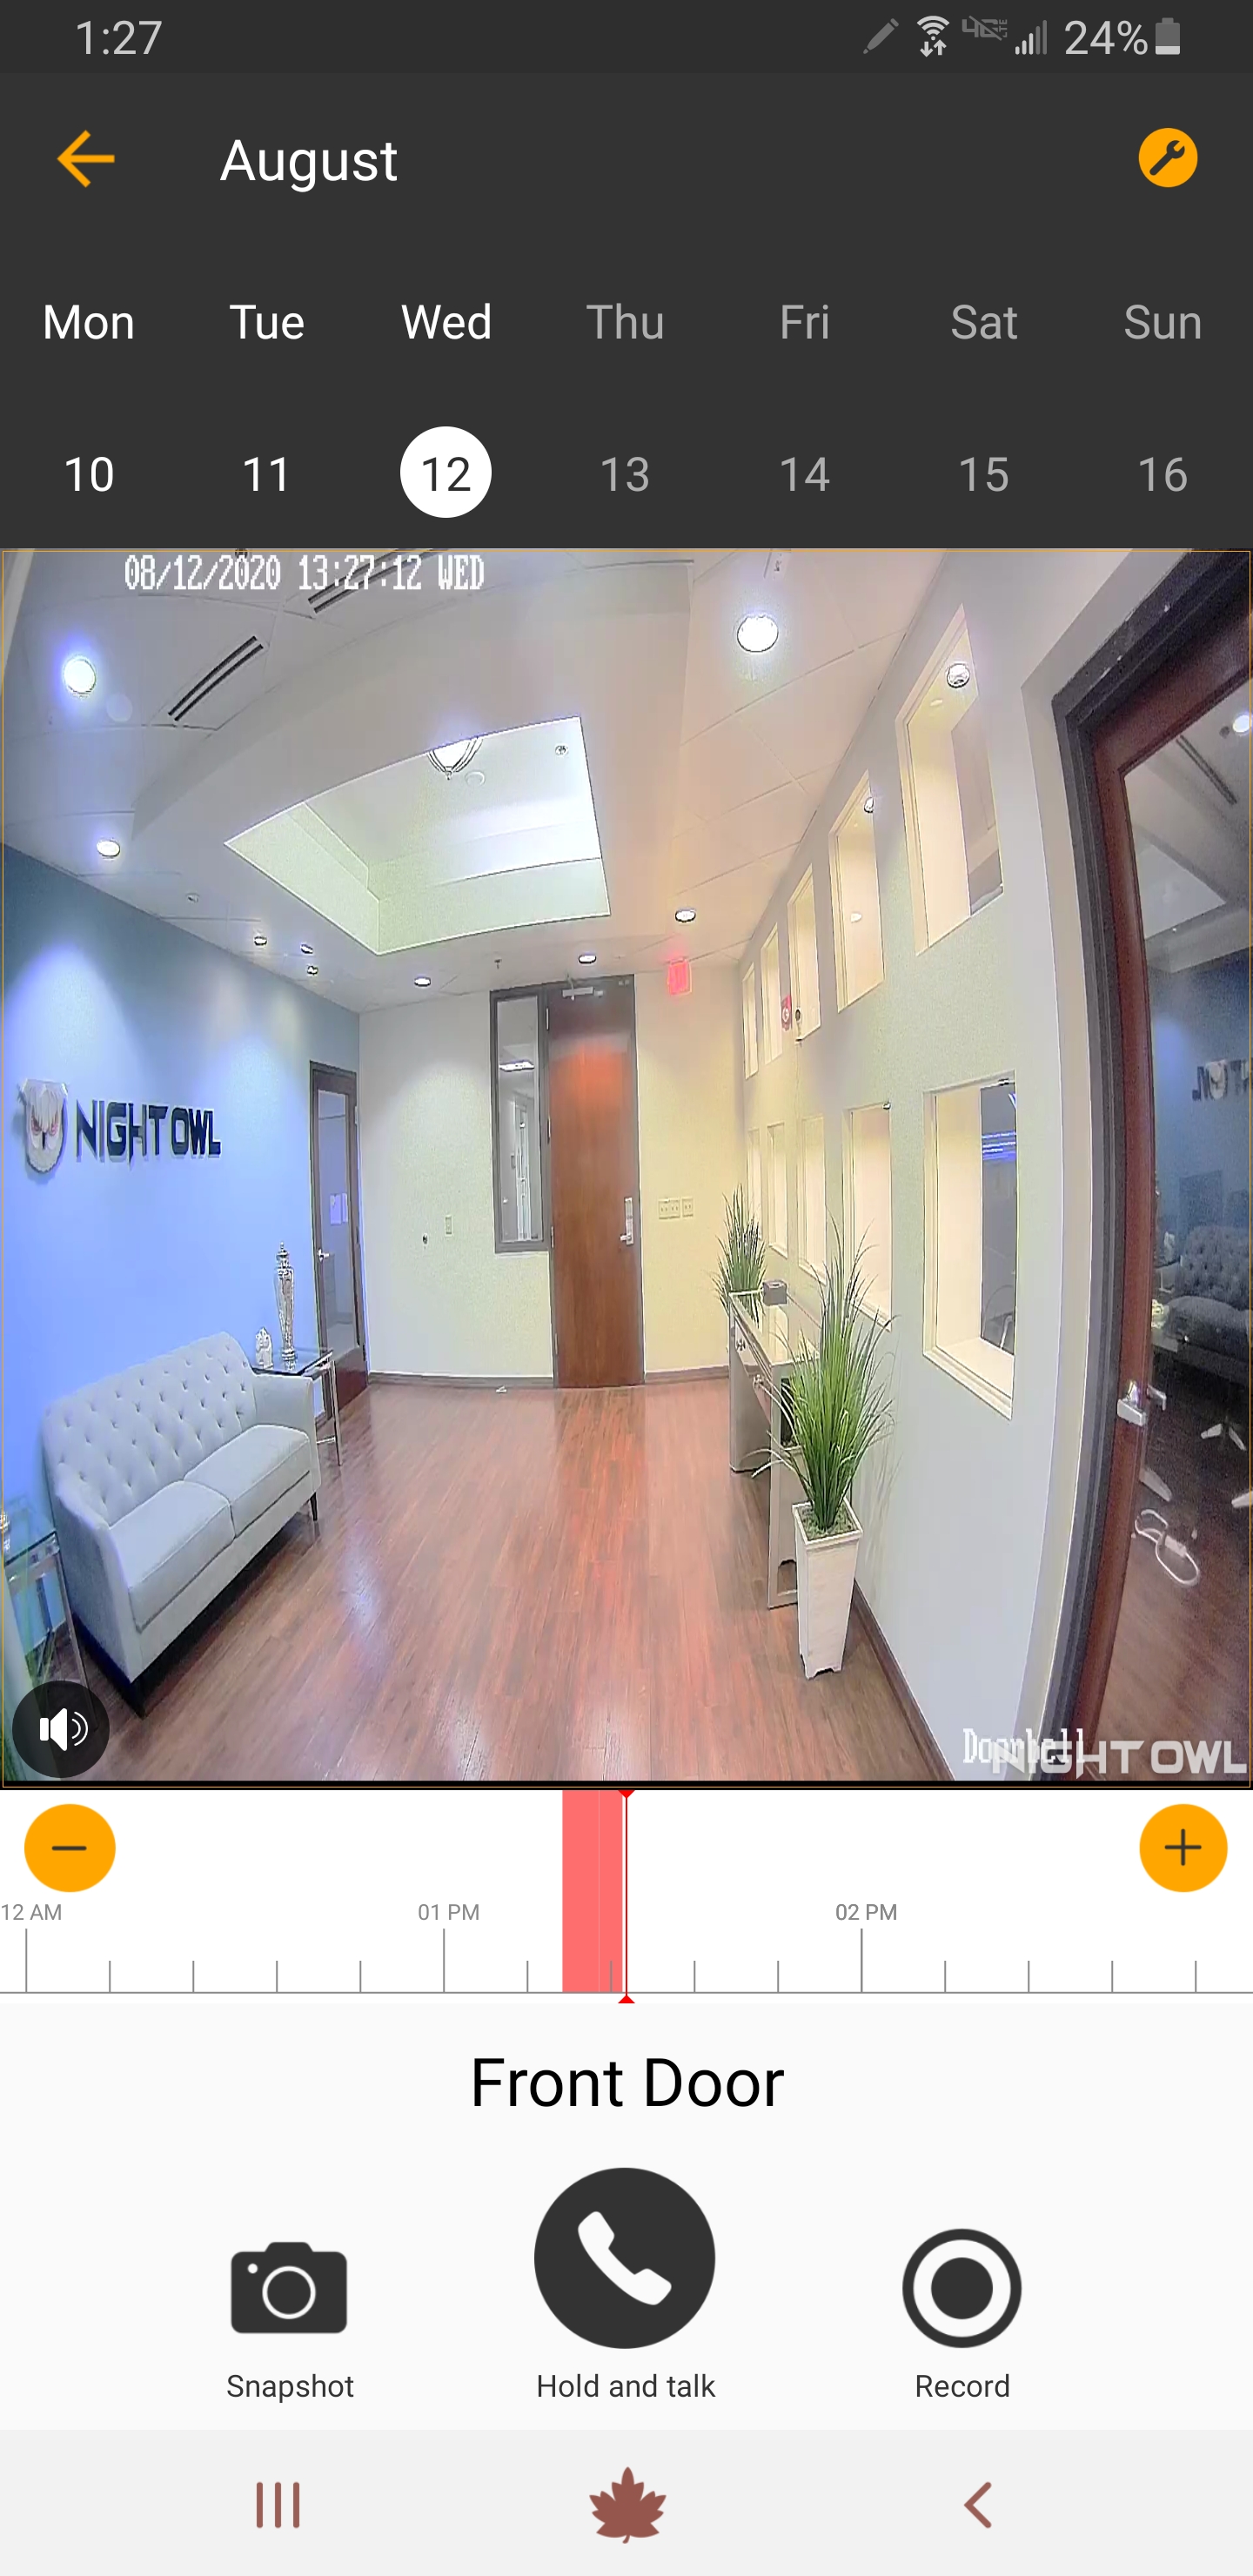
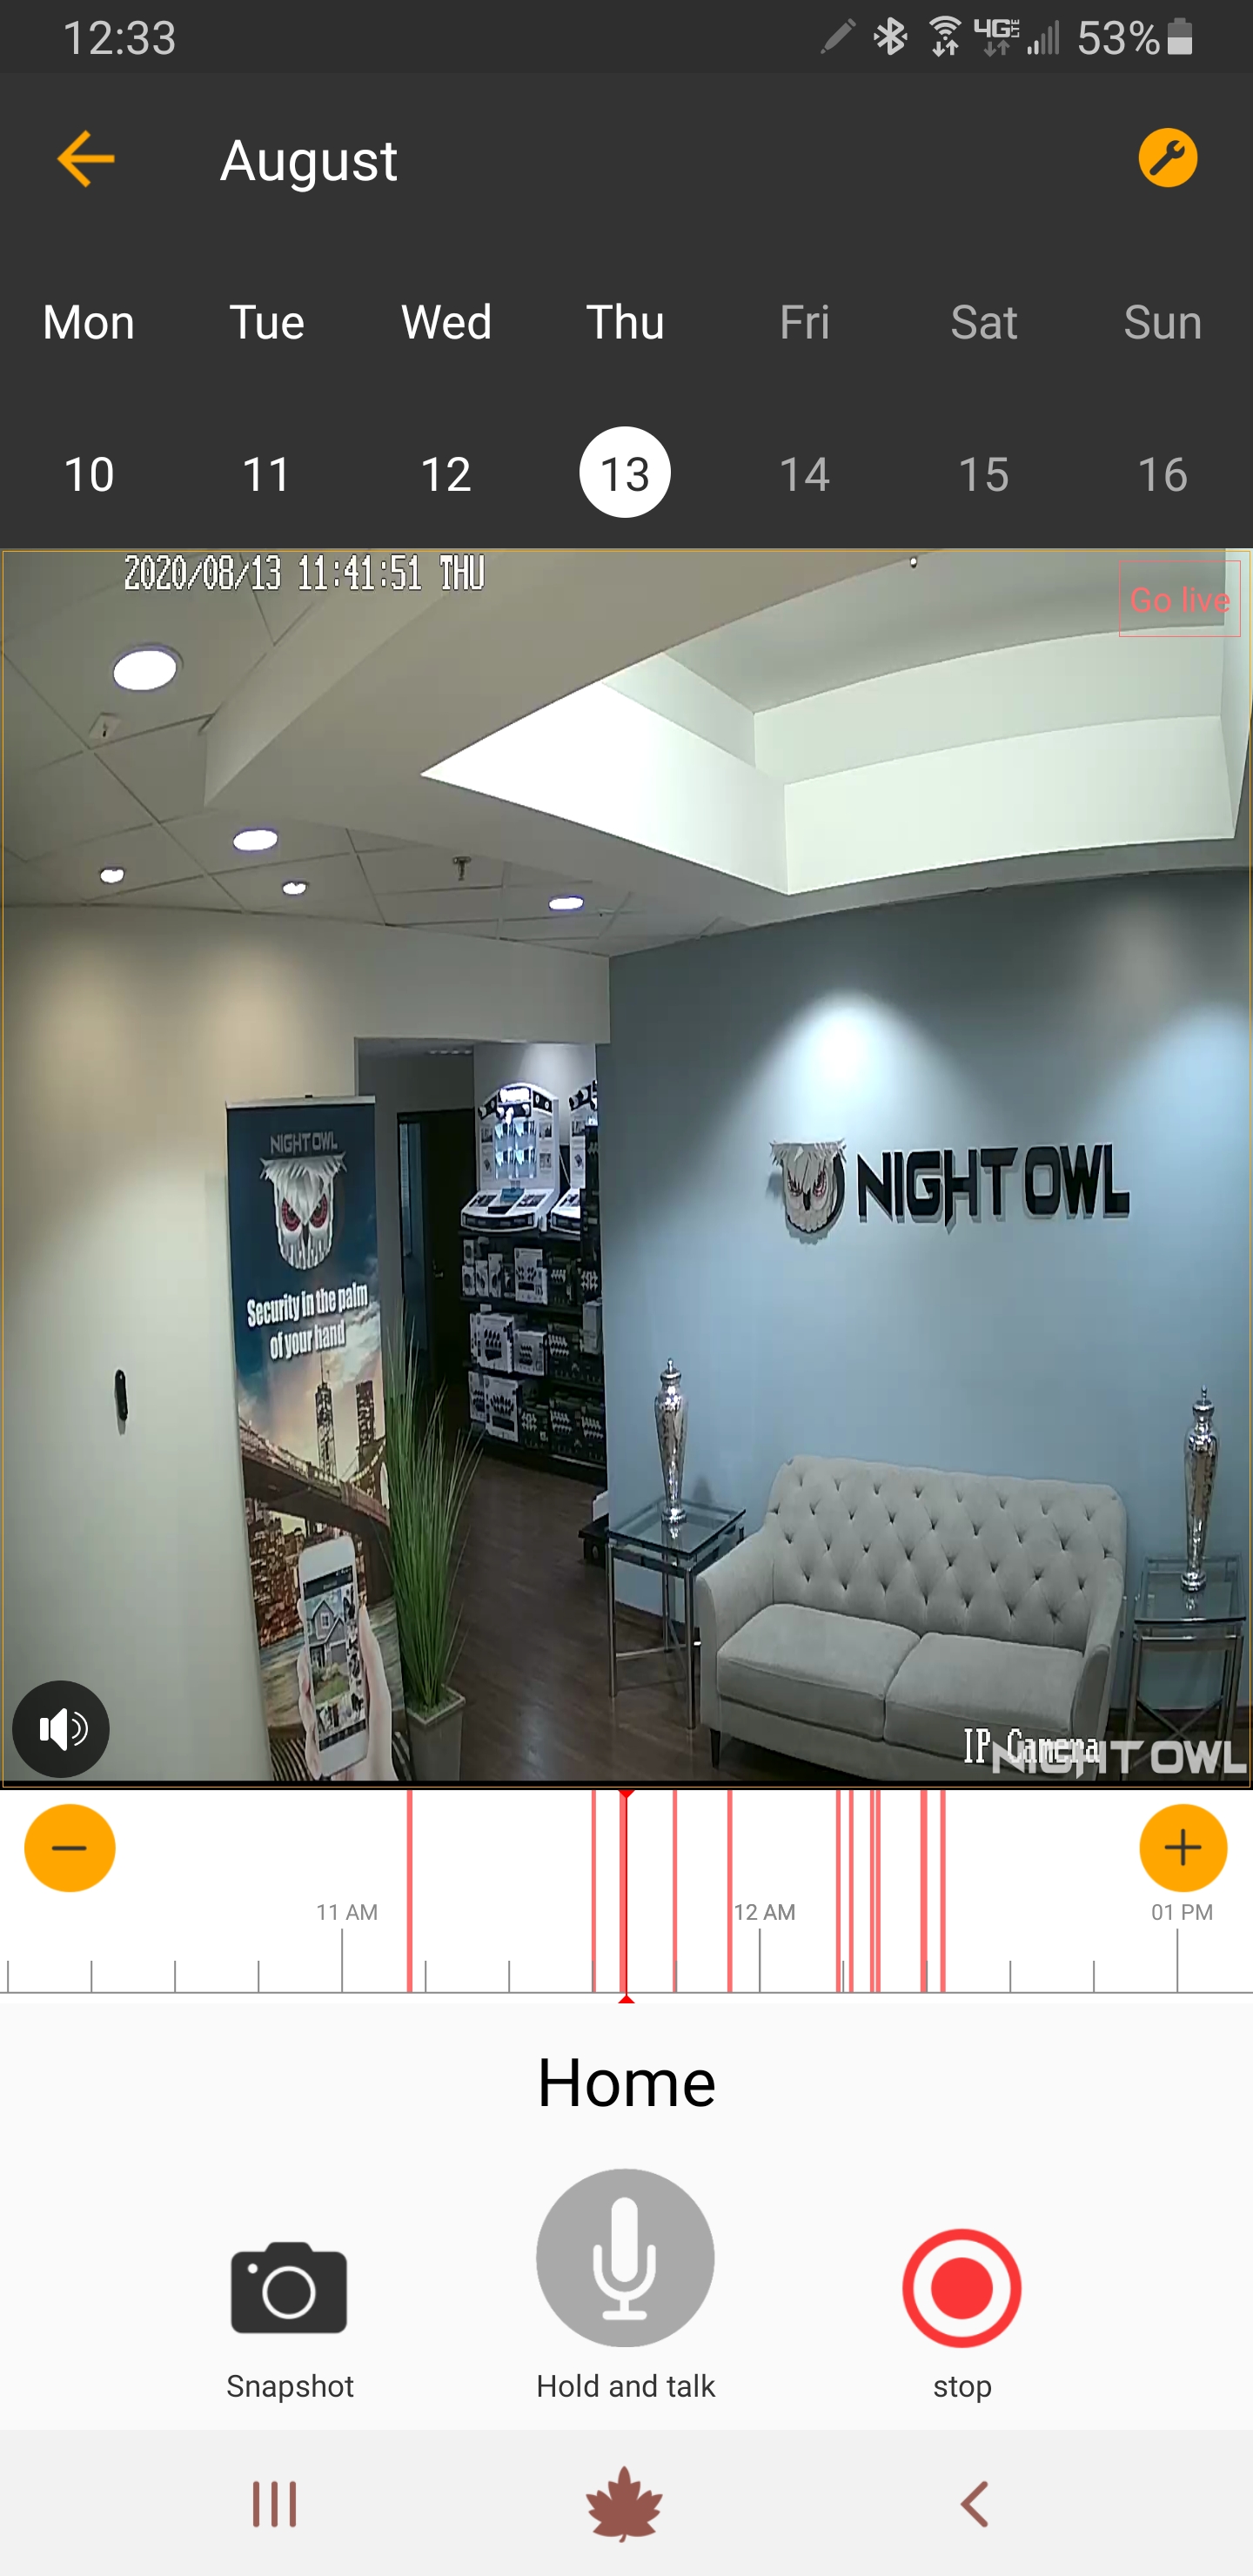
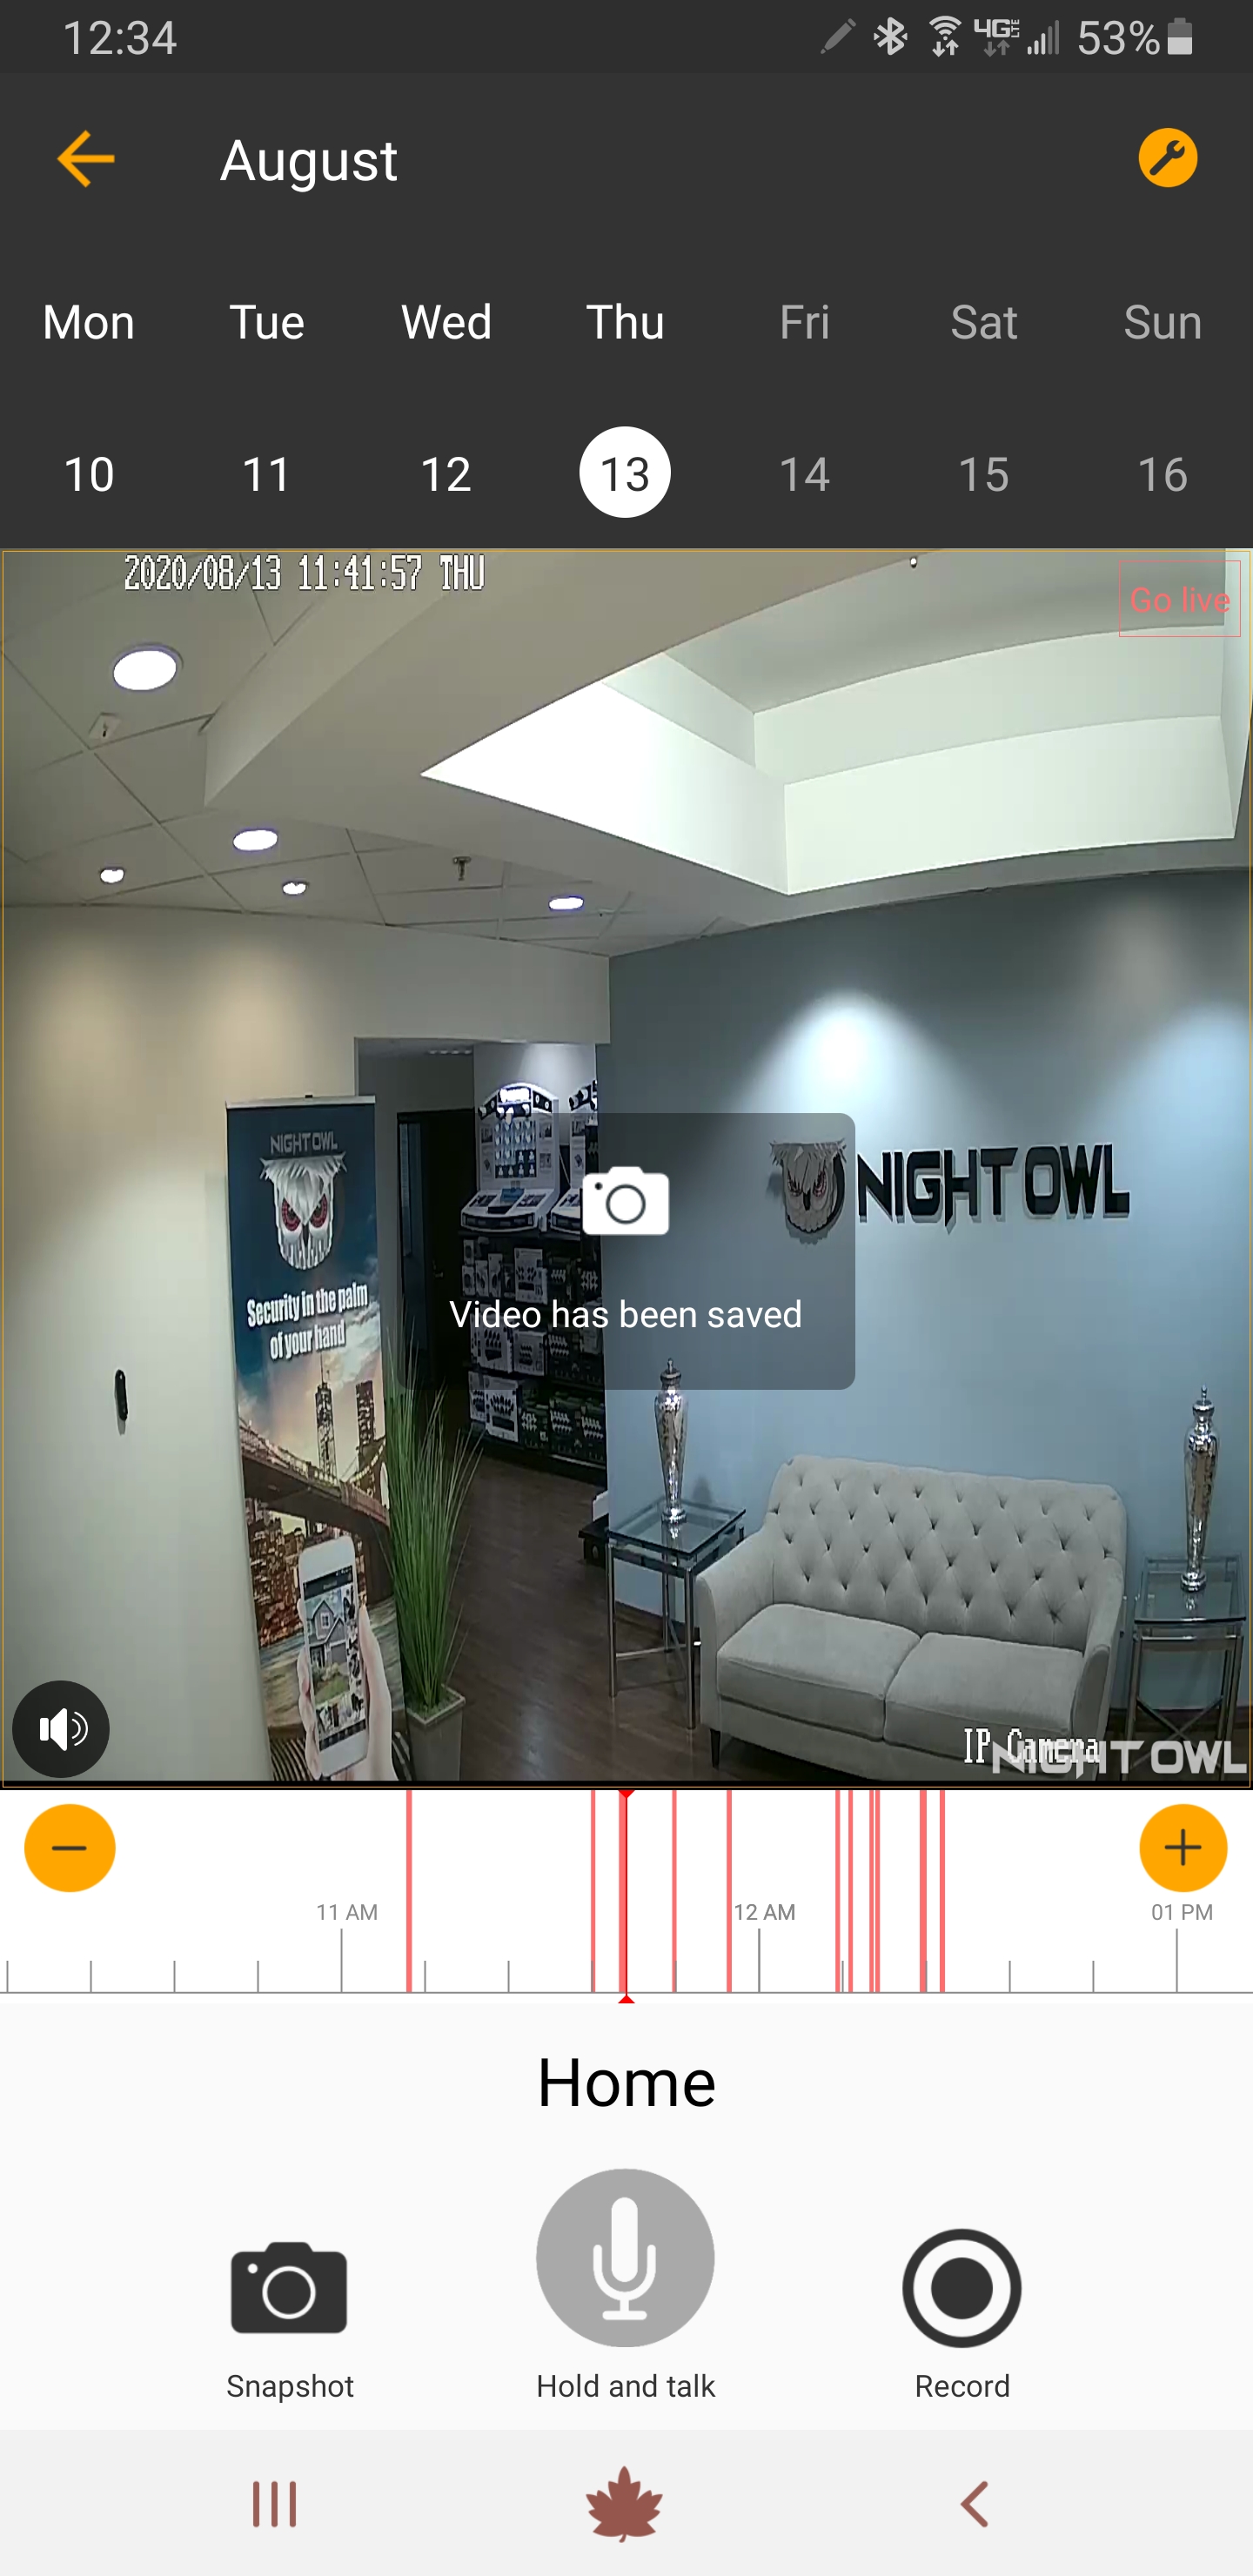
iv. To view recordings: 1) tap on the date you want to view and 2) scroll the timeline to find recordings. Segments in RED indicate motion events. Playback will start automatically.

v. To return to live view, tap “Go Live.”
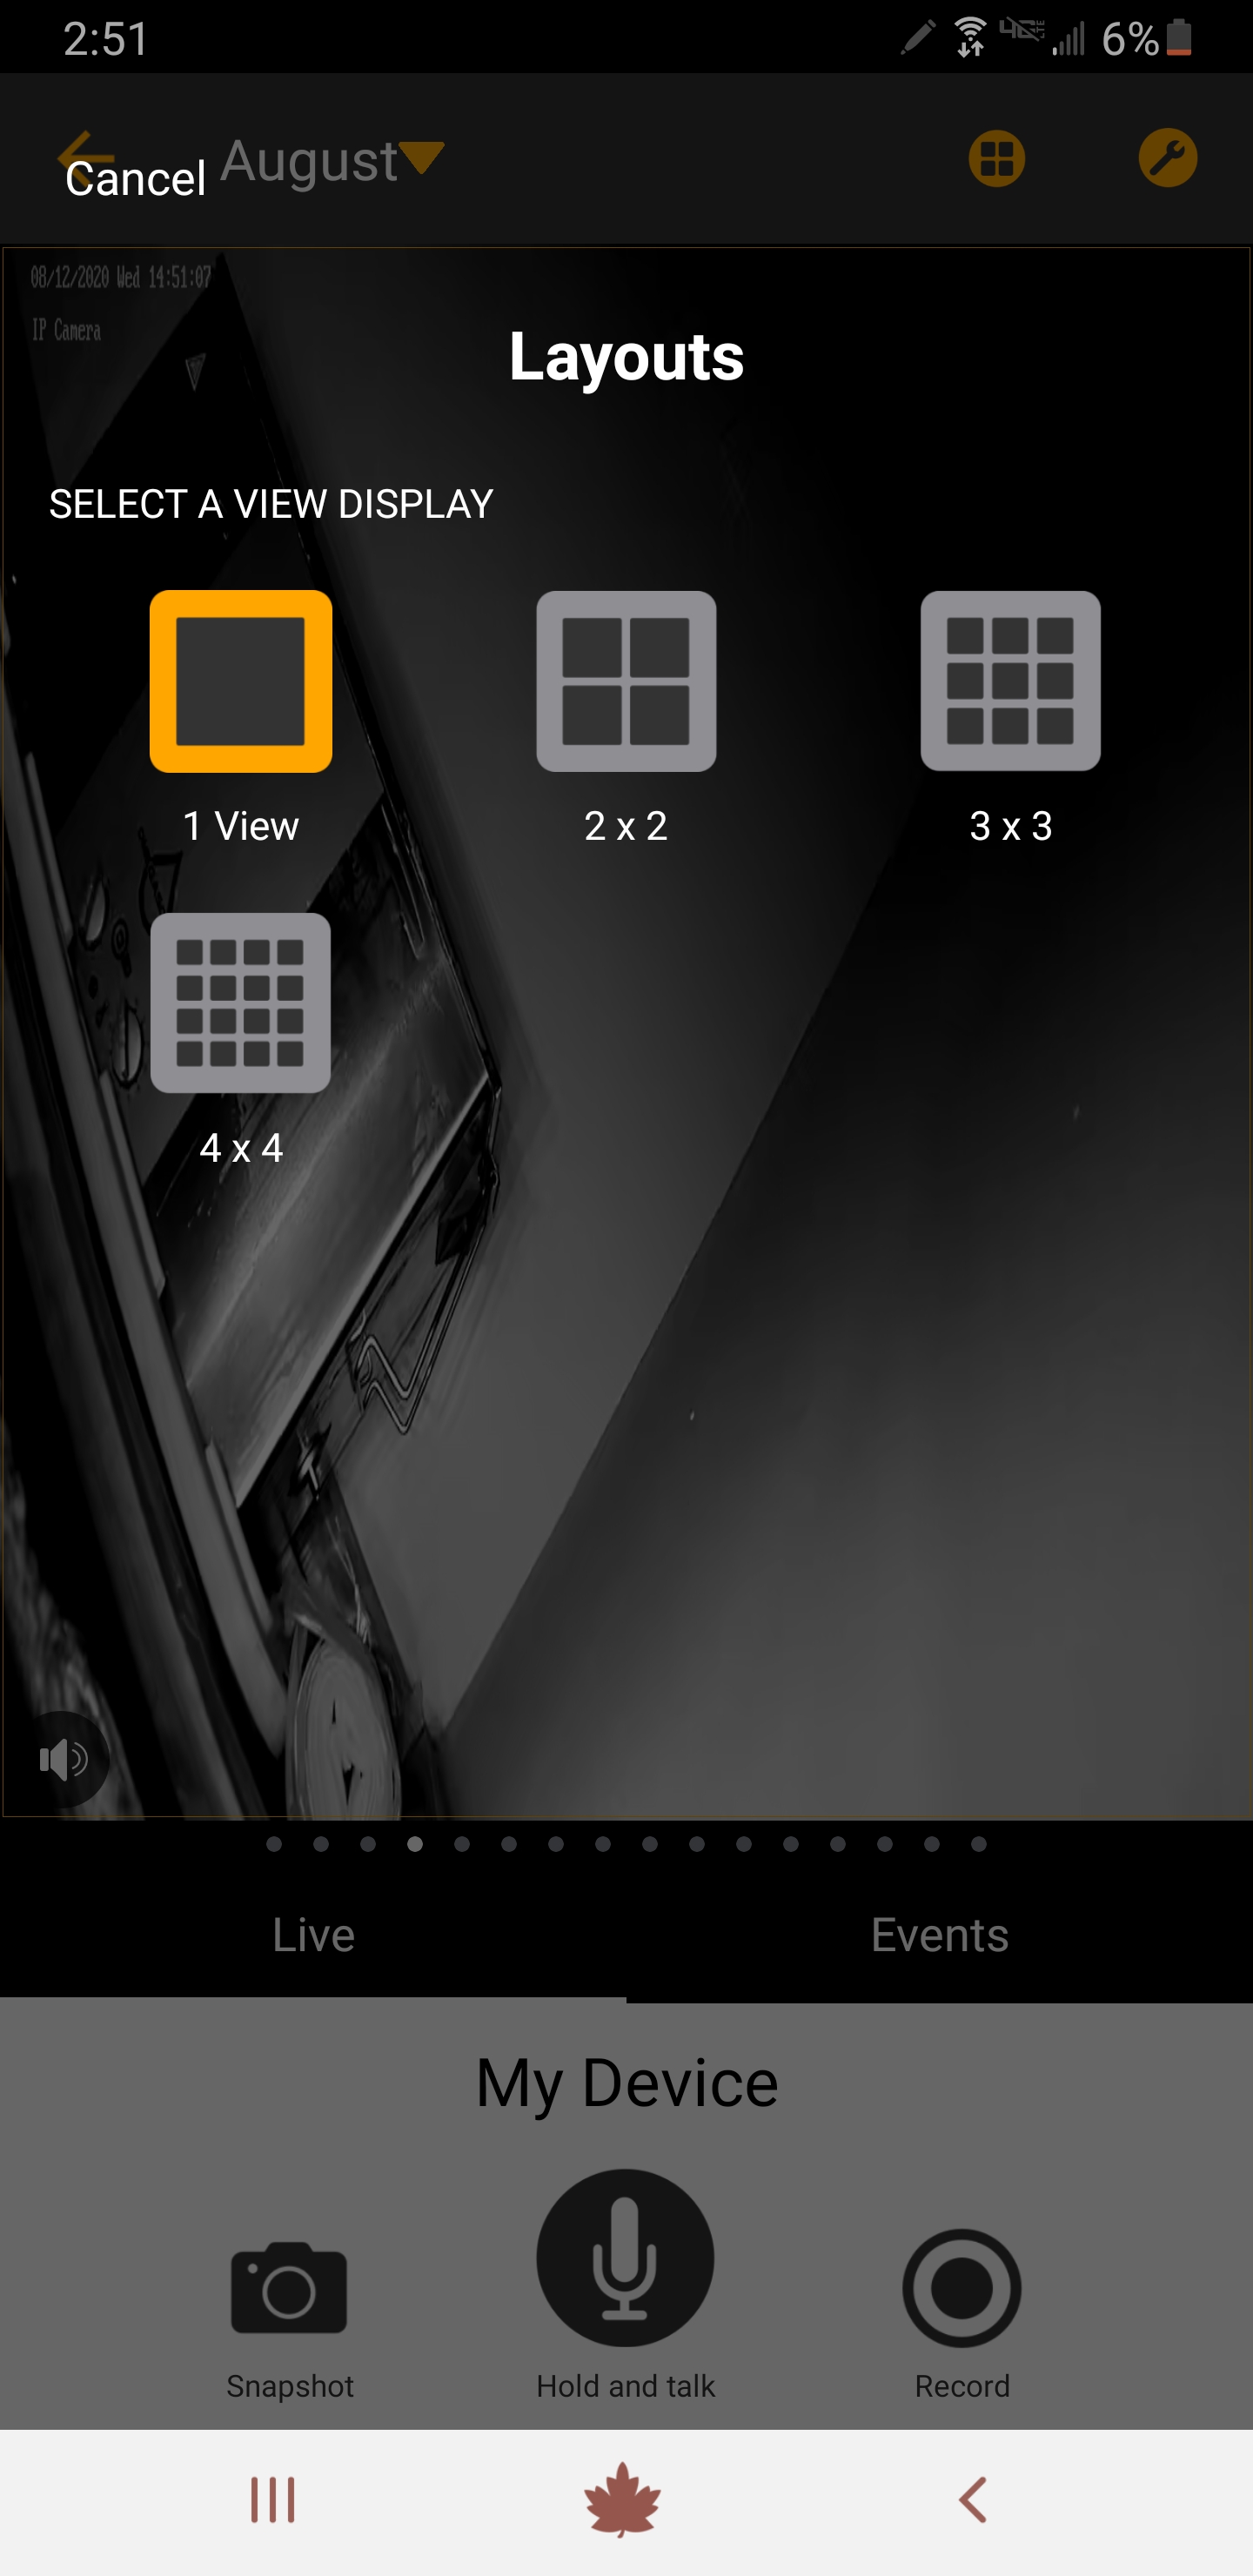
vi. If your device has multiple channels, like our DVR/NVRs, then you can choose how your cameras appear on screen. Tap the icon.
vii. You can then switch the channel configuration.
NOTE: We only show one camera below, with 3 open channels.
|
|
Copy and paste the verification code into the Code field.
|
|
viii. The live view screen also enables you to use your device’s audio (if it is audio enabled), take a snapshot and record.

1 – Listen (Speaker) – allows you to hear your device’s audio. *Device must be 2 – Way Audio Enabled for this feature to work.
2 – Talk (Microphone) – press down to speak into the App and your voice will resonate from the camera’s speaker. *Device must be 2-Way Audio Enabled for this feature to work.
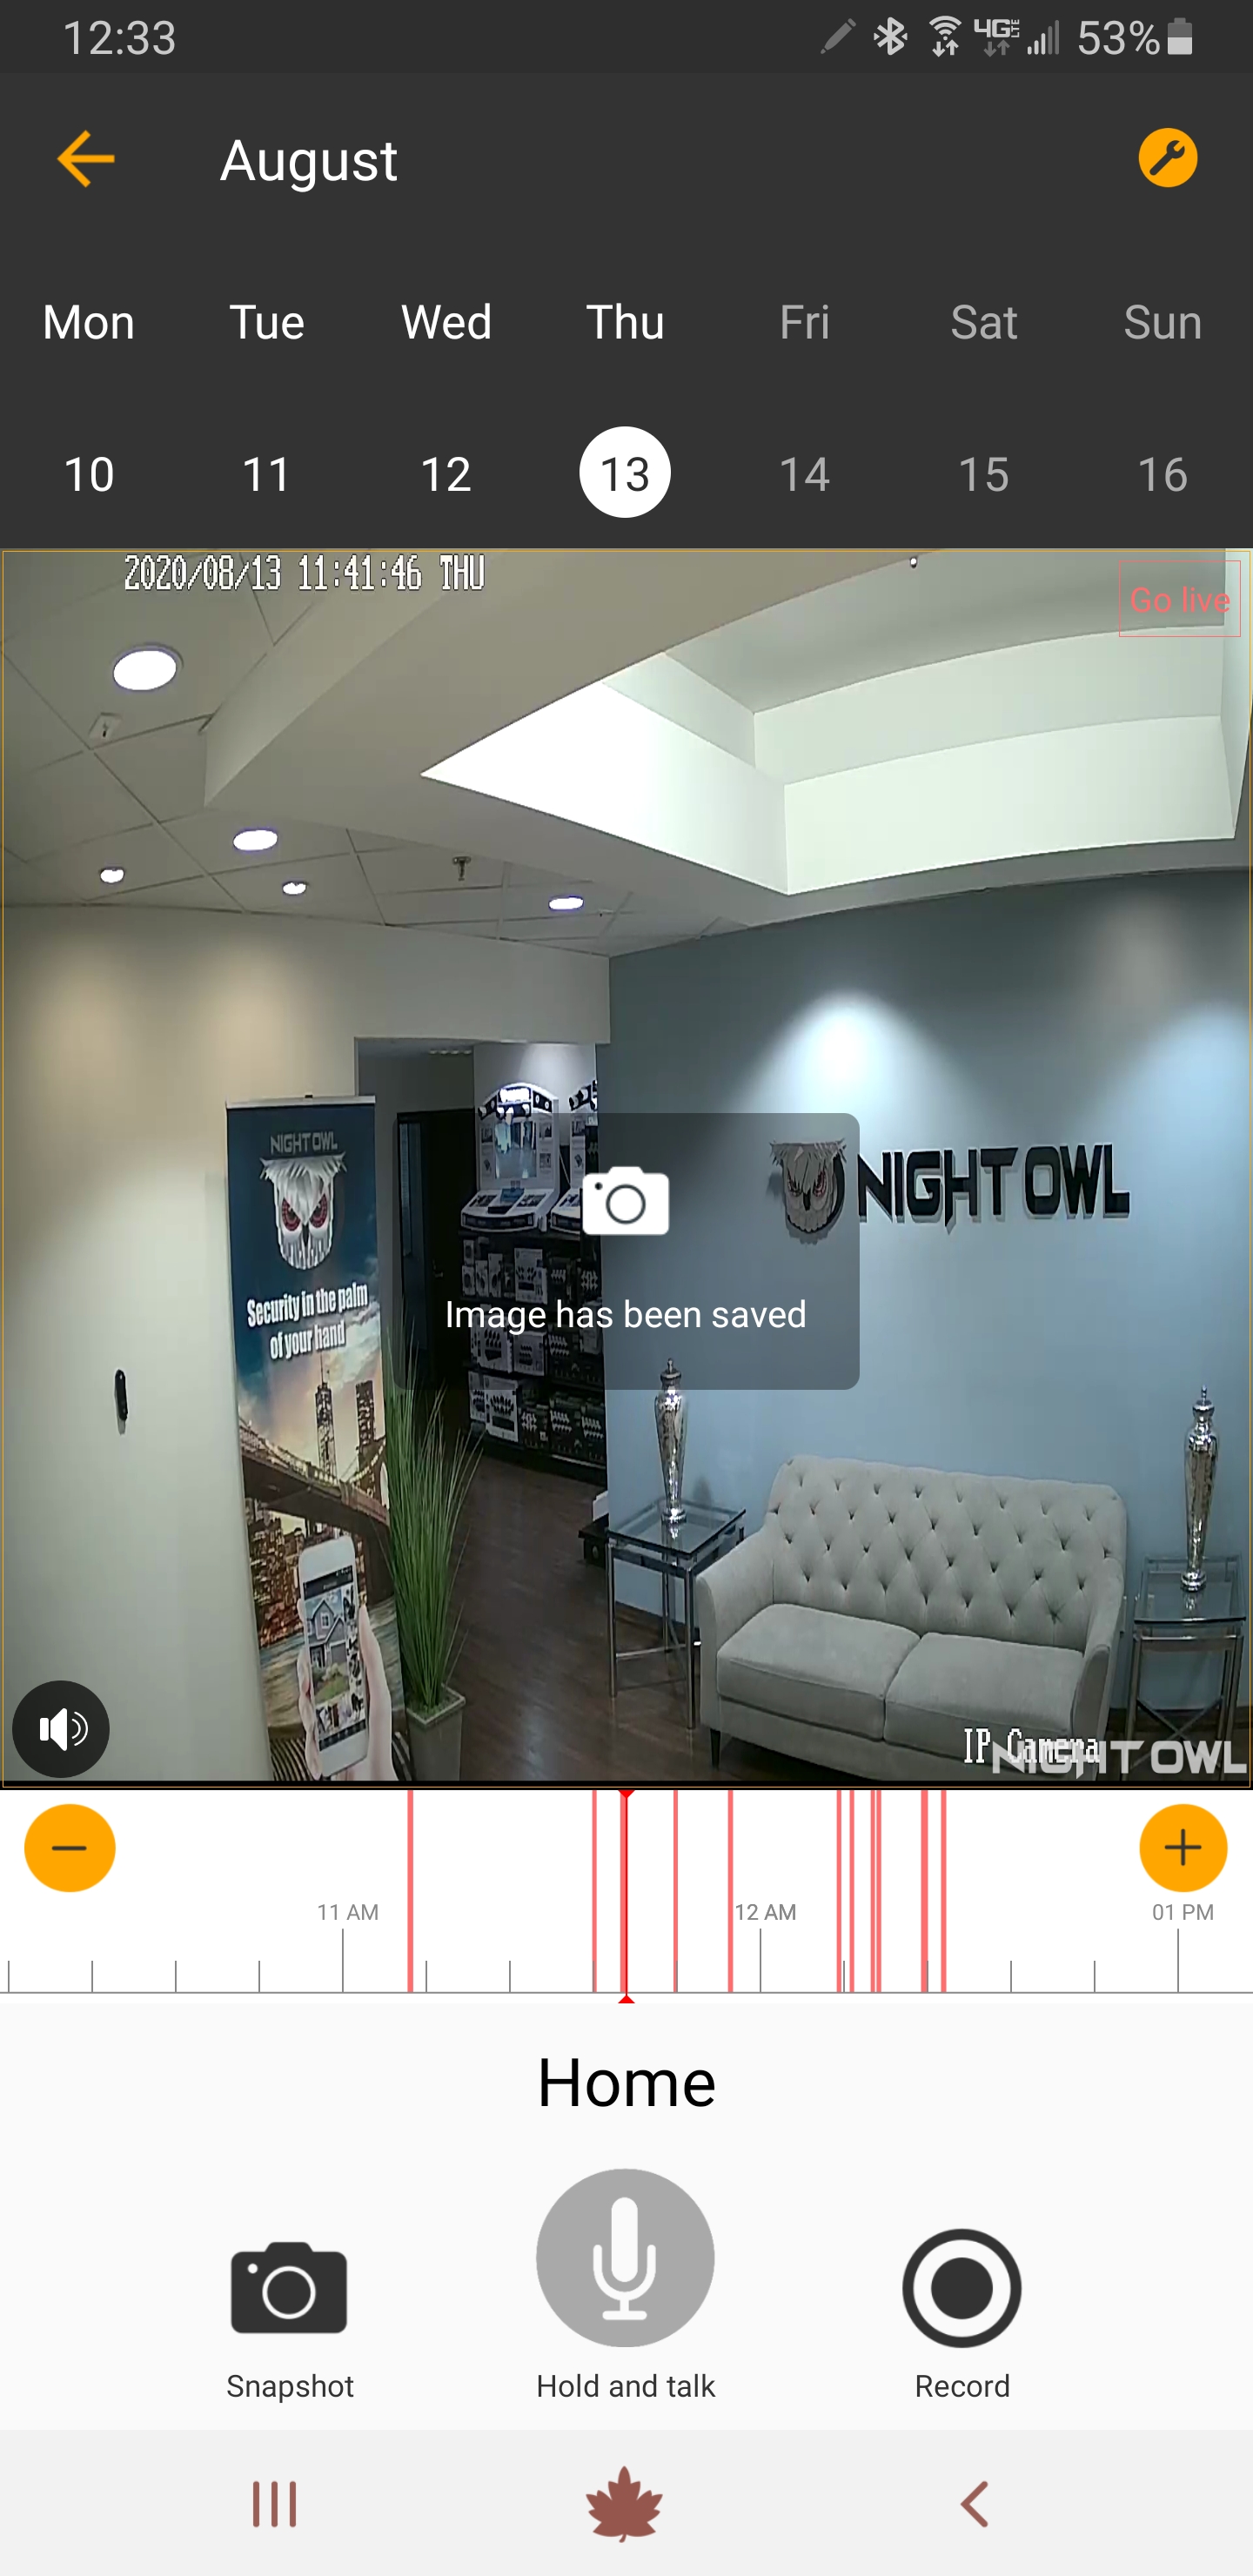
3 – Snapshot (Camera) – takes a snapshot of the live view and saves it to your Smart Device’s photo album.
4 – Record – starts a recording of the live view. Tap to begin the recording and it will turn red. Tap to end the recording and it will turn black. Recordings will be saved to your Smart Device’s photo album.
You can playback your camera’s recordings with the Night Owl Connect App. Below is a brief overview of playback and some quick troubleshooting steps should you experience an issue.
i. From the App’s main screen, tap the Play button for the device you want to playback.
NOTE: Your device must be connected to the Internet and show Online for playback.
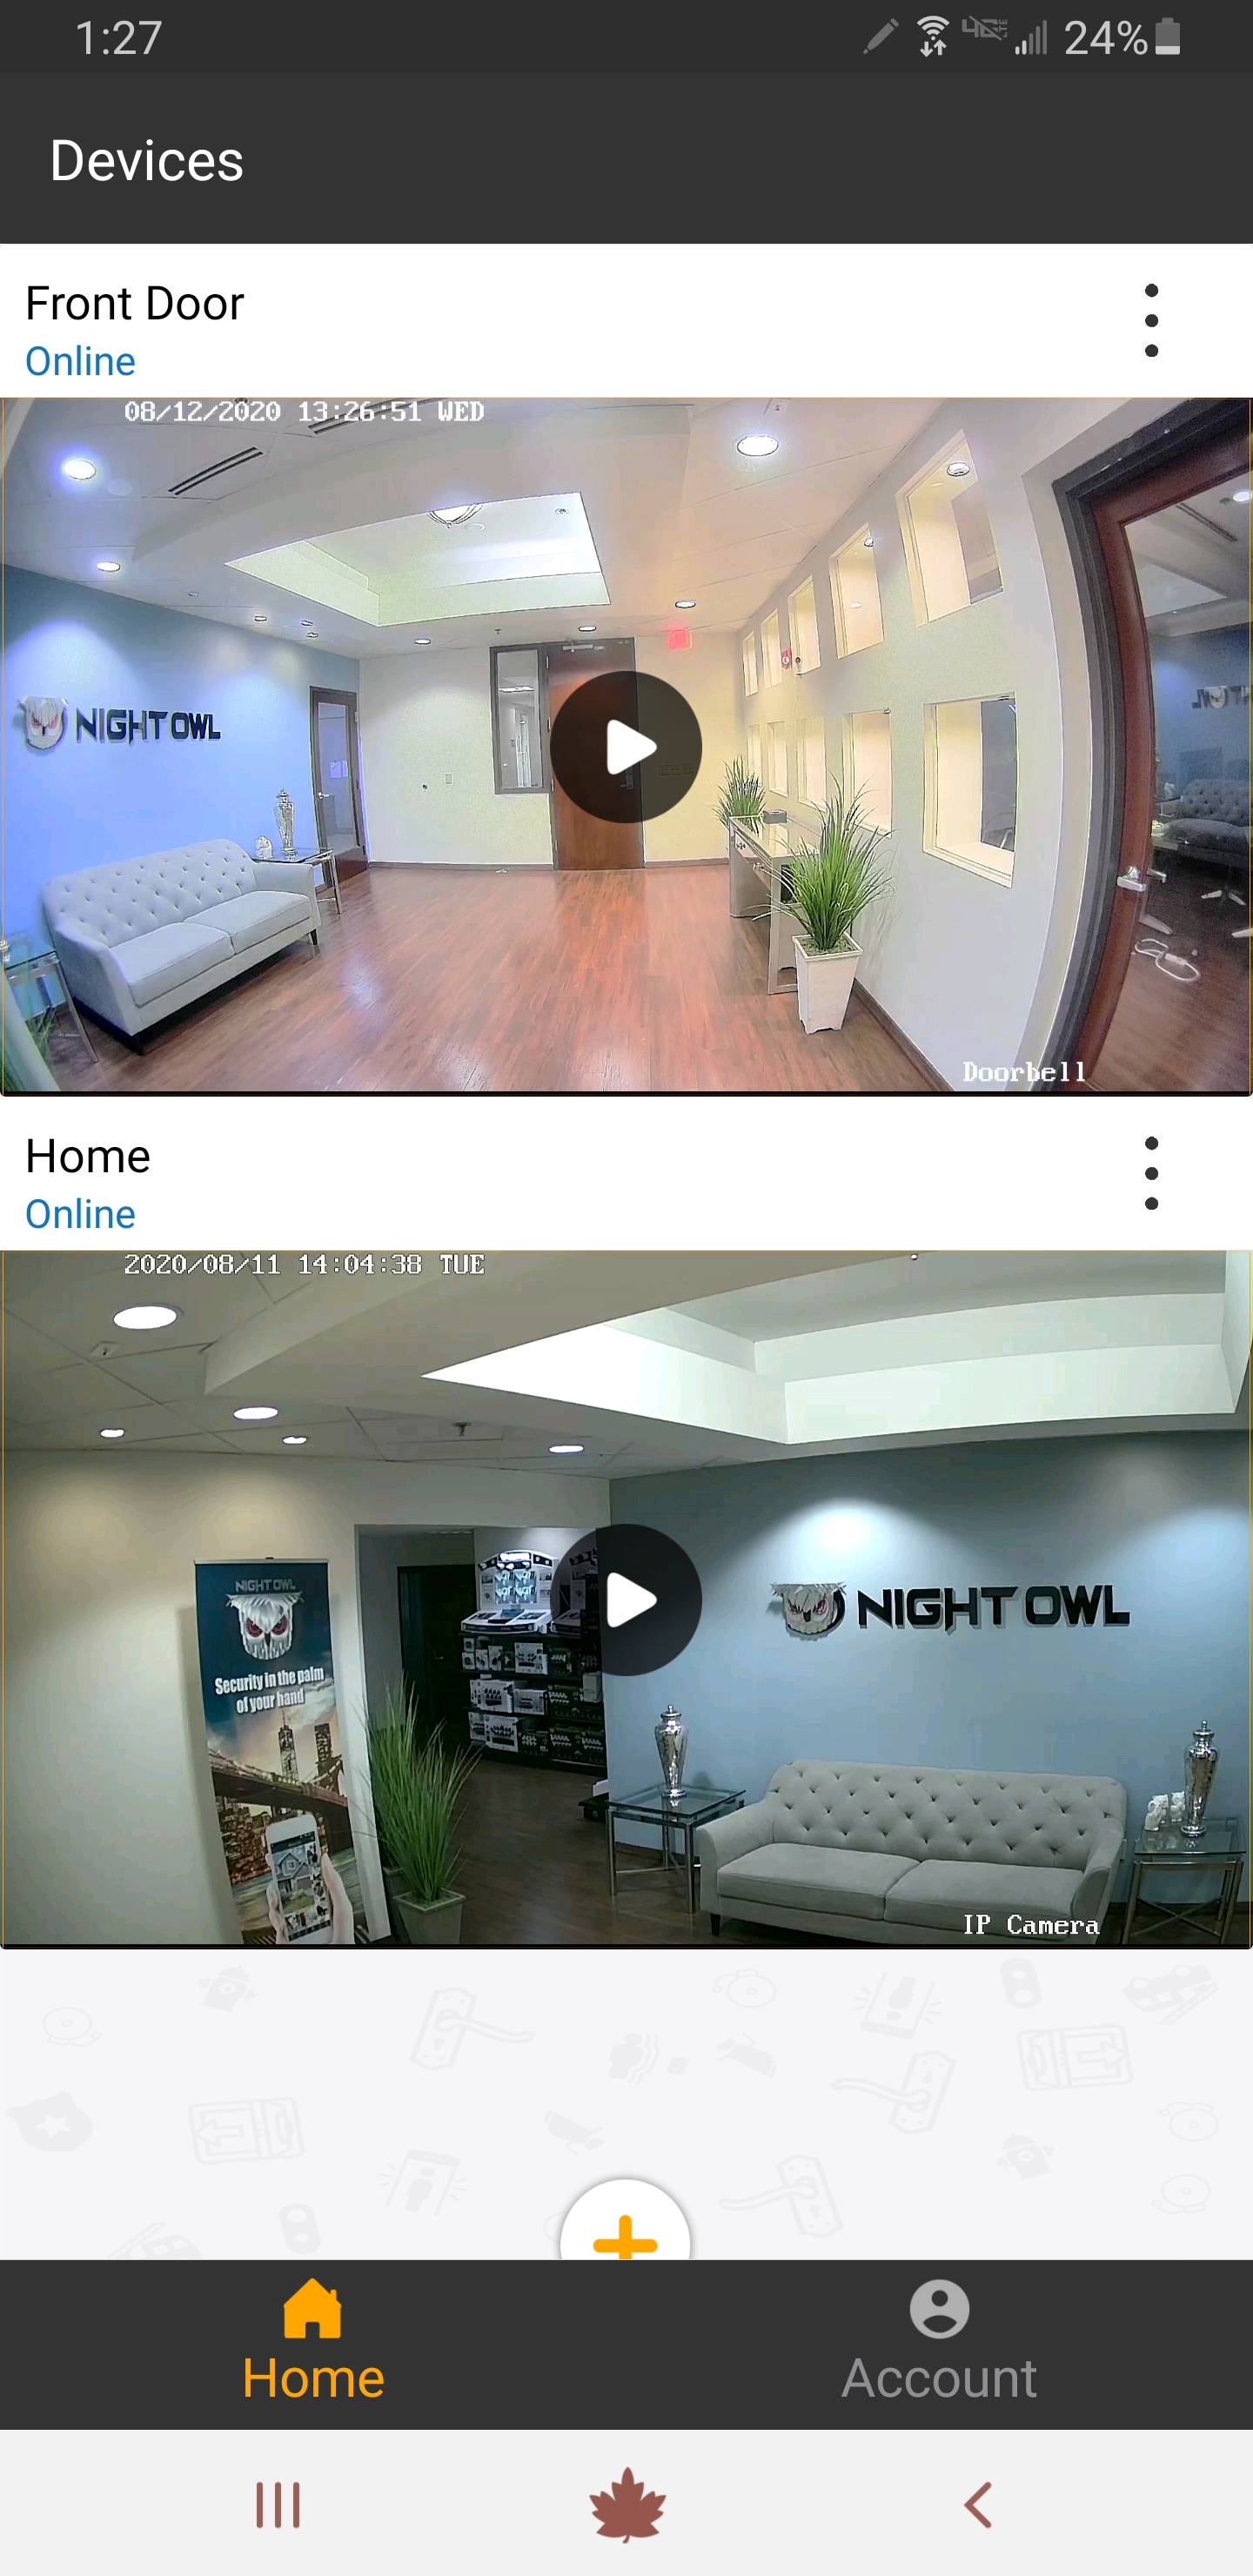
ii. For Standalone Devices
a. To view recordings: 1) tap on the date you want to view and 2) scroll the timeline to find recordings. Segments in RED indicate motion events. Playback will start automatically.
b. Tap the Snapshot icon to take a screenshot of a recording during Playback. A still image will be saved to your Smart Device’s photo album.
c. Tap the Record icon to record a segment of footage to be saved to your Smart Device’s photo album. Tap to begin the recording and it will turn red. Tap to end the recording and it will turn black. Recordings will be saved to your Smart Device’s photo album.
|
|
Copy and paste the verification code into the Code field.
|
|
d. Both the Snapshots and Recordings will be saved to your Smart Device’s album. From your album you now have the option to share the image or recording if needed.
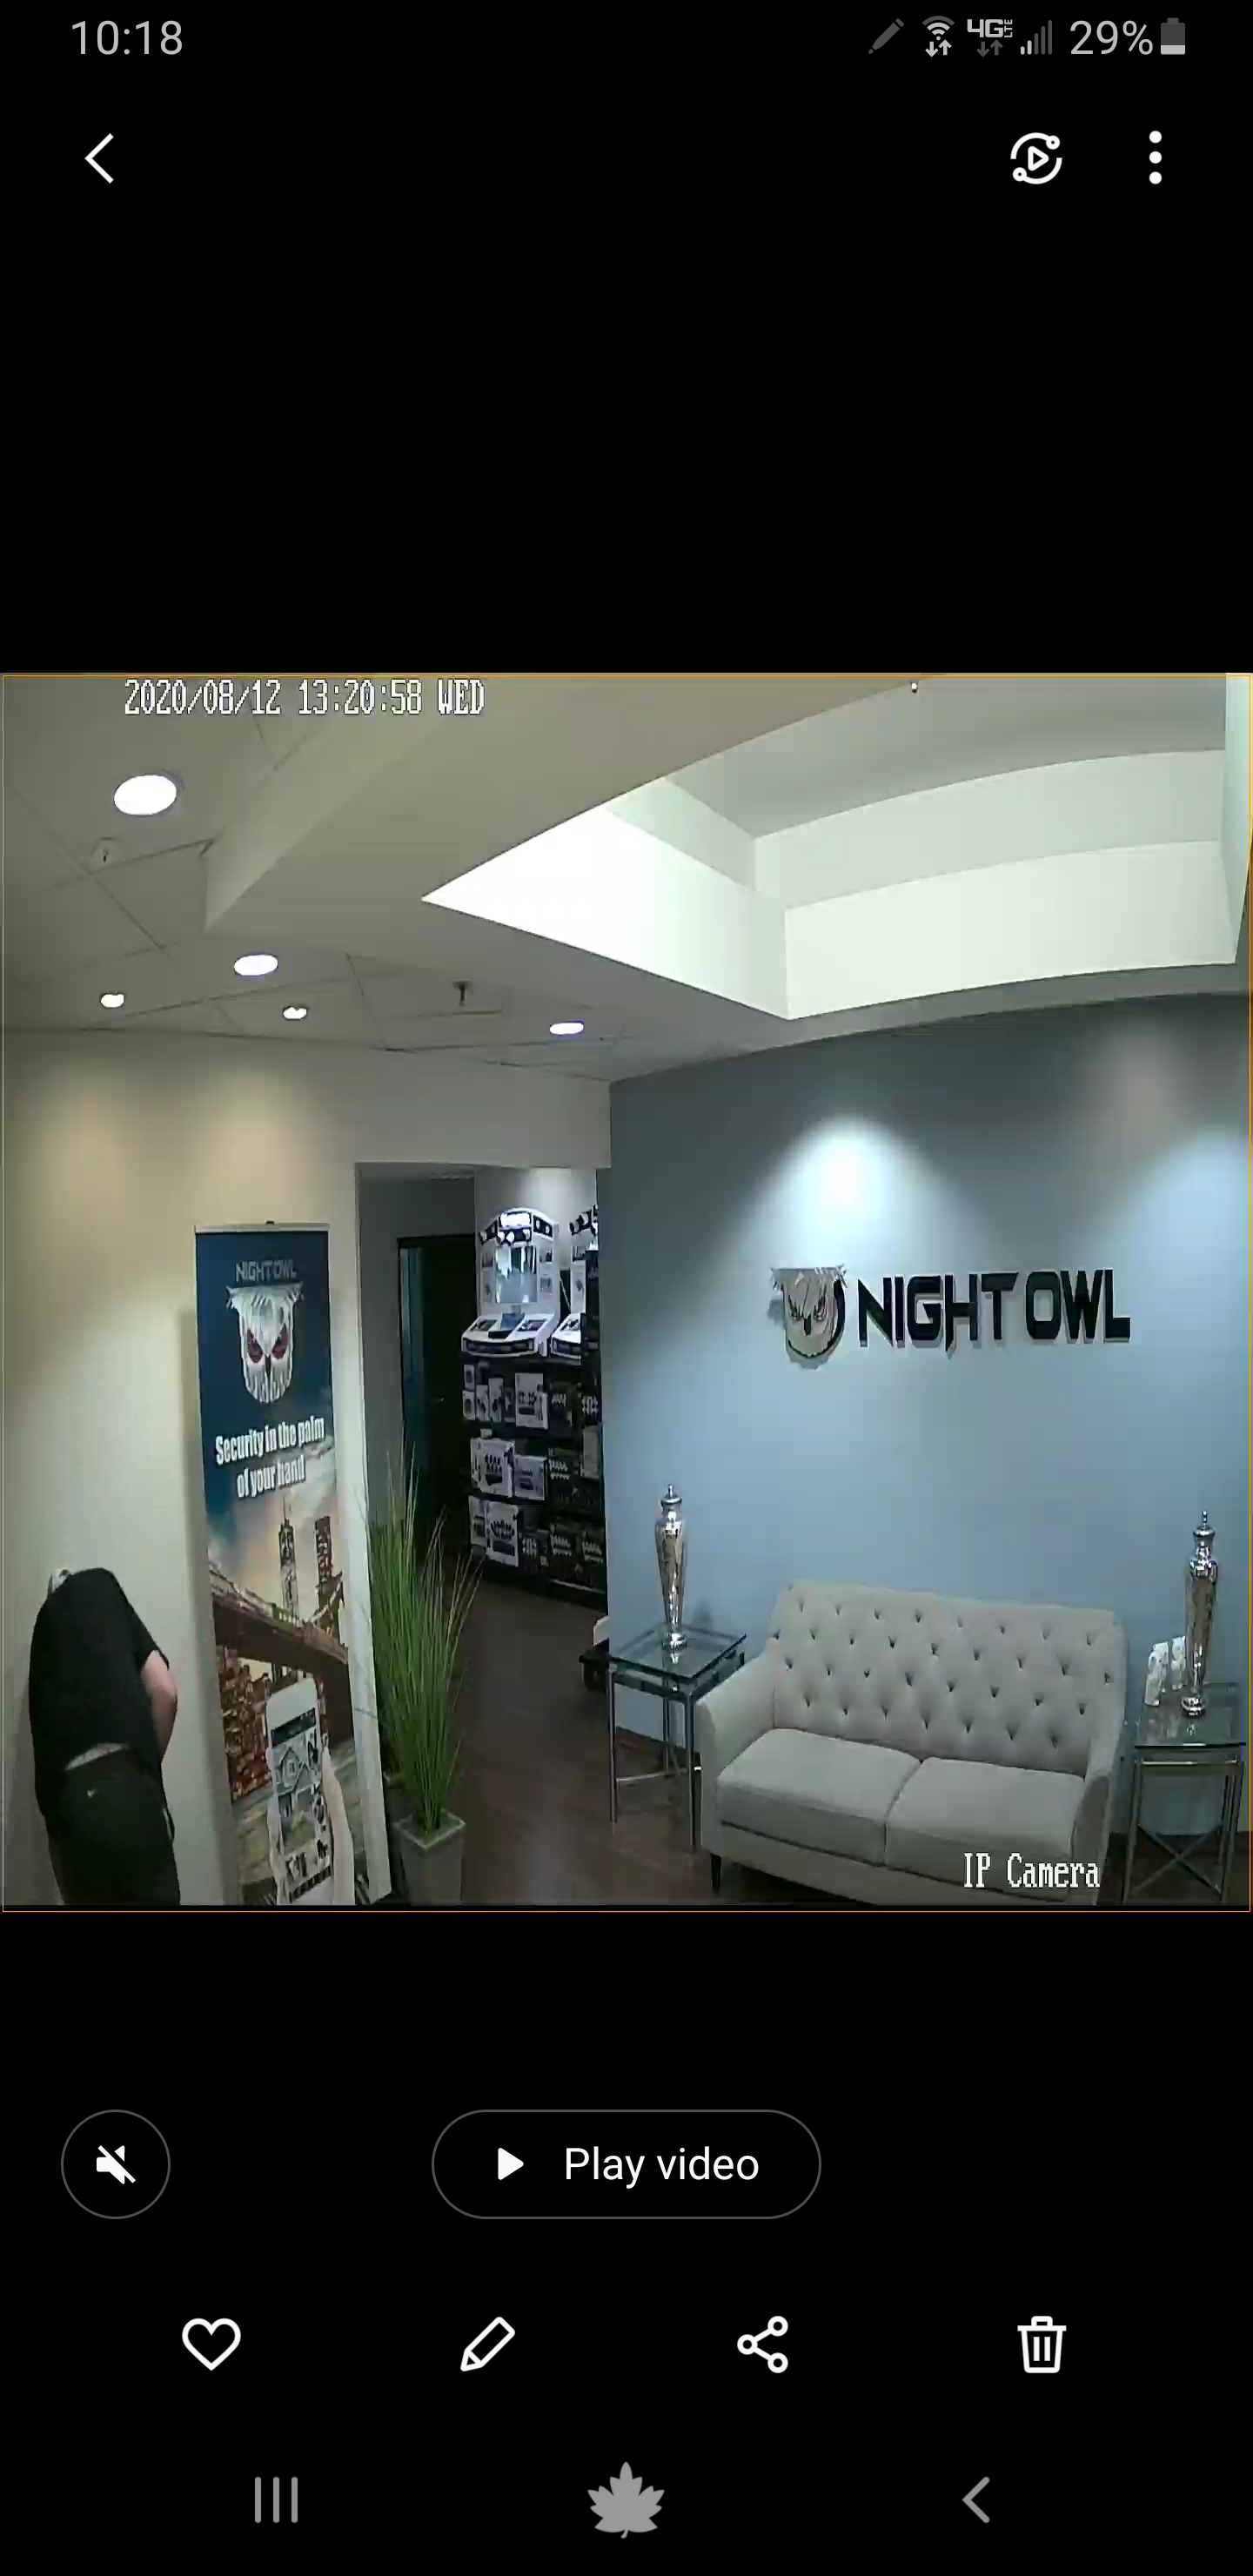
iii. For System Kits
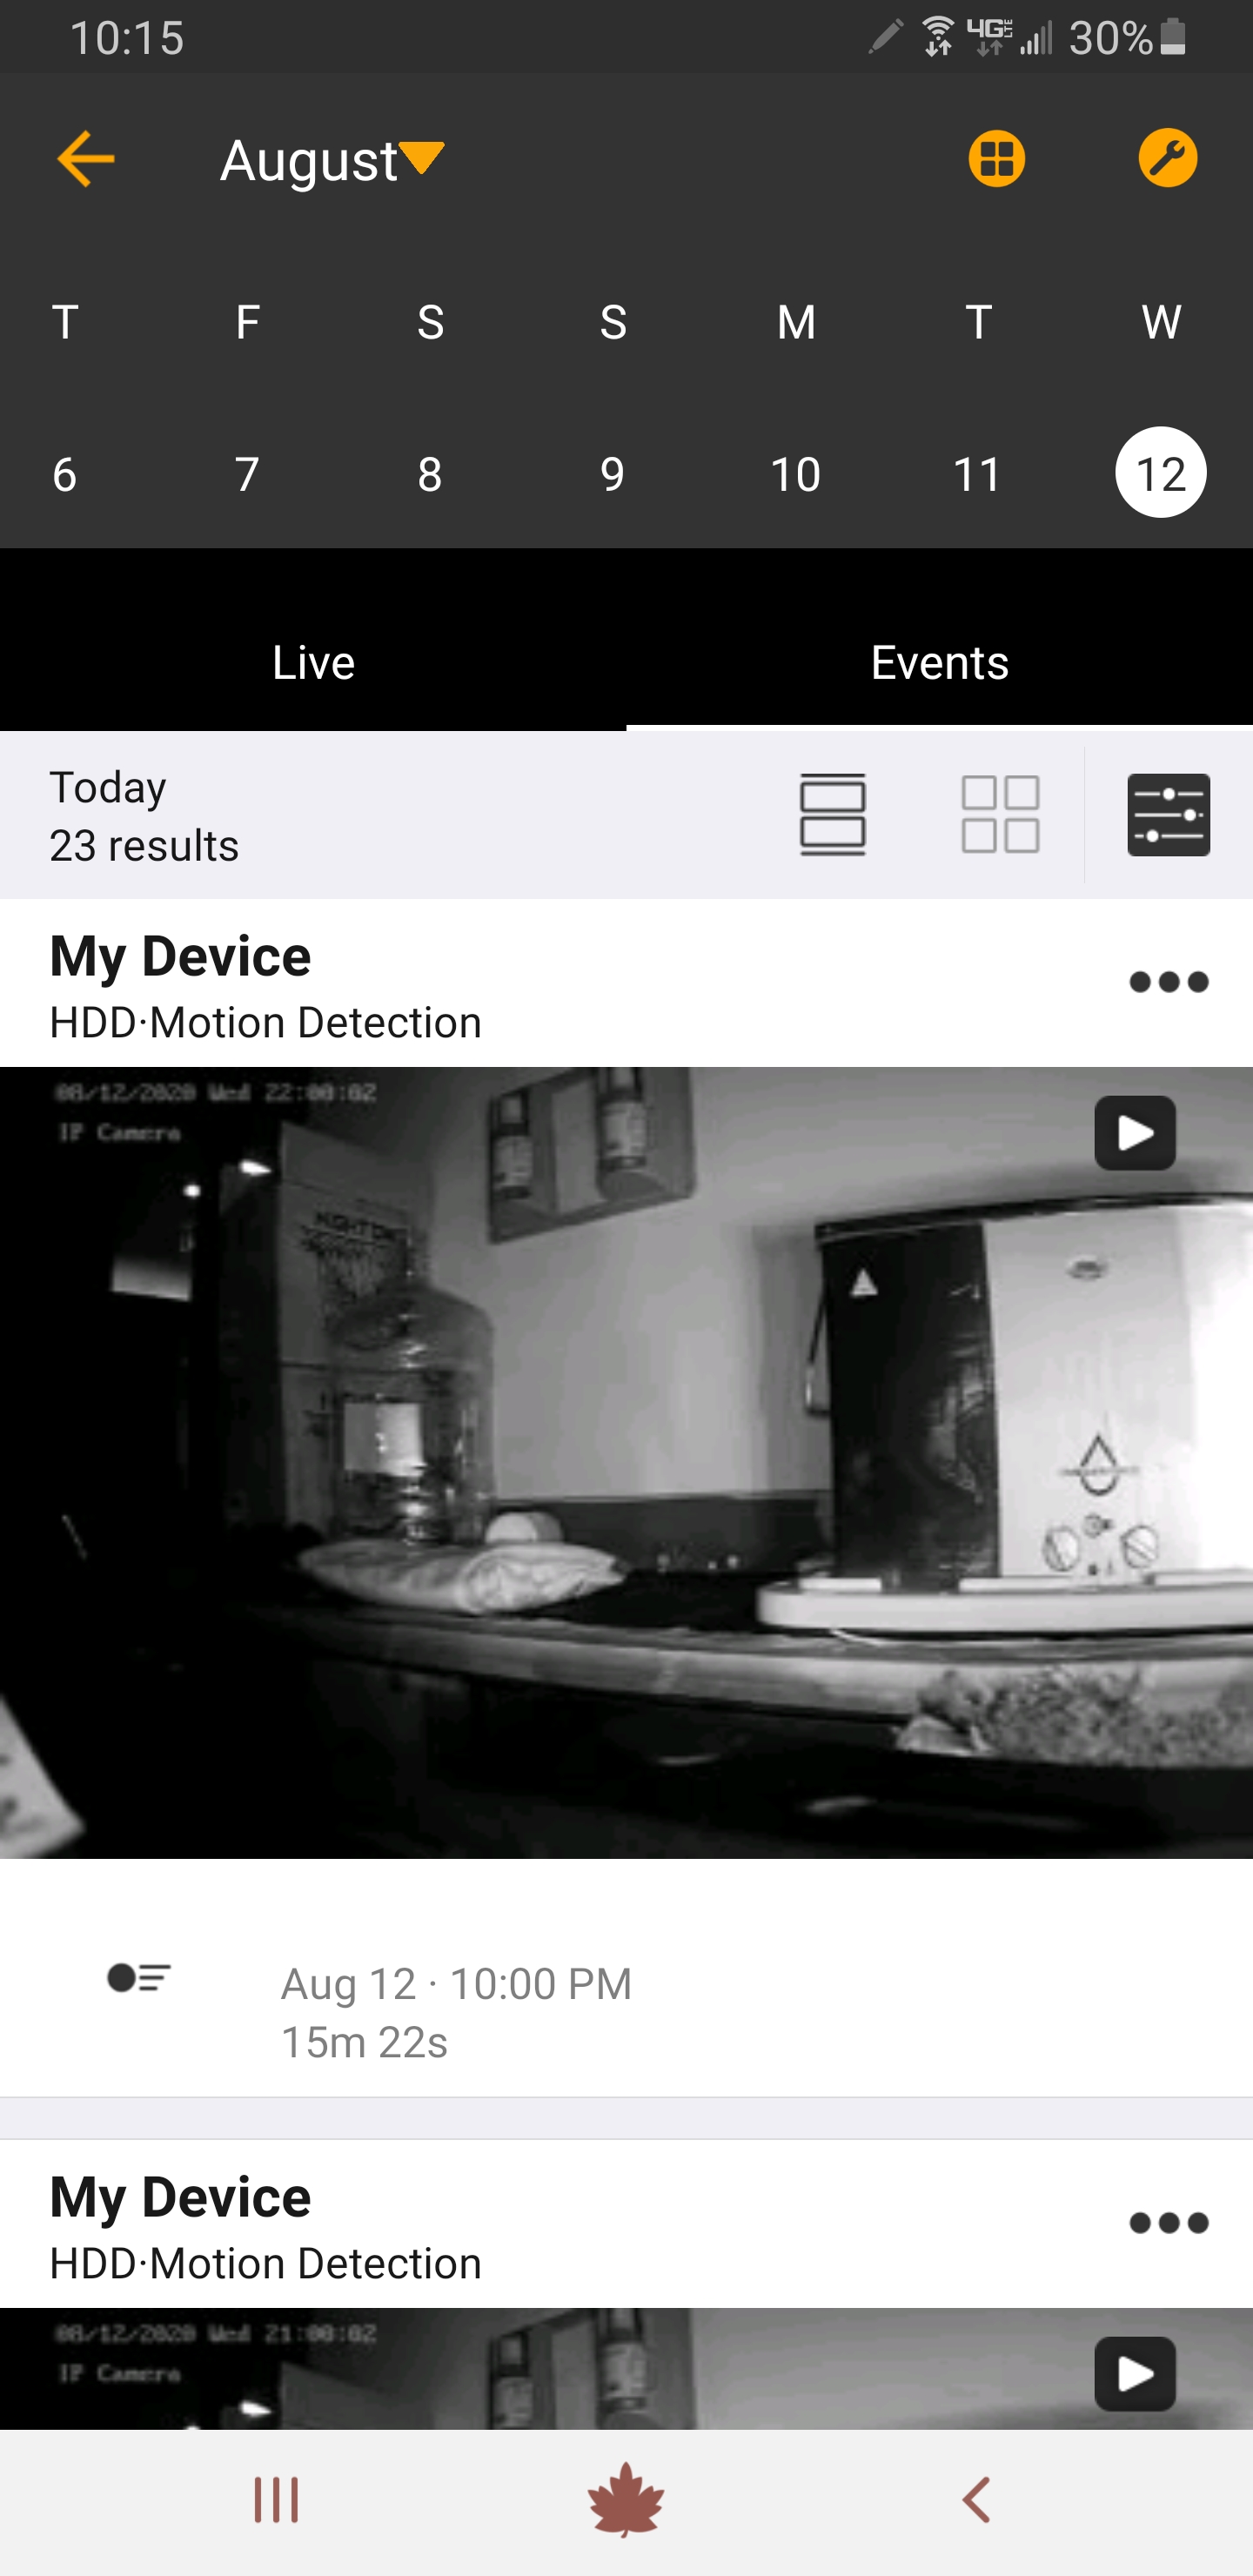
a. Tap “Events” from the live view screen.
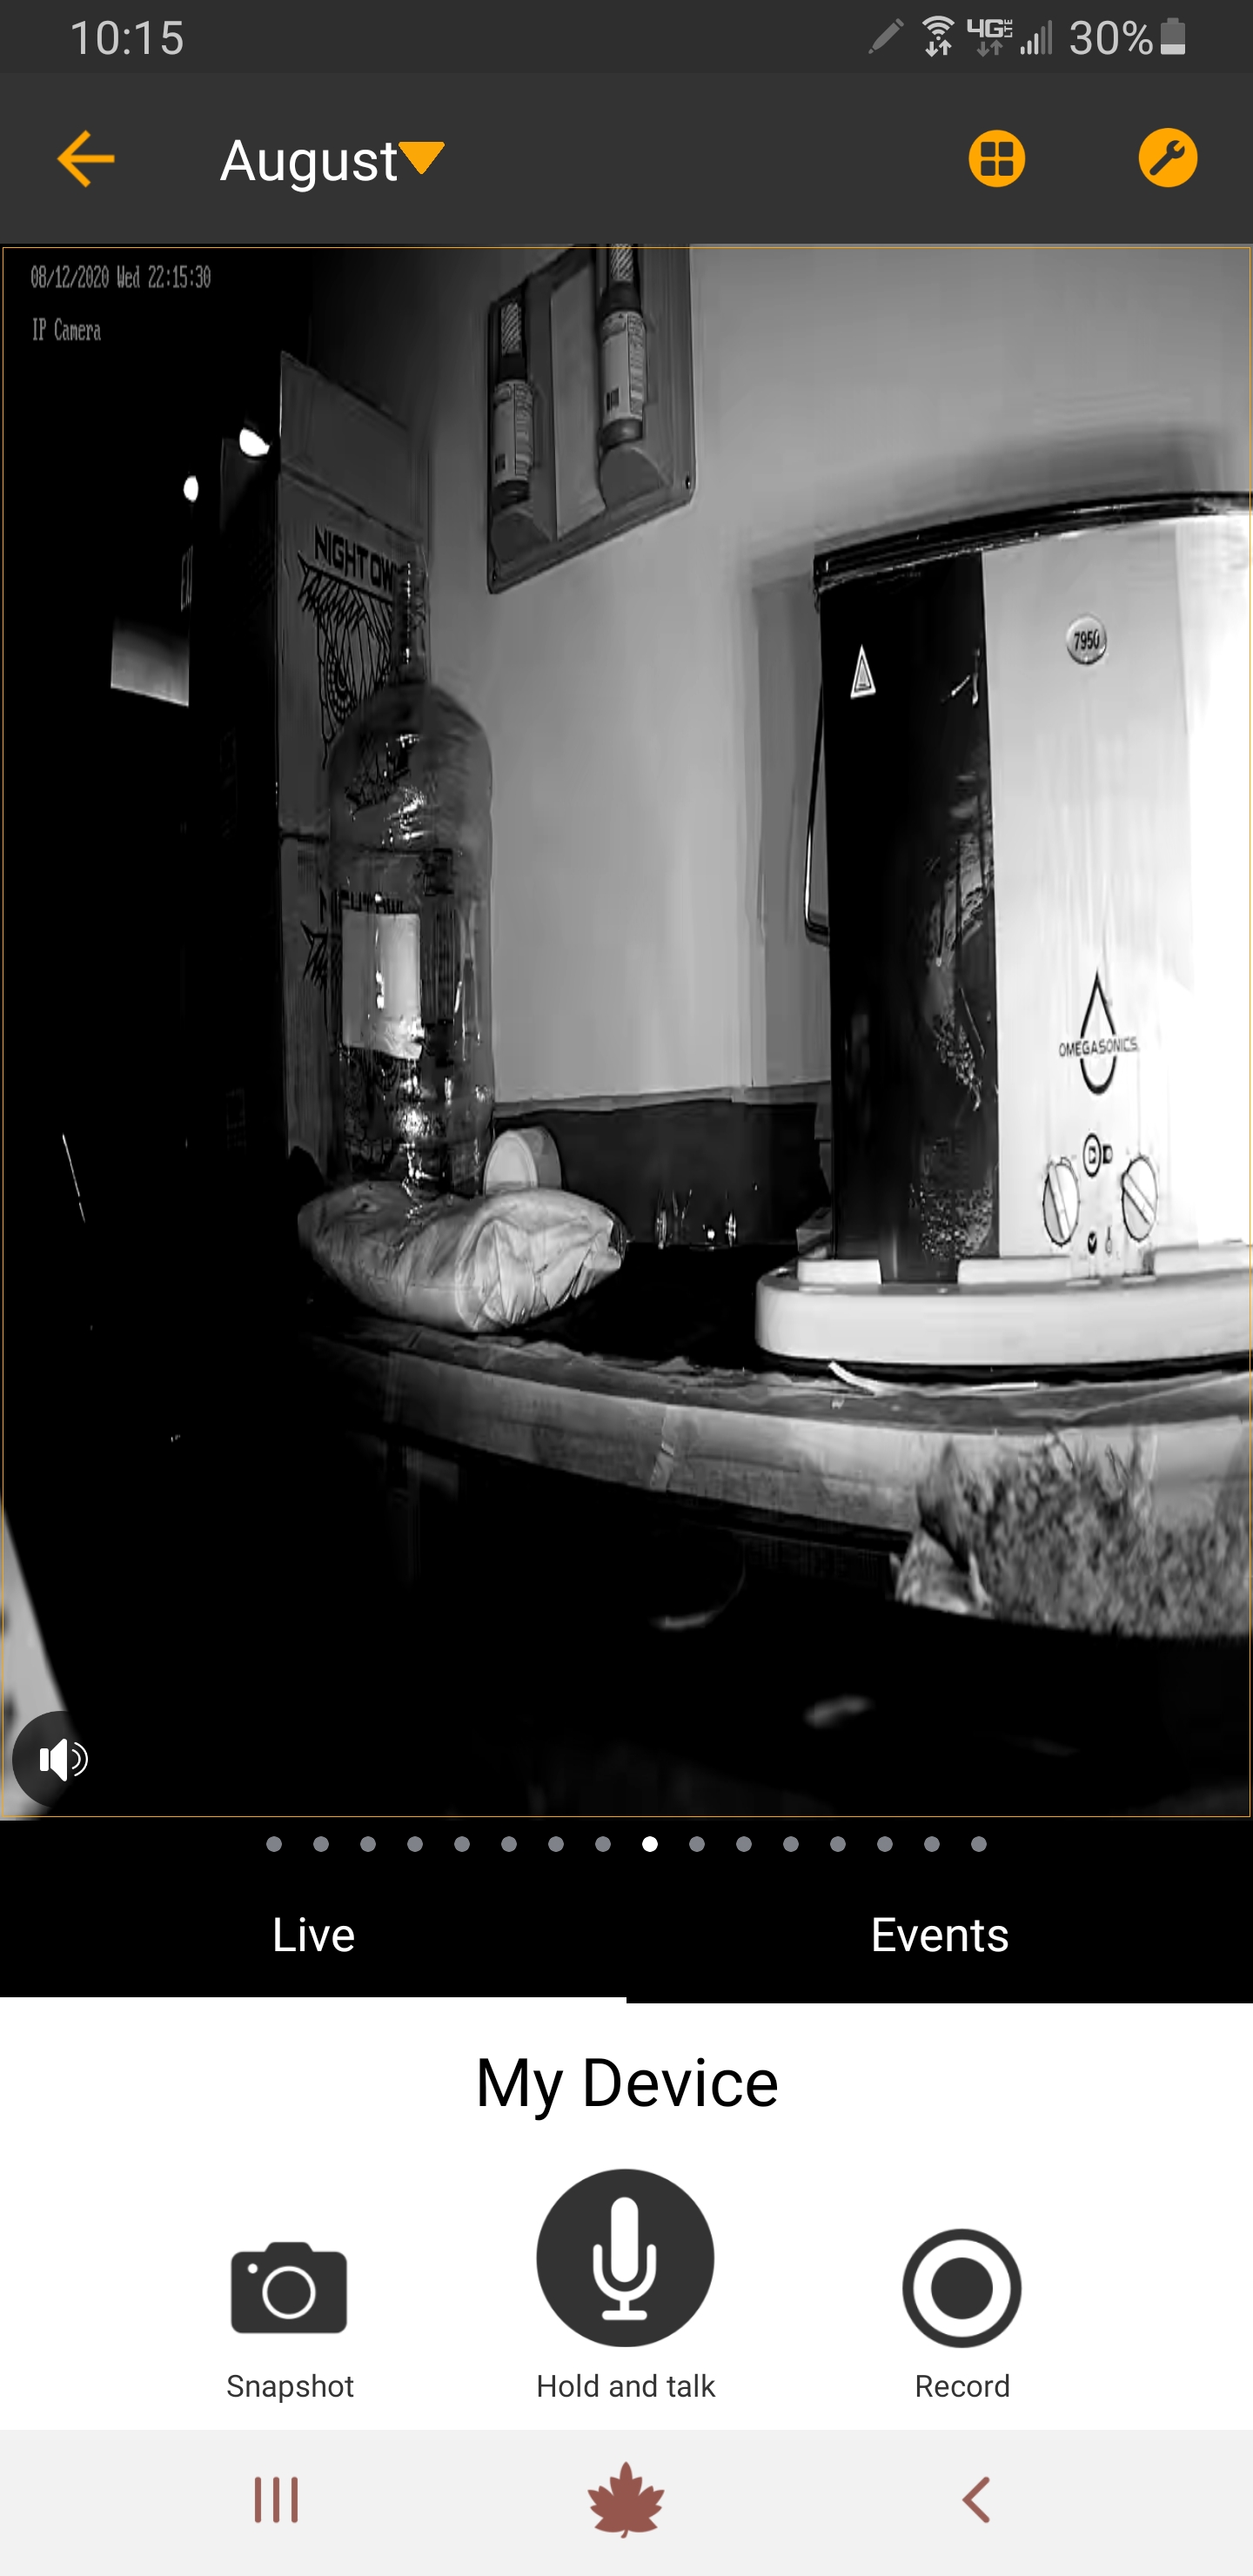
b. Use the scrollable calendar at the top of the screen to pick the date you want to playback recordings. Recordings found for the date you selected will appear.
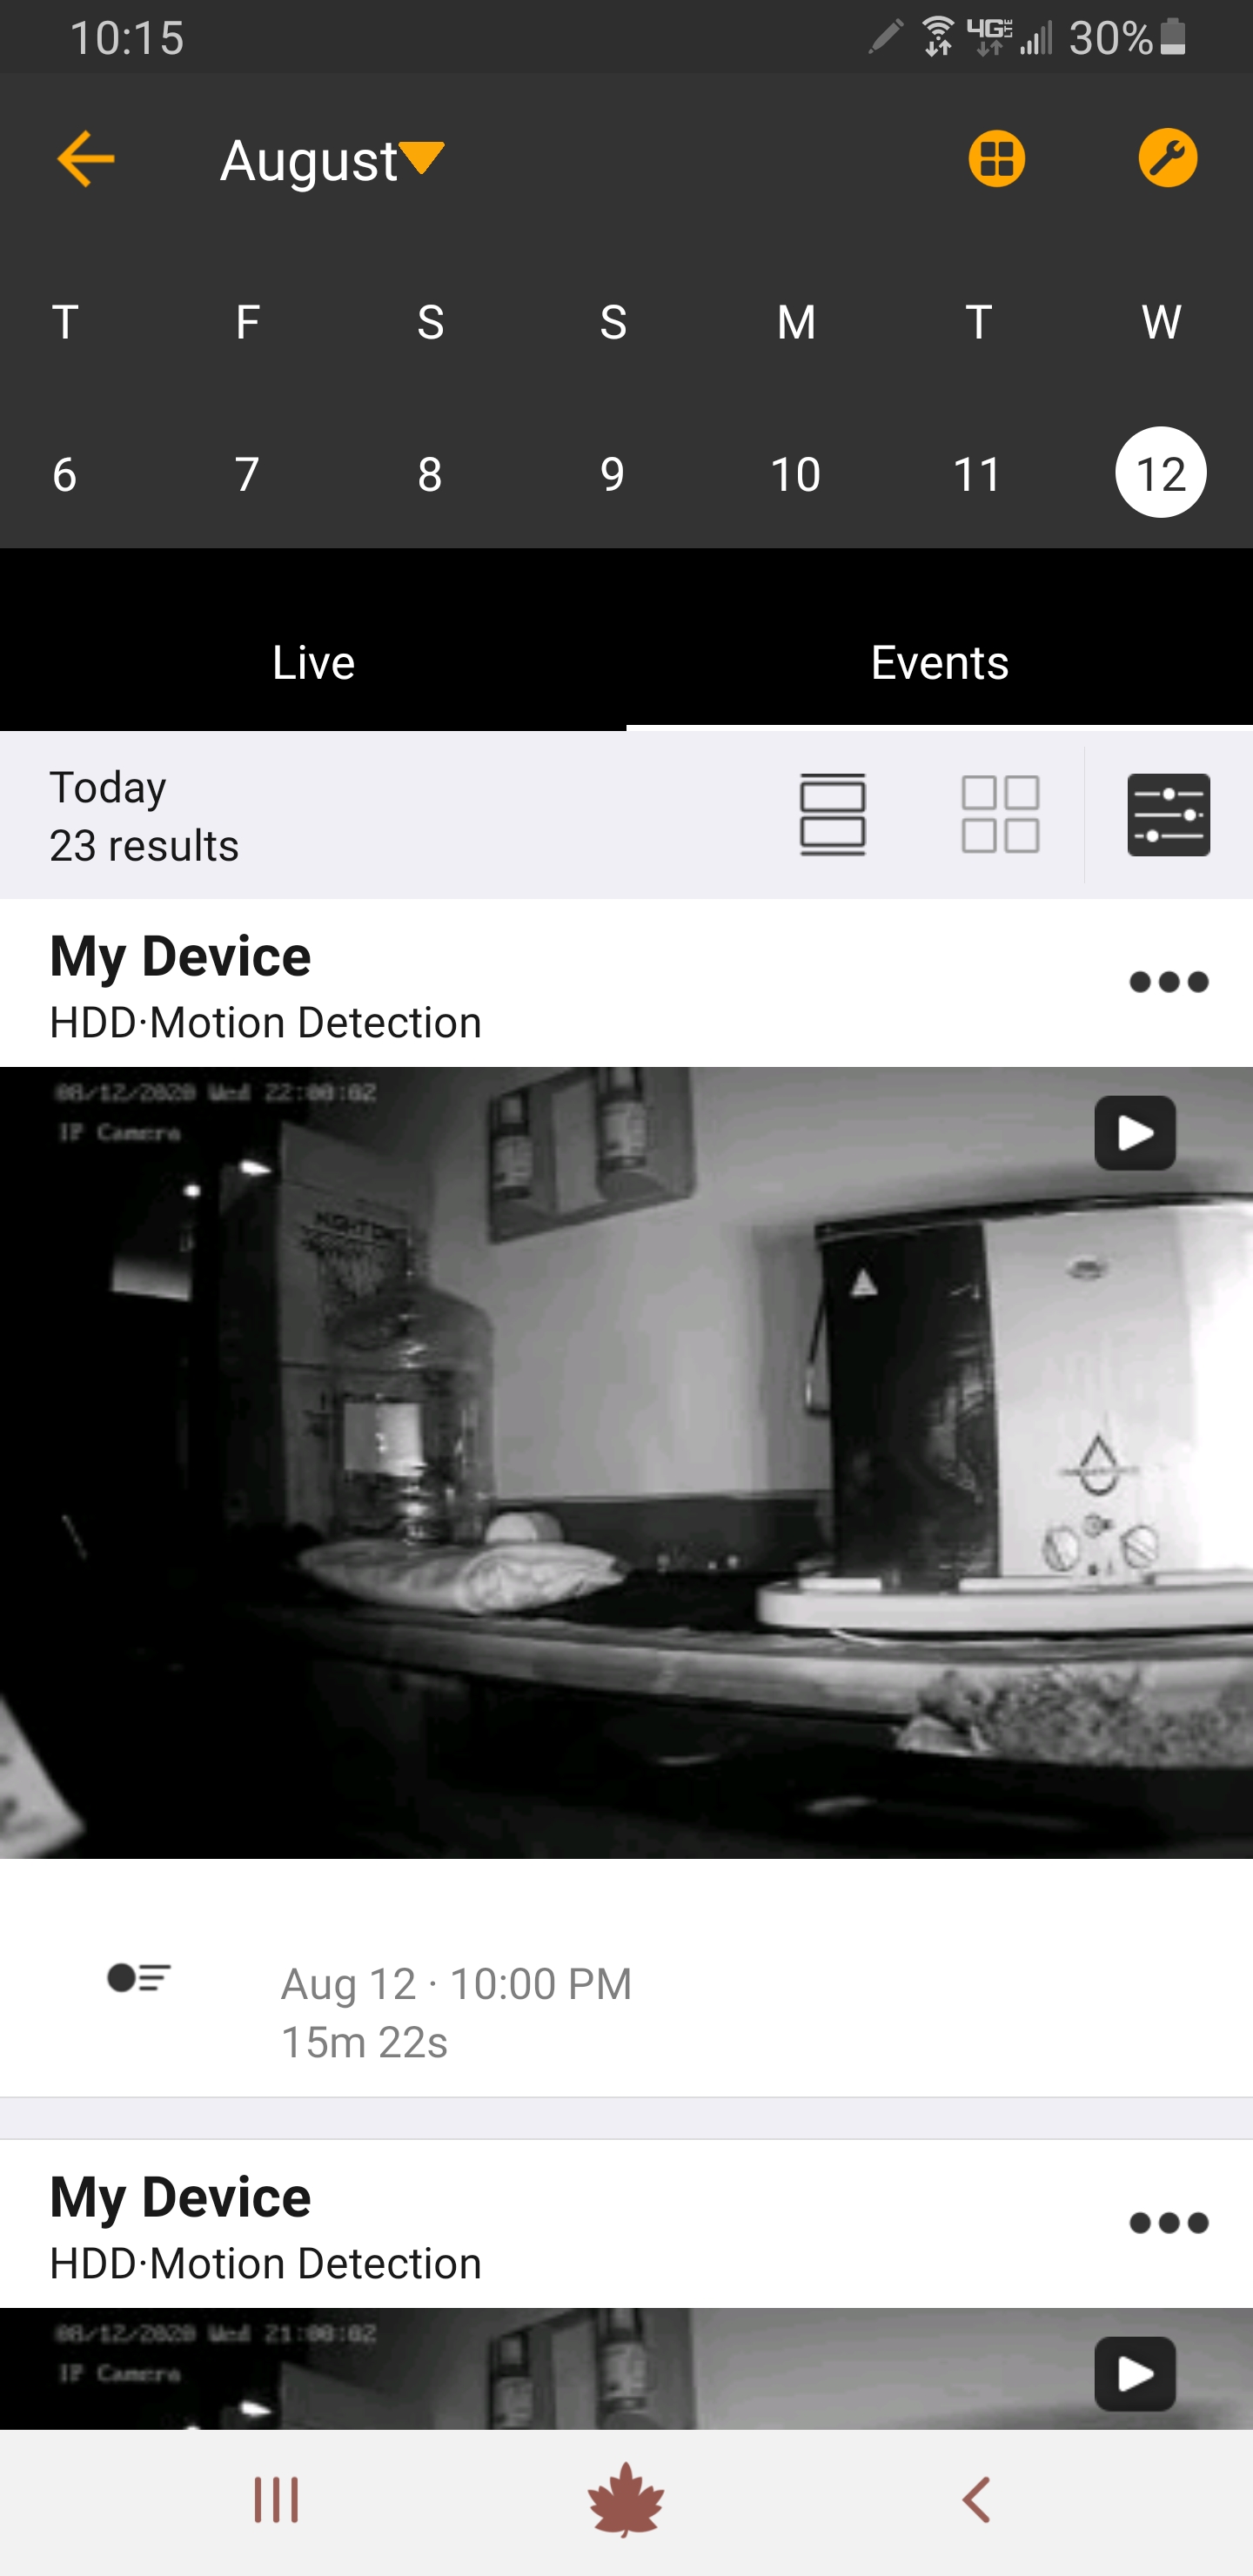
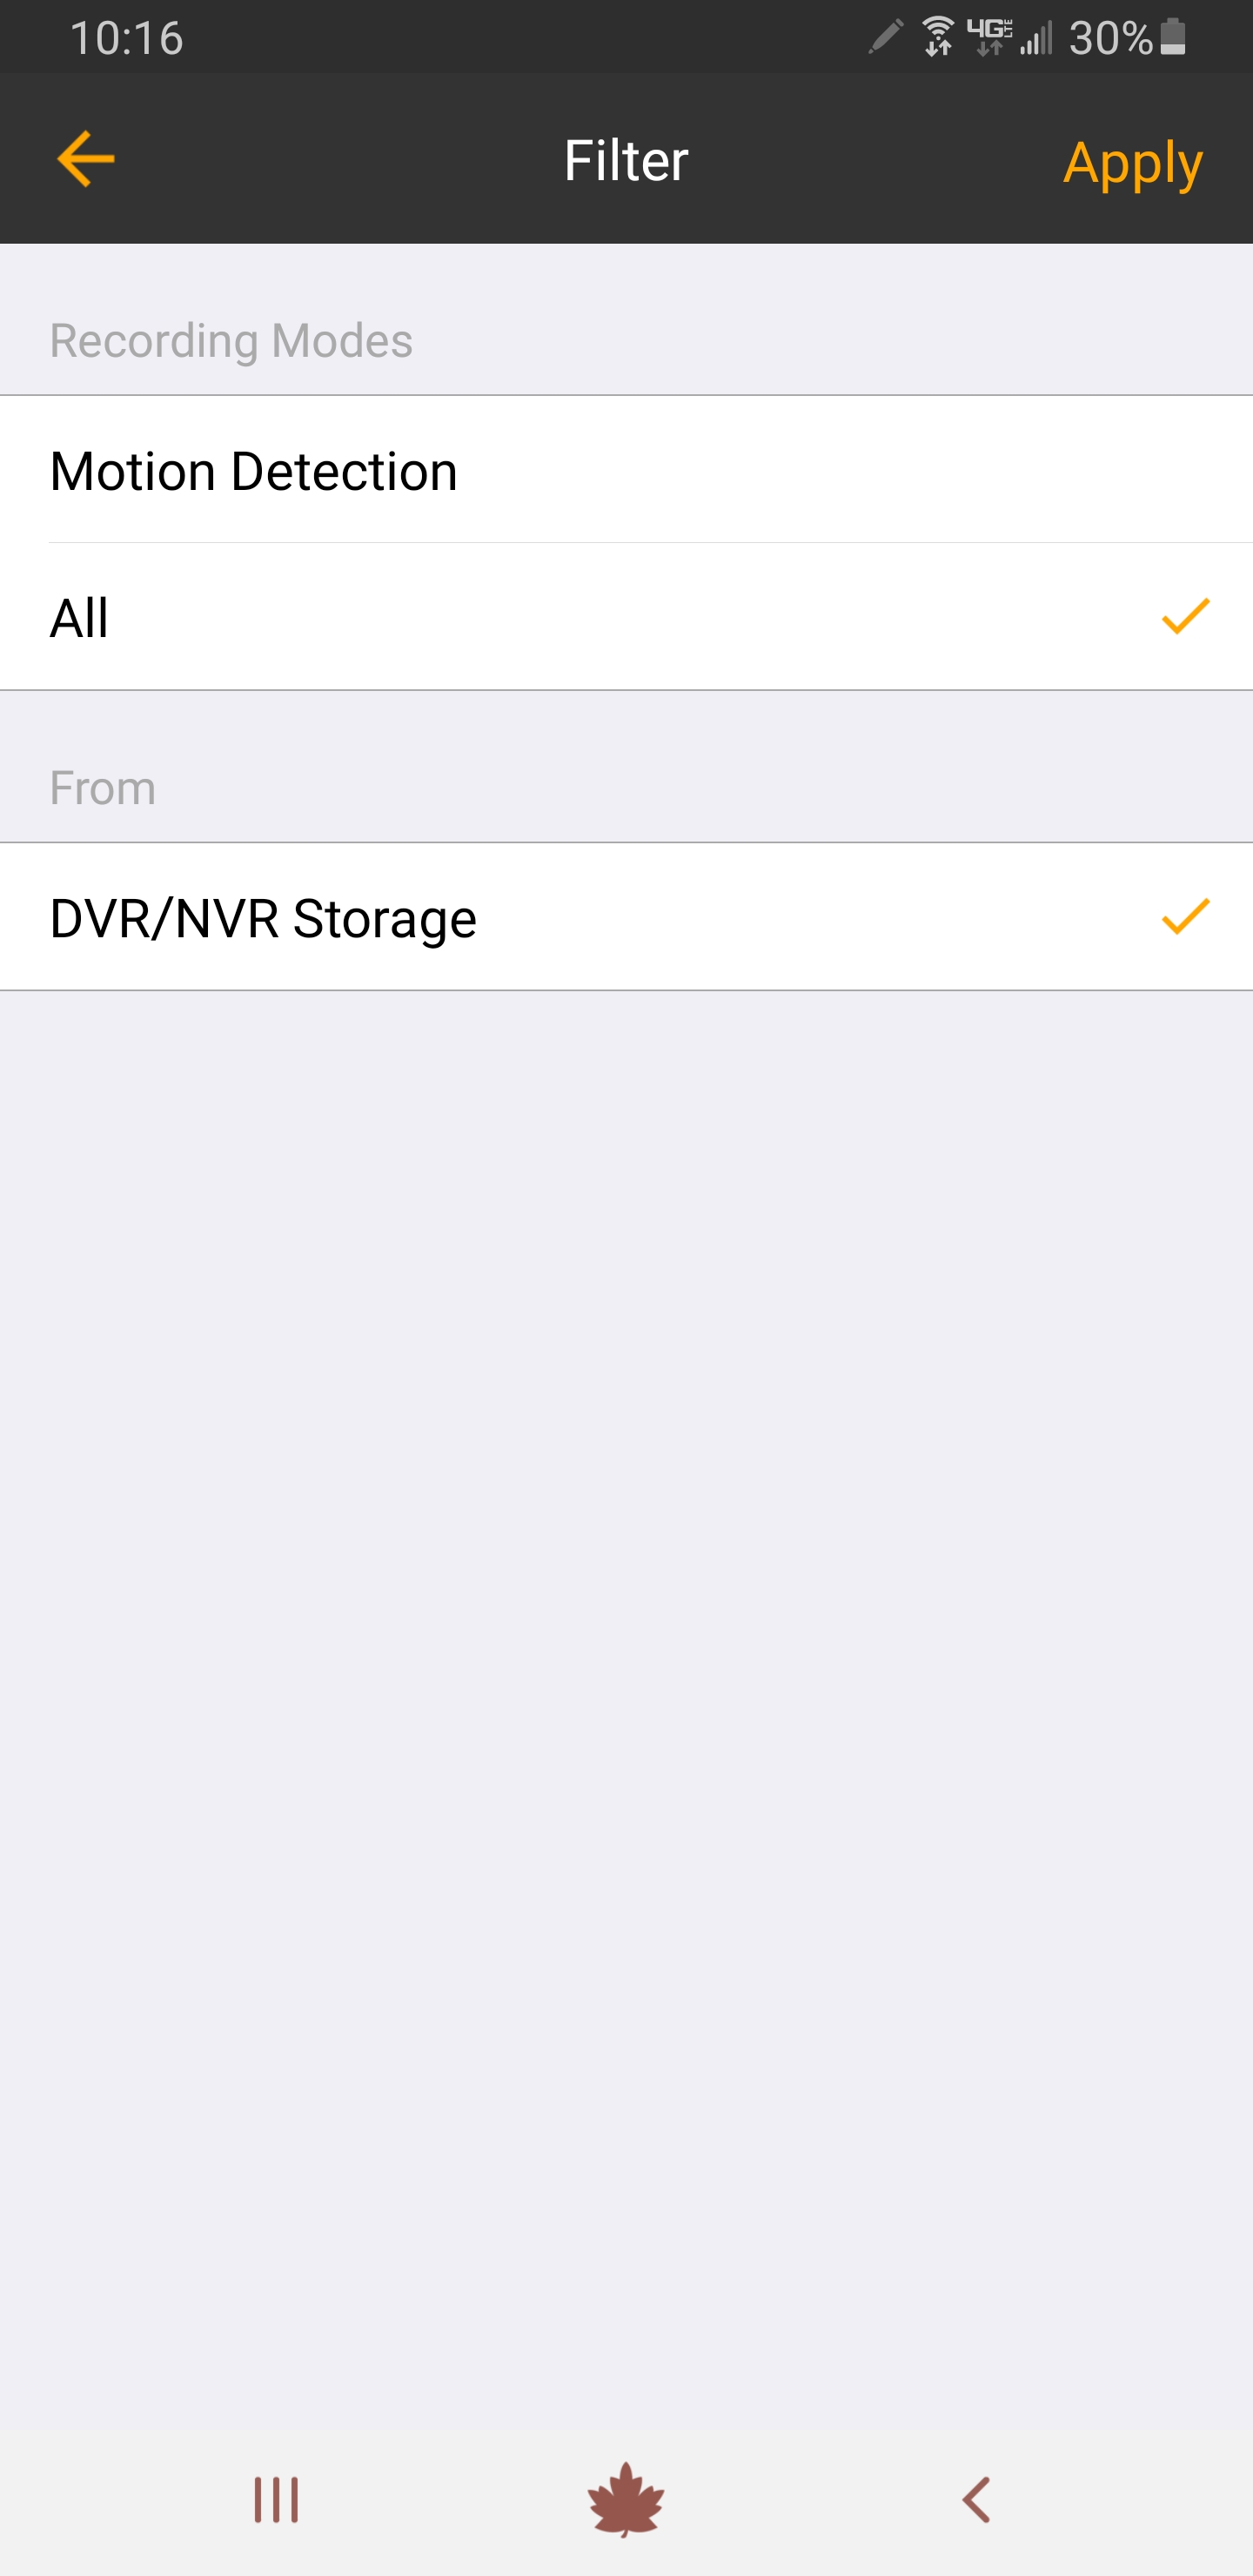
c. Tap on the filter icon to search “All” recordings or narrow it down to just “Motion Detection” recordings.
|
|
Copy and paste the verification code into the Code field.
|
|
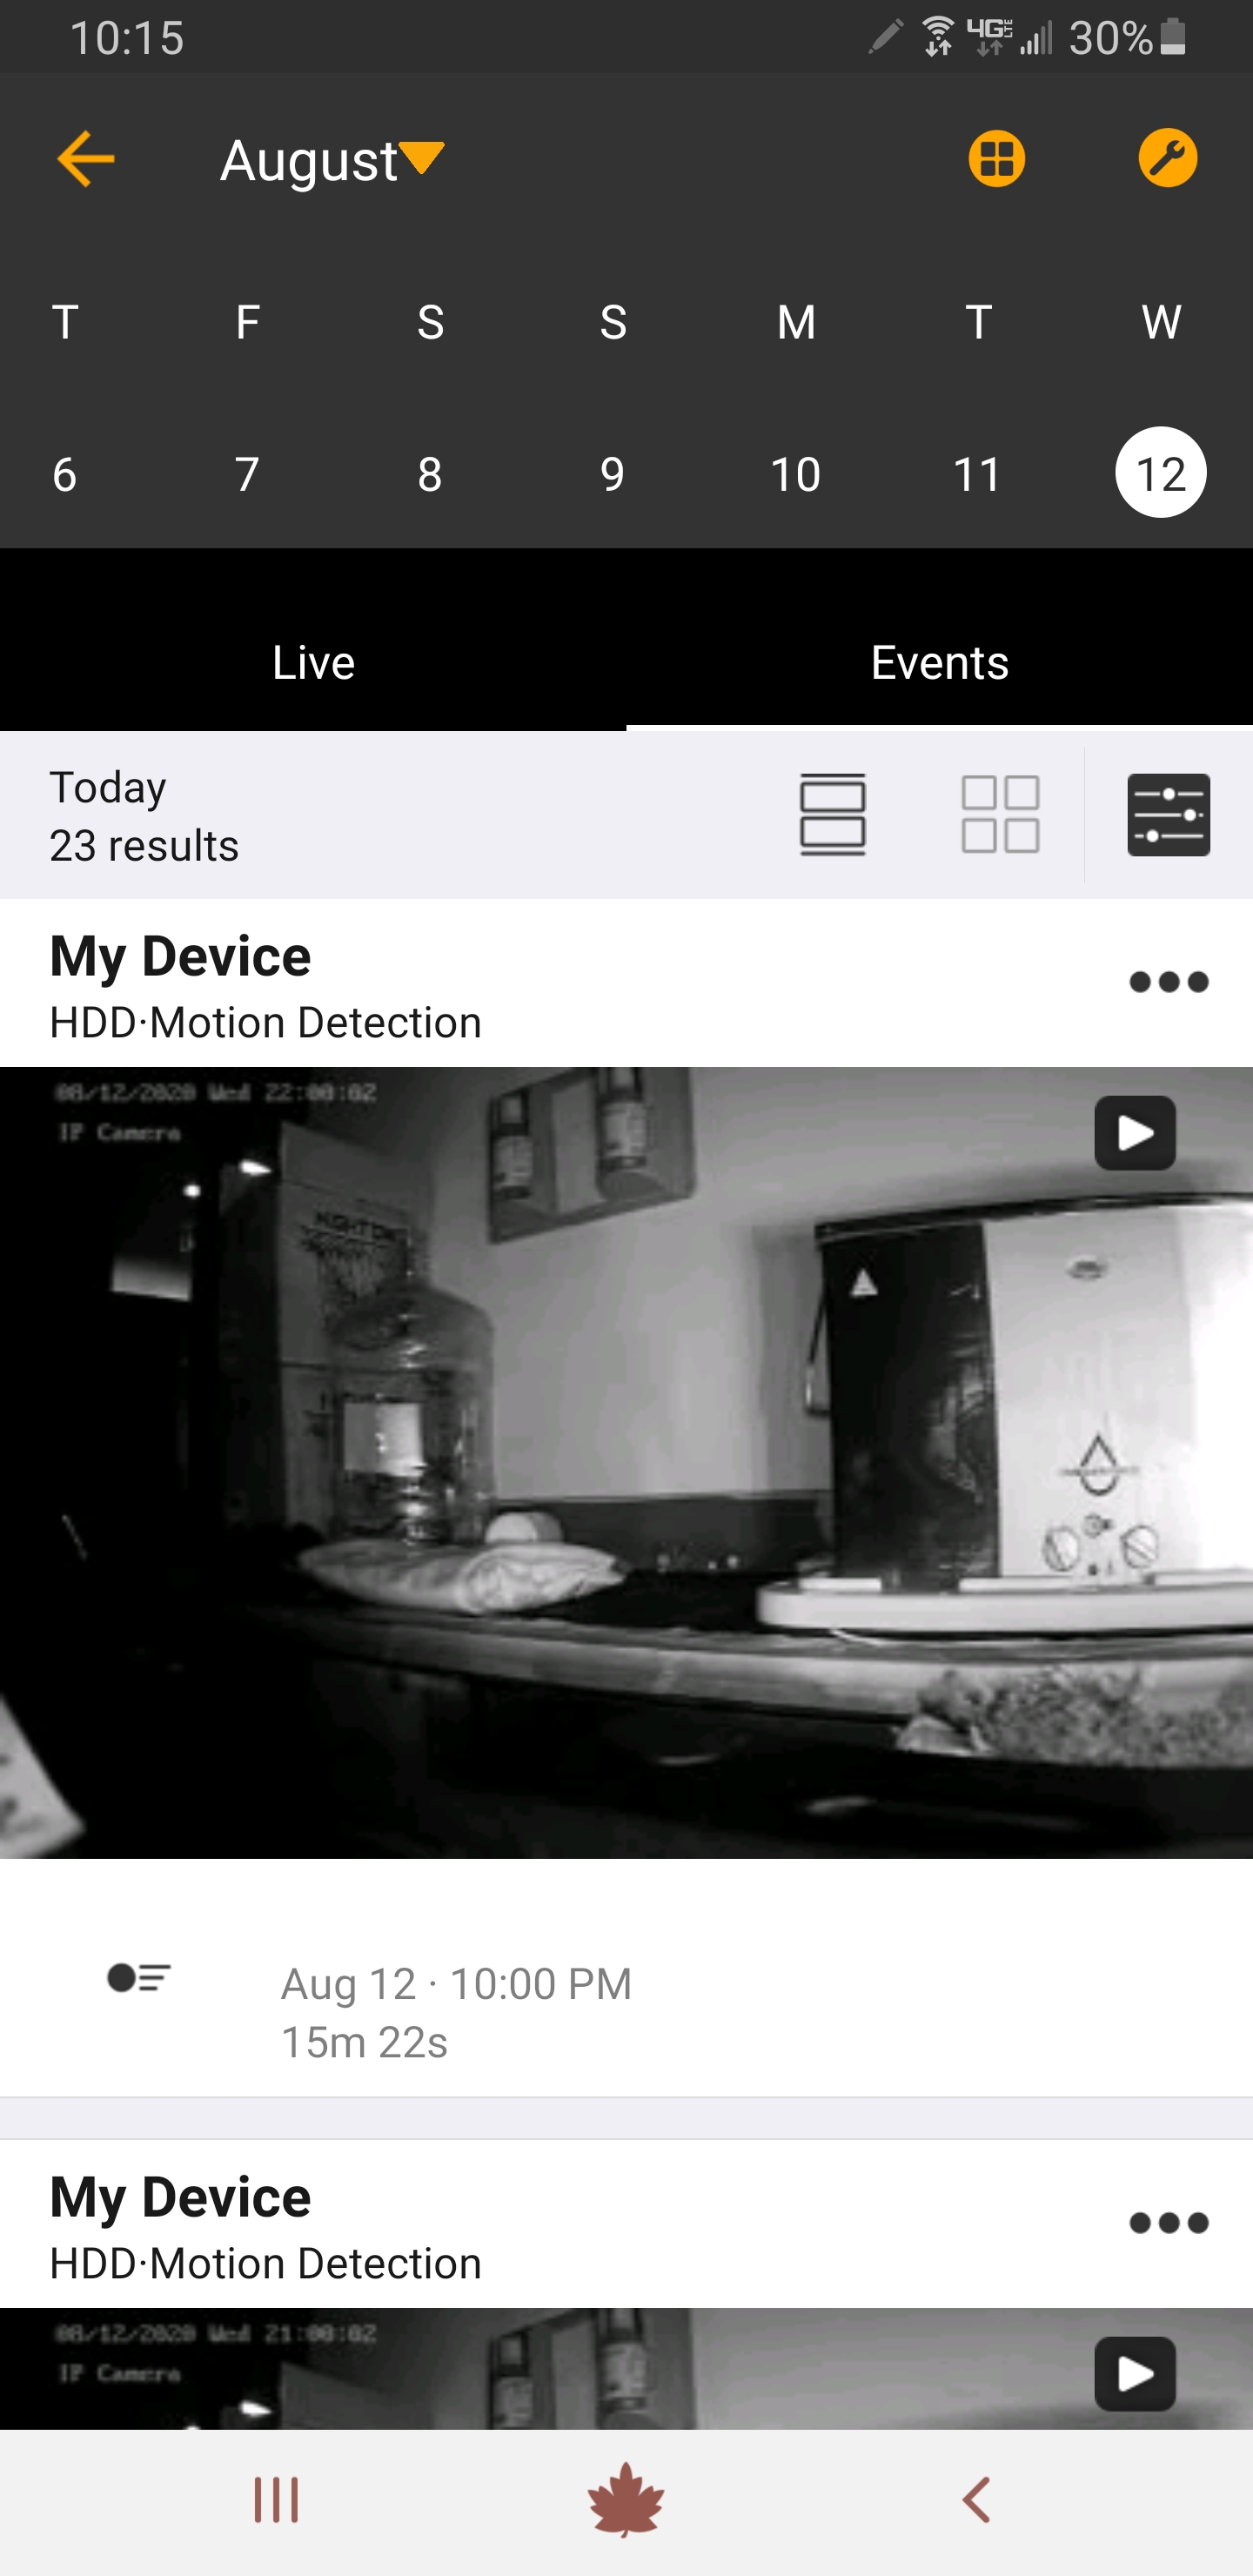
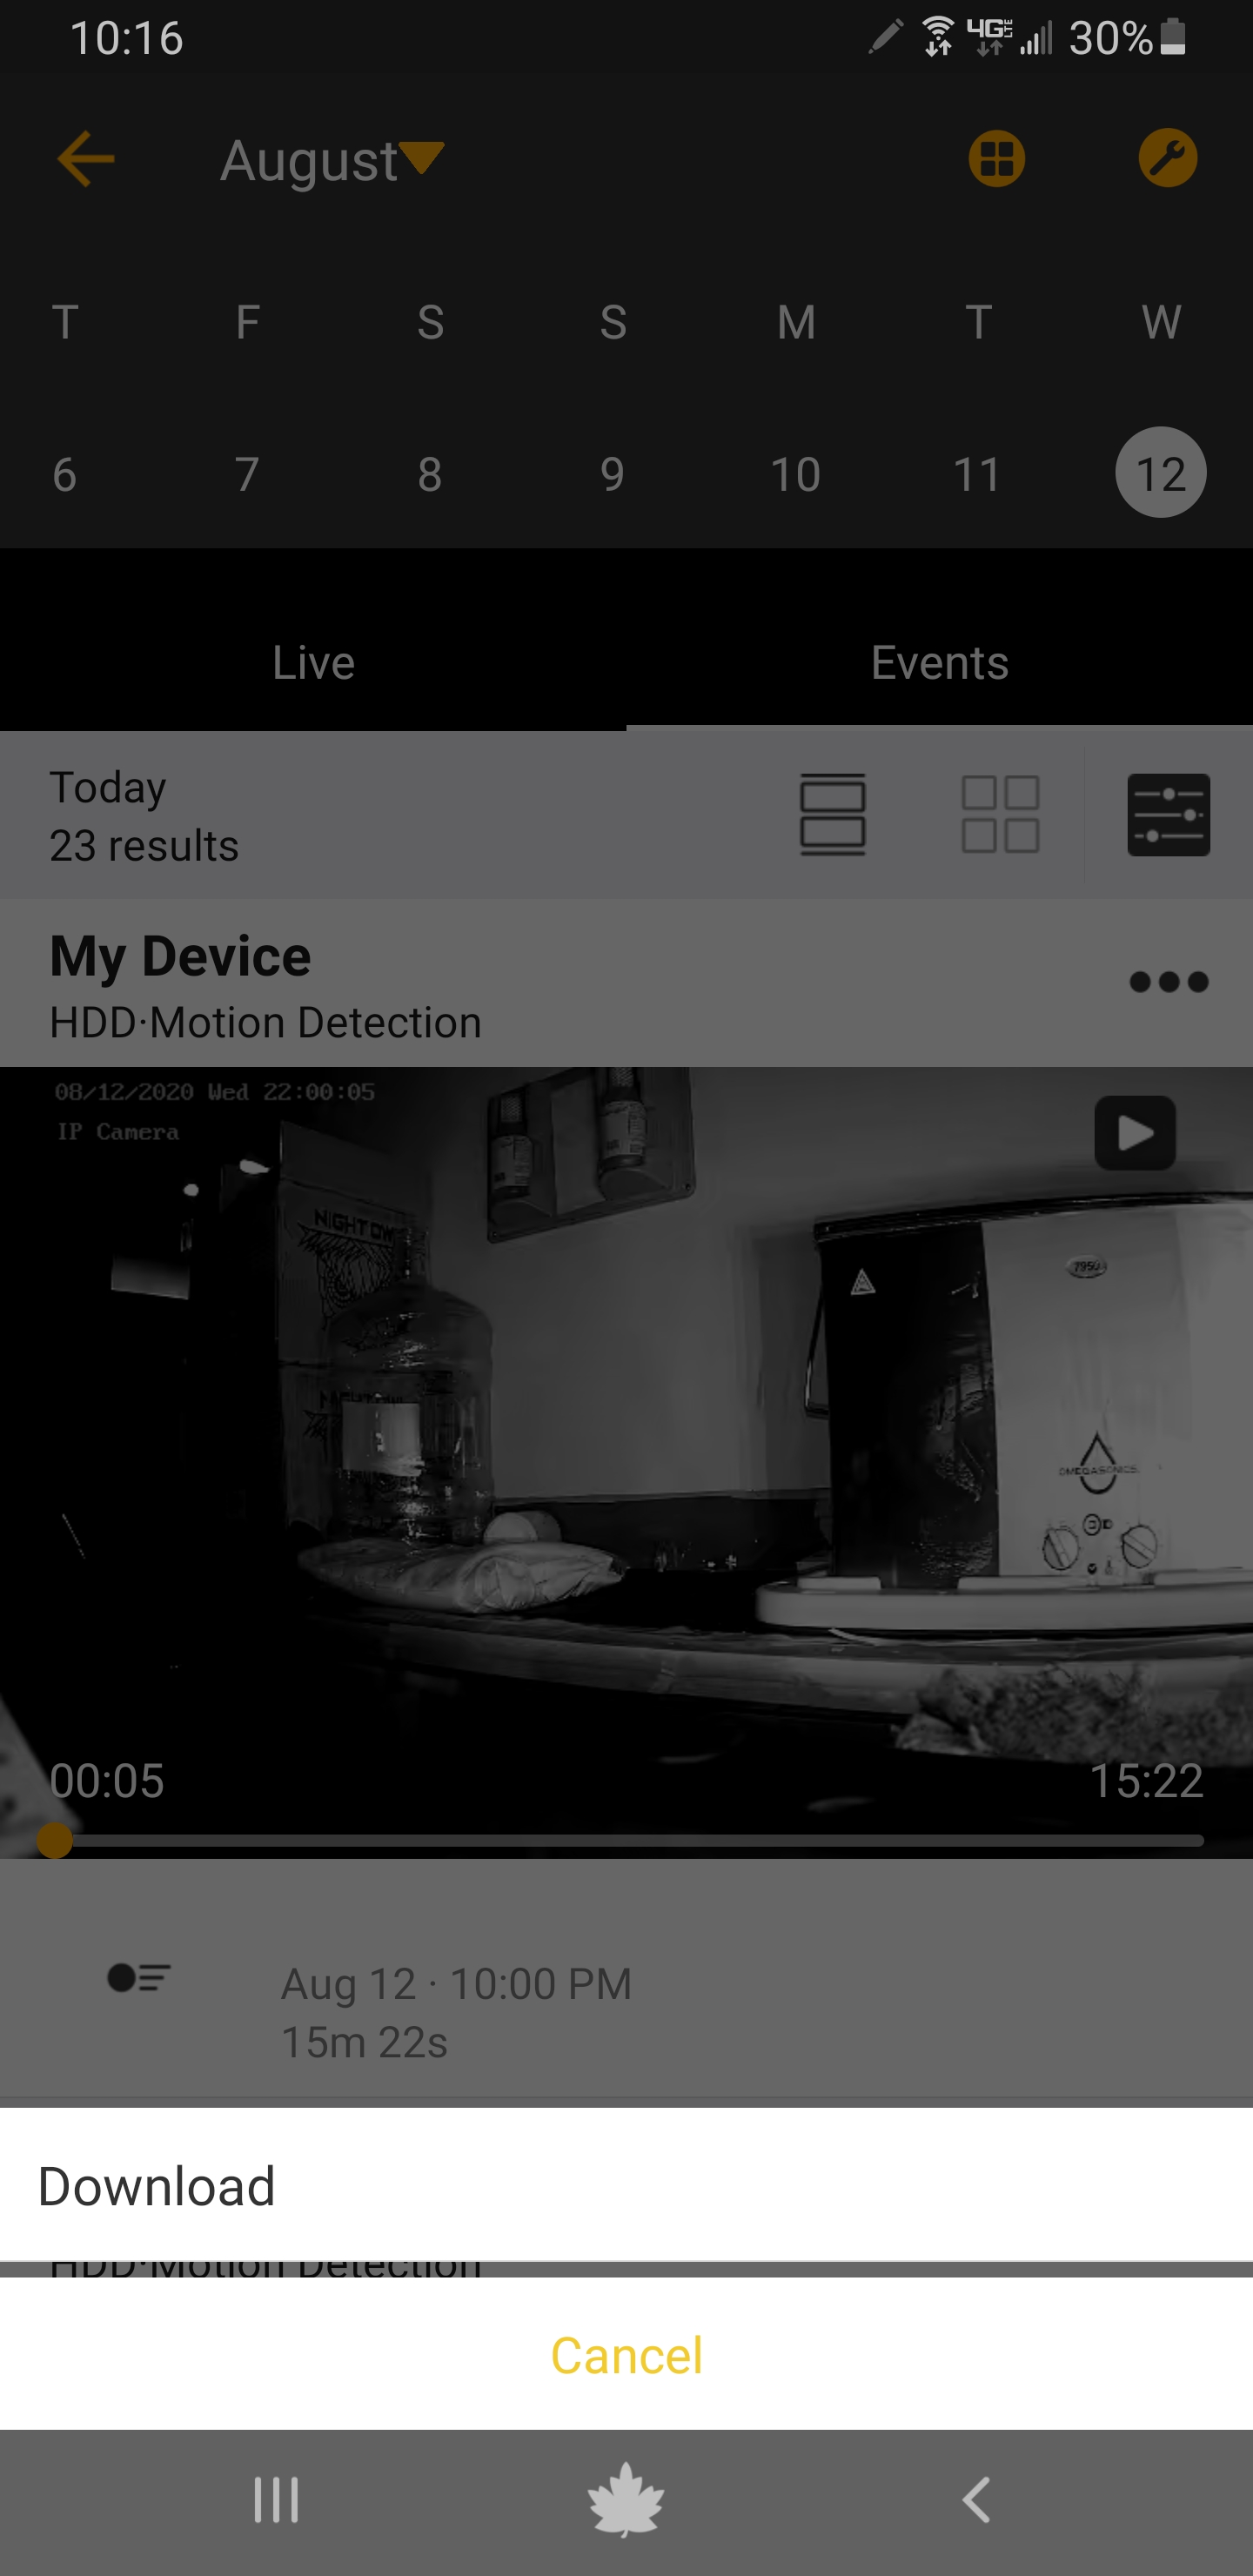
d. Tap the Play button to begin playing the recording.
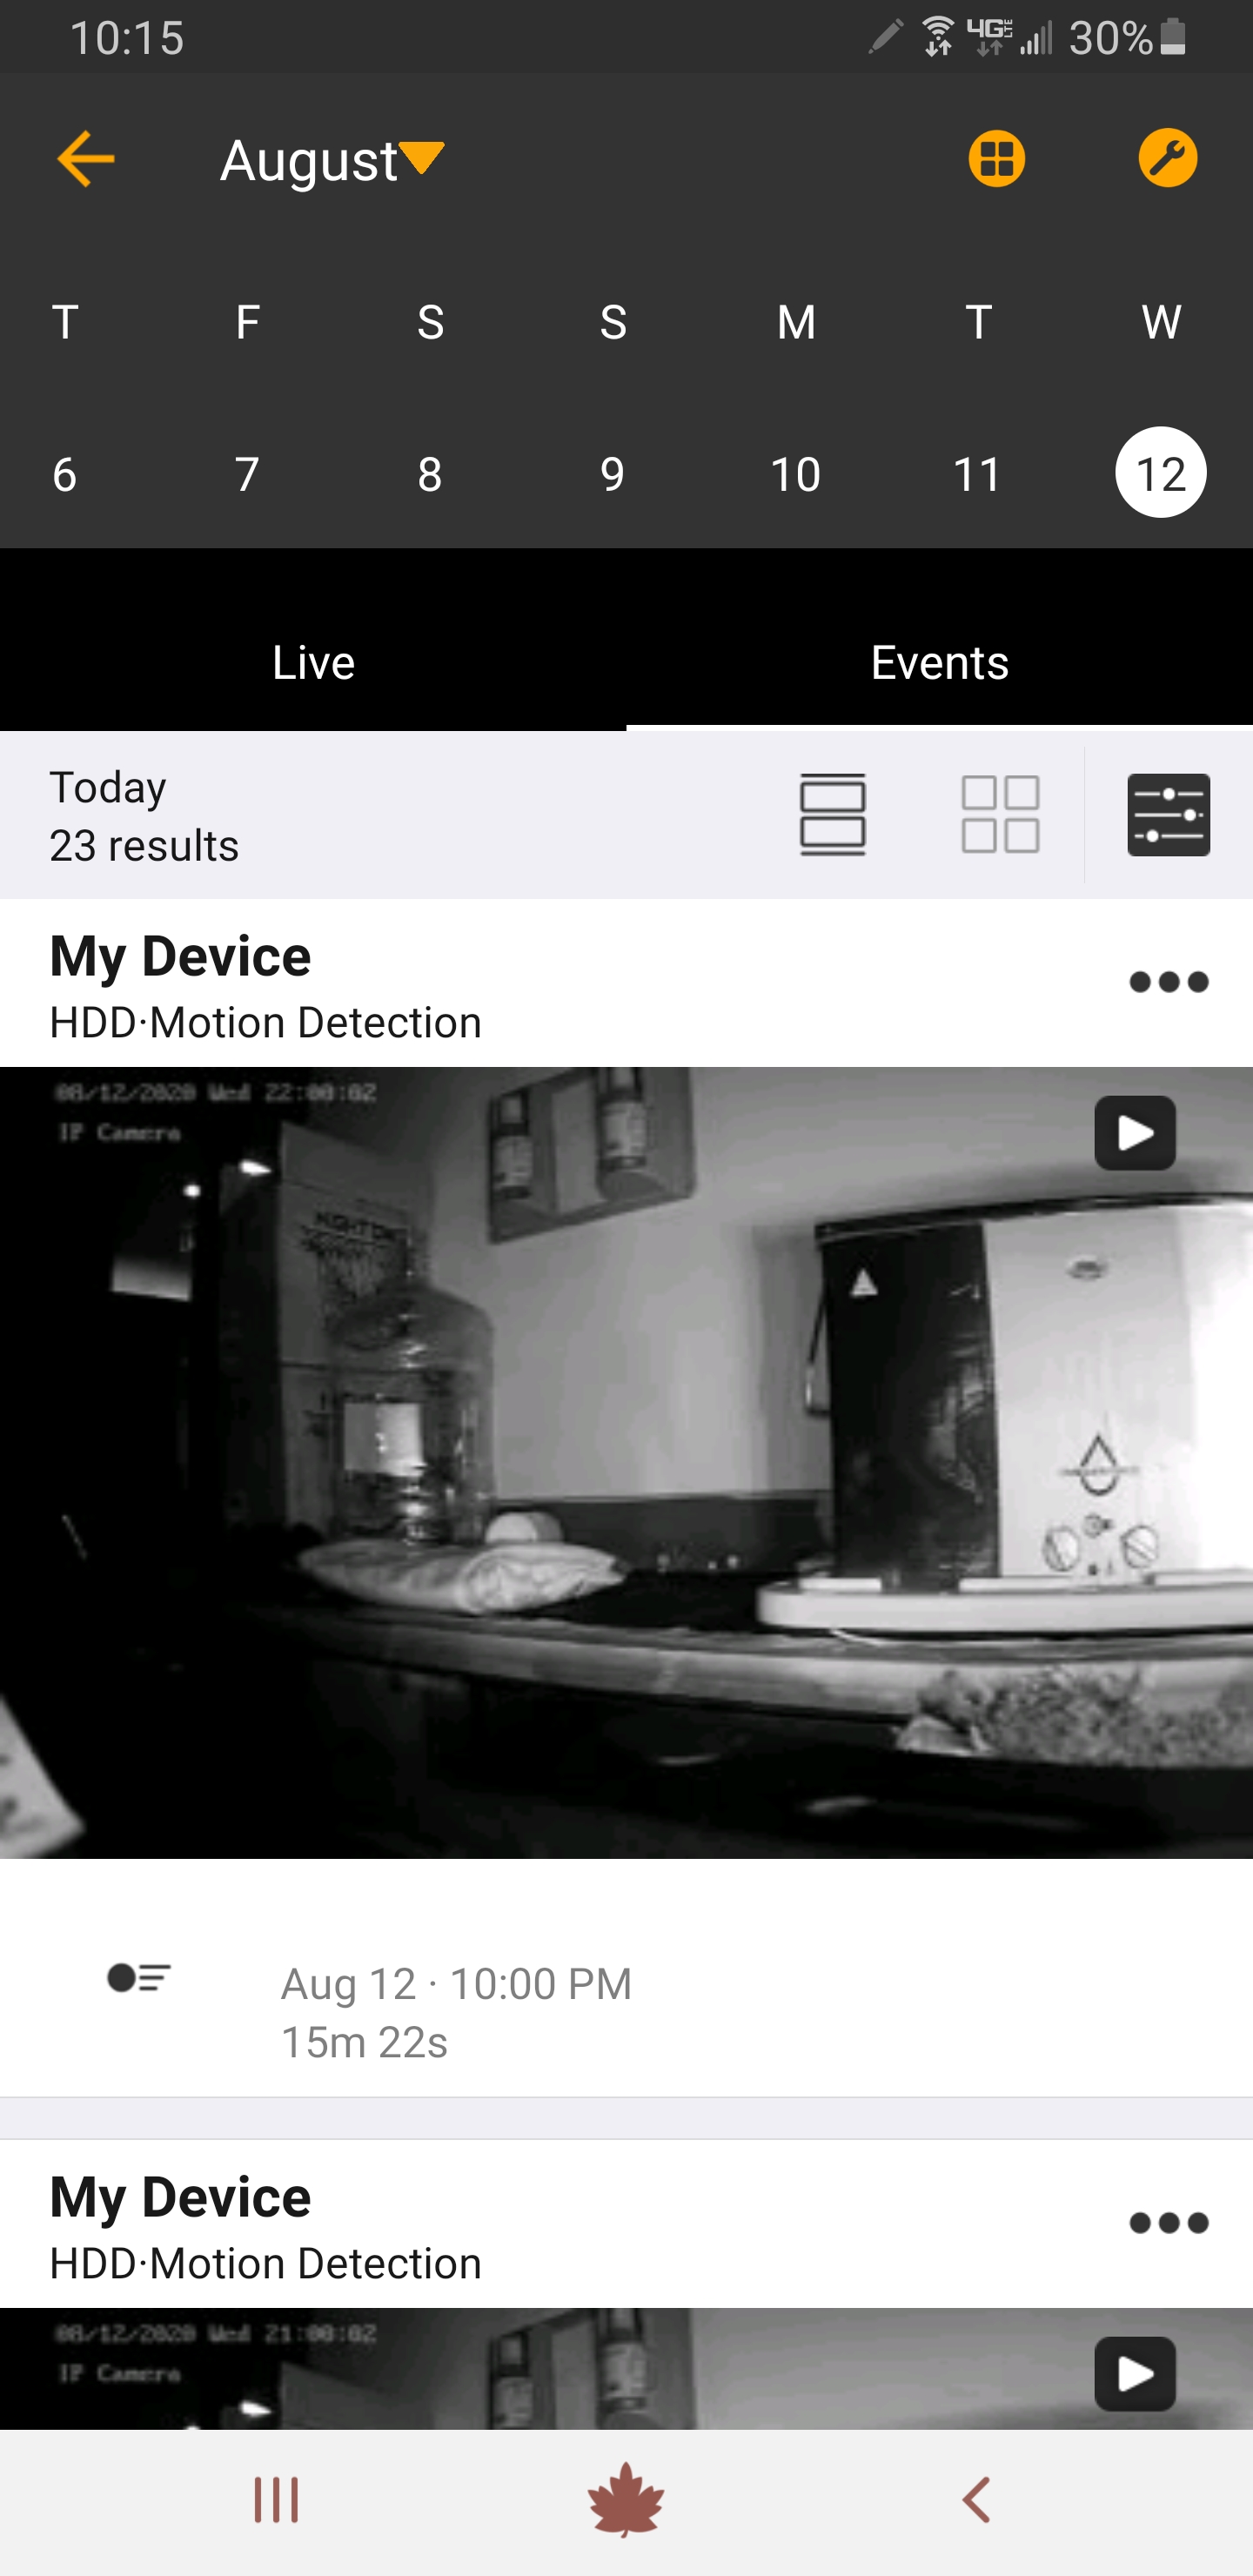
e. Tap the 3 dots to download the recording to your Smart Device’s album for saving or sharing.
|
|
Copy and paste the verification code into the Code field.
|
|
iv. Playback Troubleshooting
a. Recordings Cannot be Found or Device Won’t Connect to the Night Owl Connect App
1. If you have a standalone device, make sure it has the microSD Card inserted. As a standalone, the device will not record without a microSD Card.
i. The microSD Card must be properly formatted. See your product Manual for information on formatting.
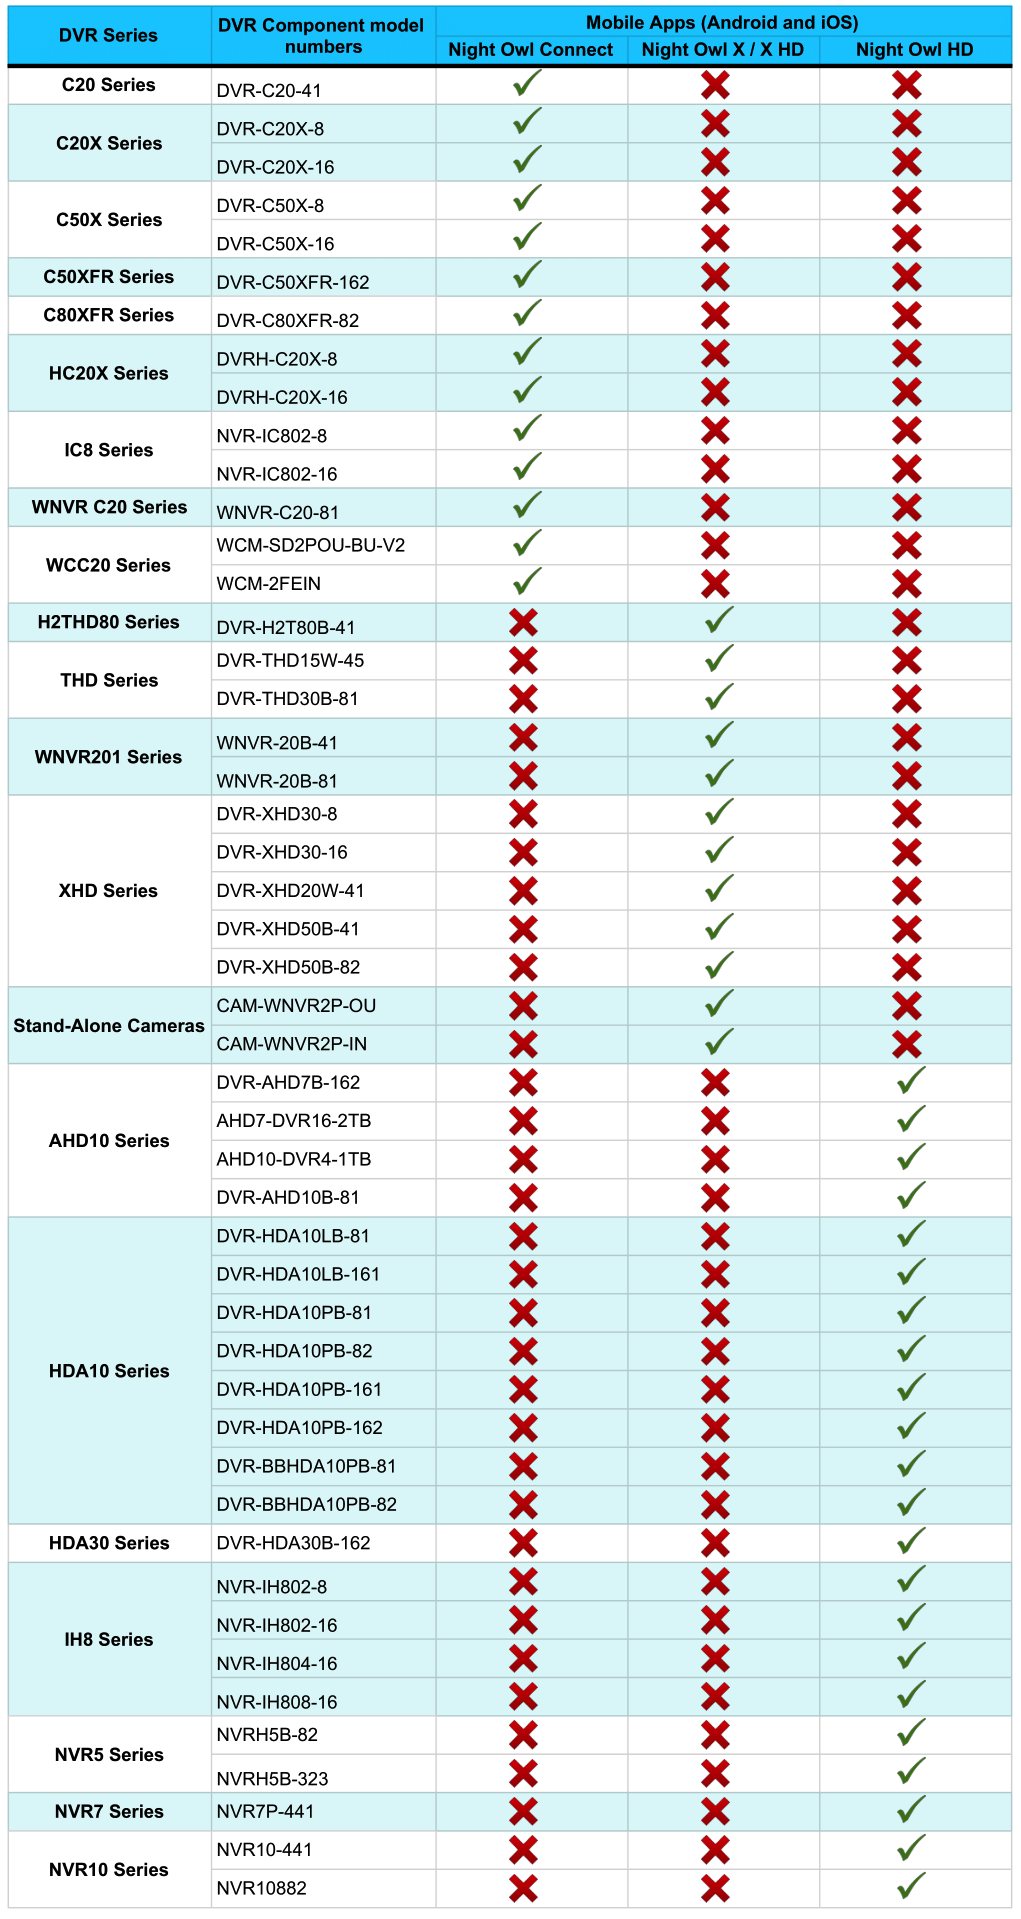
2. Please make sure you are using the correct App for your device.
See the chart below
b.Video Freezes or is Slow During Playback
1. your Smart Device connected to the Internet while the App is running.
2. Ensure the Night Owl Connect App and Smart Device software are both up to date. A new software update may have fixed the issue you are experiencing.
i. For your Smart Device:
- Android Version 4.0 or later
- IOS Version 8.0 or later
3. Make sure your camera / Recorder is connected to the Internet.
i. Ensure the device shows “Connected” on the main screen of the Night Owl Connect App.
ii. For a DVR / NVR / Wi-Fi NVR:
- Check the Ethernet cable connection to your device and router.
- Ensure the status light is flashing green on the rear of your device, which indicates the network connection is good.
4. If you are using your Smart Device’s cellular data (not Wi-Fi):
i. Ensure your Smart Device meets the requirements below:
- The coverage in your area must support 3G, 4G, or 4G LTE.
- Your Smart Device must support 3G, 4G, or 4G LTE.
ii. Verify the SIM card is inserted properly in your Smart Device.
iii. Turn off your Smart Device.
iv. Remove and re-insert the battery. If your Smart Device doesn’t have a removable battery, press and hold the power button and volume down button for up to 15 seconds until the device resets
v. Turn the Smart Device back on and open the Night Owl Connect App and see if the issue was resolved.
NOTE: Free apps and free games are filled with advertisements that eat your bandwidth/data traffic and can contribute to poor coverage/poor streaming to your Smart Device.
5. Check your devices Internet connection. For a DVR / NVR / Wi-Fi NVR or Standalone Device connected to your Internet or Wi-Fi, check your network’s upload and download speeds.
i. Use a computer with PC /MAC OS
ii. Open a Website Browser and type www.speedtest.net
iii. Right-click on Begin Test iv. See the download/upload speeds
NOTE: See your product’s specifications for recommended Internet speeds as it varies. Consider all the networked devices you have on the network you are using when ensuring you are meeting the minimum speed requirements.
6. For a standalone camera or doorbell (not connected to a Night Owl system):
i. Ensure you are within the range limitations for your product.
- Range is usually capped at 300 ft. from your router but check your product’s specifications to verify.
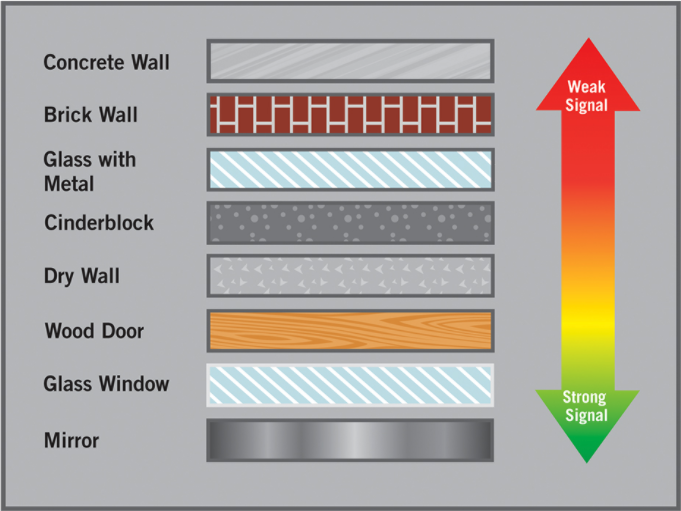
- Check if there are any obstacles affecting the signal strength. Some obstacles more heavily affect the signal strength.
See below
7. As a last resort, uninstall and reinstall the Night Owl Connect App on your Smart Device to see if that corrects the issue.
You can enable or disable push notifications from your camera or Recorder via the Night Owl Connect App. Below is a brief overview of push notifications and some quick troubleshooting steps should you experience an issue.
i. Enabling/Disabling Push Notifications
NOTE: It may take up to 5 minutes before you begin receiving or stop receiving push notifications after a change is made.
a. Tap on the 3 dots next to the device on the main App screen that you want to adjust push notifications for.
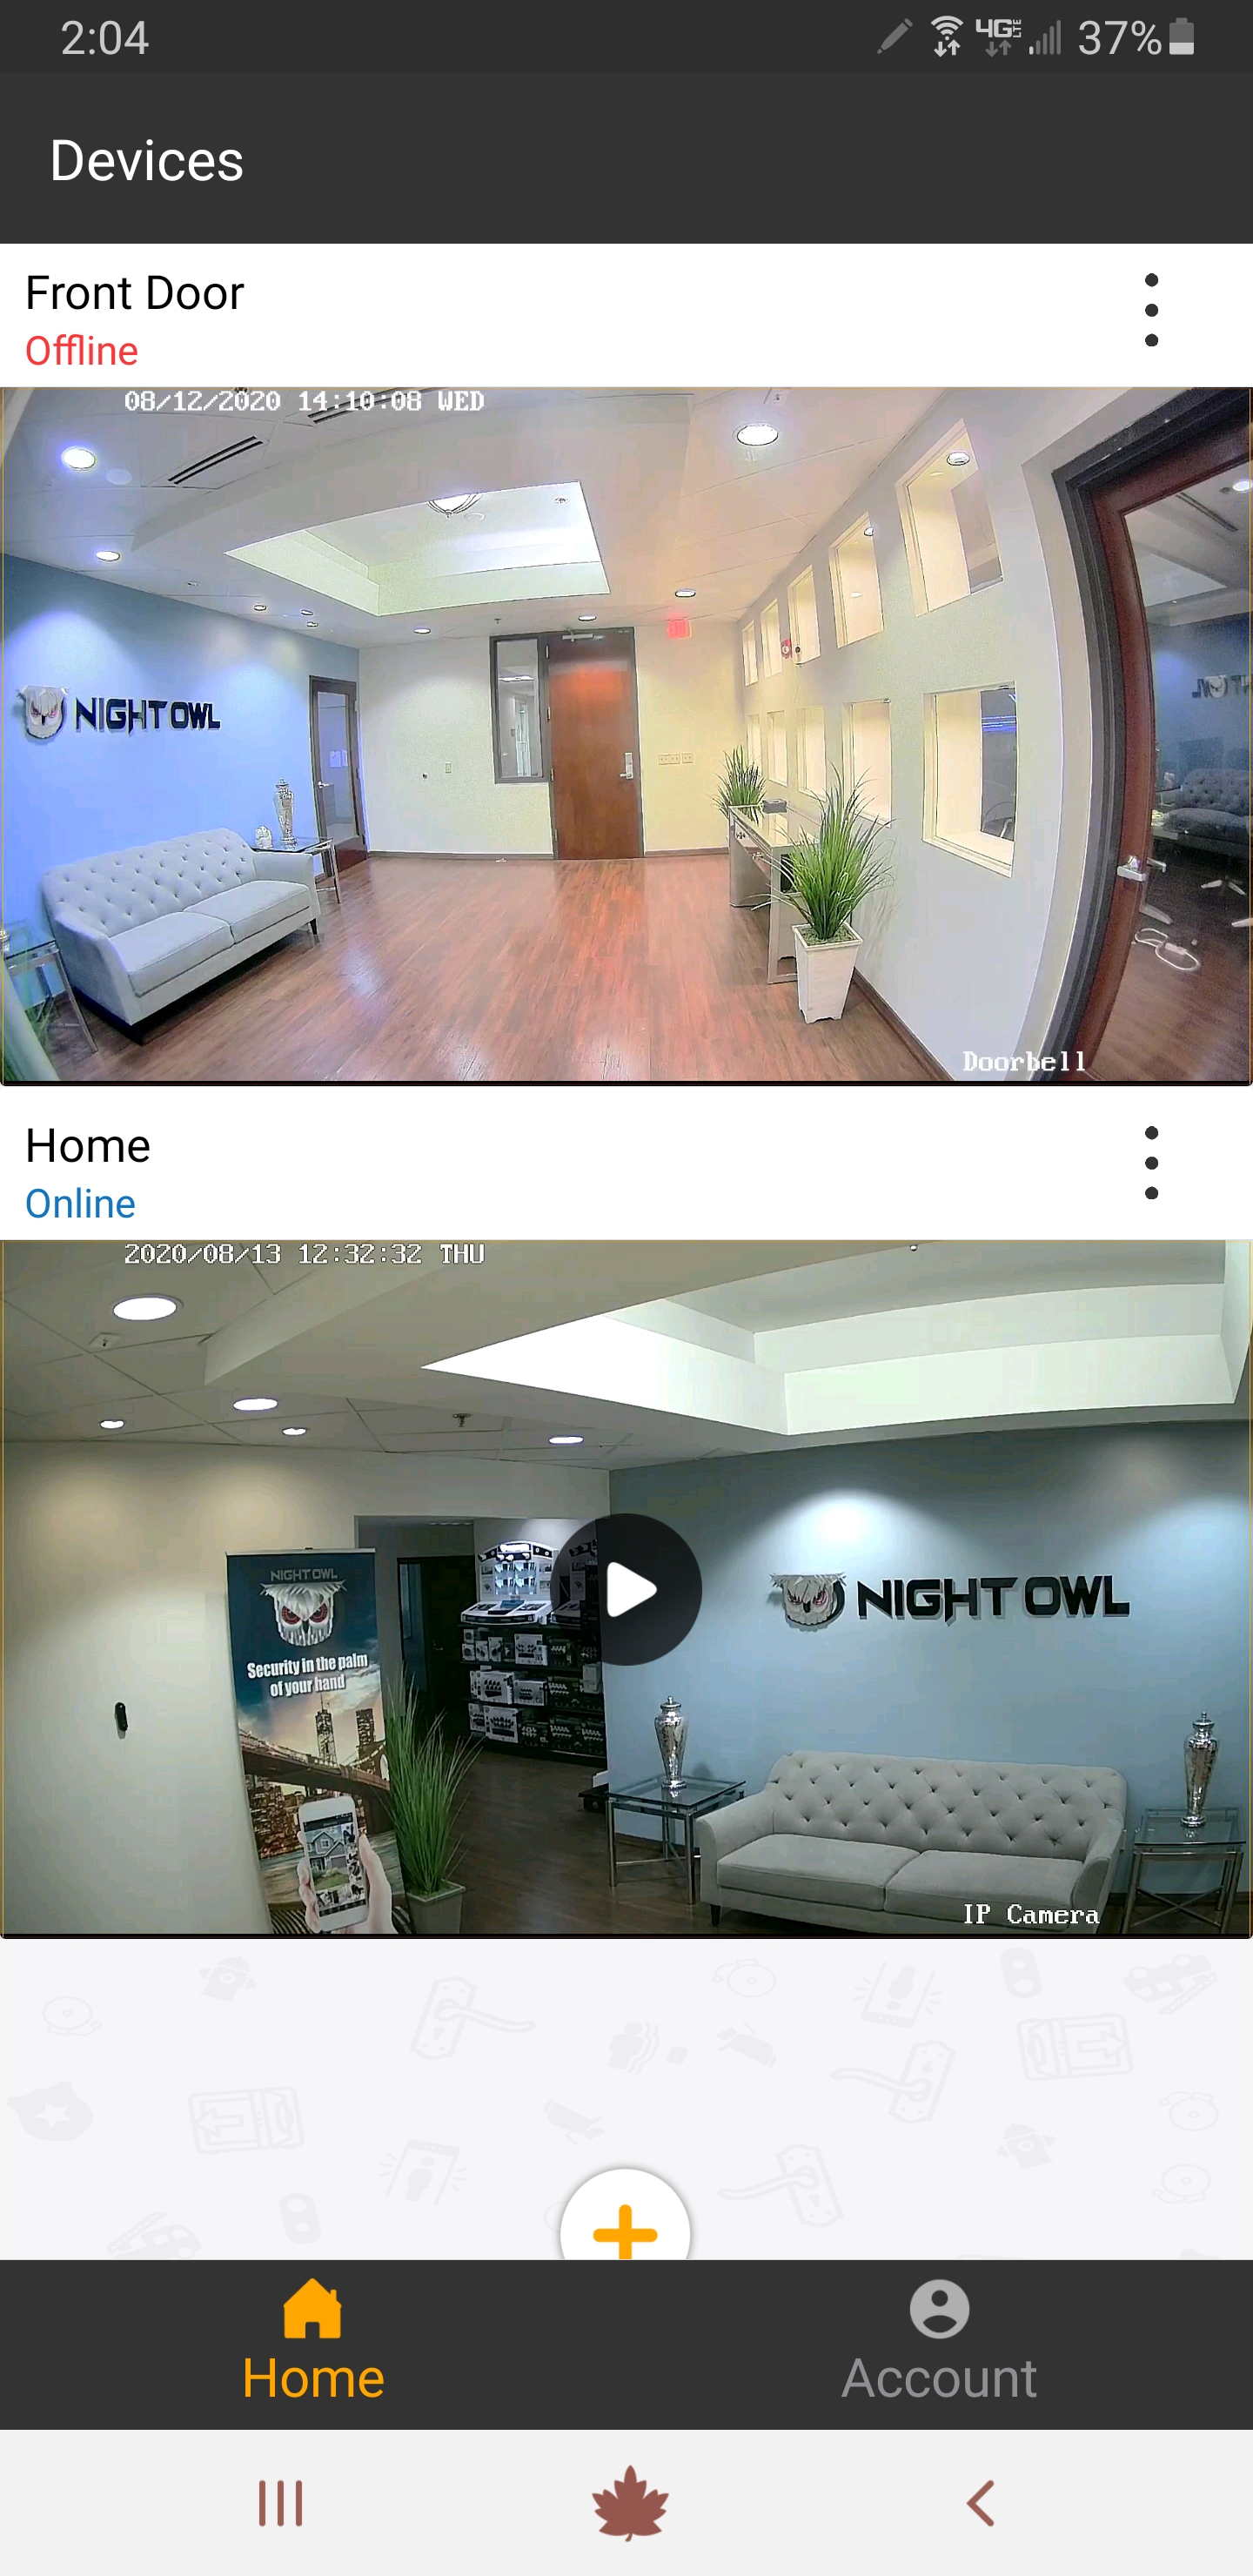
b. Tap on “Settings.”
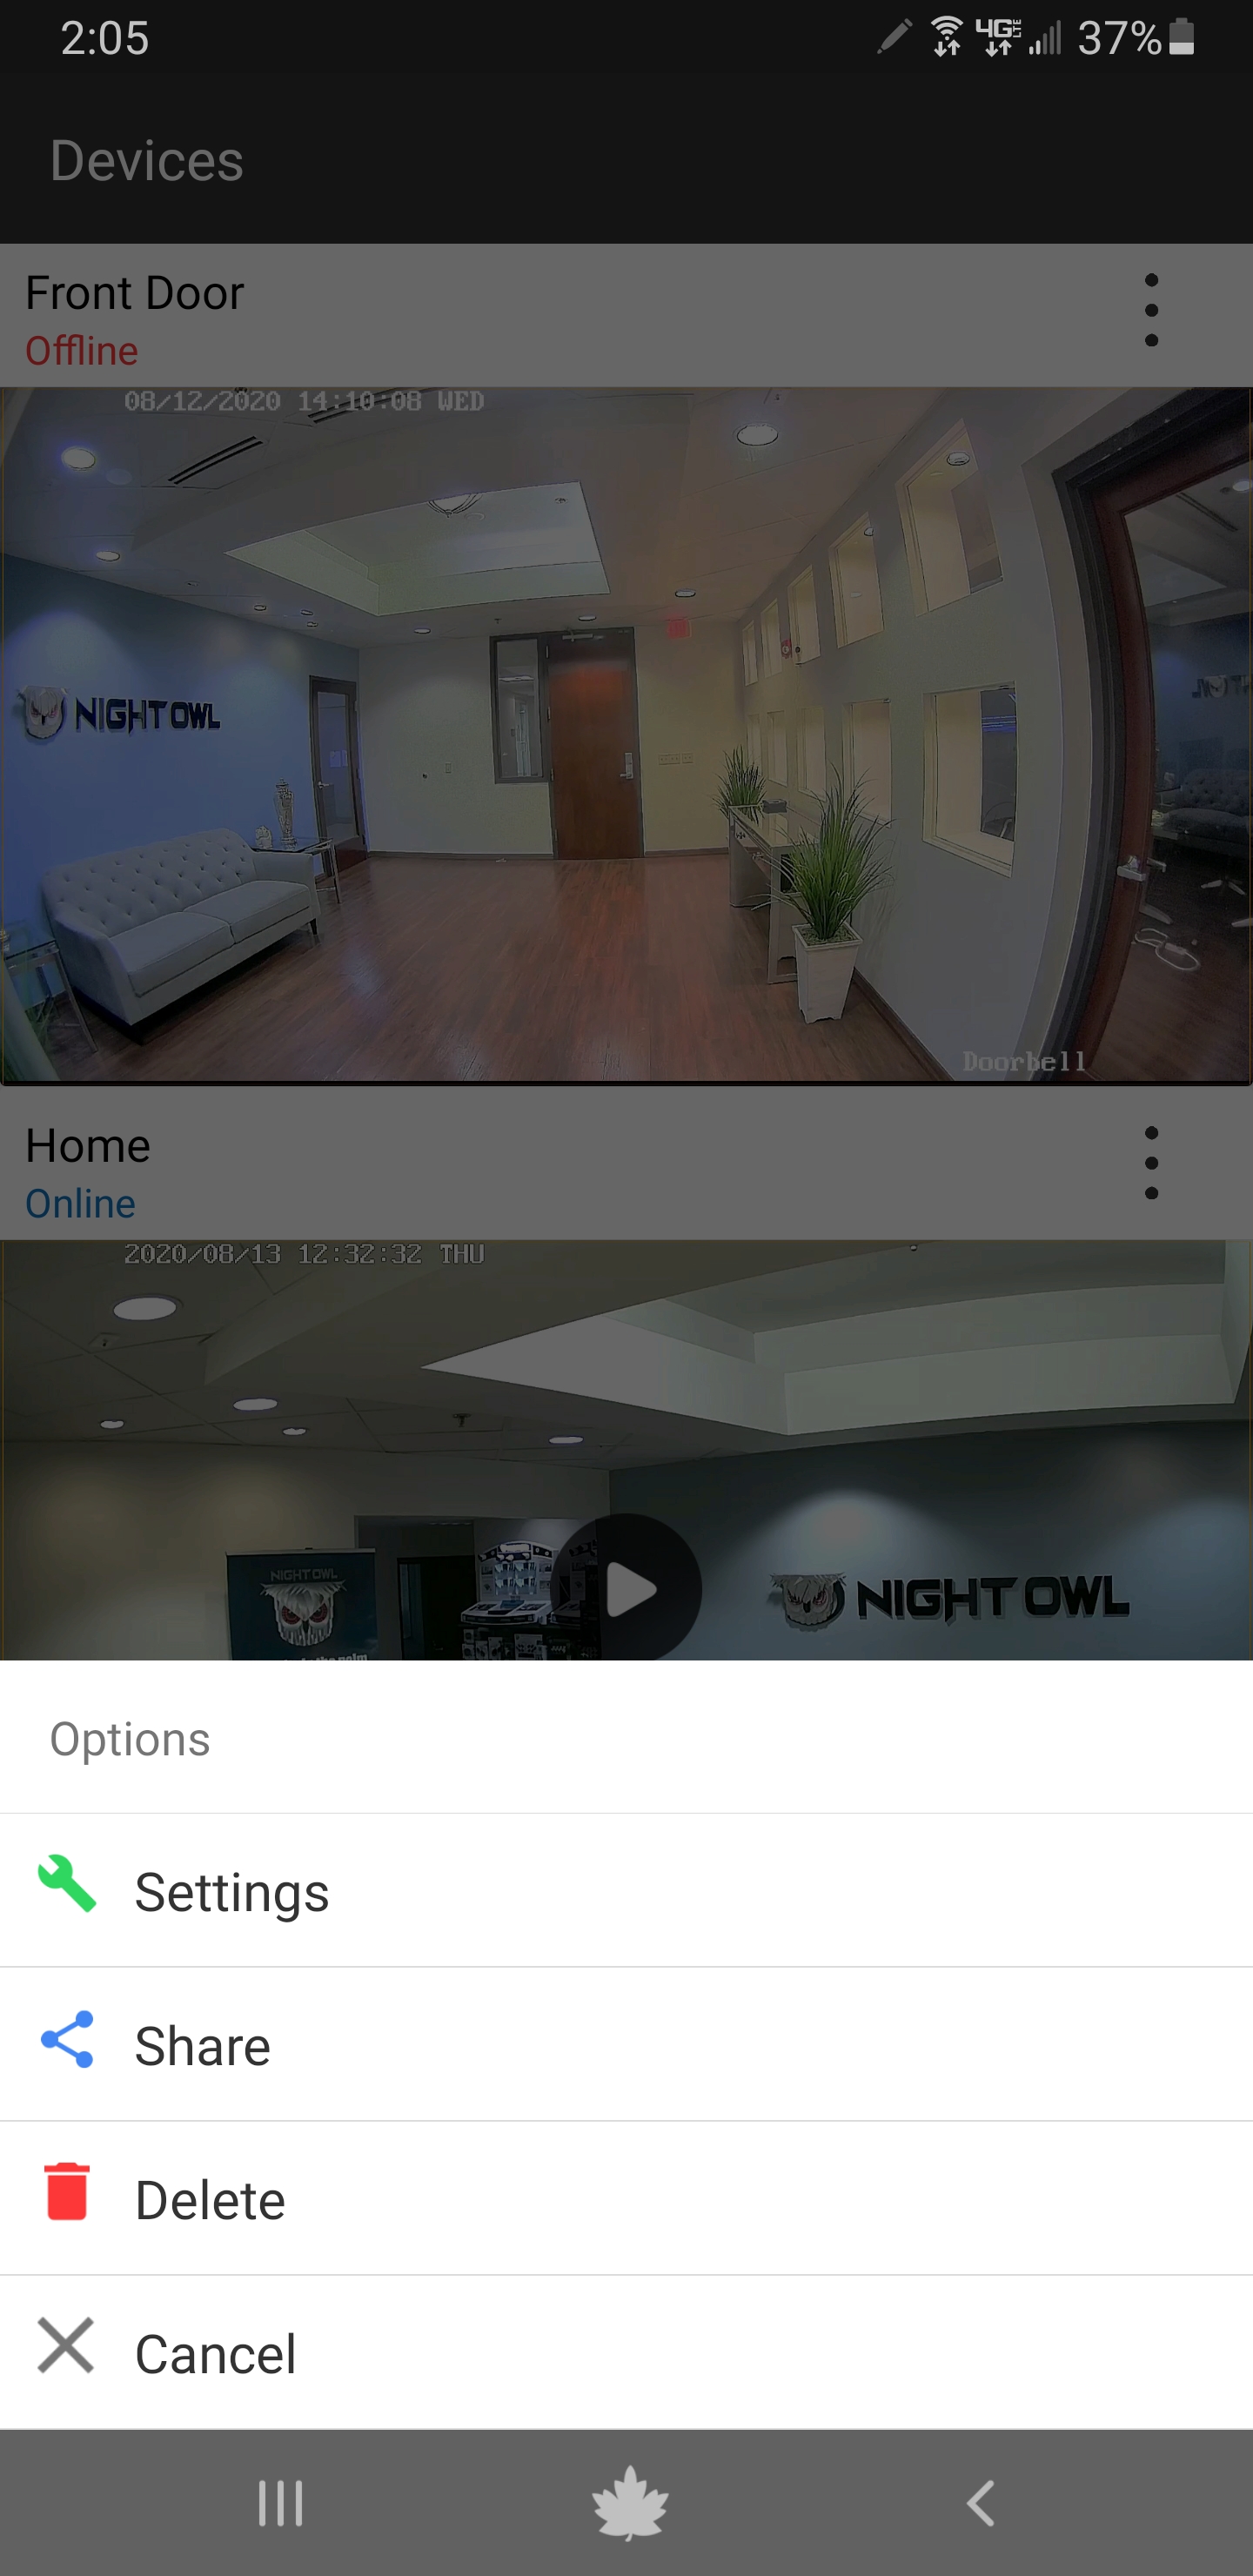
c. For systems, tap the switch tab next to Device Notifications to enable or disable push notifications.

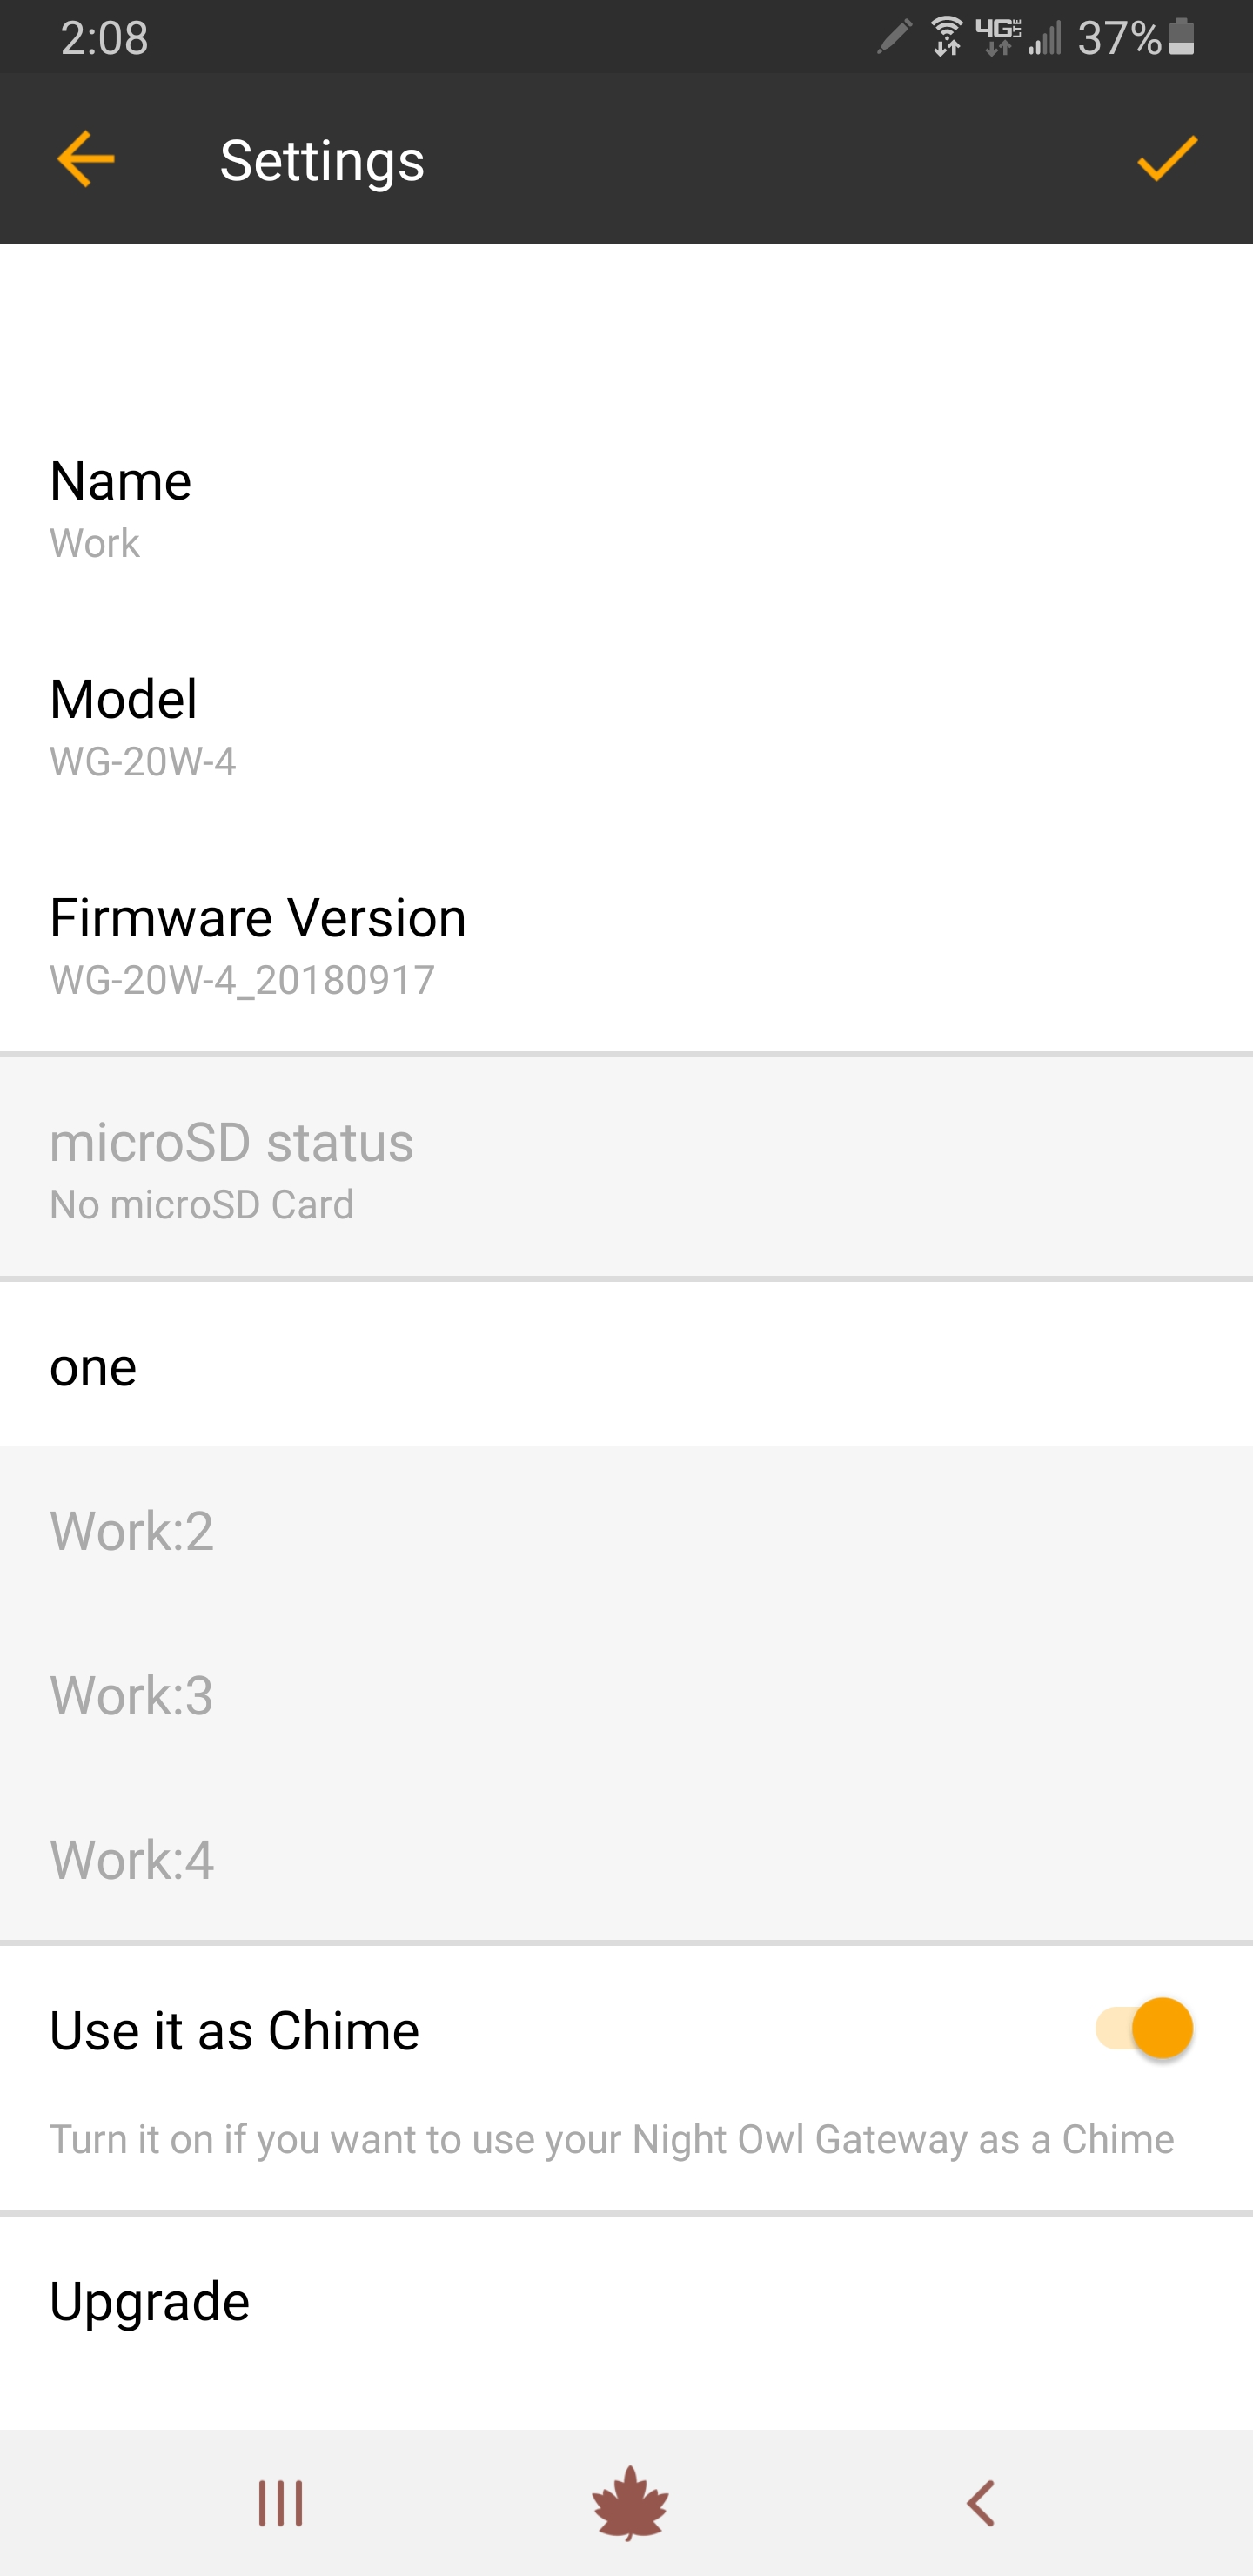
d. For our Gateway, 1) first choose the device you want to adjust push notifications for and then 2) tap the switch tab next to Push Notification to enable or disable them.
|
|
Copy and paste the verification code into the Code field.
|
|
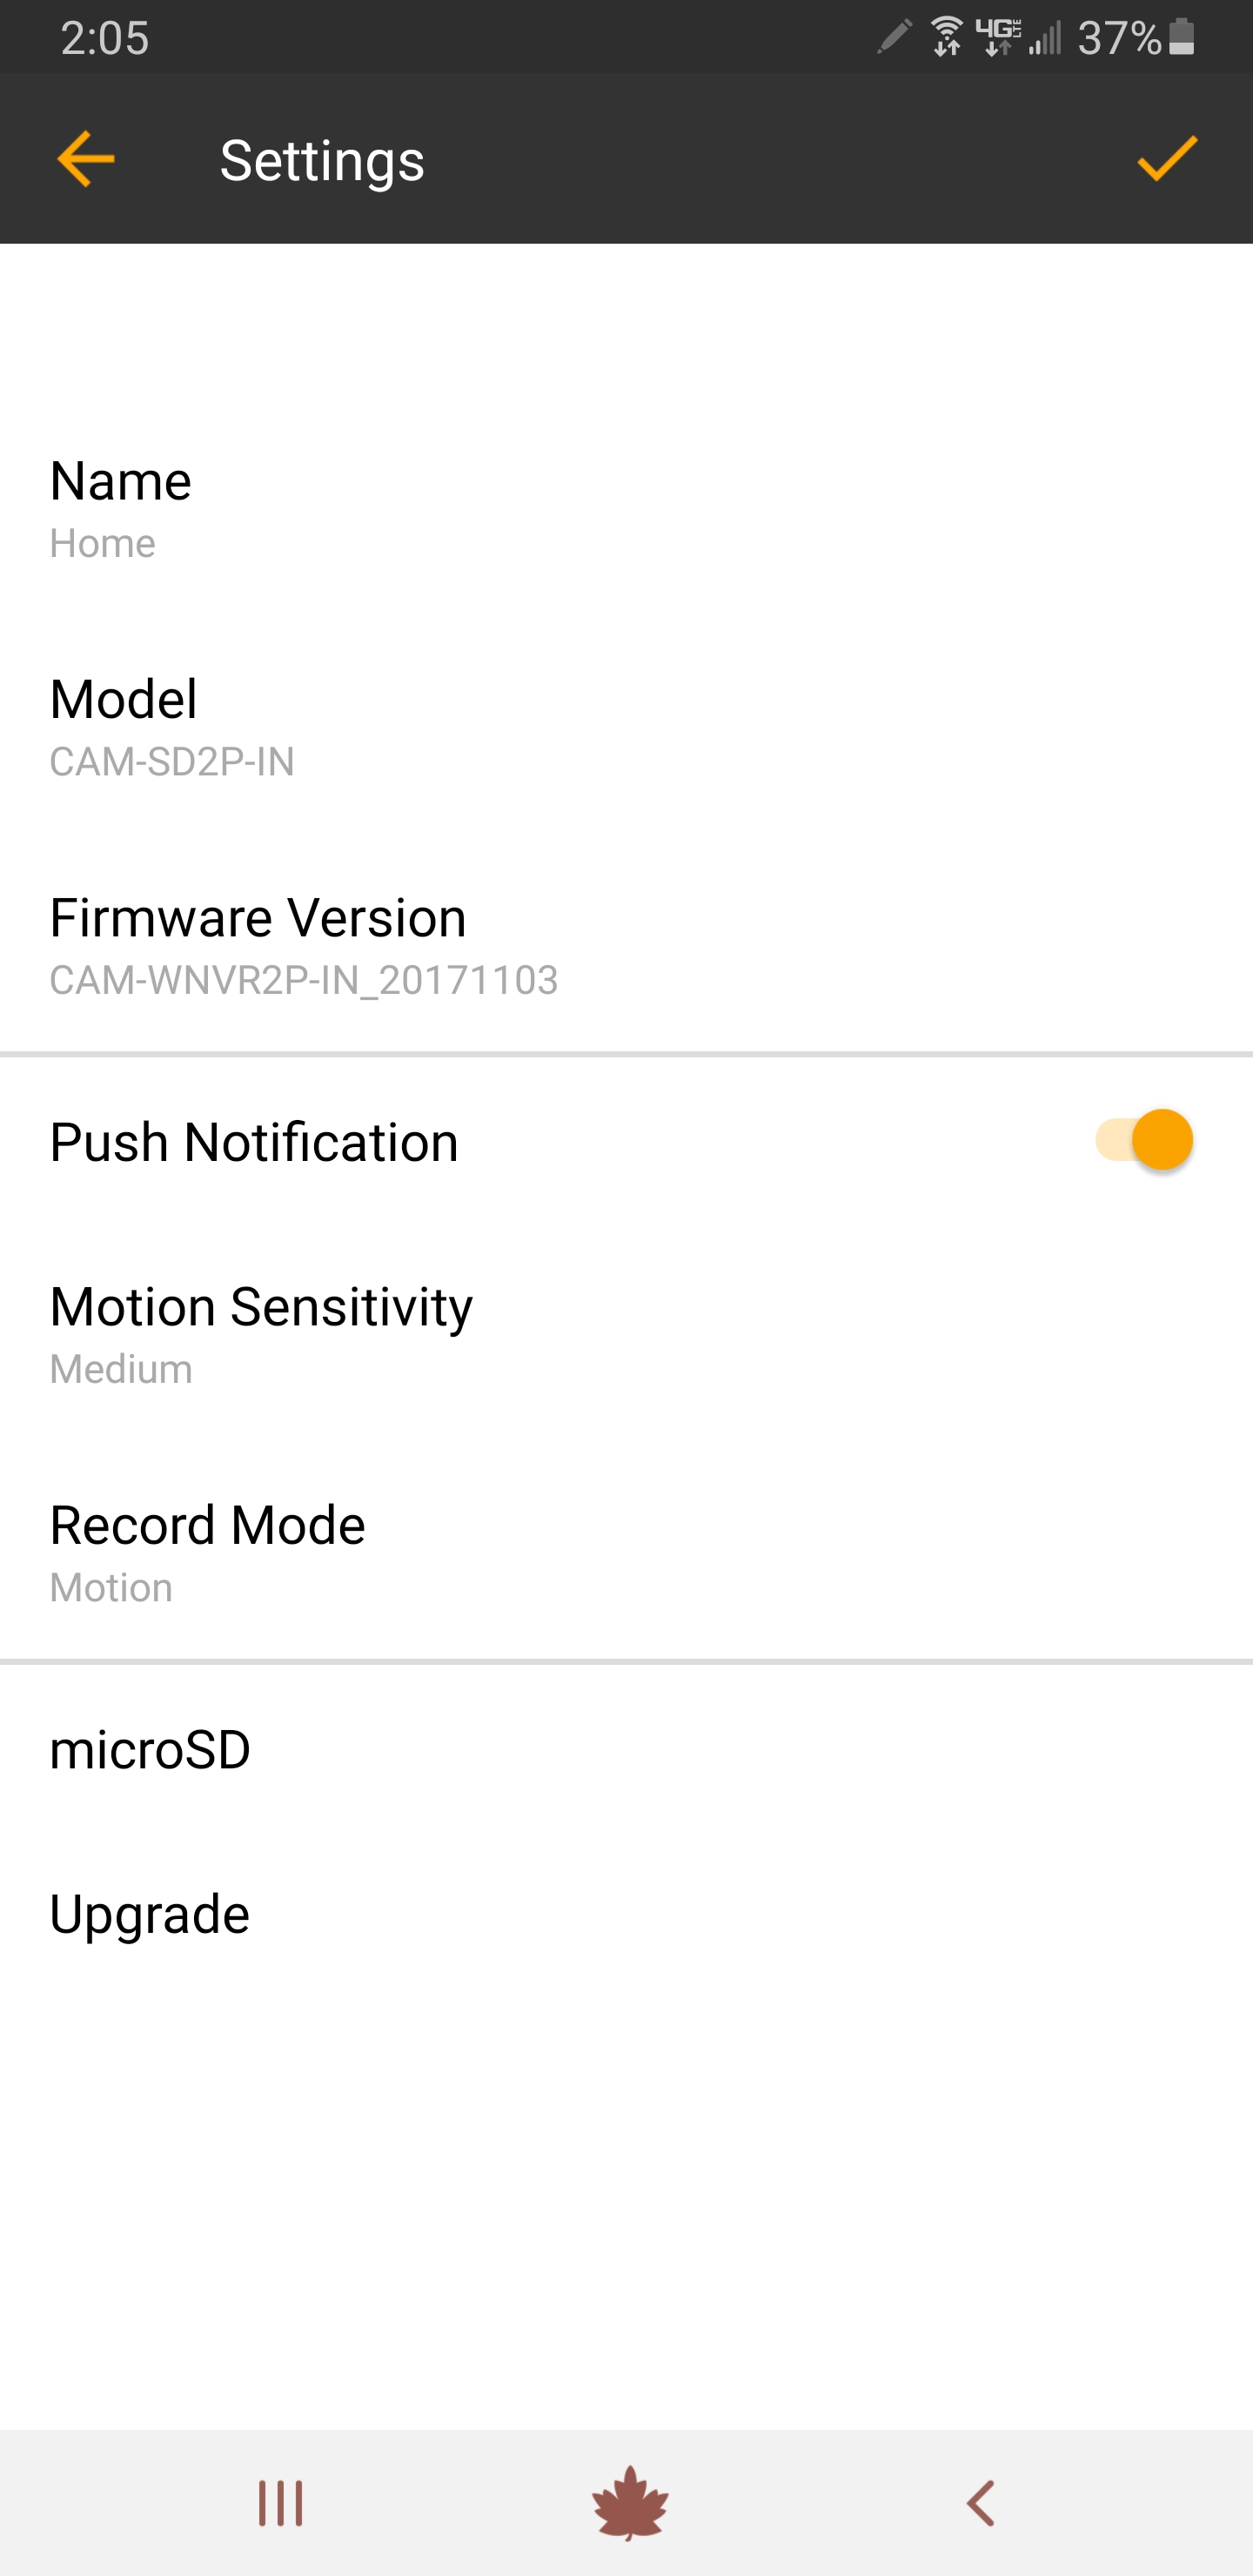
e. For standalone devices, simply tap the switch tab next to Push Notification to enable or disable notifications.
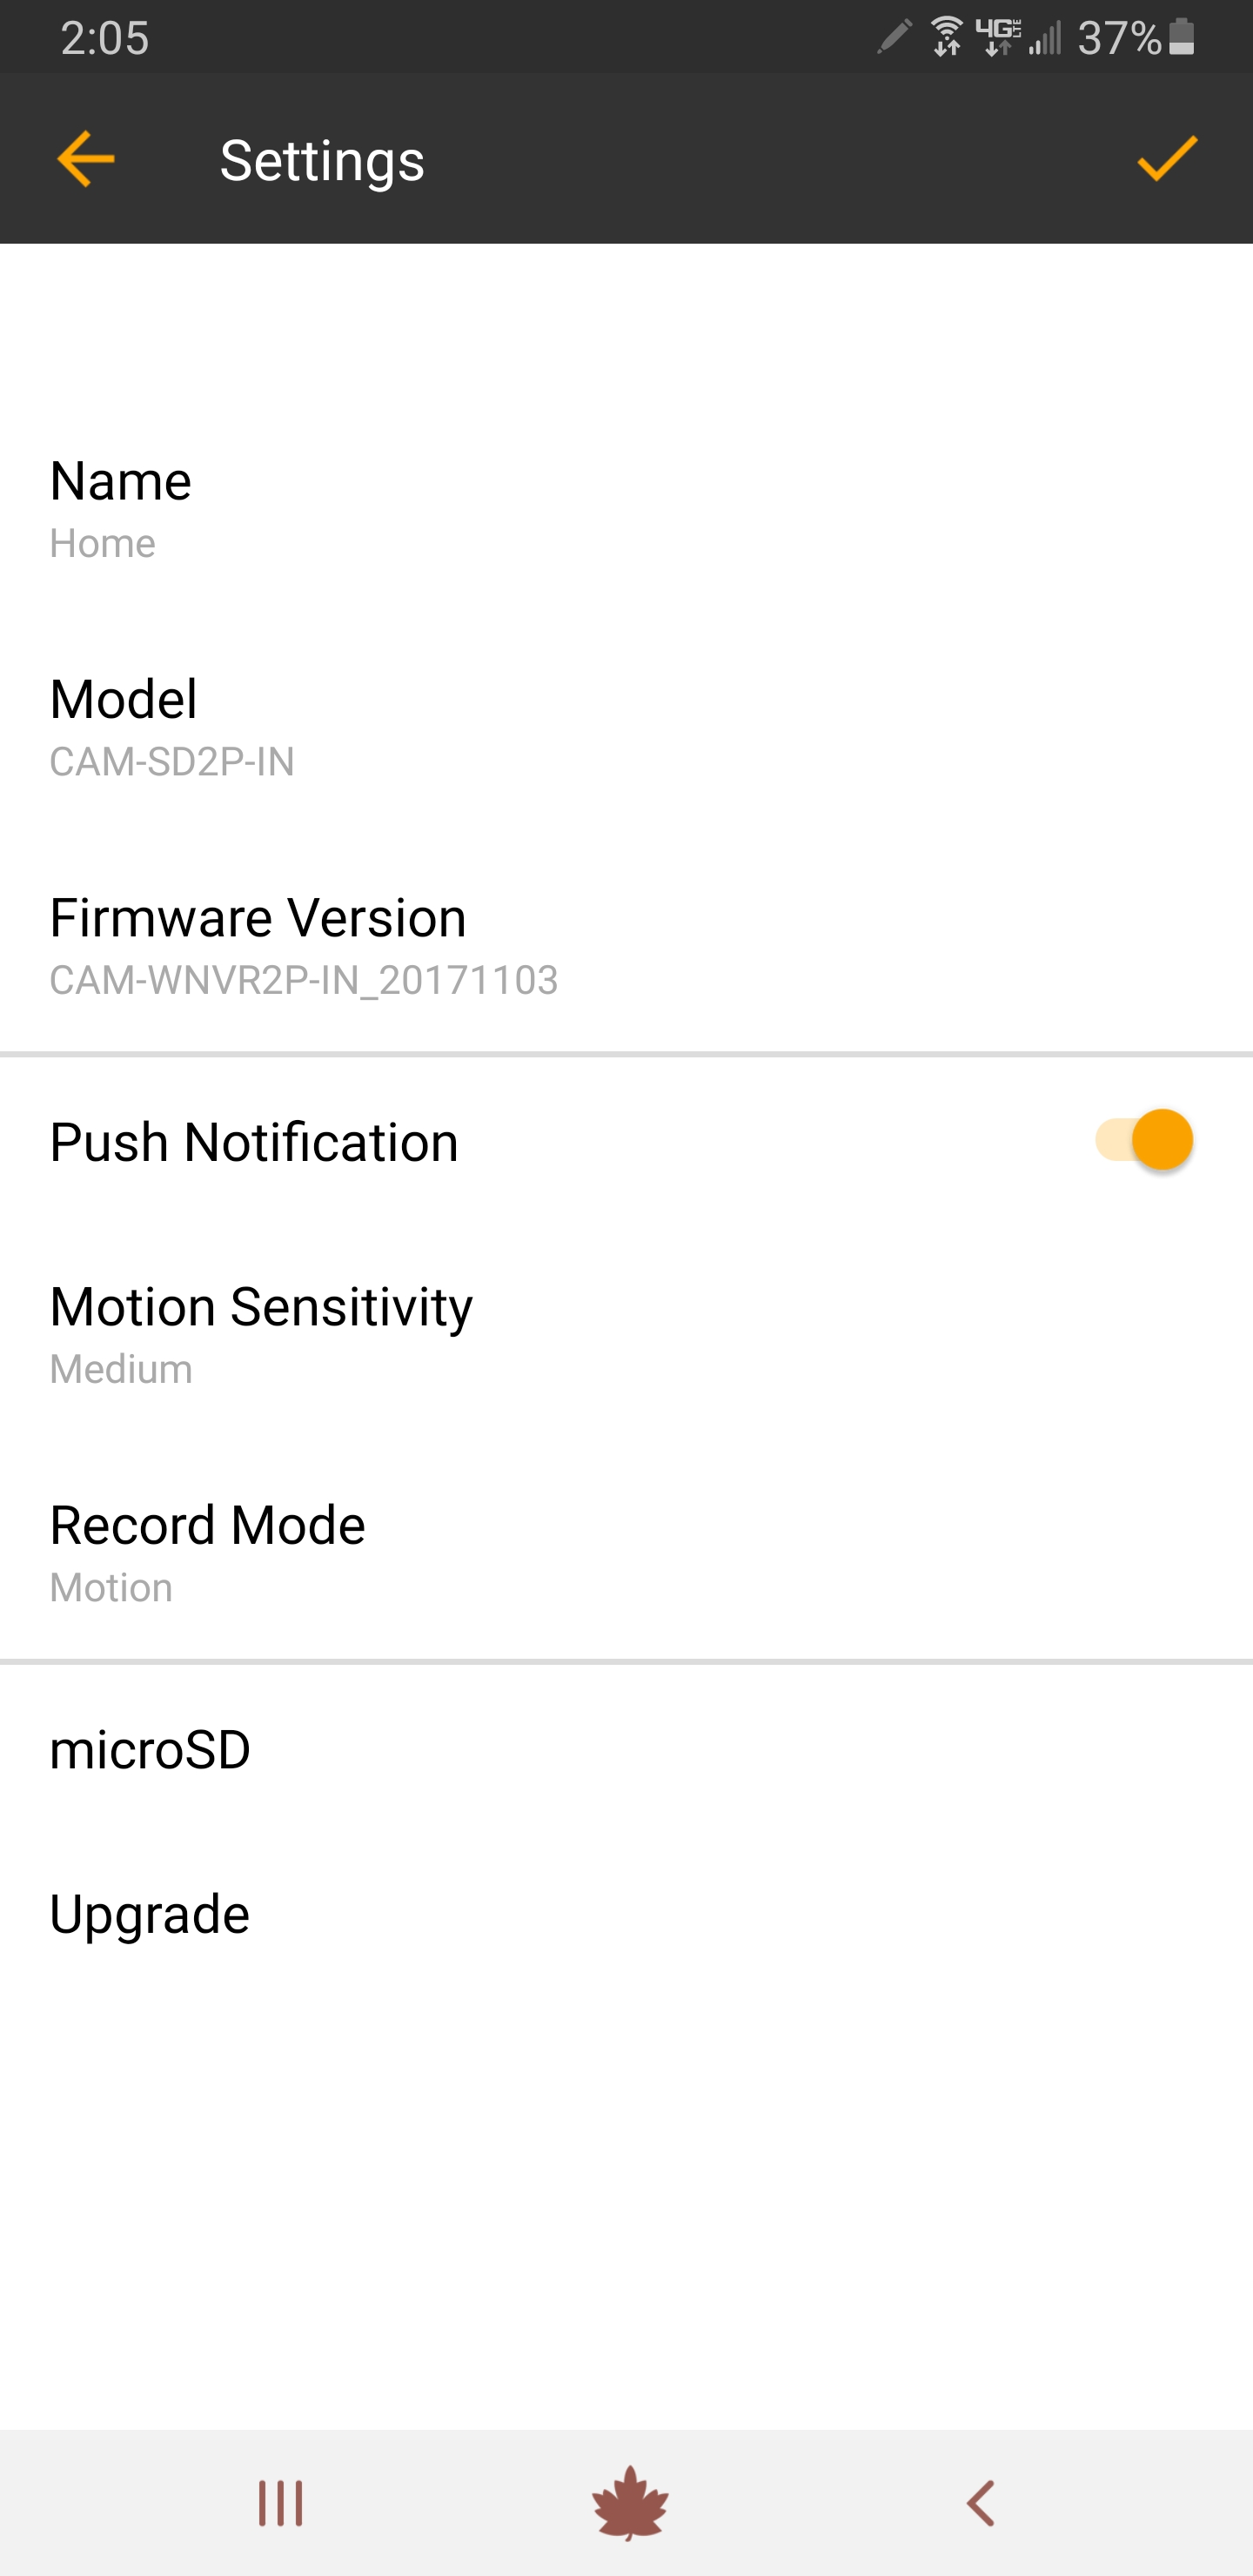
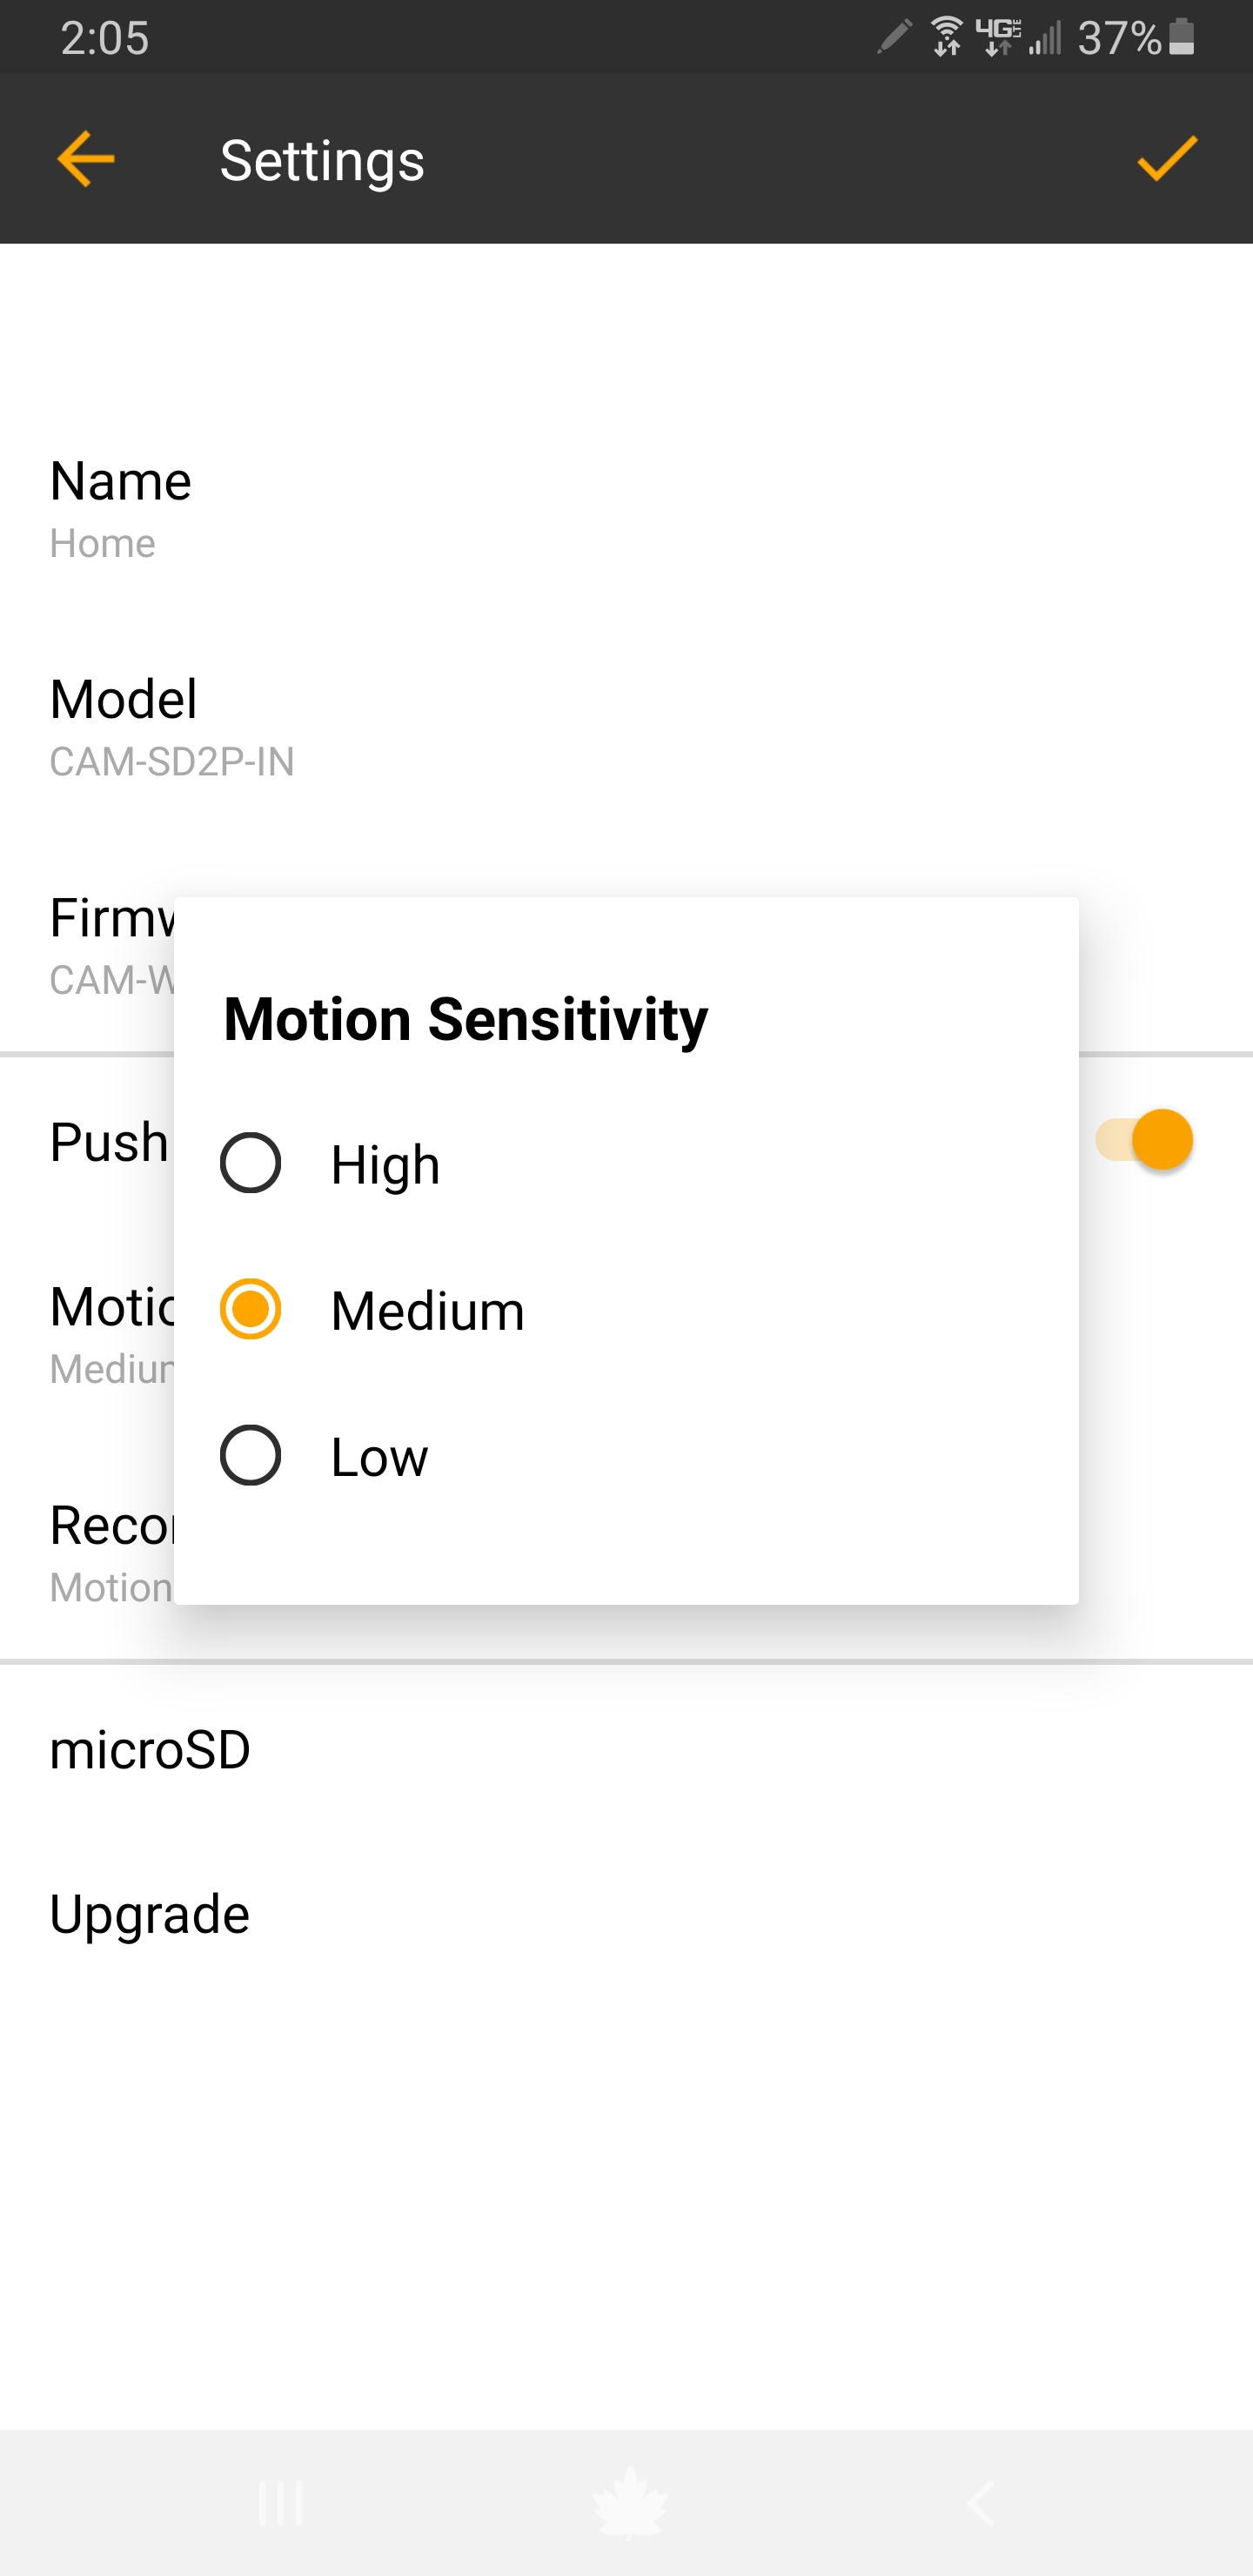
f. Tap “Motion Sensitivity” to adjust how sensitive the camera(s) is to motion.
NOTE: The higher the sensitivity, the more notifications you will receive.
|
|
Copy and paste the verification code into the Code field.
|
|
ii. Notification Troubleshooting
a. Push Notifications Not Being Received
1. If you have a standalone device, make sure it has the microSD Card inserted. As a standalone, the device will not record without a microSD Card. If the device is not recording, it will not send out notifications.
- The microSD Card must be properly formatted. See your product Manual for information on formatting.
2. Please make sure you are using the correct App for your device.
See the chart below

3. Ensure the Night Owl Connect App and Smart Device software are both up to date. A new software update may have fixed the issue you are experiencing.
i. For your Smart Device:
- Android Version 4.0 or later
- IOS Version 8.0 or later
4. Ensure both your Smart Device and your camera / Recorder are connected to the Internet.
5. Ensure you have Push Notifications enabled for the camera or channel in question.
(Click Here for a Short Video Tutorial)
i. Forgot your Night Owl Connect App Password
NOTE: This is ONLY the password for the Night Owl Connect App, not the password for your DVR/NVR or device.
If you forgot your password to log in to the Night Owl Connect App, follow these steps:
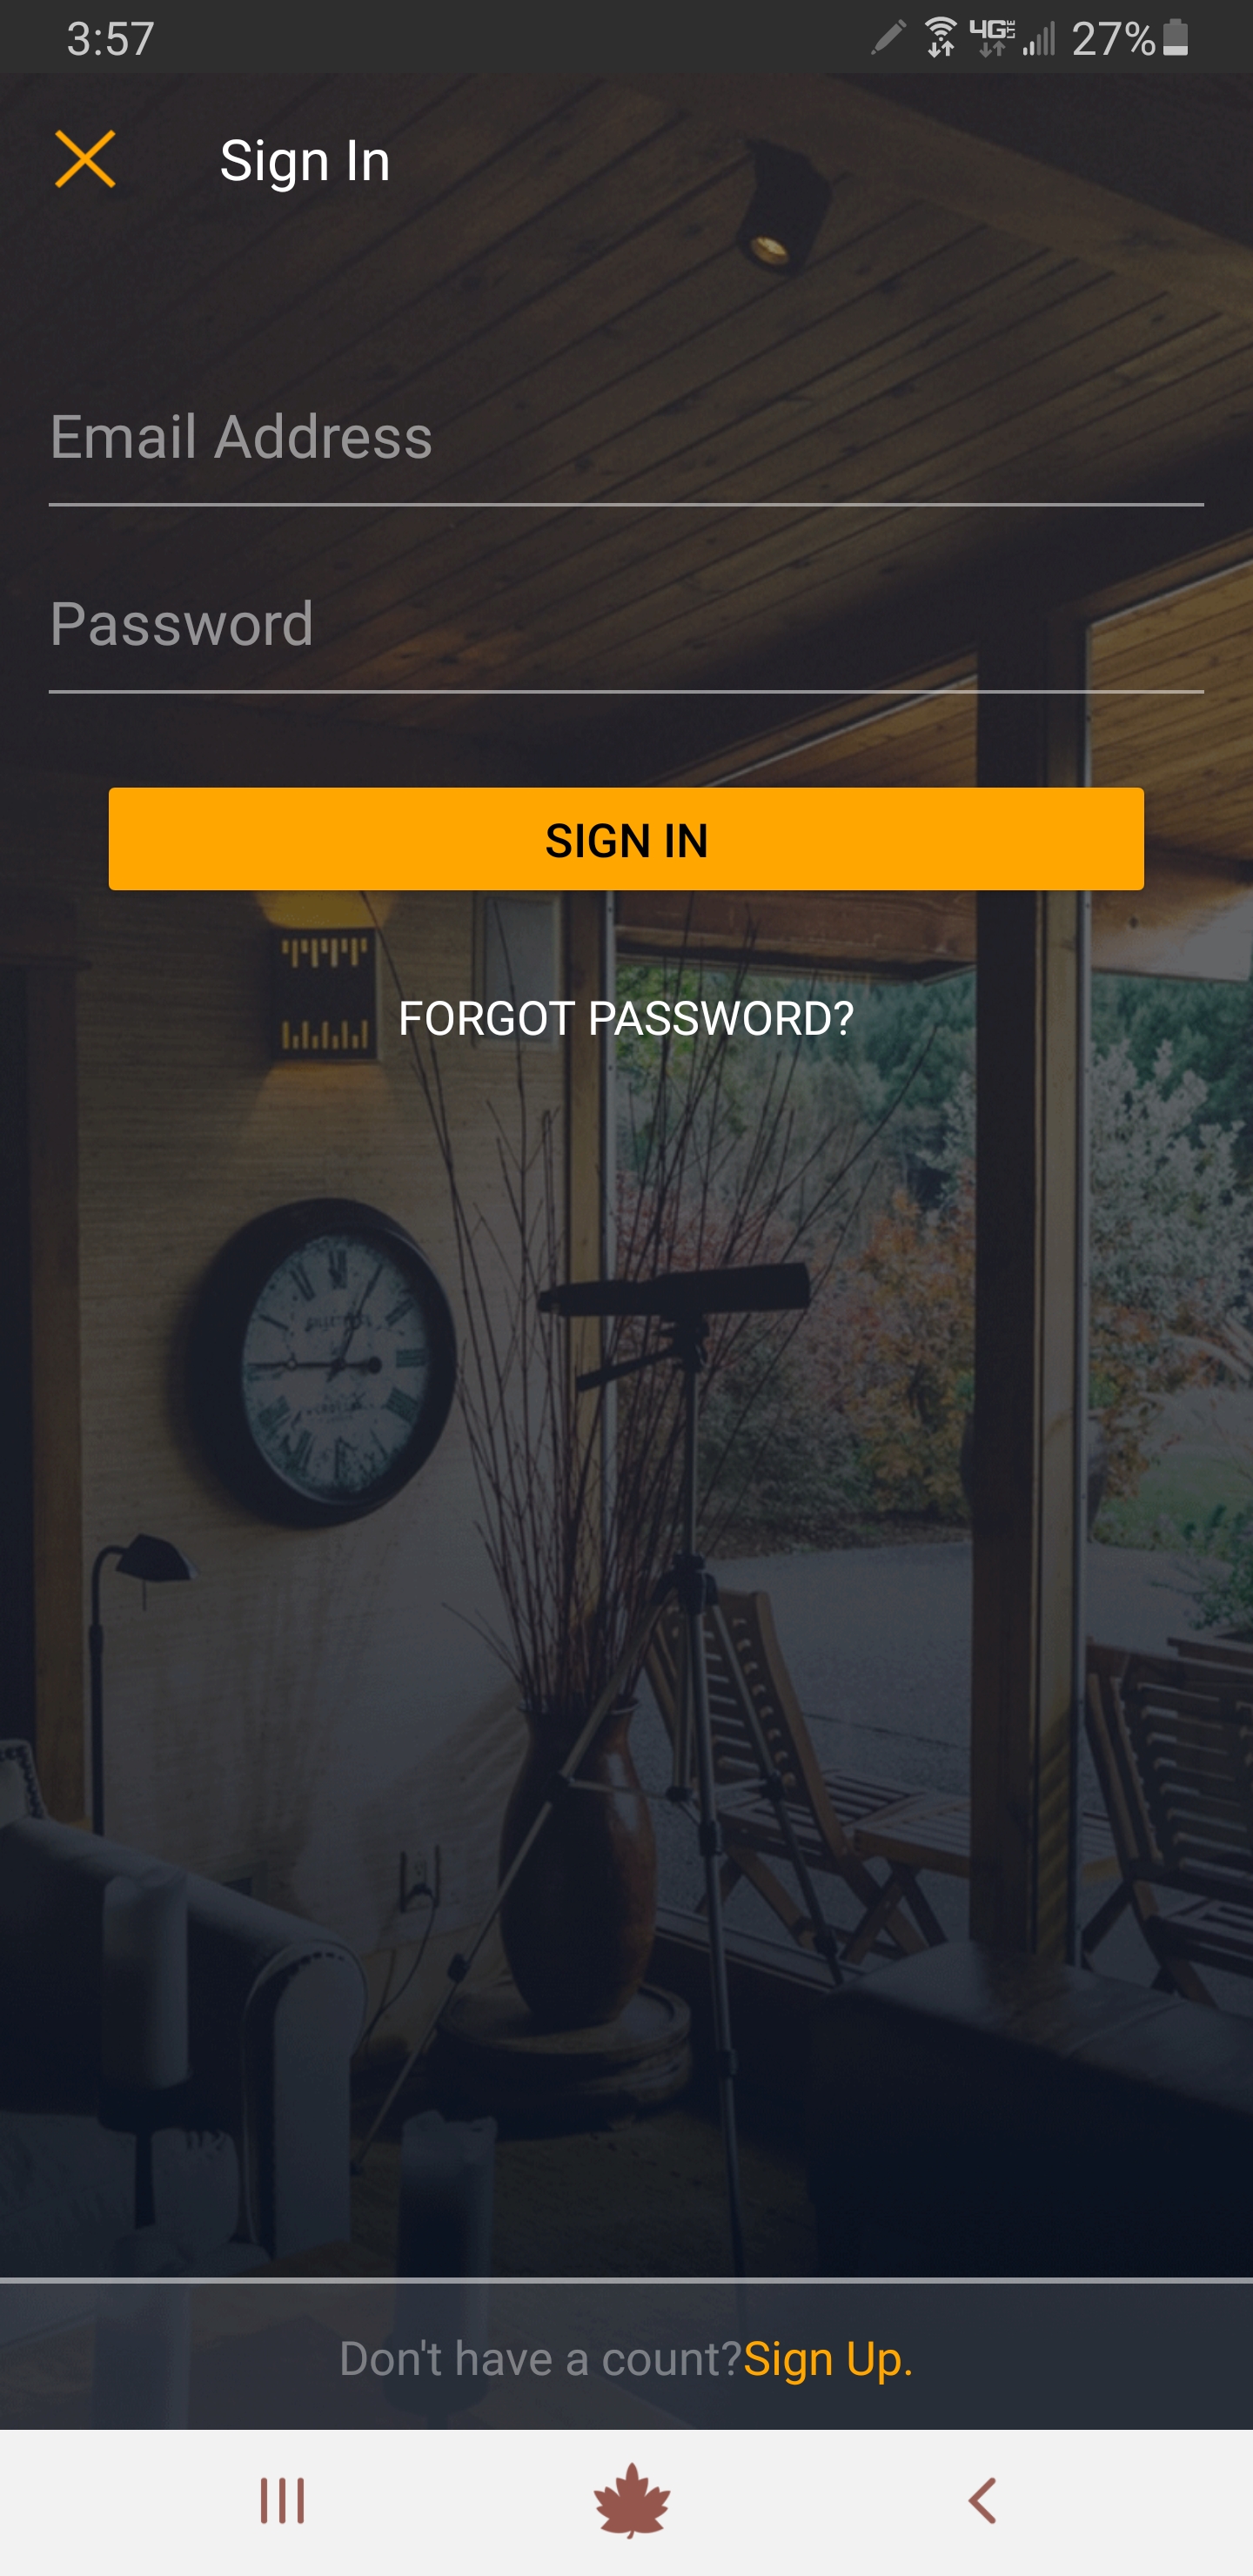
a. Tap “Forgot Password” from the Sign In screen.
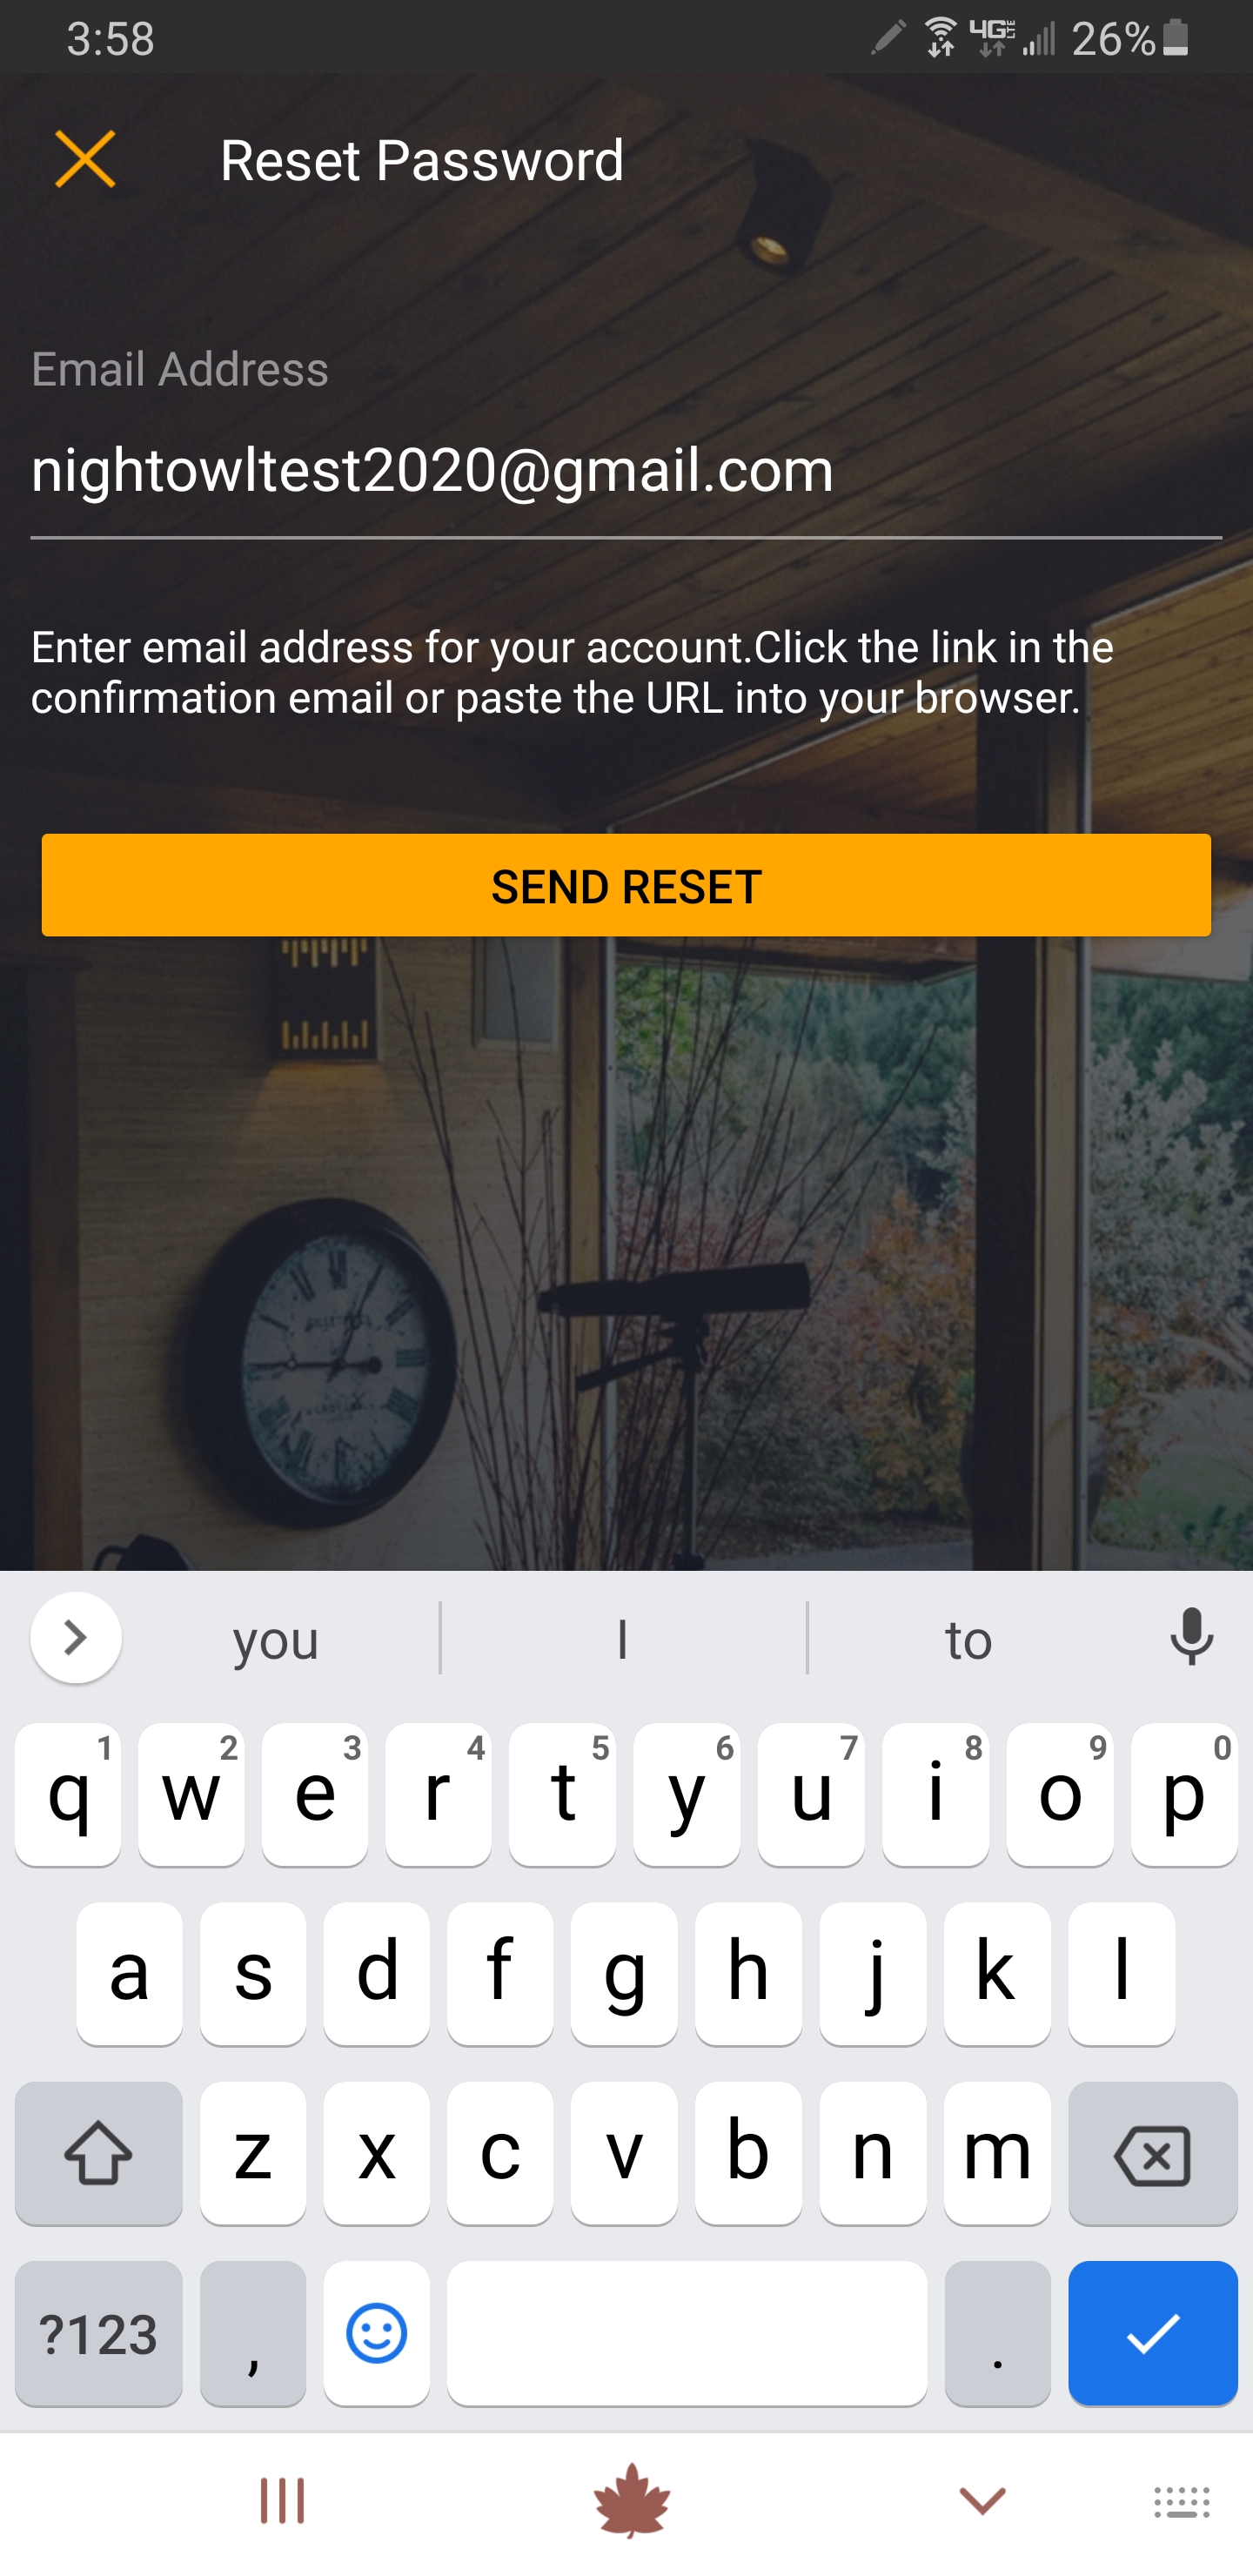
b. Enter the email address you used to setup your Night Owl Connect account and tap “Send Reset.”
c. A code will be sent to your email. Tap “OK.”
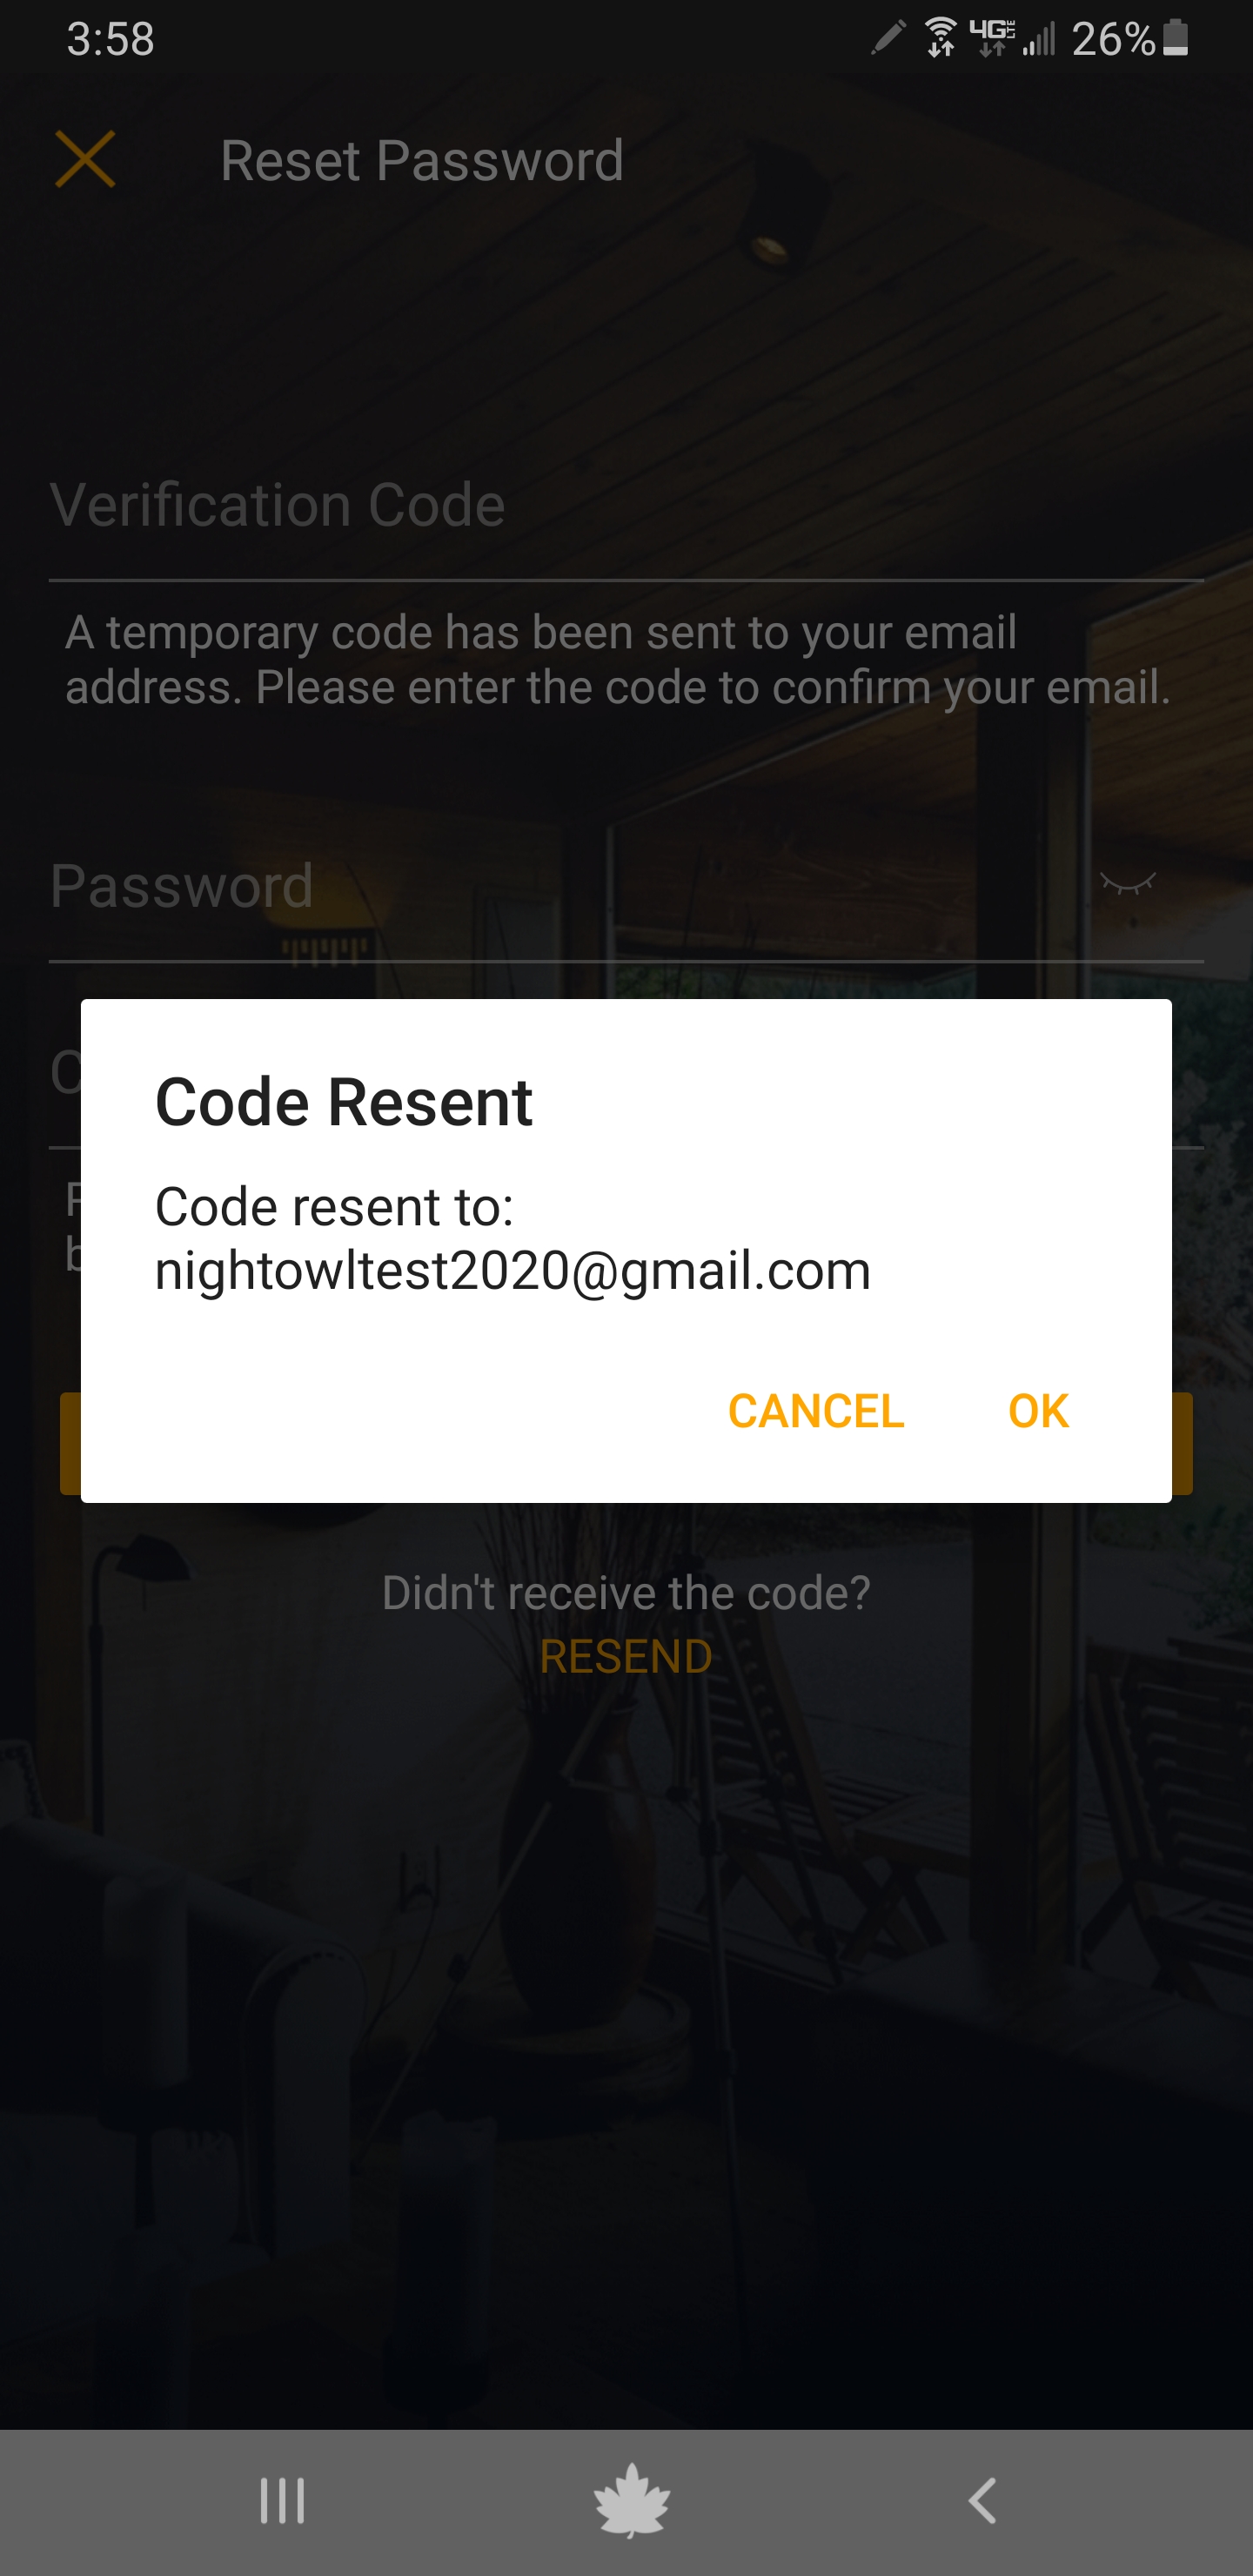
d. Check your email and copy the code you received.

e. Return to the App and enter the verification code. Then enter and confirm your new password. To complete, tap “Reset Password.”

NOTE: You can tap on the eye icon to see the password you are entering and confirming.
f. Now you will be back on the Sign In screen. Login using your email address and the new password you just created.
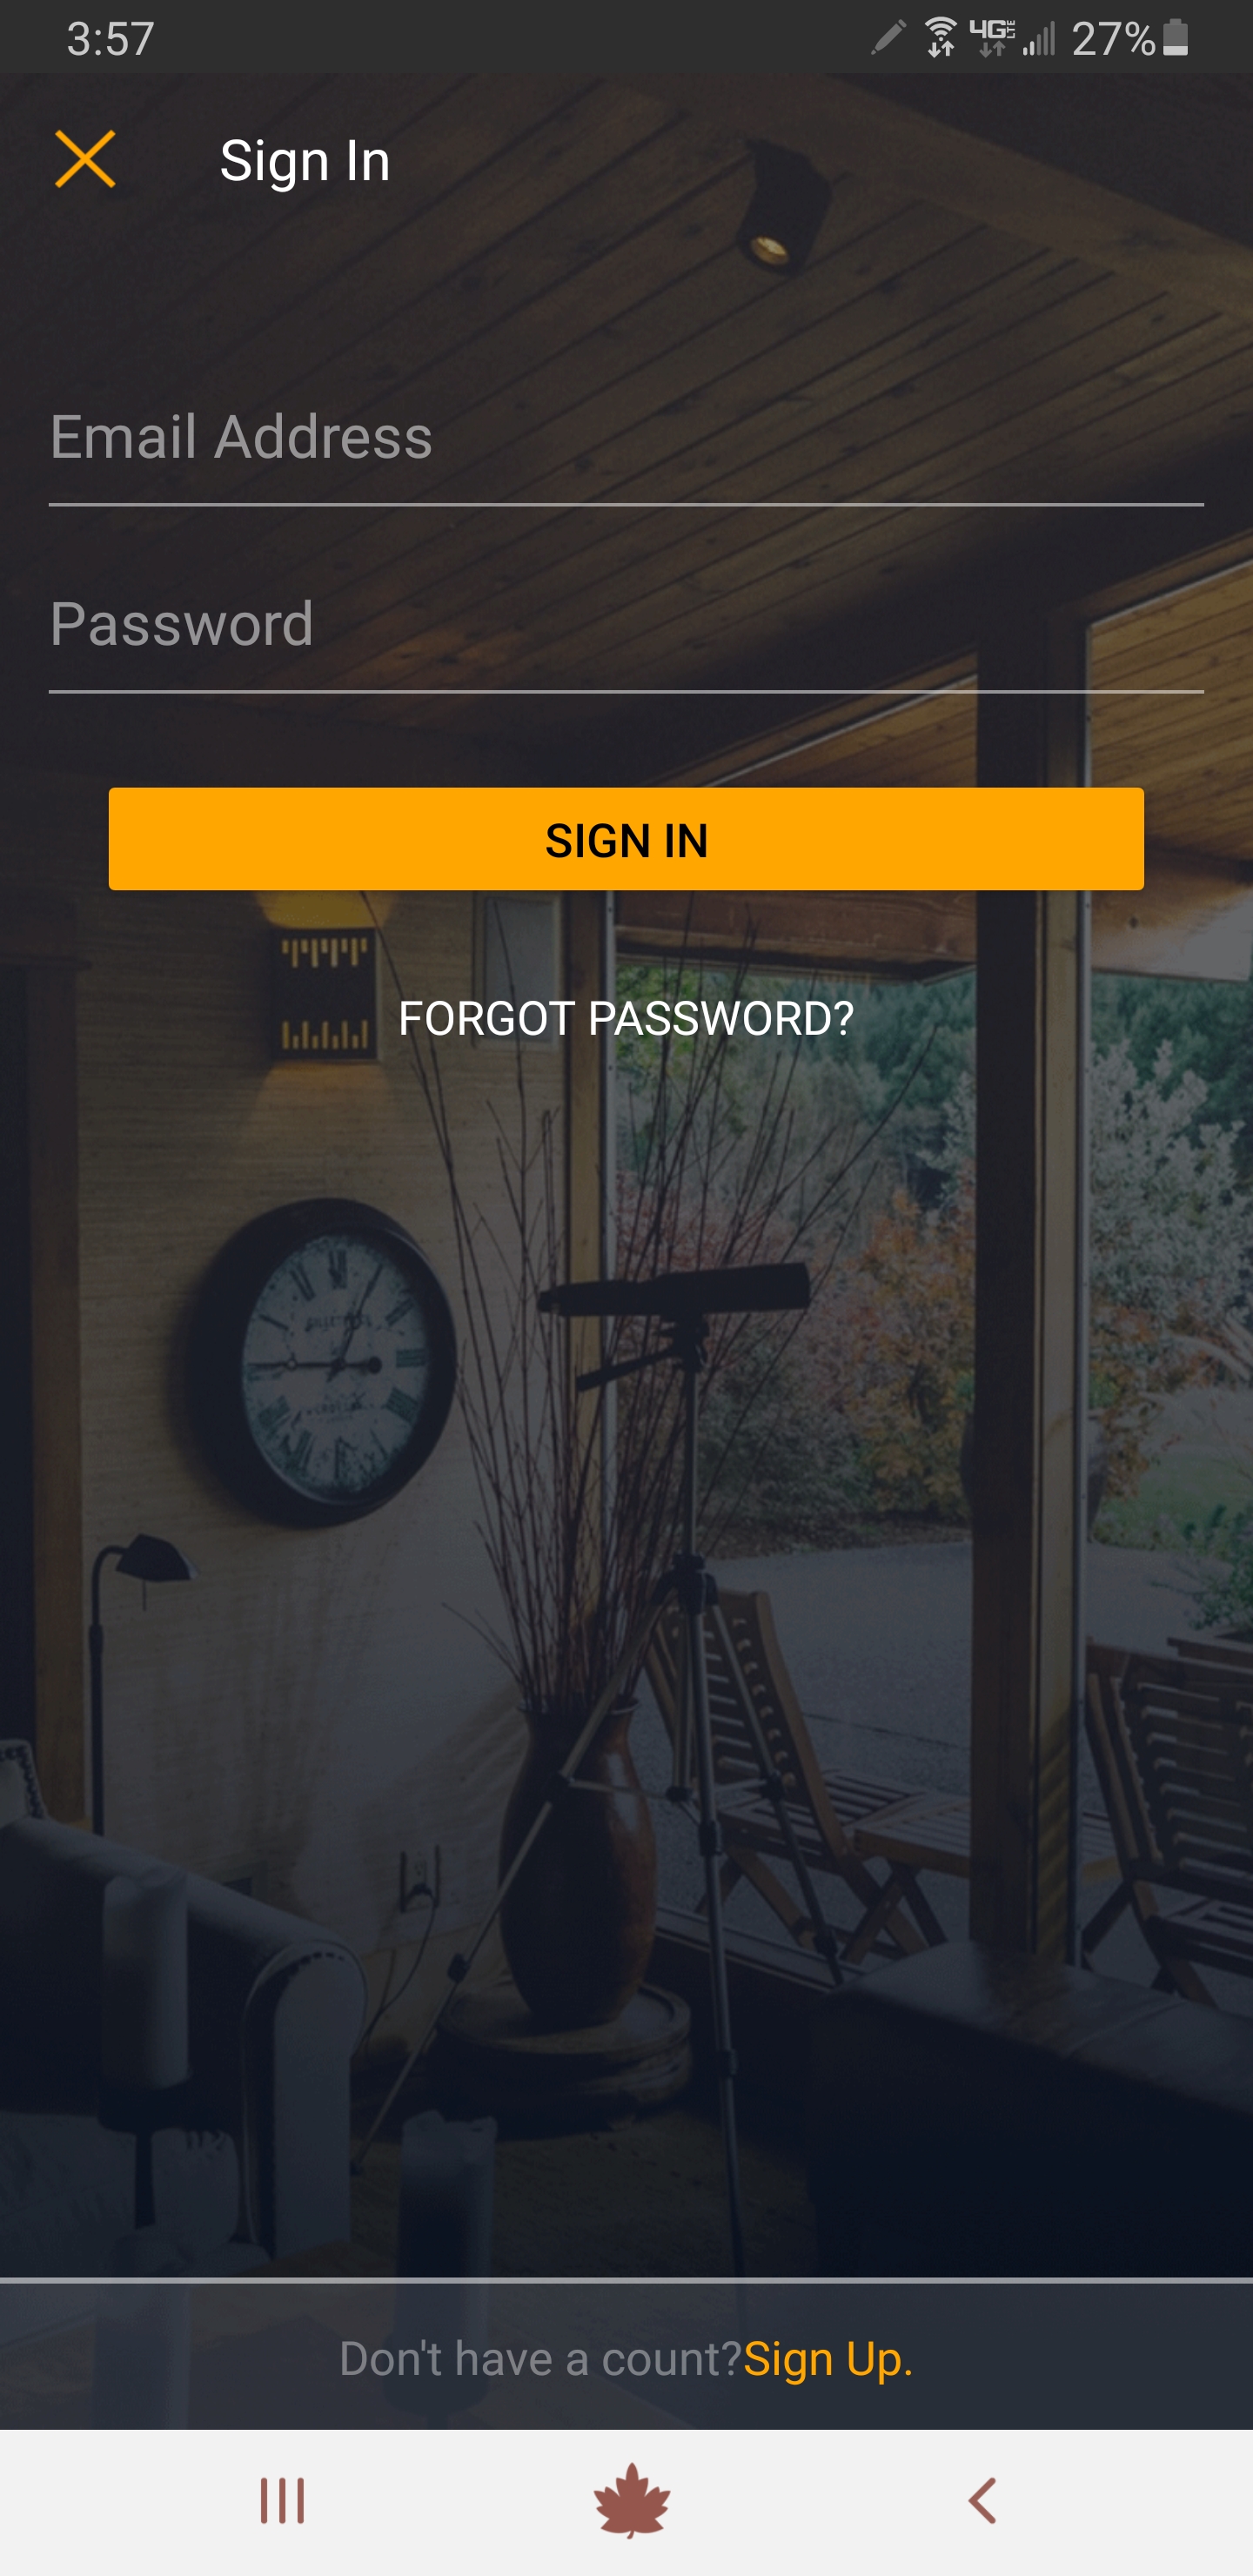
ii. Changing your App Password
Didn’t forget your password, but simply want to change it? No problem. See the steps below:
a. From the App main screen, tap on “Account.”
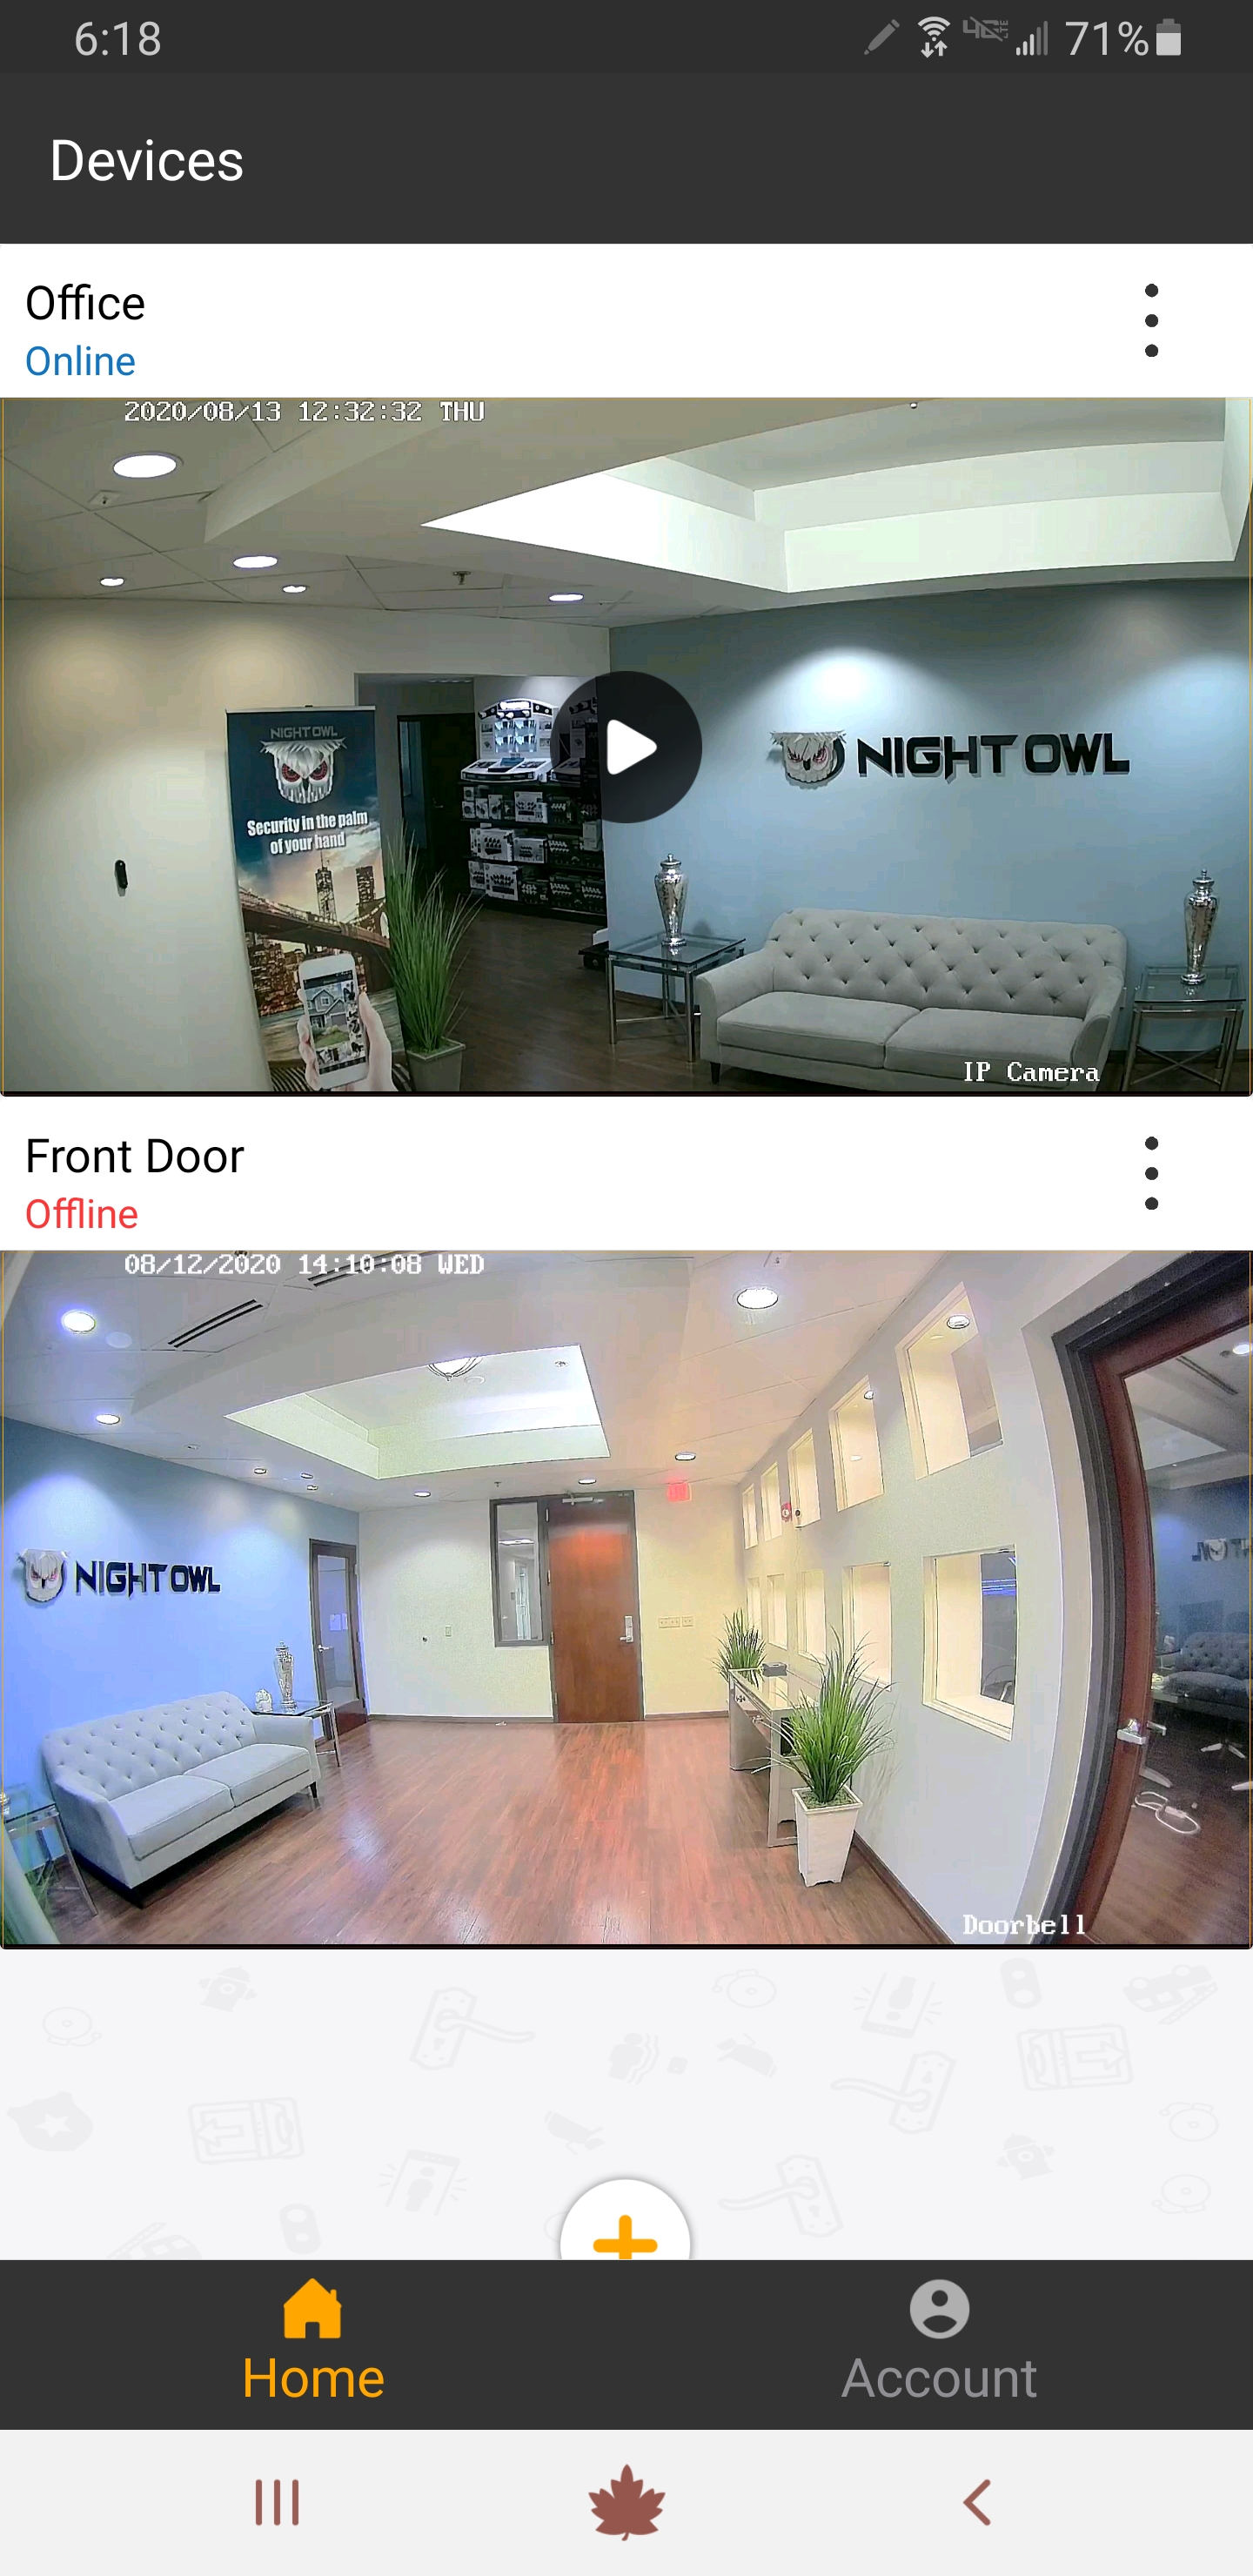
b. Tap on “Change Password.”
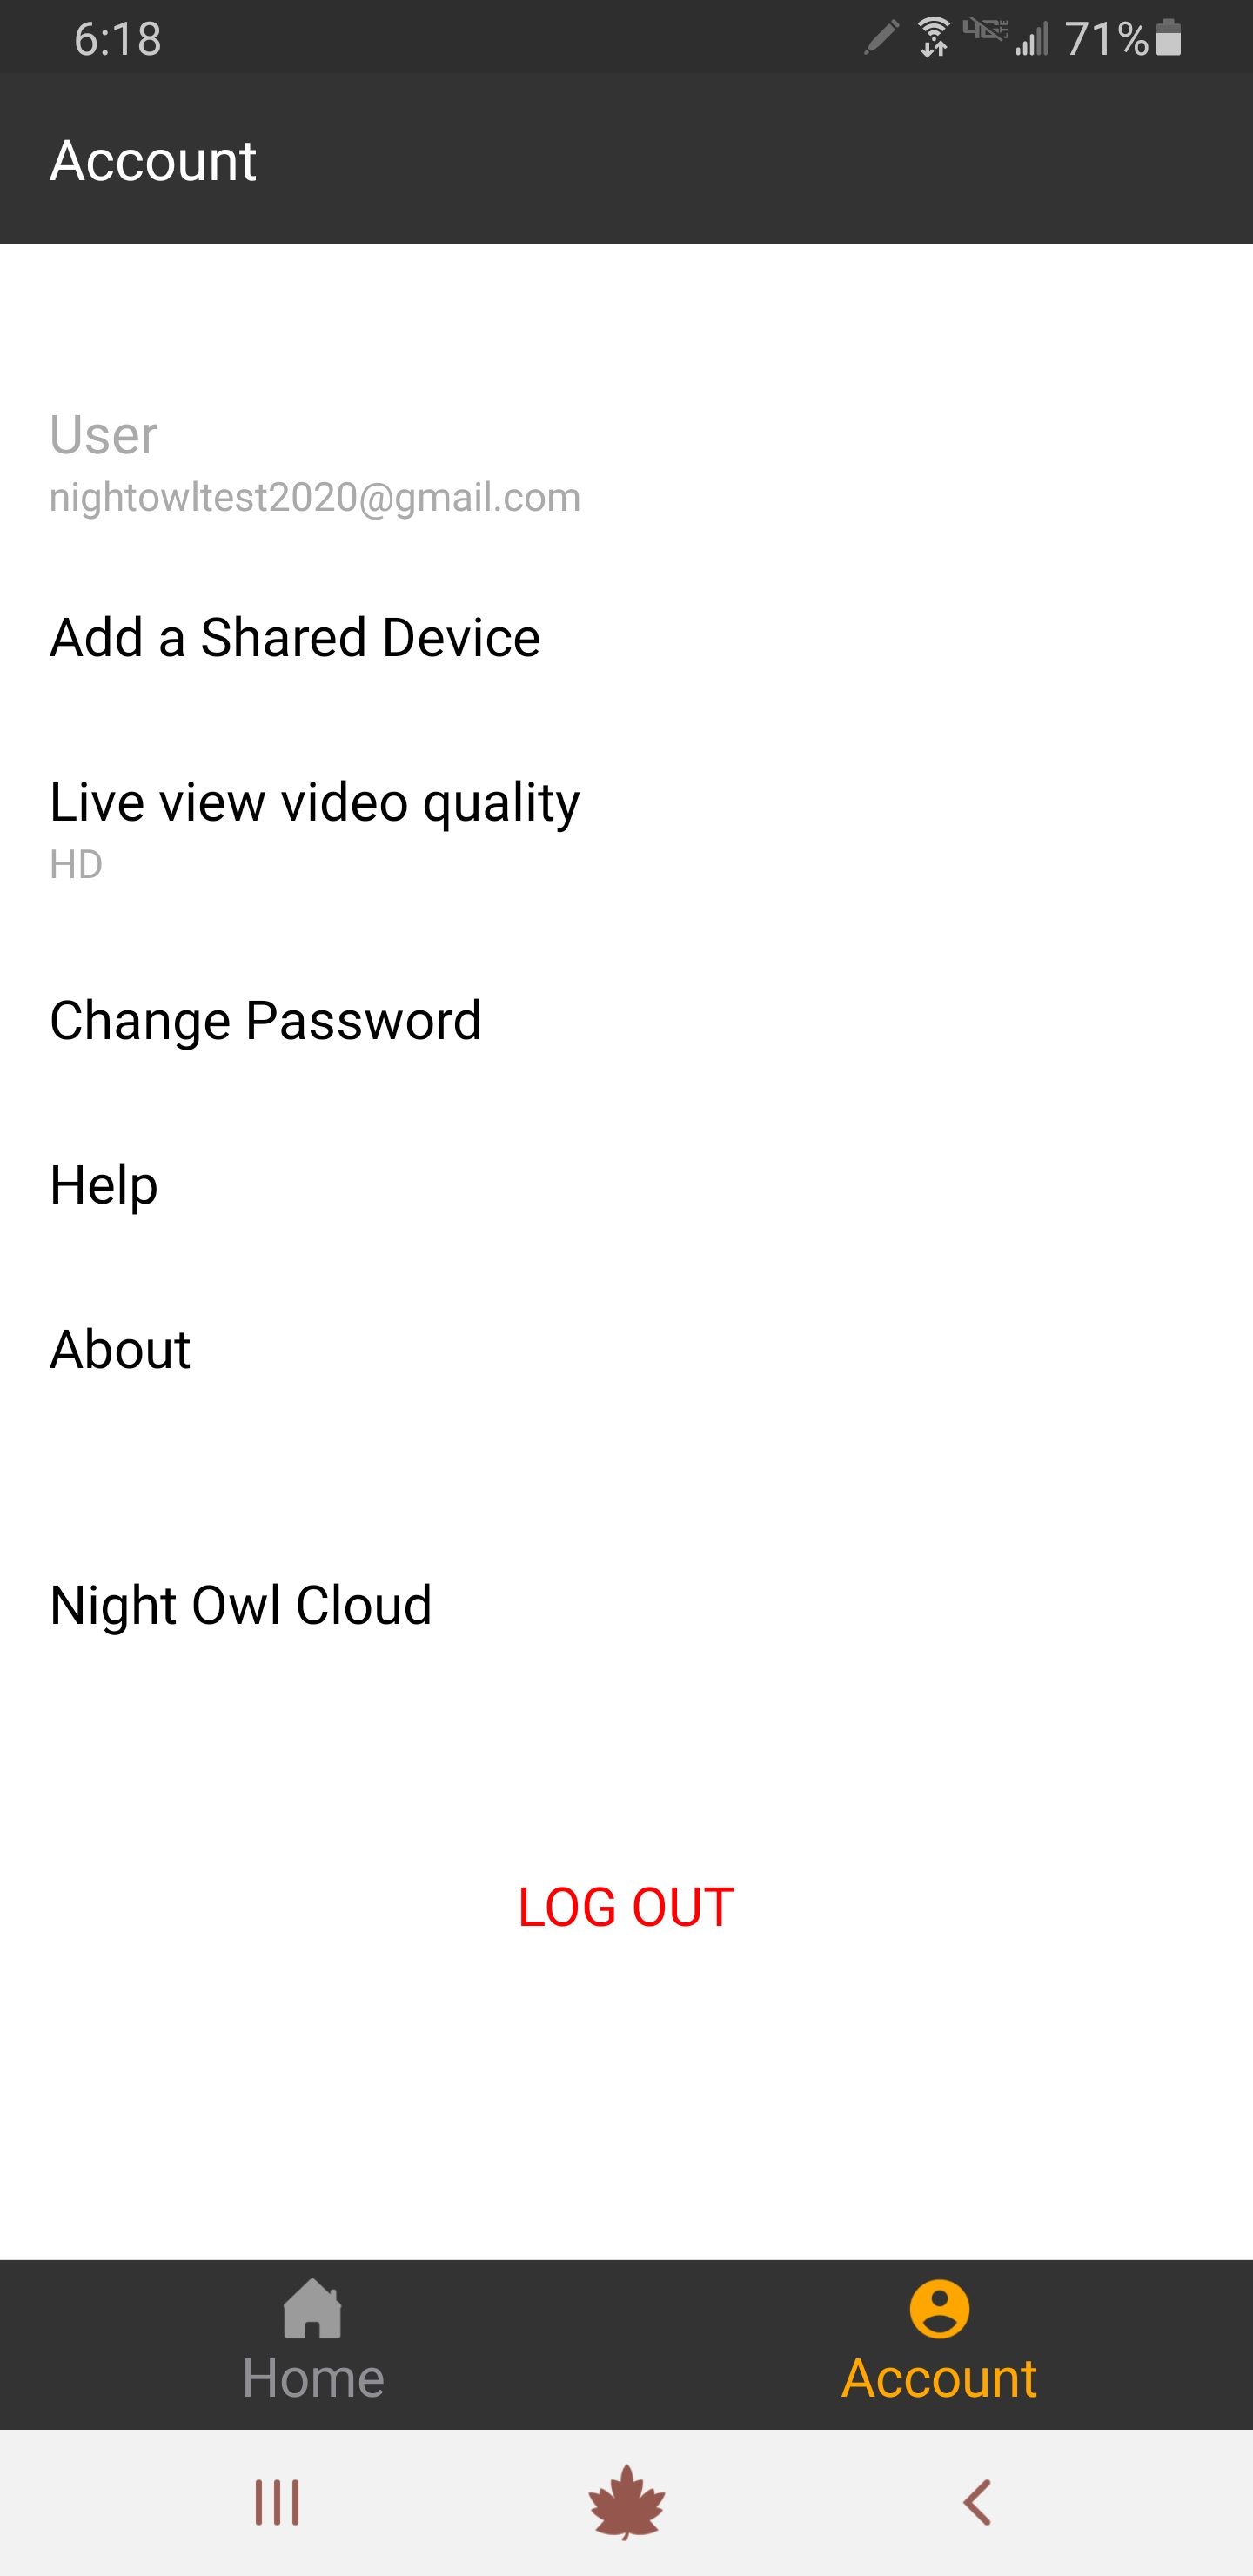
c. Enter your current password followed by your new password. You must confirm the new password. Tap on the eye icon to show the new password you are entering. Tap the checkmark in the top right corner once complete.
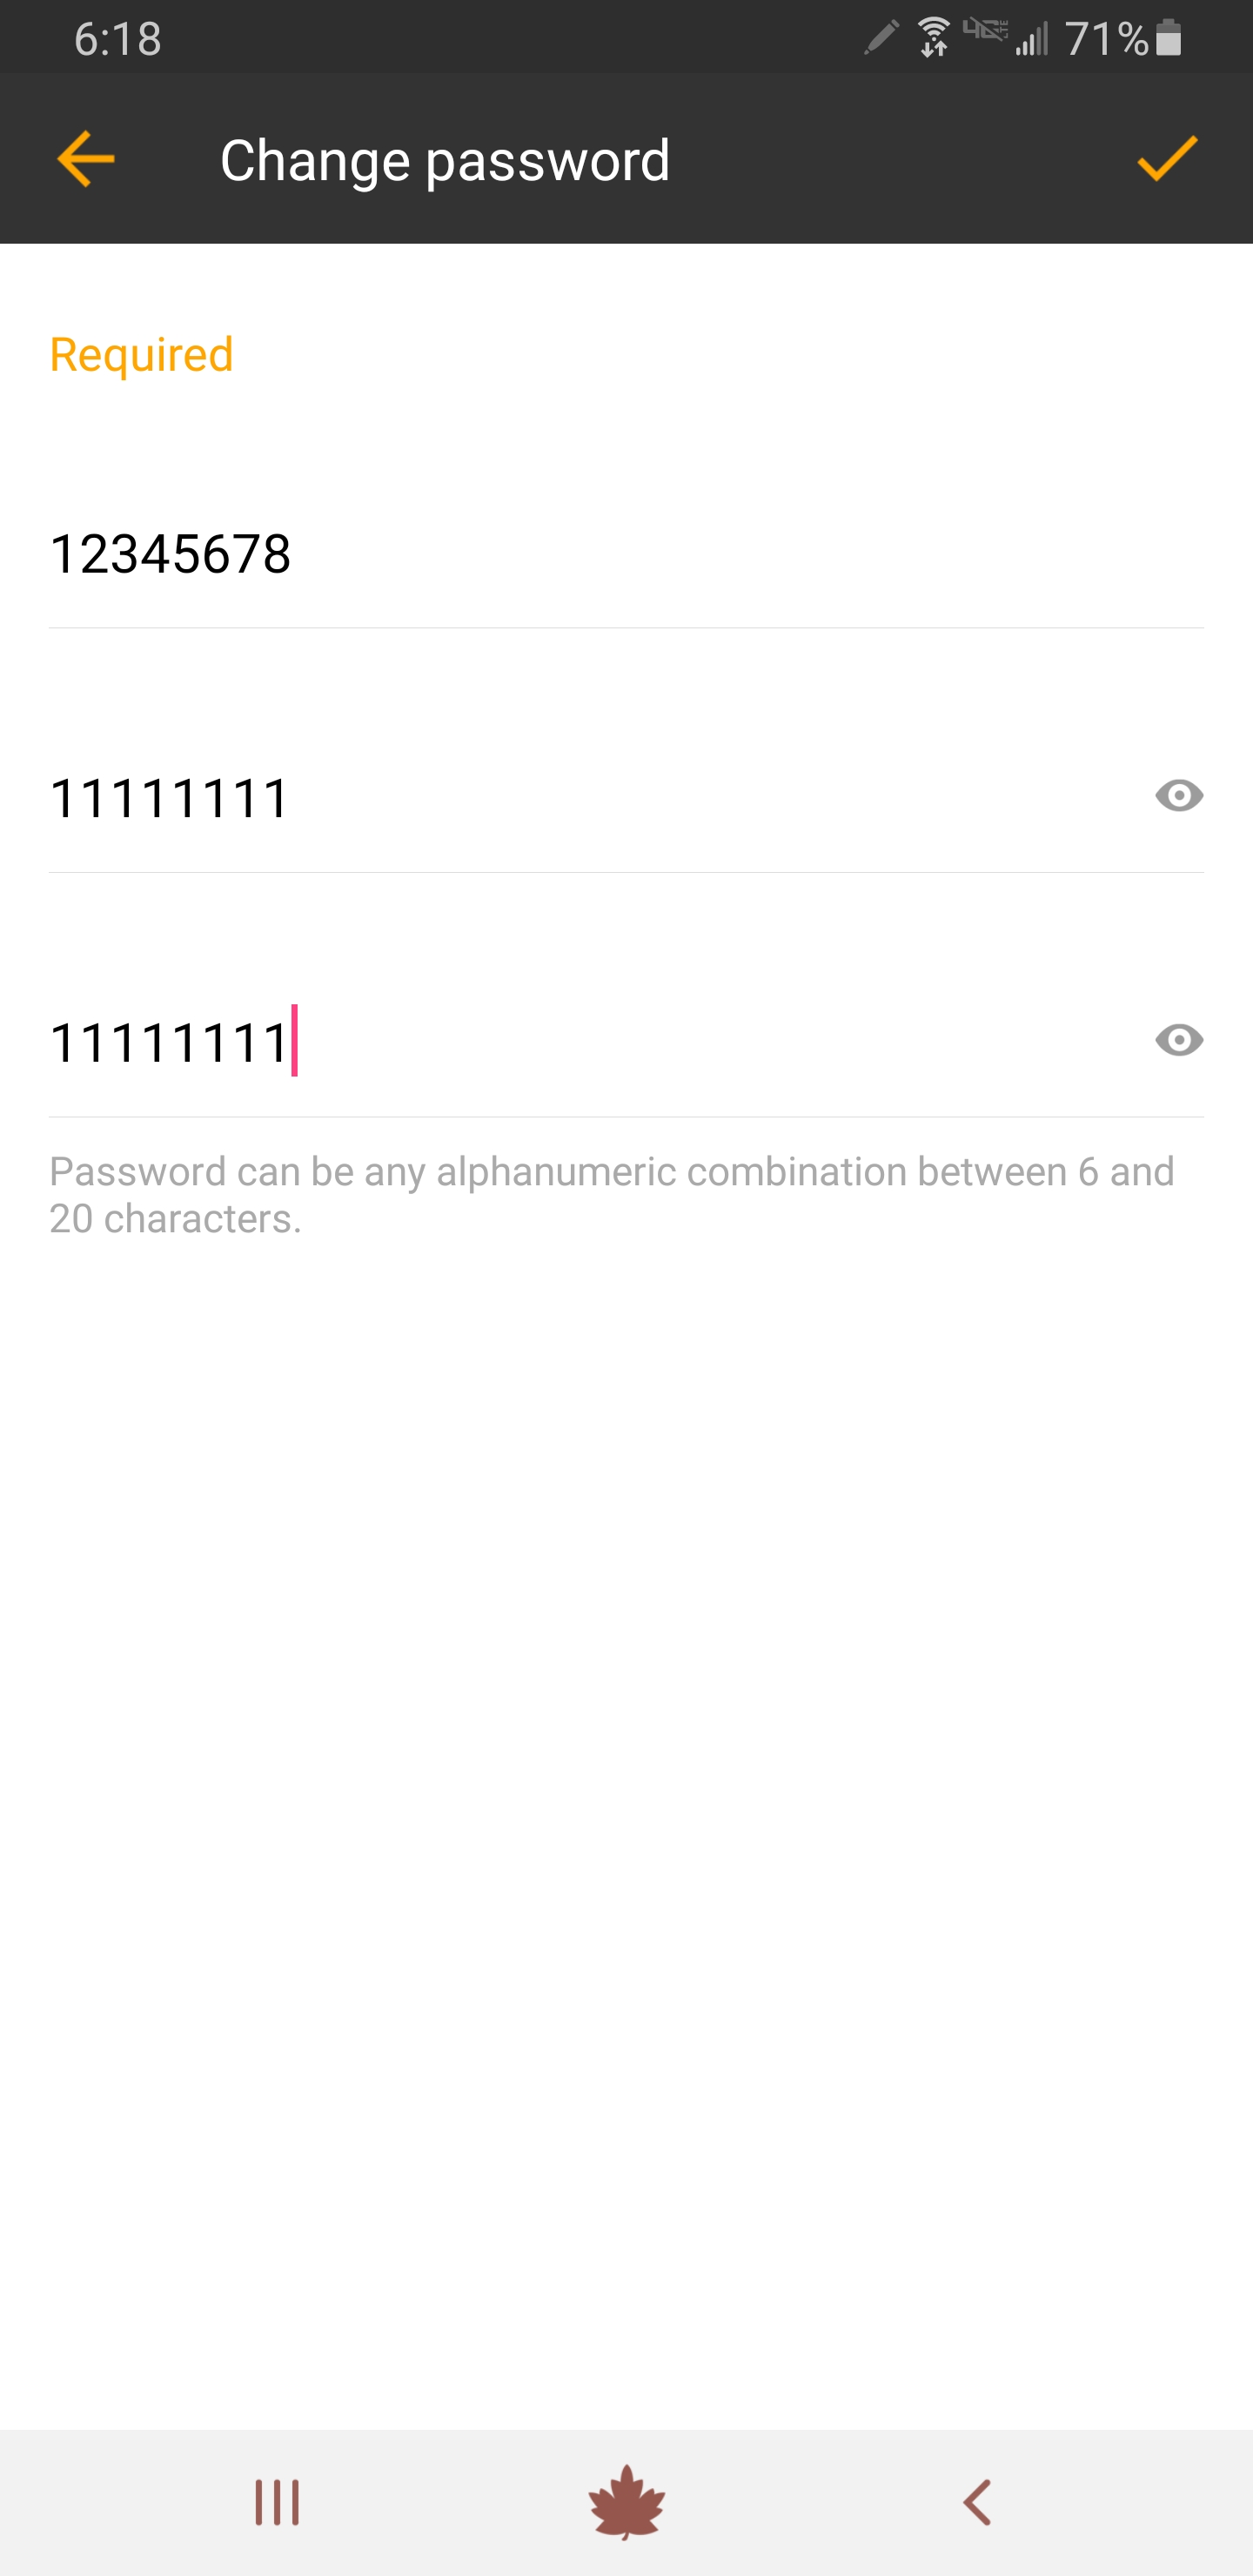
d. You will now be returned to the App Sign In screen where you can sign in with your new password.
iii. Connecting your Device to the Night Owl Connect App After Resetting your Device’s Password
If you forgot your device’s password, you may need to reset it. After you perform a password reset for your device, you will need to re-add your device to the Night Owl Connect App.
a. From the main App screen, your Recorder will show “Connecting” or “Offline.”
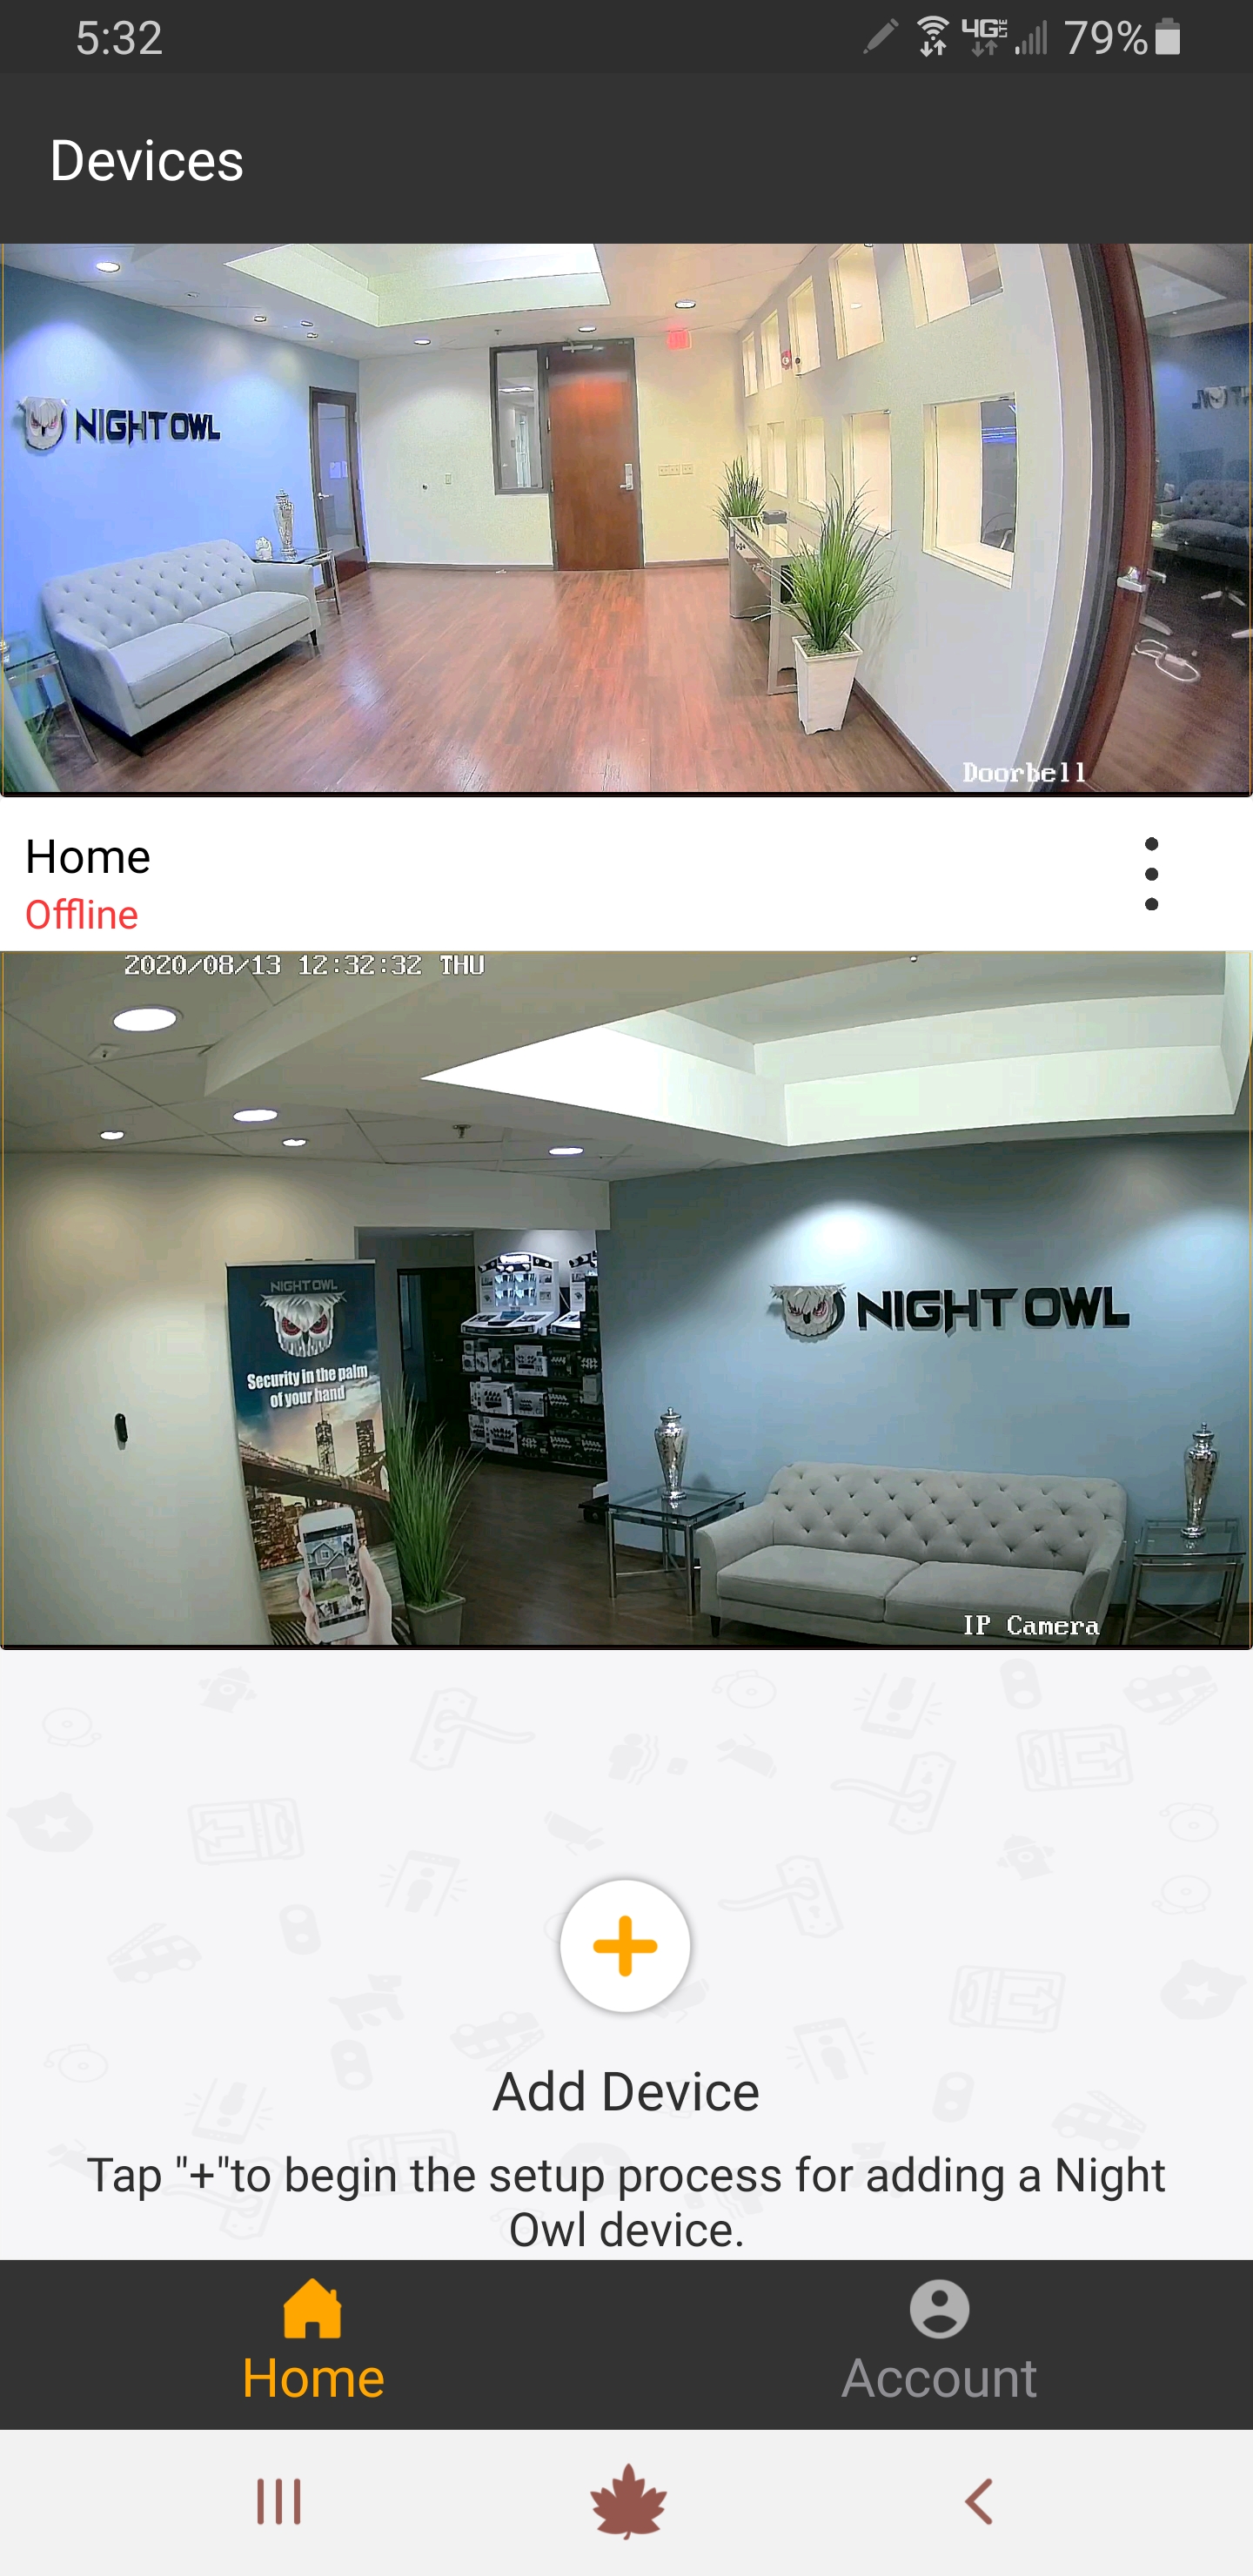
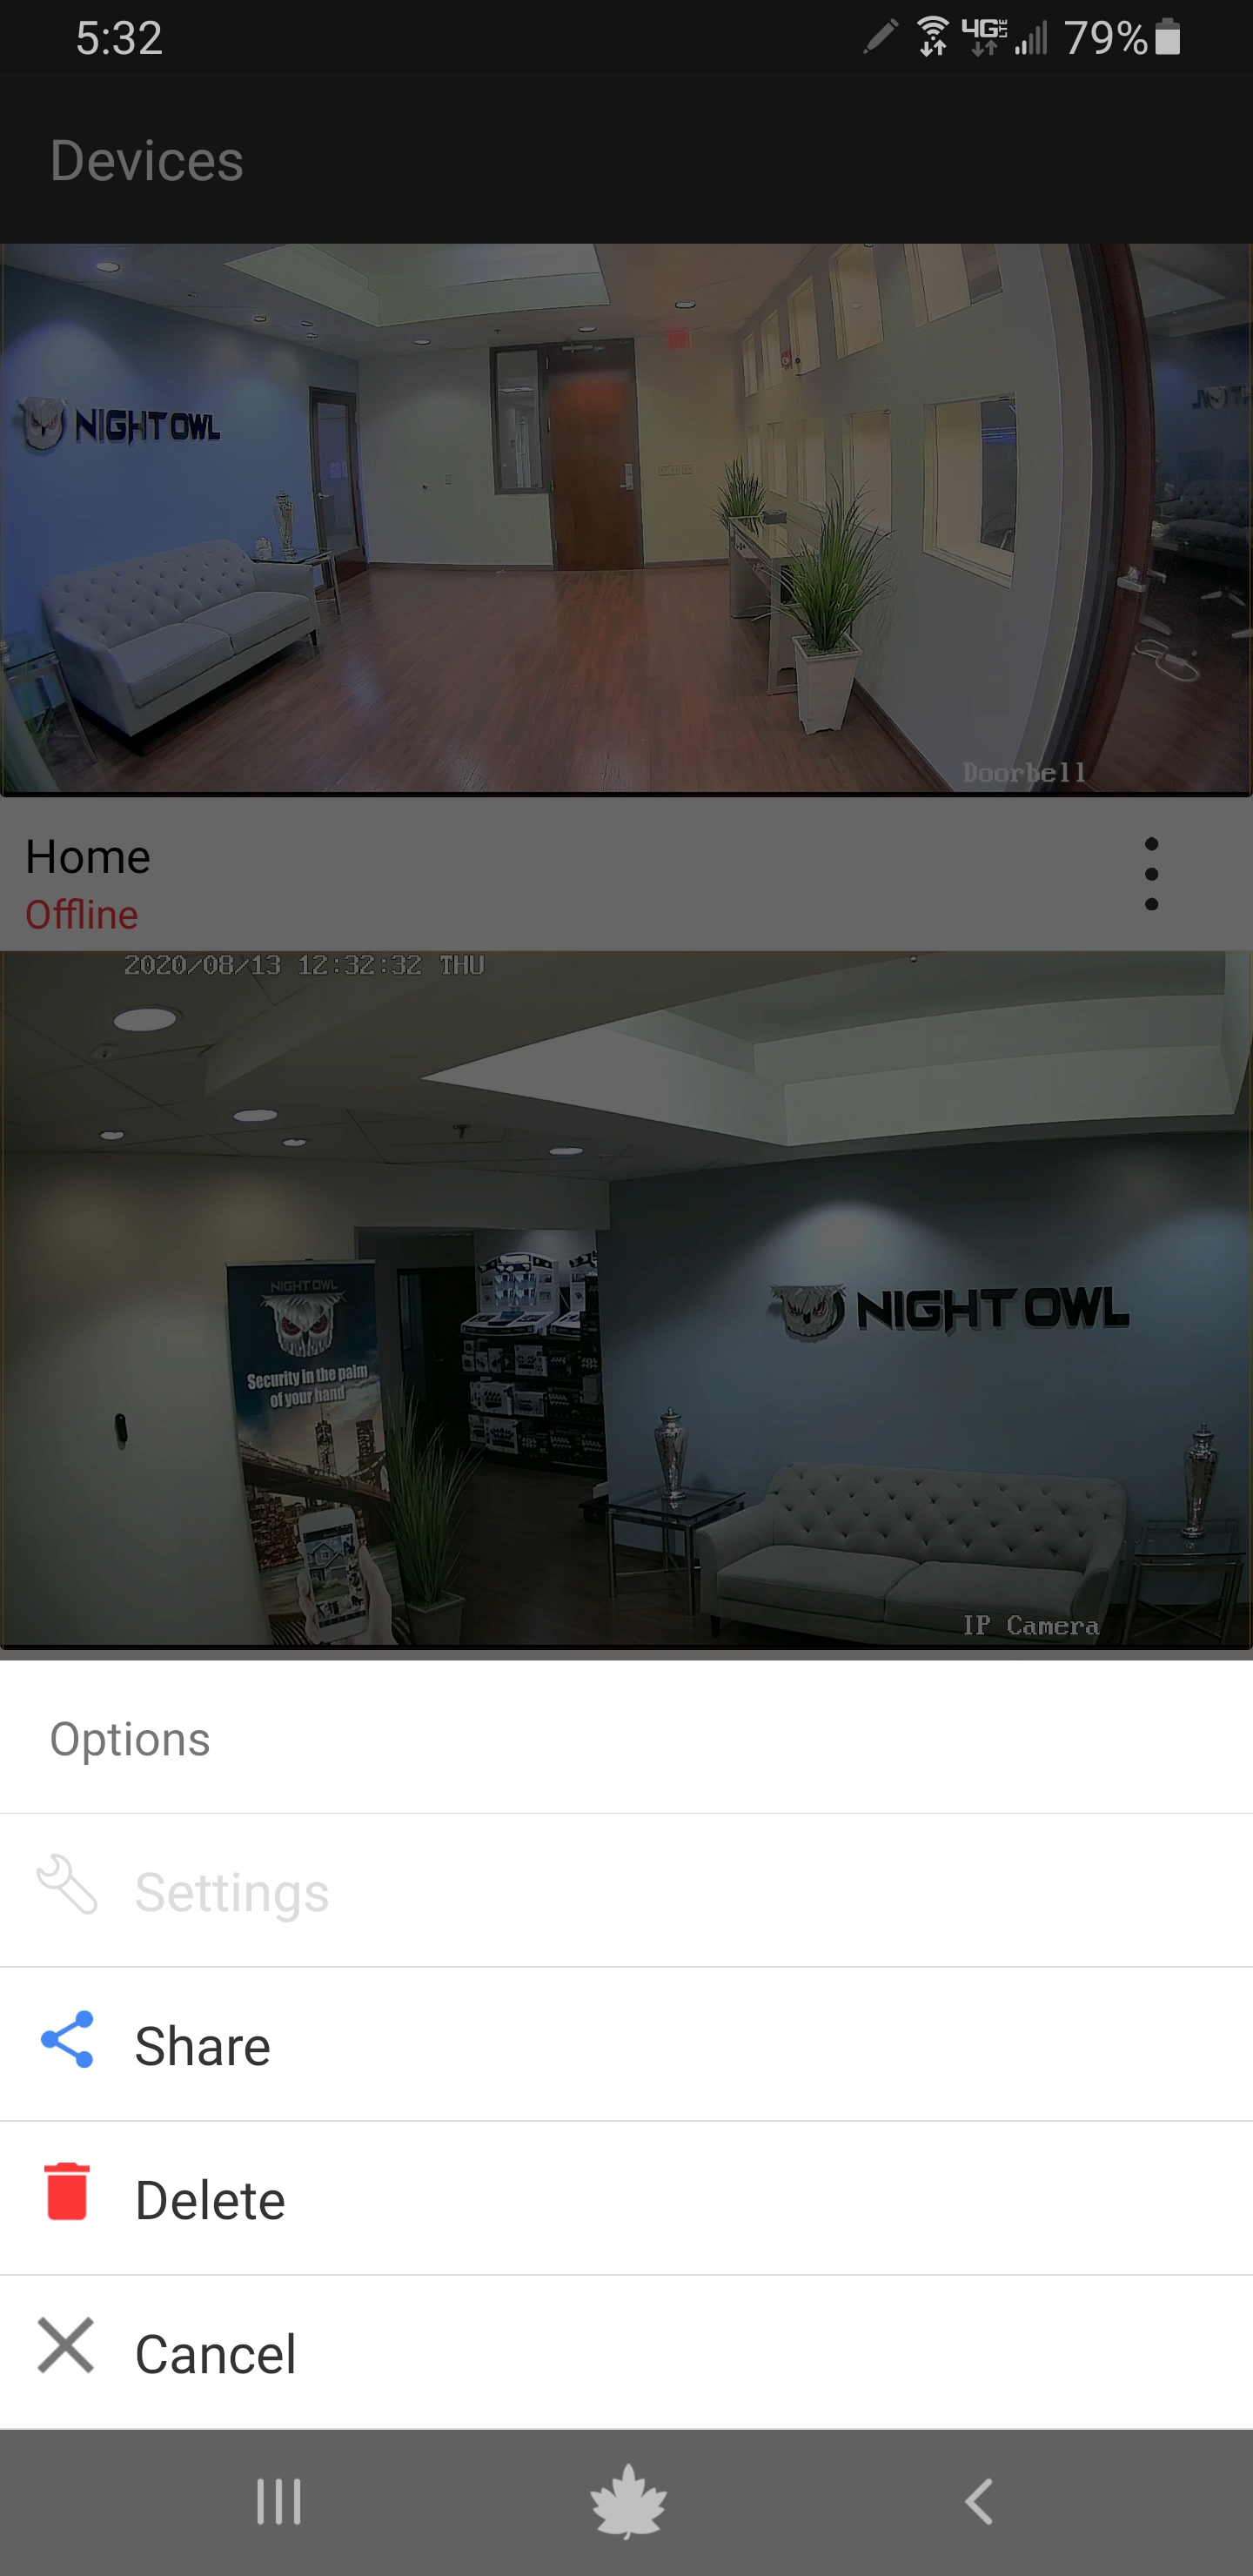
b. Tap the 3 dots to pull up the menu.

c. Tap “Delete.”
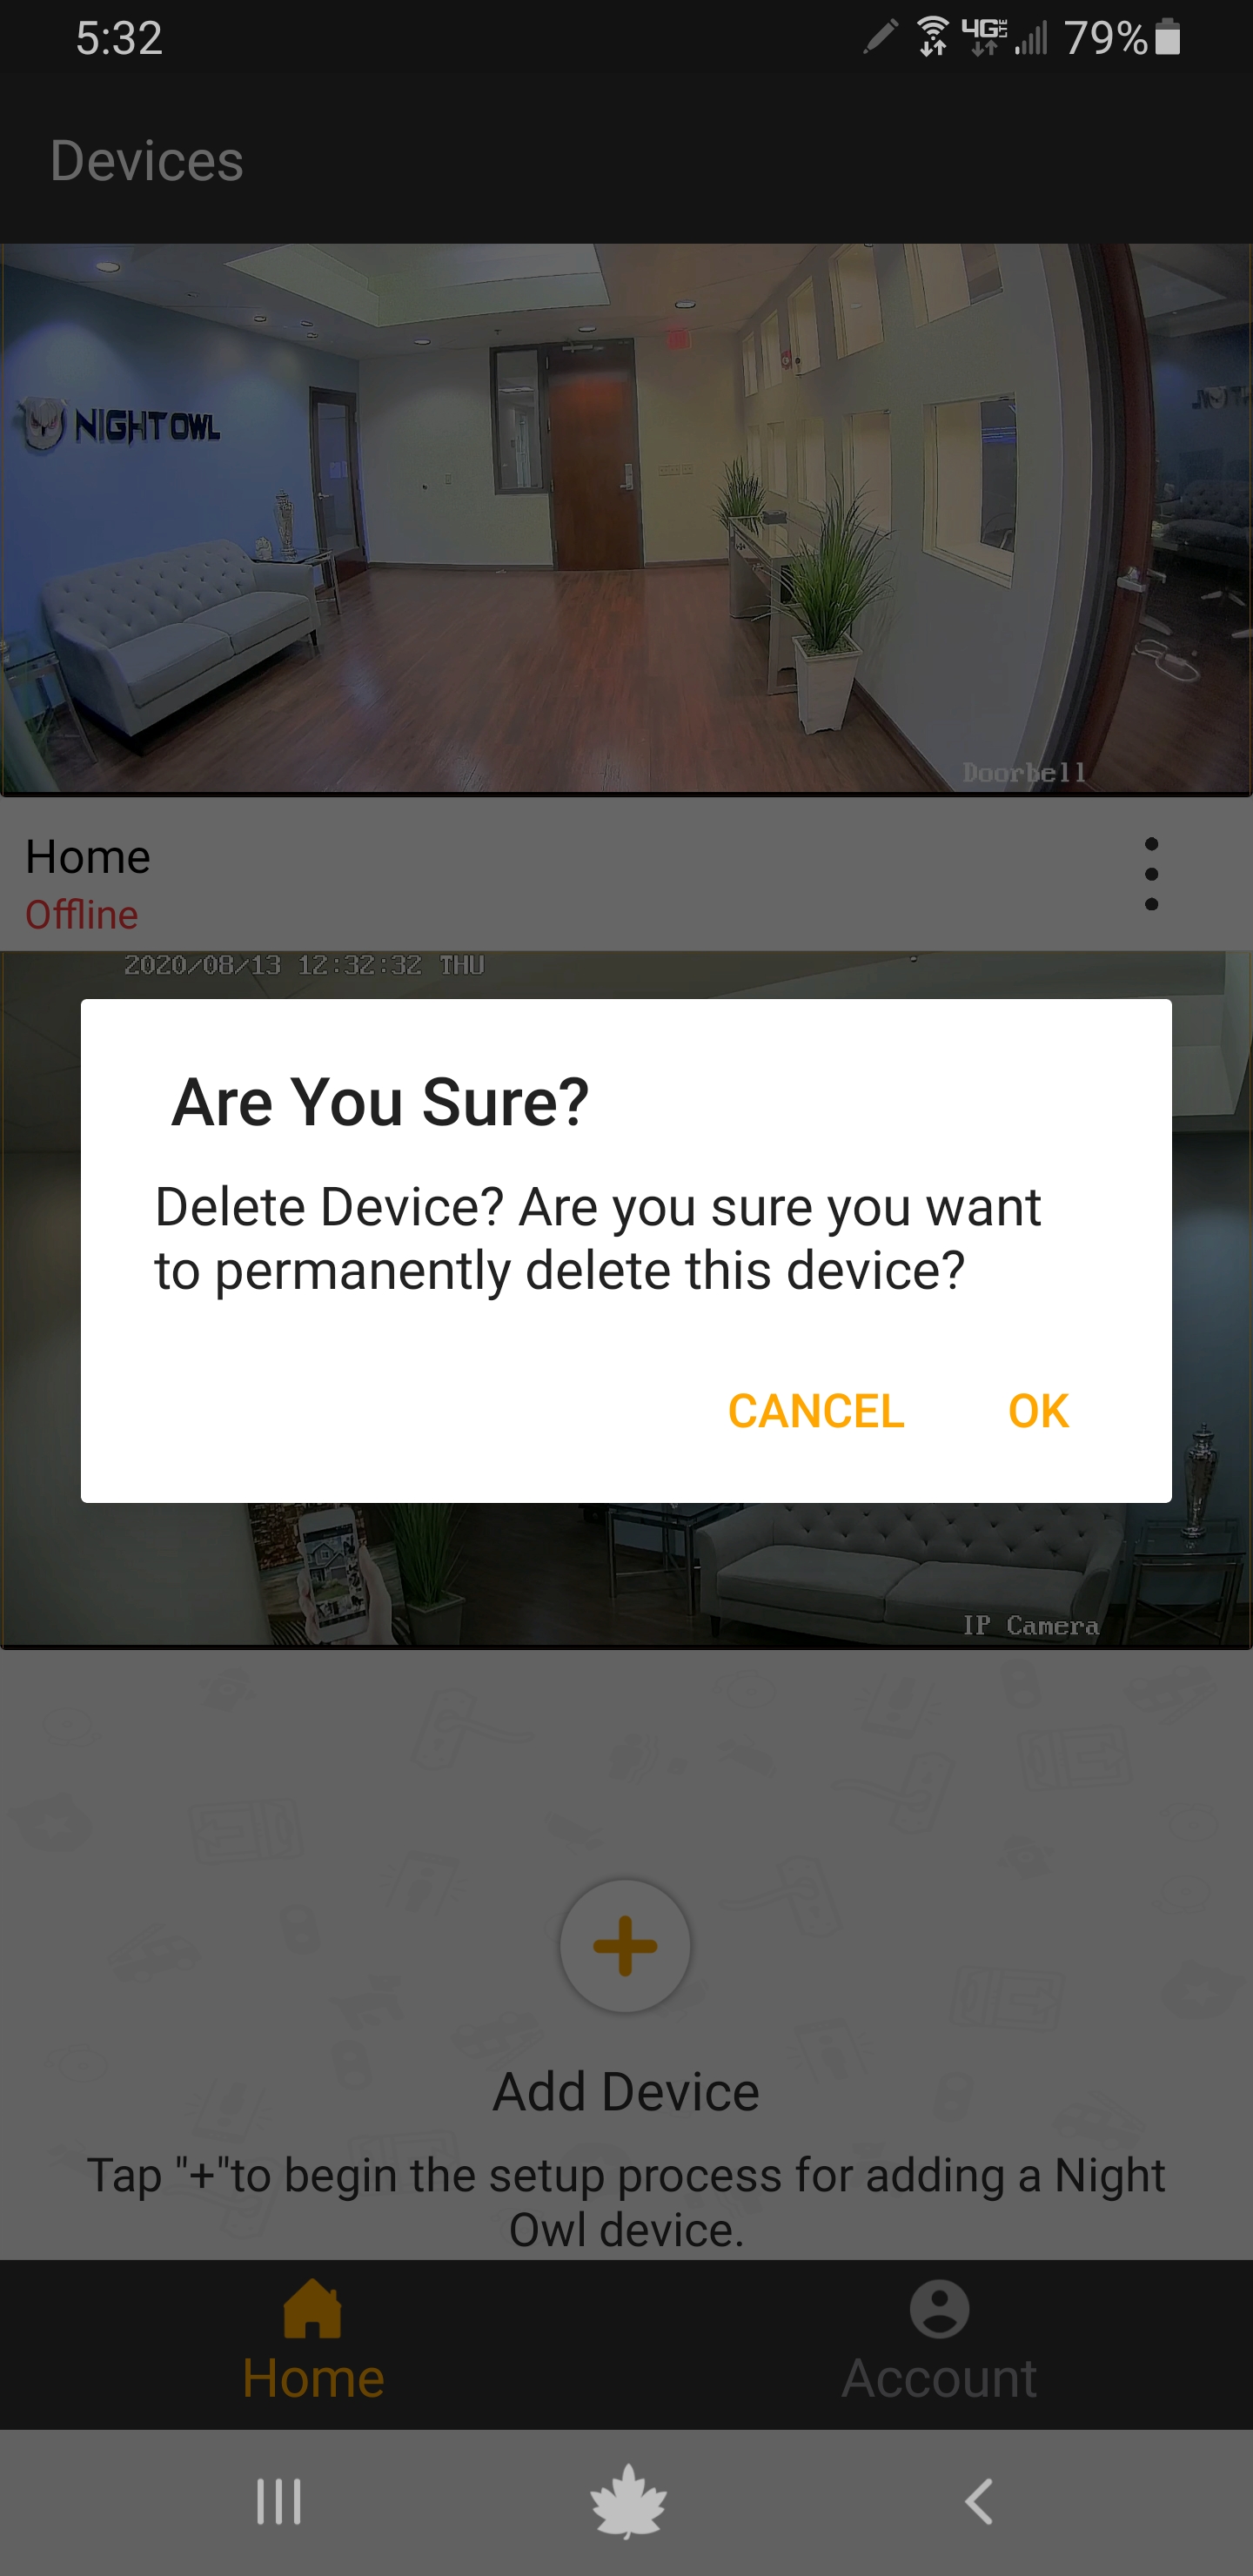
d. Confirm you want to delete the Recorder by tapping “OK.”
e. Now you simply need to re-add the Recorder to the App. Please see section titled Adding a DVR/NVR/Wi-Fi NVR for completing this process.
F. Connectivity Troubleshooting
i. Connection Failure/Degradation
a.Please make sure you are using the correct App for your device.
See the chart below

b. Make sure your Night Owl device and your Smart Device are both connected to the Internet.
Note: When adding a wireless device to the Night Owl Connect App, please ensure the device and your Smart Device are both on the same local network (router).
c. Check your device’s Internet connection. For a DVR / NVR / Wi-Fi NVR or Standalone Device connected to your Internet or Wi-Fi, check your network’s upload and download speeds.
1. Use a computer with PC /MAC OS
2. Open a Website Browser and type www.speedtest.net
3. Right-click on Begin Test
4. See the download/upload speeds
NOTE: See your product’s specifications for recommended Internet speeds as it varies. Consider all the networked devices you have on the network you are using when ensuring you are meeting the minimum speed requirements.
ii. Video Freezes or is Slow During Playback
a. Make sure you have your Smart Device connected to the Internet while the App is running.
b. Ensure the Night Owl Connect App and Smart Device software are both up to date. A new software update may have fixed the issue you are experiencing.
1. For your Smart Device:
- Android Version 4.0 or later
- IOS Version 8.0 or later
c. Make sure your camera / Recorder is connected to the Internet.
1. Ensure the device shows “Connected” on the main screen of the Night Owl Connect App.
2. For a DVR / NVR / Wi-Fi NVR:
- Check the Ethernet cable connection to your device and router.
- Ensure the status light is flashing green on the rear of your device, which indicates the network connection is good.
d. If you are using your Smart Device’s cellular data (not Wi-Fi):
1. Ensure your Smart Device meets the requirements below:
- The coverage in your area must support 3G, 4G, or 4G LTE.
- Your Smart Device must support 3G, 4G, or 4G LTE.
2. Verify the SIM card is inserted properly in your Smart Device.
3. Turn off your Smart Device.
4. Remove and re-insert the battery. If your Smart Device doesn’t have a removable battery, press and hold the power button and volume down button for up to 15 seconds until the device resets.
5. Turn the Smart Device back on and open the Night Owl Connect App and see if the issue was resolved.
NOTE: Free apps and free games are filled with advertisements that eat your bandwidth/data traffic and can contribute to poor coverage/poor streaming to your Smart Device.
e. Check your devices Internet connection. For a DVR / NVR / Wi-Fi NVR or Standalone Device connected to your Internet or Wi-Fi, check your network’s upload and download speeds.
1. Use a computer with PC /MAC OS
2. Open a Website Browser and type www.speedtest.net
3. Right-click on Begin Test
4. See the download/upload speeds
NOTE: See your product’s specifications for recommended Internet speeds as it varies. Consider all the networked devices you have on the network you are using when ensuring you are meeting the minimum speed requirements.
f. For a standalone camera or doorbell (not connected to a Night Owl system):
1. Ensure you are within the range limitations for your product.
- Range is usually capped at 300 ft. from your router, but check your product’s specifications to verify.
- Check if there are any obstacles affecting the signal strength. Some obstacles more heavily affect the signal strength.
See below

g. As a last resort, uninstall and reinstall the Night Owl Connect App on your Smart Device to see if that corrects the issue.
iii. Power Issues for Standalone Wireless IP Cameras
a. Make sure the camera’s power adapter is connected to the power outlet.
b. Verify if the camera is getting power by checking the status lights. For wireless indoor IP cameras, the status light is blue and located on the back of the camera. For wireless outdoor IP cameras, the status light is green and located at the end of the power cable of the camera.
c. Check to see if there is power going to the outlet where you are connecting your camera. Try connecting another device such as a lamp or charger to make sure the outlet has power or try a different power outlet.
d. Please verify if the power adapter is connected to a surge protector/power strip or battery backup. If yes, please connect the camera’s power supply to the wall socket. This will help identify if the issue is with the surge protector/power strip or the battery backup.
e. See if the AC power adapter is defective or incorrectly connected. Make sure the power adapter being used is the one that came in the box with the system.
f. If you have more than one camera of the same model, swap the camera power adapters. It helps to determine if the problem is the camera power adapter.
i. Ensure you device is audio enabled. Not all Night Owl cameras and products are audio enabled. You can go to support.nightowlsp.com and enter the Series from your product Support Sticker to discover if it is audio enabled.
ii. Ensure the audio is not muted in the App.
|
|
Copy and paste the verification code into the Code field.
|
|
iii. Ensure your Smart Device’s audio is not muted.
iv. As a last resort, try resetting the camera. To do this, use the reset pin to press the reset button until you hear the camera is resetting.
2. CMS (Control Management Software)
CMS allows you to remotely view your Night Owl product from a PC or Mac.
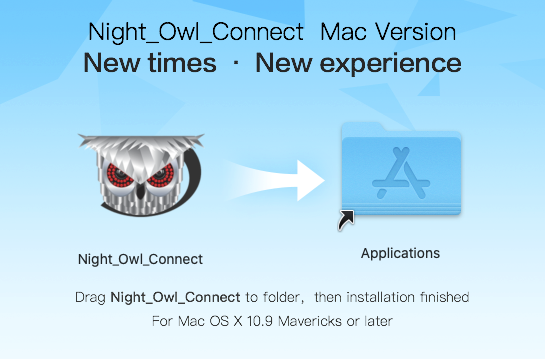
i. Download the Night Owl Connect CMS software for your PC or Mac.
ii. Install and launch the CMS software on your PC or Mac.
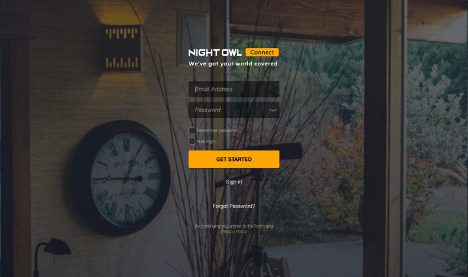
iii. Once you have launched the Night Owl Connect CMS software, you will have the option to sign in with a pre-existing account or you can click “Get Started” and create a Night Owl Connect account.
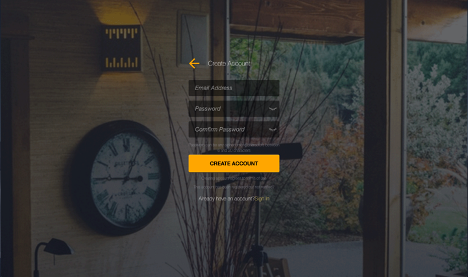
iv. If creating an account, once you click “Get Started” you will be asked to enter a valid email and create a password. Once finished click “Create Account.”
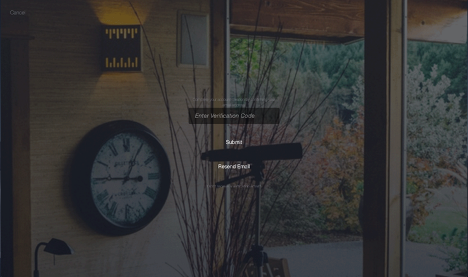
v. Retrieve the verification code that was sent to your email address and enter it. Click “Submit” to continue.
vi. Log in to see all connected devices in the live view layout screen.
NOTE: If no devices are shown, verify the device has been added to the Night Owl Connect Mobile App. Once the device is added in the Mobile App, log in to your Night Owl Connect CMS software again and the device should display.
B. Login Troubleshooting
Please refer to the Initial Setup section if you have not created an account.
i. Ensure you have already completed the account setup in the Night Owl Connect Mobile App. A device should be added to the mobile App before it can be viewed in the Connect CMS on your PC or Mac.
ii. Make sure you have verified your email address via the verification code email before proceeding.
iii. Follow these steps to reset your password:
NOTE: This is ONLY the password for the Night Owl Connect App, not the password for your DVR/NVR or device.
a. Click “Forgot Password.”
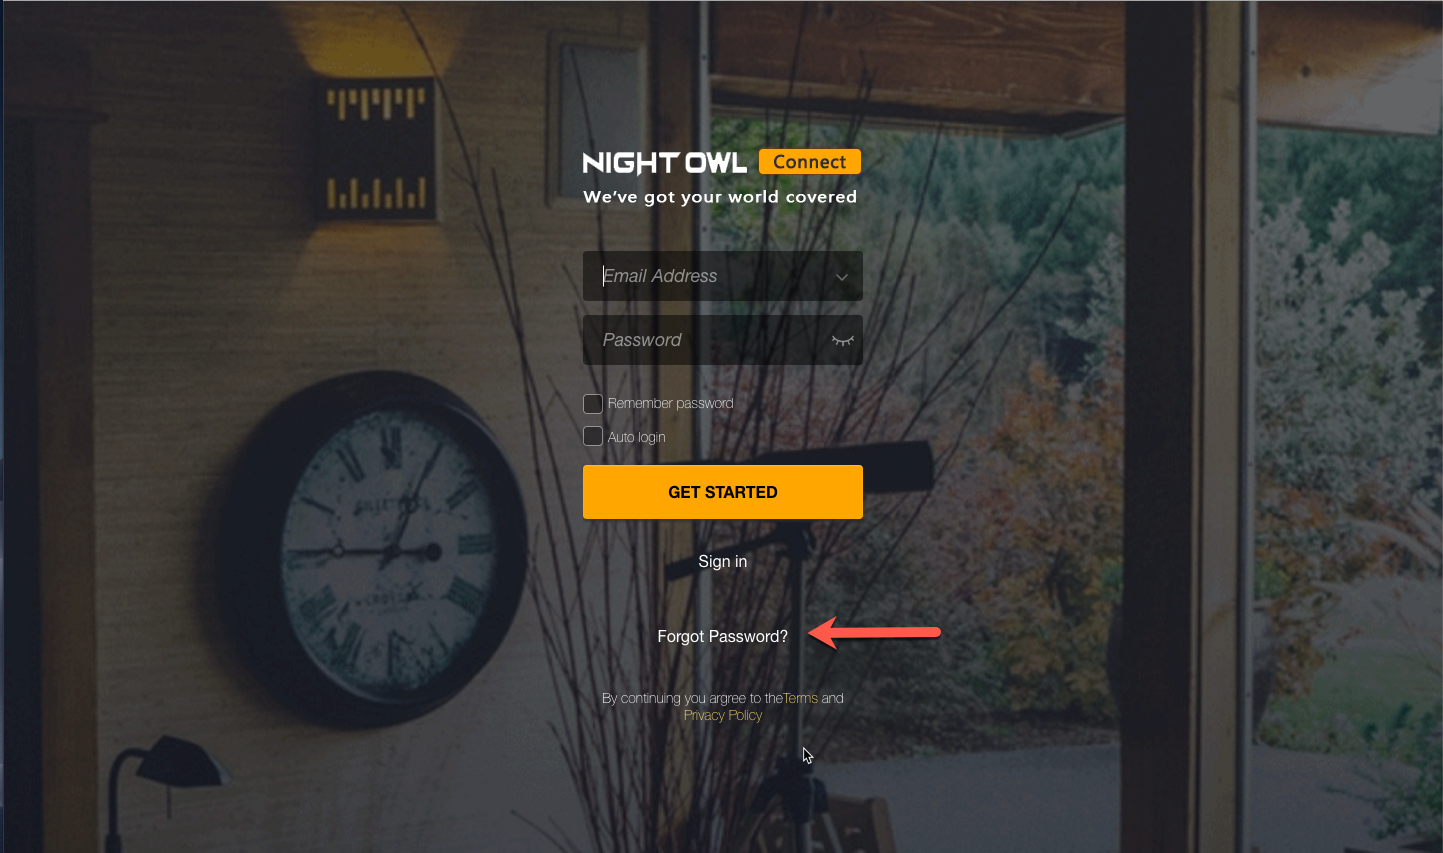
b. Enter the email address used for your account setup and click “Get Verification Code.”
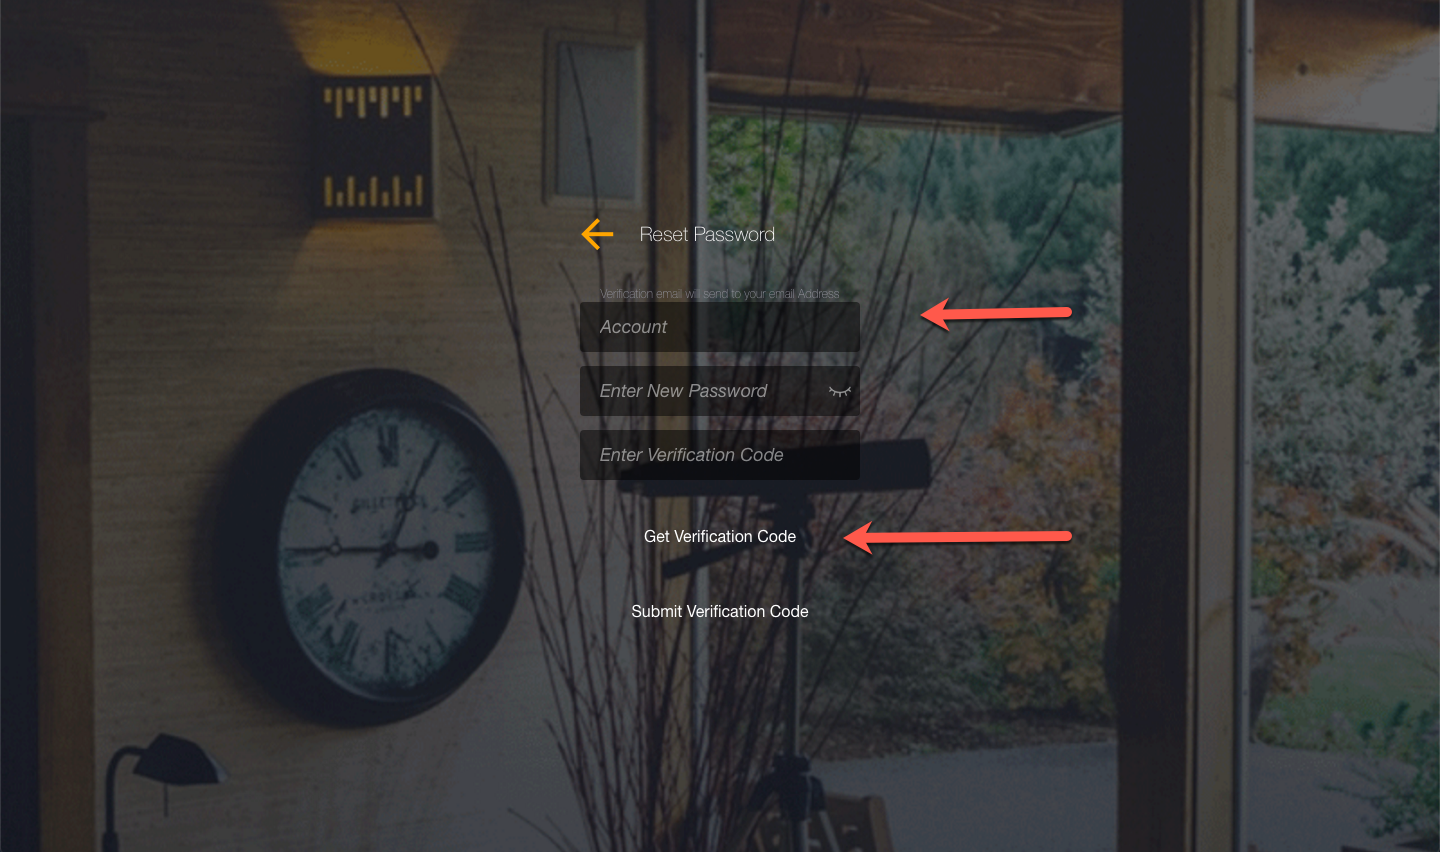
c. Once you have sent a reset code to your email address from the Night Owl Connect CMS software, log in to your email account and select the email with the subject line “Your Night Owl Connect verification code.”
d. Open the email and copy the six character reset code and paste it into the Night Owl Connect CMS “Enter Verification Code” field. Then, enter a new password in the “Enter New Password” field and click “Submit Verification Code.”
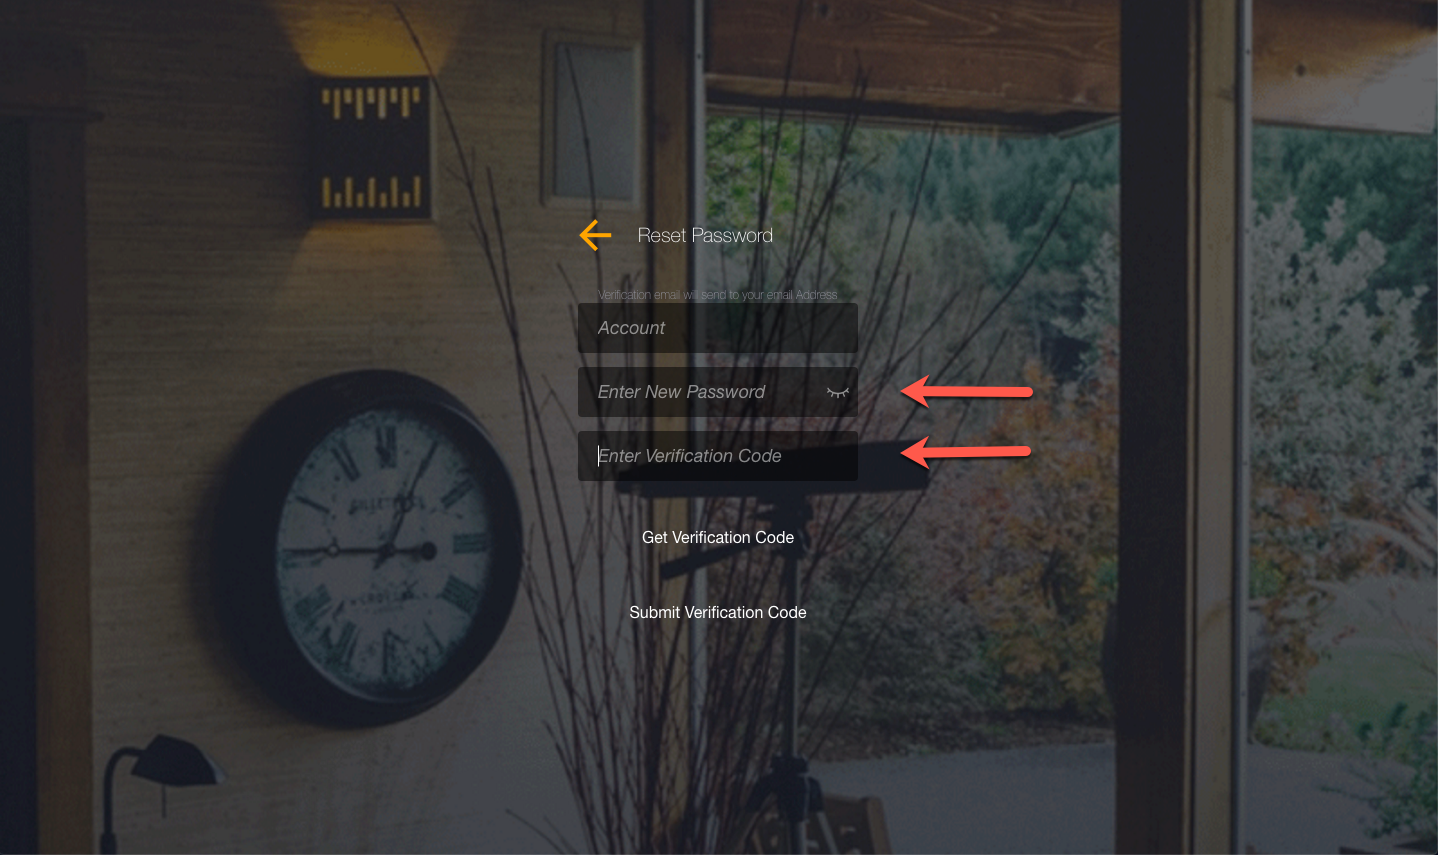
e. After submitting, use the back arrow to return to the login screen and log in with your new credentials.
i. If the CMS software is not displaying live view images or the software does not add an online device, follow the steps below:
a. Verify you are using the Night Owl Connect CMS Software for your Recorder
b. Ensure your Recorder and your PC/Mac are both connected to the Internet
NOTE: Ensure that your Recorder is connected to the same local network where your computer is connected.
c. Restart the Night Owl Connect CMS software
d. Make sure the network where the Recorder is connected meets the minimum speed requirements. You can find this information listed in your product’s specifications on the packaging or on the product page at nightowlsp.com. Then:
1. Use a computer with PC /MAC OS
2. Open a website browser and type www.speedtest.net
3. Right-click on Begin Test
NOTE: See your product’s specifications for recommended Internet speeds as they vary. The bare minimum is for dedicated Mbps. So, take note of all the devices you have on that network and how they may be affecting the overall speeds.
ii. If you are experiencing a black screen:
a. Make sure you are using the Night Owl Connect CMS Software for your Recorder
b. For black screen issue using a Windows PC, follow the next steps:
1. Find the Night Owl Connect software icon located on the PC.
2. Right-click on the “Software Icon” which is located on the system desktop and Left-click “Run as administrator.”
3. This will give the Software priority to perform better. In most cases, this will fix the black screen issue.
c. Please be sure that your PC/MAC complies with the following specifications:
1. PC Operating System: Windows® 7, Windows® 8/8.1 and Windows® 10
2. MAC Operating System: MAC OS X® 10.9 and above
d. Restart the CMS software
NOTE: Please note any error message from your PC/MAC if the software still crashes after completing all the troubleshooting steps. If possible, take a screenshot of the error message. Gather all relevant data and submit it to our Technical Support Team to troubleshoot your crash report.
3. Google Home (For Compatible Devices Only)
For assistance with Google Home, click the link below for troubleshooting articles.

hello nice sharing thanks
my recorder is not working
I really love you
Can you write your contact number?
I am having trouble with the installation
hi how can i do
hi how can i do
I really love you
hi how can i do
I am having trouble with the installation
I can’t upload
I am having trouble with the installation
I really love you
Can you write your contact number?
It really worked, I appreciate it!
I sent an e-mail from the communication channel. Can you help?
I really love you
my recorder is not working
It was a great sharing
It really worked, I appreciate it!
can you help me please
problem not solved thanks
It was a great sharing
I am having trouble with the installation
hello nice sharing thanks
problem not solved thanks
my recorder is not working
can you help me please
Can you write your contact number?