Eseecloud 4G Solar Camera Guide,IP Pro(same as VR Cam, EseeCloud)– Remote view for 24 hours in Mobile APP.With concise and fashion GUI, support multiple and real- time preview, QR scan, PTZ control, video capture, recording backup. It is developed by Juan.
Installation and configauration
4G SD Card installation and configuration
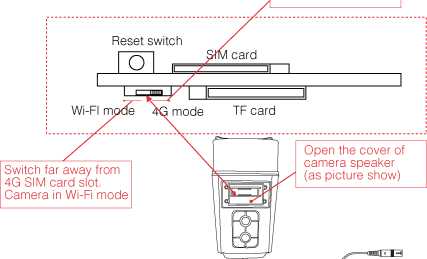
Note: Before configuring the device, please confirm the status of the WIFI/4G dial switch of the device. When the dial switch is placed close to the side of the 4G card slot, it is in the 4G configuration mode; the dial switch is placed to the side away from the 4G card slot. When it is WIFI configuration mode. Switching the status of the dial switch must be performed while the device is powered off.
Eseecloud 4G Solar Camera Guide
Read More :
- ClareVision Cameras Setup Guide
- Uniview IP Security Camera Guides
- How to setup Arlo Home Security System
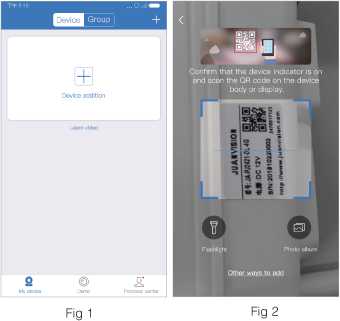
1. After successfully downloading and installing the APR, log in to the App;
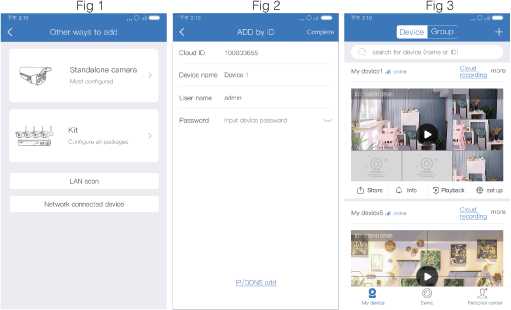
2. Click “+” in the device list (Figure 1) Jump to the QR code scanning interface.
Switch near to 4G SIM card slot,camera in 4G mode
(Figure 2);
3. When your device has a 4G card with Internet, and the dial switch is placed close to the side of the 4G card slot, please check the process of 4G mode addition in 1.1; When the dial switch is placed to the side away from the 4G card slot, please check the process of WiFi mode adding in 1.2.
■ 1.1 Add process with 4G mode
Before operating this unit,please read these instructions carefully,and save them for future use.
Status light prompt of 4G camera tail line:
In 4G mode:
- .Slow flashing: The 4G module is abnormal or the SIM card is abnormal, and flashes once every 2s.
- .Fast flashing: No dialing number (no flow or bad signal), flashing once every 0.5s.
- .Always on: The network is normal.
In Wifi mode:
- .Slow flashing: In hotspot mode, flashes once every 2s.
- .Fast flashing: The device is configured to the router, but the connection is disconnected, flashes once every 0.5s.
- .Always on: The network is normal.
- .Make sure the device has an available 4G card ,and WiFi/4G dial switch is placed to the side of the 4G card slot;
- .Connect the device to the power supply and wait for the device indicator to become normally on ;
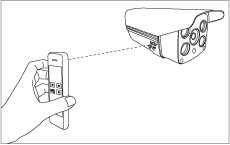
a There is a QR code on the device :
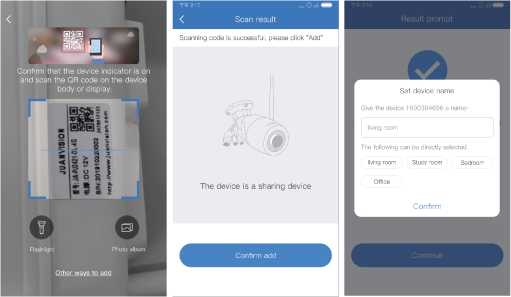
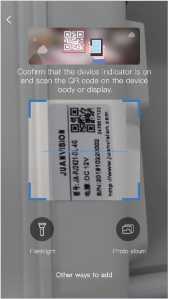
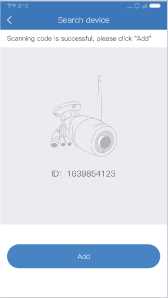
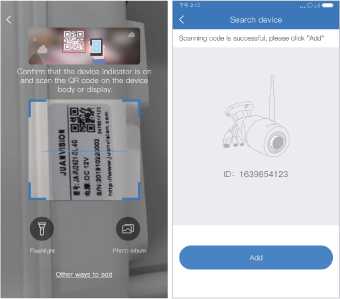
- .Scan the QR code of the camera body (Figure 1), and click “Add” on the search device page (Figure 2);
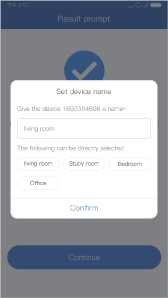
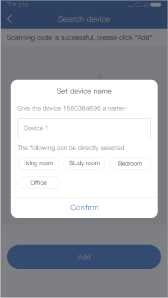
- .Set the device name(Figure 3), after confirming, return to the device list to display the device (Figure 6).
![]()
![]()

![]()
![]()
a Device QR code cannot found:
(1).Click “Other ways to add” on the QR code scanning interface(Figure 1);
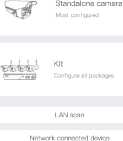
(2).Select the connected device (Figure 4);
(3).Input the device ID and name in the ID adding interface, click complete in the upper right corner (Figure 5), and return to the device list after adding is successful (Figure 6).
Fig 4
Fig 5
H
Fig 6
CONNECTED
IPCS48618T7834161
TP-LINK_N750
Xiaomi_4BF8_5GGD rc
TP-L!NK_N750_5G
PDCN_5G <■
CaoHHAriPort
NETGEAR.5G
Saved
Add Device
Fig 2
Fig 3
Product
Please input WiFi password
Configure the network
The phone is connected device WiFi:IPC 4123
O 0 0 O
Scan code Even hotspot Select add Complete
View.(most peop e choose)
Direct Connection:
View video without network .select Direct Connection.(few people choose)
Tip: 5GHZ wireless network is not supported at this time
Direct Connection
It takes a few minutes for the device to match wifi, Please wait…
78%
Need to wait for a while, do not disconnect
the network!
■ 1.2 Add process with WiFi mode
1.2.1 Adding Process to Non-networked Devices
(1).Make sure the dial switch is placed to the side away from the 4G card slot; (2).Connect the device to the power supply and wait for the device indicator to flash slowly (in hotspot mode, flash once every 2s);
(3).Please go to the phone system settings and select the device hotspot starting with IPC. The default password is 11111111 (Figure 1) (Hint: please keep connected with the device hotspot during the connection process).
- .After connecting to the hotspot, return to APP, scan the QR code of the device (Figure 2), and click “Add” on the search page (Figure 3);
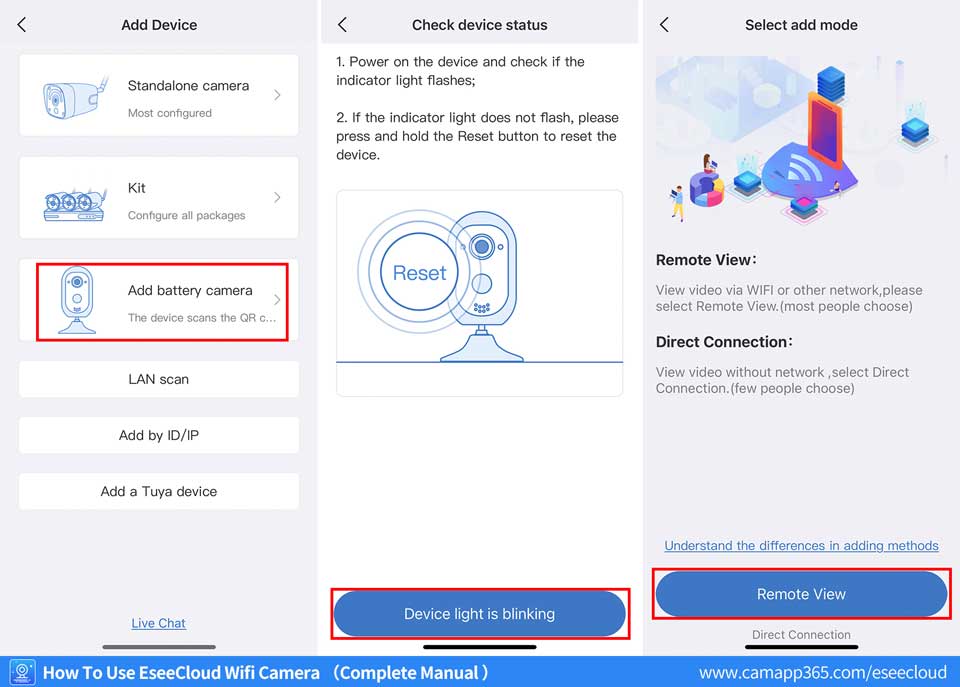
- .View video via WIFI or other network, please select Remote View.View video without network , select Direct Connection.
Remote view: Click the “Remote view” button (Figure 4) to go to the configuration network interface. The system will display the WiFi search near the device below the interface. Select or input the routing WiFi name and password at home (Figure 5) and click OK The device is configured with WiFi (Figure 6). After the configuration is successful, follow the interface to complete the device name and password settings (Figures 7 and 8). After the addition is successful, return to the device list.
Direct Connection: Click the “Local direct connection” button (Figure 4), pop-up box for setting the device name, follow the interface content to complete the device name and password settings (Figure 7, 8), and return to the device list after adding successfully.
a Device QR code cannot found:
- .After connecting to the hotspot, return to the APP, enter the QR code scanning interface, and click “Other ways to add” (Figure 2);
- .Select the wireless standalone camera (Figure 9). For the subsequent network configuration steps, please refer to the second step of adding the QR code on the device.
1.2.2 Add process of networked device
□ When there is a QR code on the device:
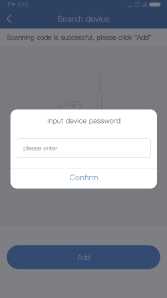
- .Scan the QR code on the device (Figure 1),click “Add” on the search page (Figure 2);
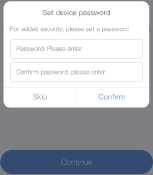
- .Set device name (Figure 3), Input the correct password (Fig 4) (skip this step if there is no password), and return to the device list after adding successfully.
- If unable to find the QR code on the device:
- :LAN search device and add process
- .Please go to the mobile phone system settings and connect the hotspot of the device to ensure that the mobile phone and the device are under the same WiFi;
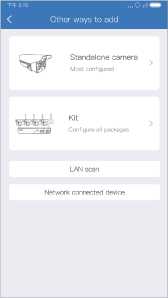
- .Open the Eseecloud APP and enter the QR code scanning interface, click “Other ways to add” (Figure 1);
- .Select LAN scan (Figure 5);
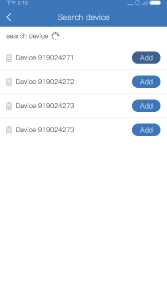
- .Select the required device ID in the scanning interface (Figure 6), click Add to enter the ID adding interface, input the device name and password, click Complete in the upper right corner, then return to the device list after adding successfully.
2: Add networked device process
(1).Open the Eseecloud APP and enter the QR code scanning interface, click
“Other ways to add” (Figure 1);
- .Select the networked device (Figure 5);
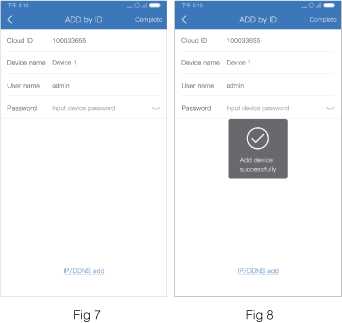
- .After enter the device ID and password(Figure 7), click Complete in the upper right corner, then return to the device list after adding successfully(Fig 8).
1.2.3 Wired connection configuration mode
- .Confirm that the device is connected to a router with internet access through the network cable;
- .The subsequent adding steps are the same as the adding process of networked devices in 1.2.2.
4G spotlight camera management Flow recharge and abnormal conditions
■ 2.1 4G spotlight camera management Flow recharge
4G card management:
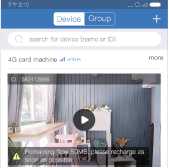
- .When the flow is sufficient, it will be displayed normally (Figure 1). When the flow reaches the warning value, it will display the current remaining flow (Figure 2);
- .Click the 4G card management (Figure 3) or the traffic alert value prompt text in the settings to jump to the 4G card management interface (Figure 4), and you can view the traffic usage, signal level and other information of the 4G card in the current interface.
![]()
![]()
![]()
4G card traffic recharge:
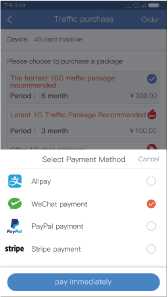
(1 ).ln the 4G card management interface, click the “flow recharge” button (Figure 4), enter the flow purchase interface (Figure 5), select the package and payment method, and then click pay now (Figure 6);
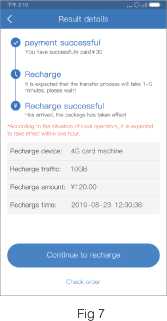
(2).After the payment is completed, it will return to the app and display the result details. After the recharge is successful, it will display the recharge device, flow and other information (Figure 7).
Note: The effective time of recharging is expected to take effect within one hour according to the situation of each operator.
Fig 1
Device: 4G card machine
Please choose to purchase a package
I The hottest 10G traffic package Q
recommended
Period : 6 month ¥ 300.00
Latest 1G Traffic Package Recommended
Period : 3 month ¥ 100.00
Offer 1G data package O
Period : 3 month ¥ 100.00
Preferred 10G traffic for business trips
Period : 1 month ¥ 100.00
® I have read and agreed Sales agreement
Fig 5
fh Share 0 Info 5 Playback ® setup
1961121876
My device5 .ill online
Fig 2
Help
Basic settings
4G card management
Device WIFI
Enable audio recording
Voice prompt
Device with voice prompt after start
Device volum
Restart the camera
El
Total flowl 50GB 120GB remaining
Refresh
Traffic alarm push CD
Signal strength weak
Valid time 2019-2-1 to 2019-7-31
Carrier information
View card package
Fig 4
■ 2.2 4G card device abnormal conditions
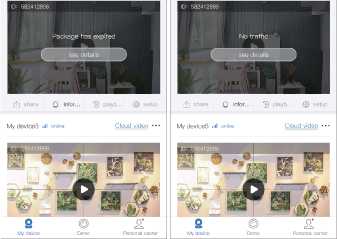
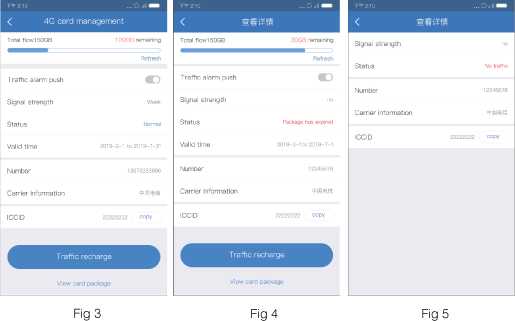
When the 4G card device has no traffic and the package expires, the device list displays the corresponding status (Figure 1 and 2). Click to view the details to enter the 4G card details interface, display the corresponding status
(Figure 3 and 4) according to the offline reason of the device list, and click the flow recharge to enter the 4G card flow recharge process.
Note: when the camera is inserted into the 4G card that is not provided with the device, it will not support the functions such as recharge of the traffic package, traffic query, early warning, etc. (Figure 5).
4G card machine .,il offline
4G card machine ,.H offline
Warning
In case of fire or lightning,pls don’t put product in damp andraining place,operate or maintain the device according to the user manual.
| APRA | |
| Warning | To reduce electric shock, unprofessional people please don’t open product front panel or rear panel |
| Warning
In case of electric shock and fire, pls don’t use power supply beyond power list in user manual |
|
Be careful when you see
attachment with a Dangerous Voltage which might cause serious electric accident.
- Ensure your equity,pls read the user manual carefully before you use the product
- Pls contact professional people if you need install and maintain the product
- Input voltage of this model is DC 12V
- Working Environment:temperature of -20°C~+60°C, relative humidity under 85%
- Pls don’t exceed the user manual’s standard range of temperature,humidity and voltage.
![]()

![]()
![]()
![]()

![]()
![]()
![]()
