GAMUT RECORDER Installation and user guide, Gamut are manufacturers of professional-grade security and CCTV solutions, all built to withstand the most demanding CCTV trade and commercial applications. Since being founded in Bristol in 2009, Gamut cameras and recorders are used by a wide base of tradesmen and installers, servicing the home, business and local government markets. To ensure reliable build and picture quality, all products are put through a rigorous testing process both in-house and in the field before they allowed to bear the Gamut badge.
How to reset the password to your Gamut recorder
This article will show you how to find the necessary information you need to send us so that we can help to reset the password for your Gamut recorder.
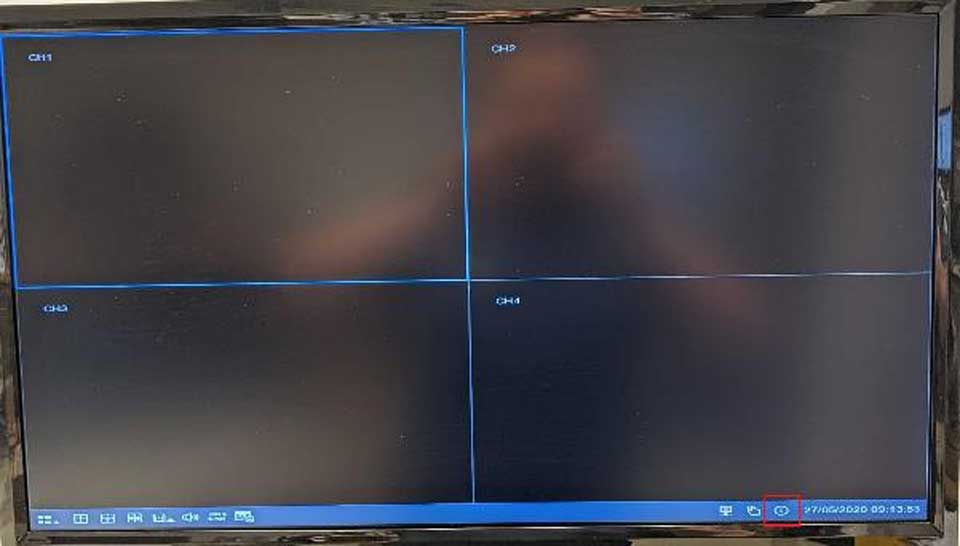
First, turn the recorder on and move your mouse to the bottom of the camera live view screen. A blue bar will appear at the bottom; click on the ‘i’ symbol that I have marked in red in the screenshot below.
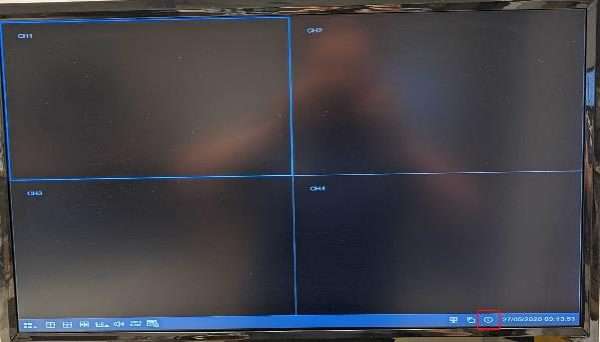
This will open up a page of information about the recorder including the MAC address.

You will need to send the MAC address and the date and time on the recorder, even if the time/date on the recorder is not actually correct.
This is very important, because we will generate a temporary password for you which is created based on the unique MAC address of the device and the time and date on it. If the date and time are accurate, just say that, or if you know it is five hours behind but the date is correct for example, just mention that when you email in and that should be sufficient.
Otherwise, just send in a picture clearly showing the MAC address and date/time on the device and say exactly when the picture was taken.
Get in contact here, set the support status as ‘Password reset’ and the email subject as ‘Gamut password reset’. You will also need to send your original order/invoice number and the original delivery postcode to confirm your identity.
We will try to get back to you as soon as possible.
How to set up and view your Gamut PTZ on a Windows or Apple computer (GTIP210PTZ)
Purpose of The Guide
This guide will walk you through the initial configuration of your Gamut PTZ and show you how to view the camera on your computer.
Before You Begin
Let’s Get Started
First we need to make sure that the camera is talking to your network. If you look on the box for the camera and on the side of the camera itself you should see a sticker that looks something like the one shown below.
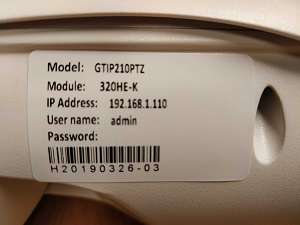
Make a note of the IP Address, User name and any Password shown on the sticker.
Next we need to open Internet Explorer on the computer. In the address bar at the top of the page enter the IP address that you saw on the sticker. You should then be prompted to log in to the camera, here you need to use the User name and Password shown on the sticker, if there is no password on the sticker then leave the password field blank.
Please make sure that you are using Internet Explorer and not any other browser. The reason for this is that most CCTV systems require the use of software called Active X to be able to display your live video and that software is only supported by Internet Explorer.
If you are prompted to install any software you need to allow this to happen, this software enables your computer to display the video feed from the camera.
At this point you should be seeing a live view from your camera and can go ahead and fit your camera wherever you need it. To watch your cameras in future you will simply need to open Internet Explorer, go to the IP Address from before and log in to the camera. From there you can also control the motion of the camera by using the PTZ controls shown below. These features are explained more in depth in other guides which can be found here.

If you were unable to access your camera this way then it’s not a problem, we just need to use a different method. Alternatively if you wish to view the system without having to log in through Internet Explorer each time then continue reading and you will see how to view the camera without needing to log in each time.
First open CMS5/VMS, the program that you installed before we began, and click on Device Manager. You will now be presented with a screen that looks like this:

You should see a camera in the list that has the same IP Address as previously seen on the sticker on the camera. If you don’t then click the IPV4 Search button and after a few moments the camera will appear. Select the camera by ticking the box to the left of it and click Add.
The camera will now be displayed in the bottom half of the window. Towards the right hand side you will see a number of buttons, you need to press the Modify IP button as highlighted in the following image.
![]()
At this point if you wish to use the camera through Internet Explorer rather than CMS5 you are now able to. Make a note of the new IP address that the camera is displaying and follow the steps detailed near the top of this guide for accessing the camera using Internet Explorer.
Now click the Home button to return to the main page for CMS5/VMS, then click Monitor. On the right hand side you will see your camera in the list of devices. Double click on your camera and the video feed will appear in the middle of the screen. If you then double click on the video if will go in to full screen mode so you can see a larger picture. To then control your camera click the button shown below and the PTZ controls will appear. As before more articles about controlling your camera can be found by clicking here.
![]()
GAMUT RECORDER Installation and user guide
Read More : UNV Recorder Set Up Guide
How to add your Gamut recorder or camera to a mobile phone or tablet
Purpose of The Guide
This guide will show you how to add your Gamut camera or recorder to a phone.
Before You Begin
Your Gamut device will need to be turned on and connected to your internet router. If you have a recorder with a hard drive you will need to use a TV or Internet Explorer to set it up for the first time, follow the quick start guide to do so.
If you are using a recorder and cameras, make sure that the cameras are connected and working.
If you are using a Wi-Fi bridge system with your camera, make sure that the bridges are turned on, wired correctly and communicating before you begin.
You will need to download the app RXCamView onto your phone or tablet.
Android
Apple
Let’s Get Started
Open up RXCamView on your device and tap on the head and shoulders icon to open the side menu.

Then tap on ‘Device List’.
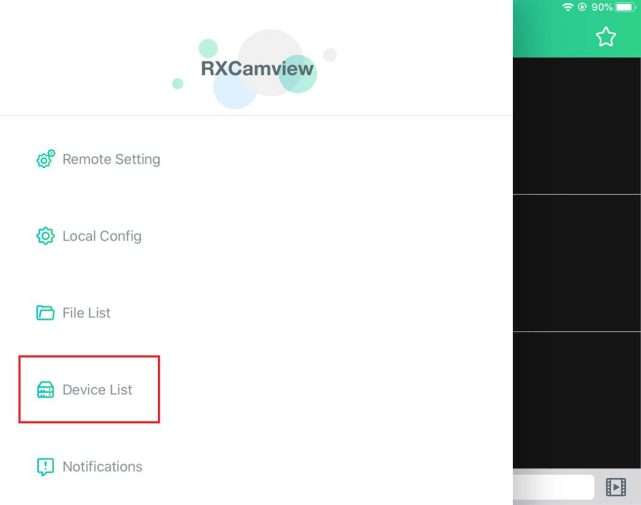
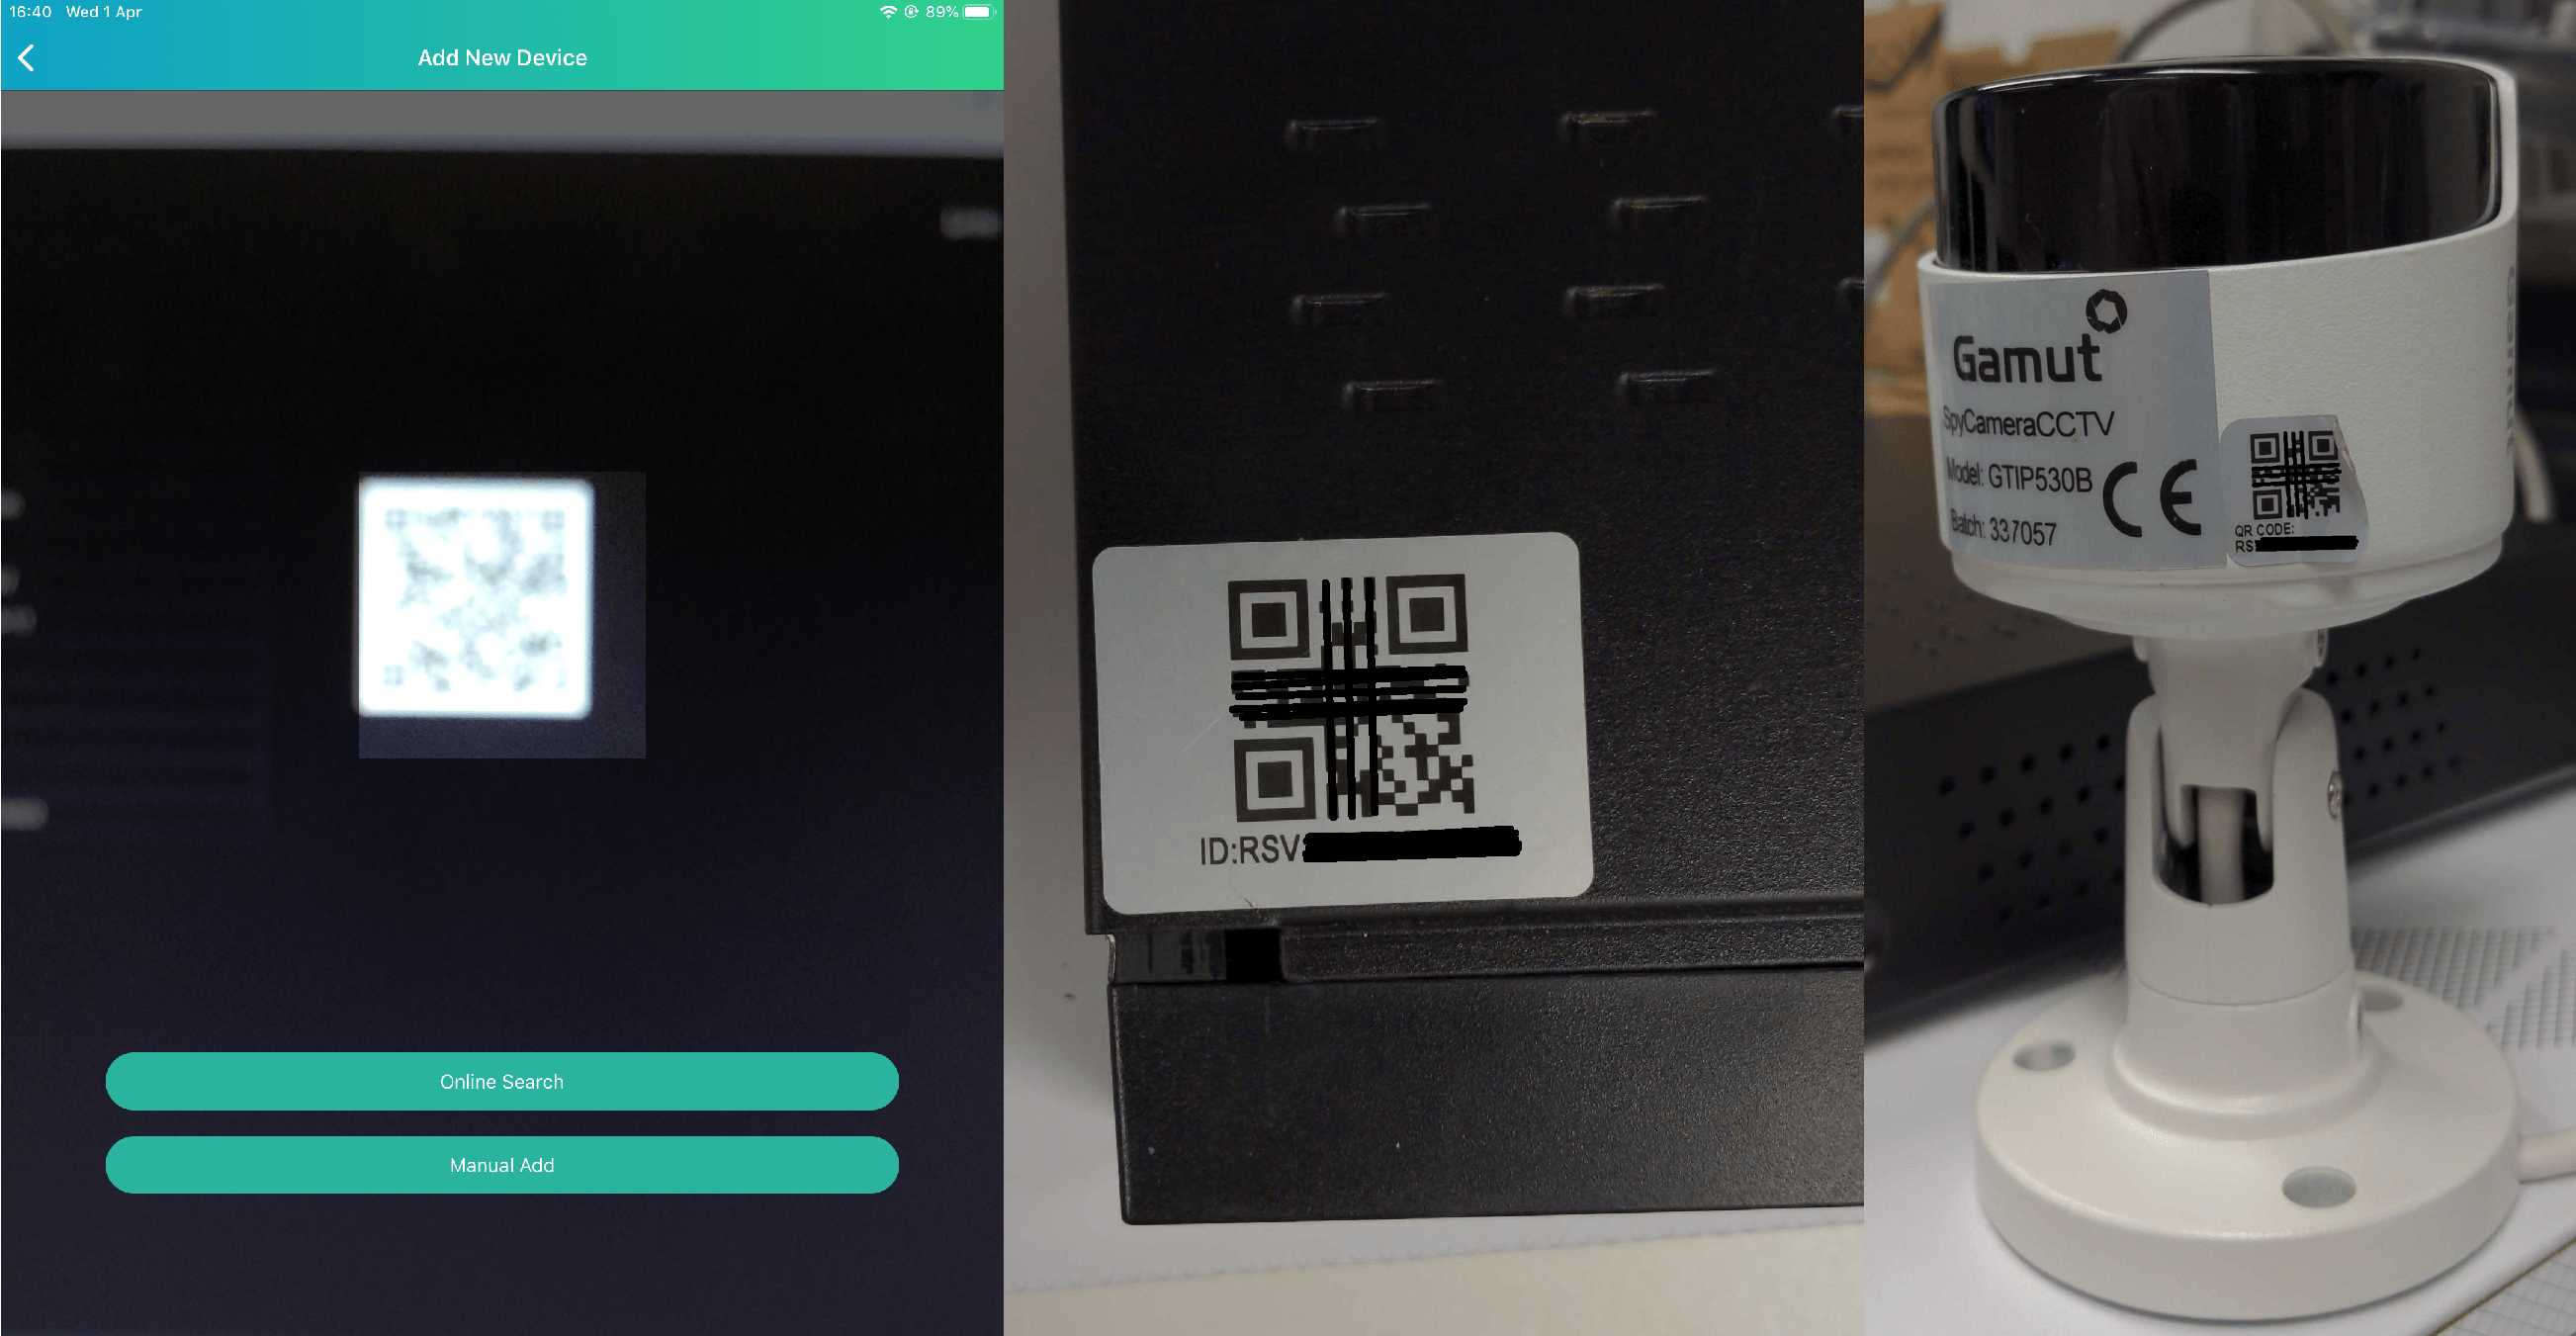
On the Device Manager page, tap on the ‘+’ icon then tap on ‘IPC/NVR/DVR’.

The app will request permission to use your camera, allow it to. It will open up your camera and you need to point the camera to the QR code on the label on your recorder or camera.
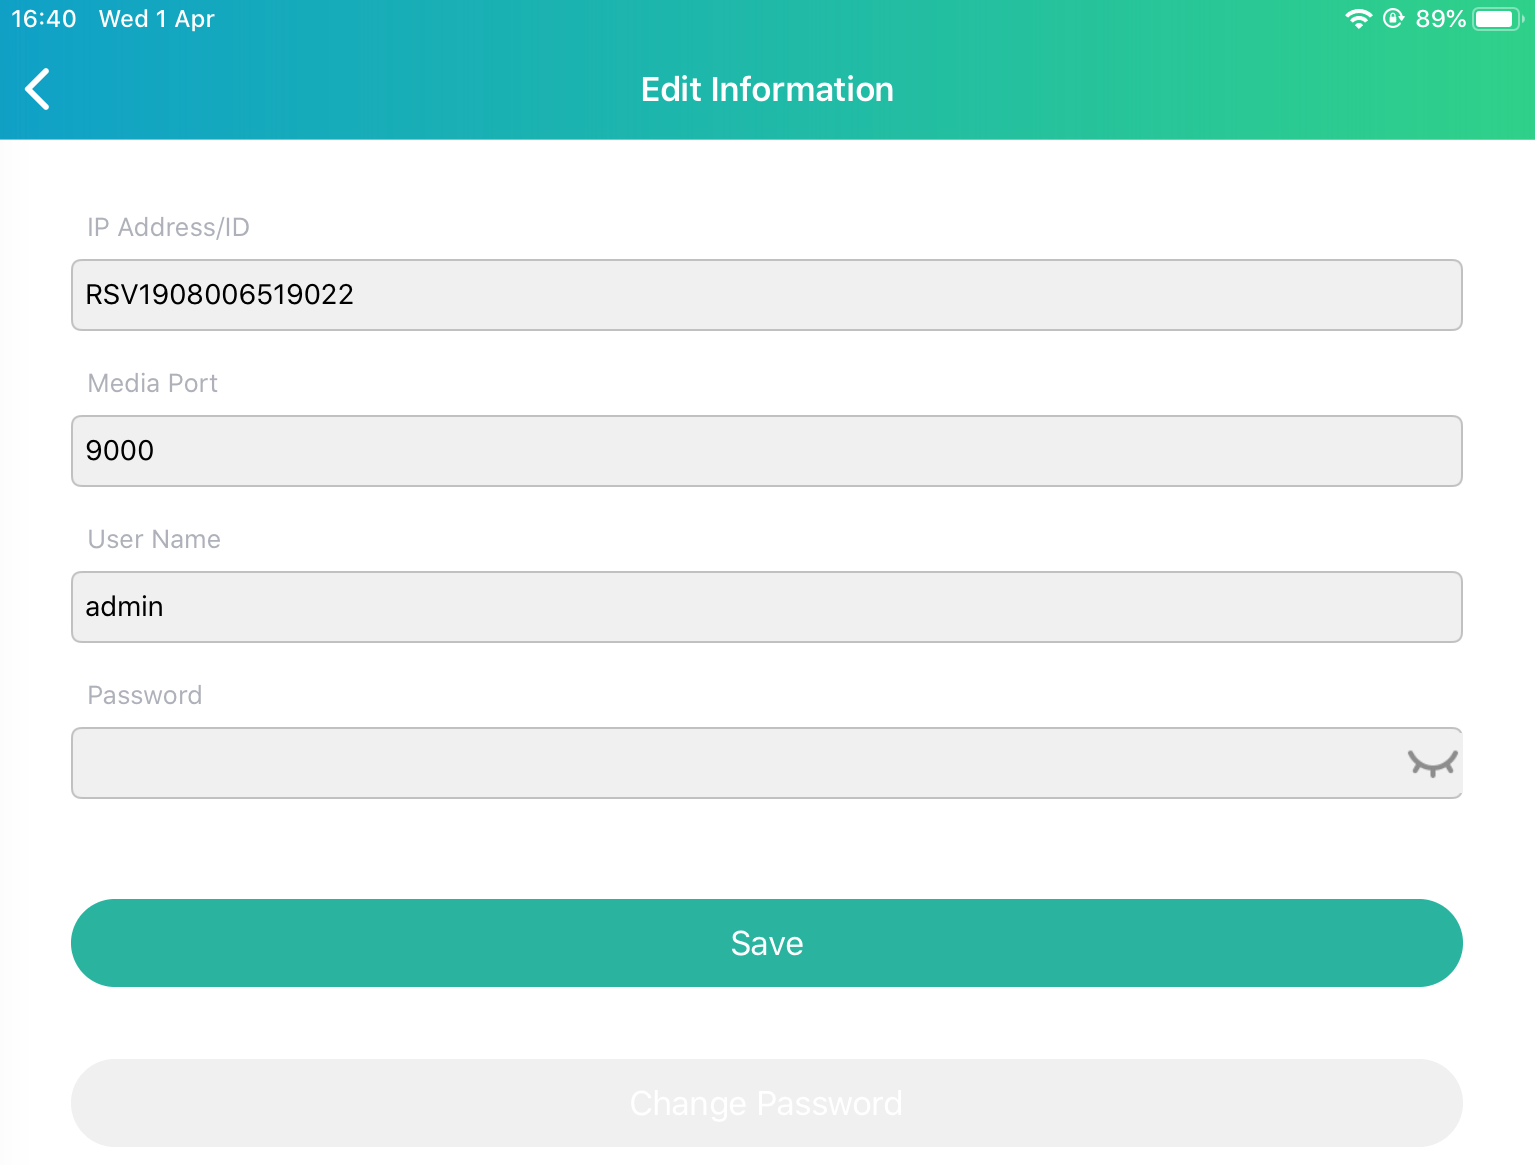
Once you have successfully scanned the QR code the app will prompt you to fill in some information. Leave the IP/Address and Media Port fields, the username is admin by default, and the password is blank by default.
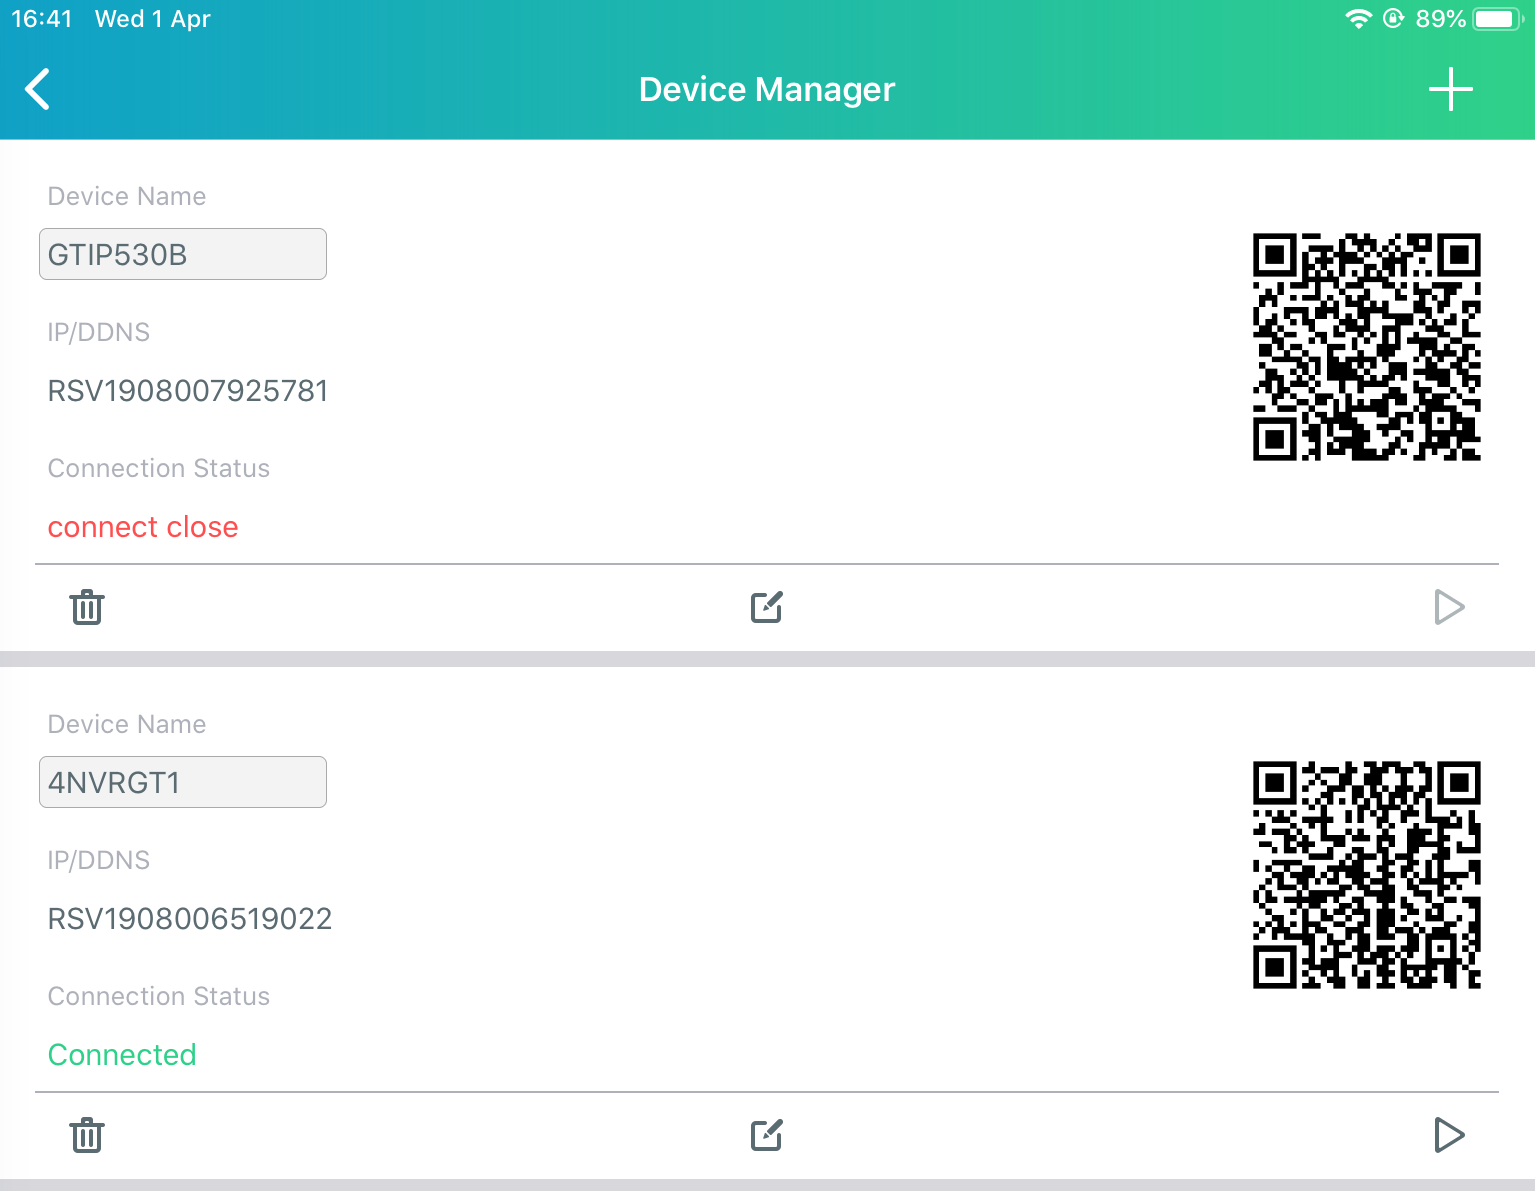
Then the device will appear in the device list, it should say ‘Connected’. If it says ‘connect close’ then check the password is correct and that nothing has been disconnected.
If you tap on the play icon underneath the device, you will be taken to the live view window. Just tap on the name of the device to begin live view.
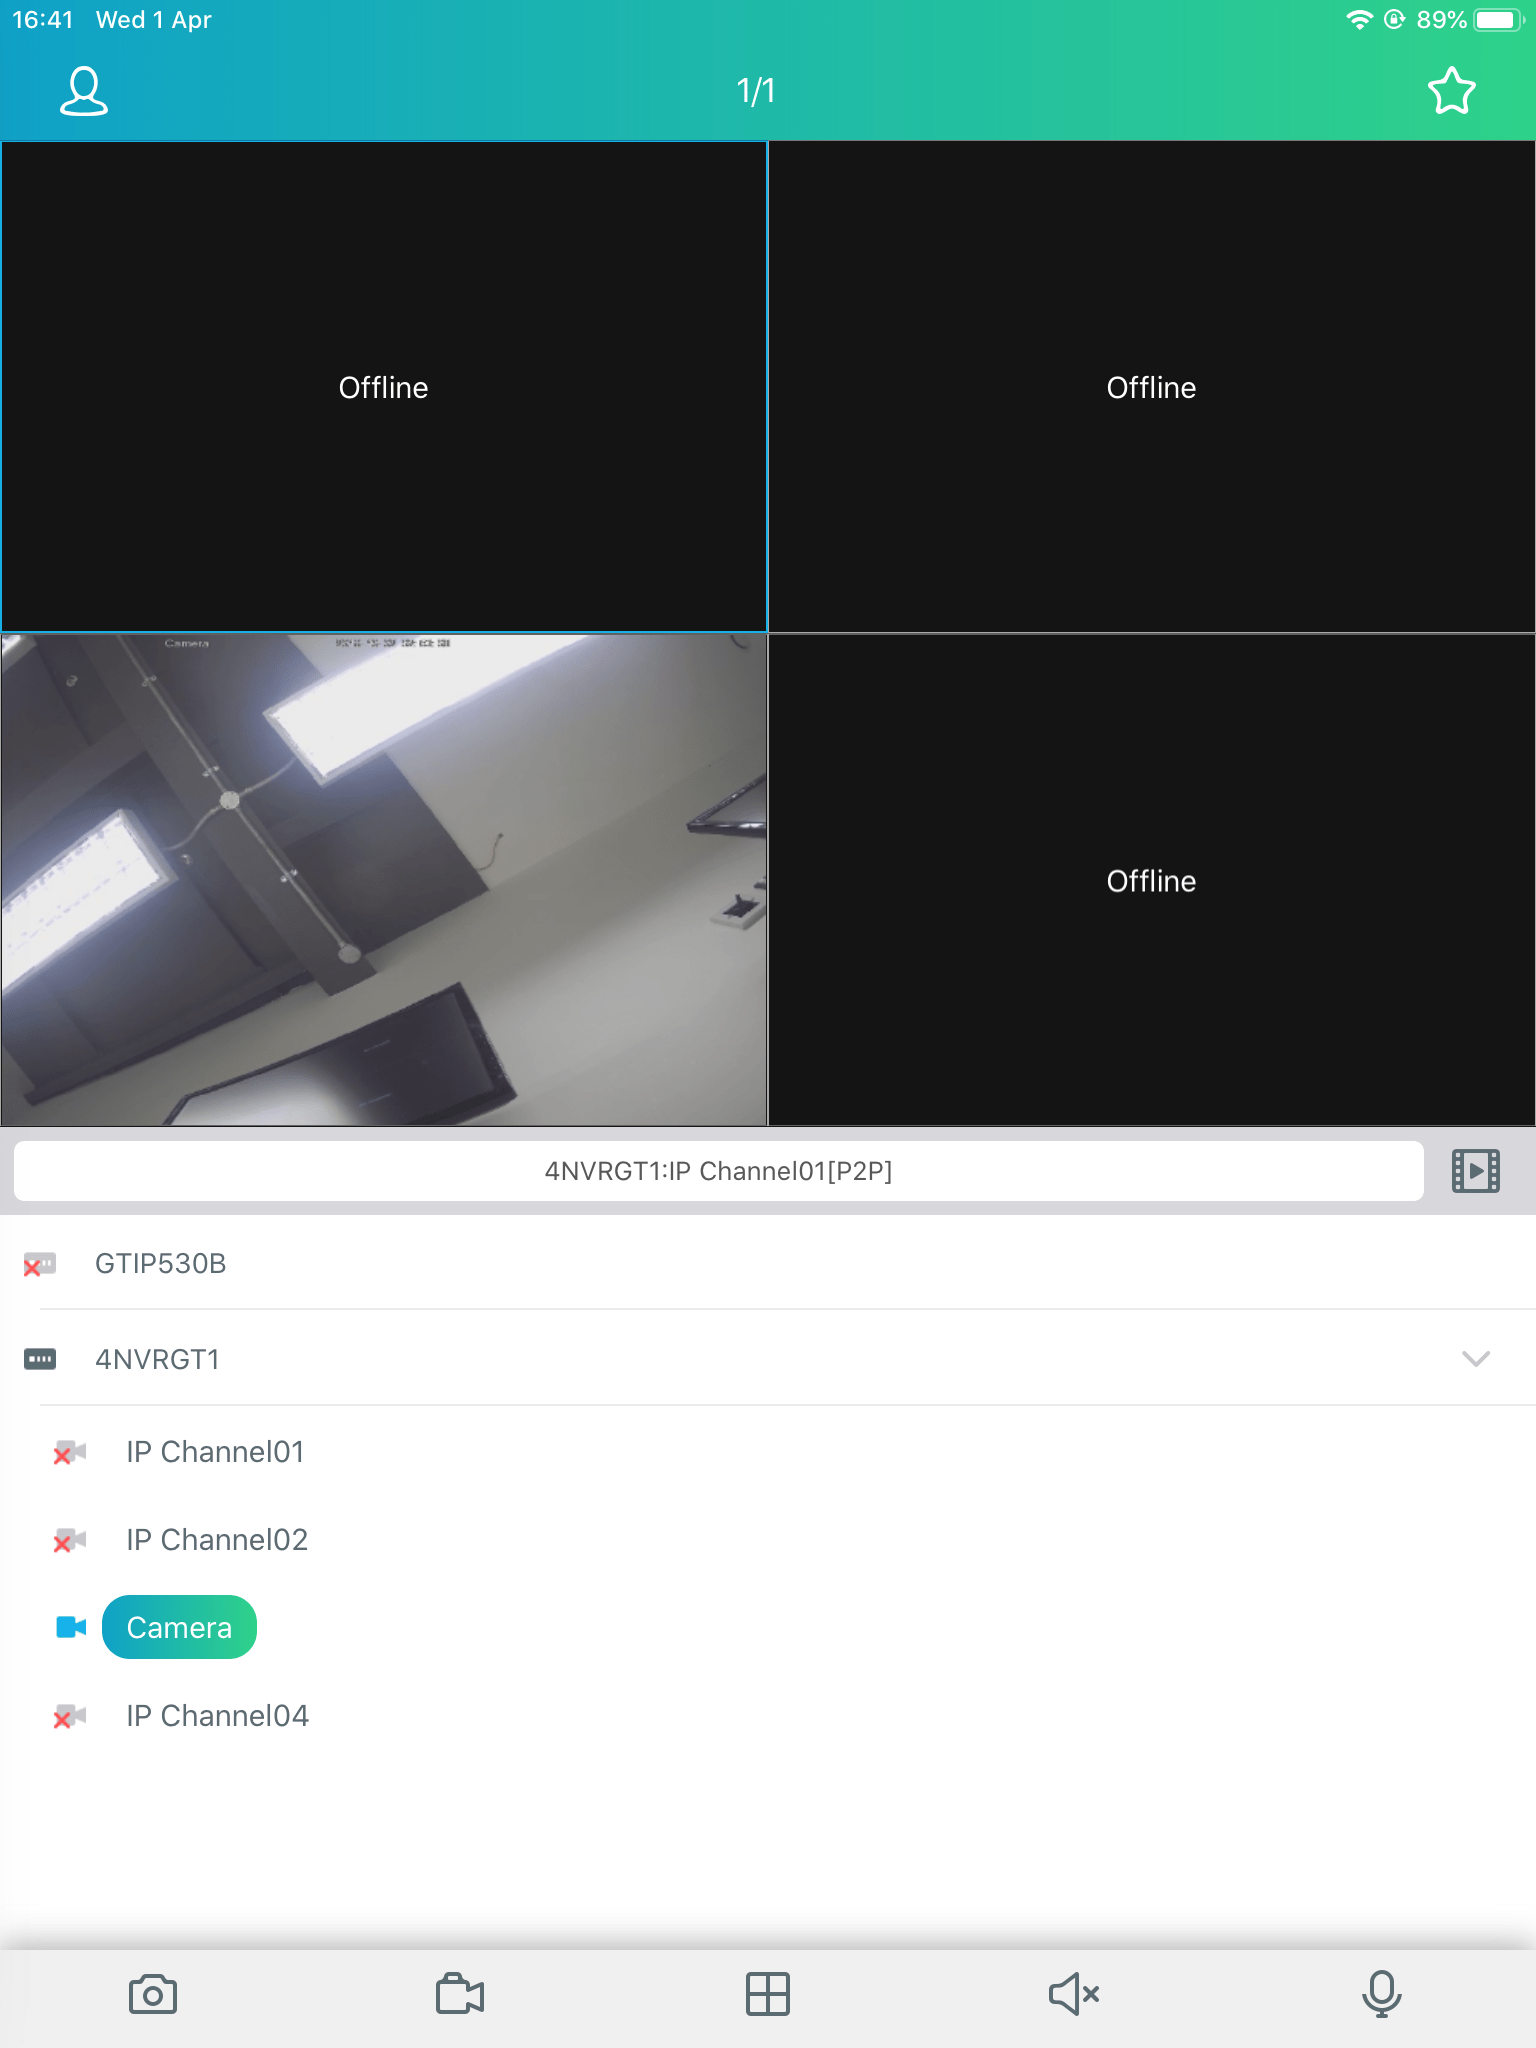
To view recordings, just tap on the film reel icon at the bottom right below the live view screen:

For more information on the settings of the recorder, please refer to the quick start guide or the manual.
If you find that the device only works when you are connected to the same internet router as it, and not when accessing it via another Wi-Fi network or with 4G, take a look at this guide.
How to access your Gamut camera or recorder using a Windows or Mac computer
Purpose of The Guide
This guide will show you how to access the live footage, recordings and settings of your Gamut camera or recorder, using a Windows or Mac computer.
Before You Begin
Your Gamut device will need to be turned on and connected to your internet router. You will need to use a TV to set up the recorder for the first time, follow the quick start guide to do so. After the initial setup, a TV or monitor is not necessary when accessing the recorder via a network connection.
If you are using a recorder and cameras, make sure that the cameras are connected and working.
If you are using a Wi-Fi bridge system with your camera, make sure that the bridges are turned on, wired correctly and communicating before you begin.
Let’s Get Started
Now that you have connected your recorder/camera to your internet router and turned it on, you will be able to view it using a program called Surveillance Client.
First you will need to download some software called Device Config Tool, which will allow you to find out the IP address of the camera/recorder and edit some of the settings.
Download it from here if you are using Windows, and here if you are using a Mac.
Once the software has been downloaded and installed, you will see a window like the screenshot below. Make a note of the camera/recorders IP address.
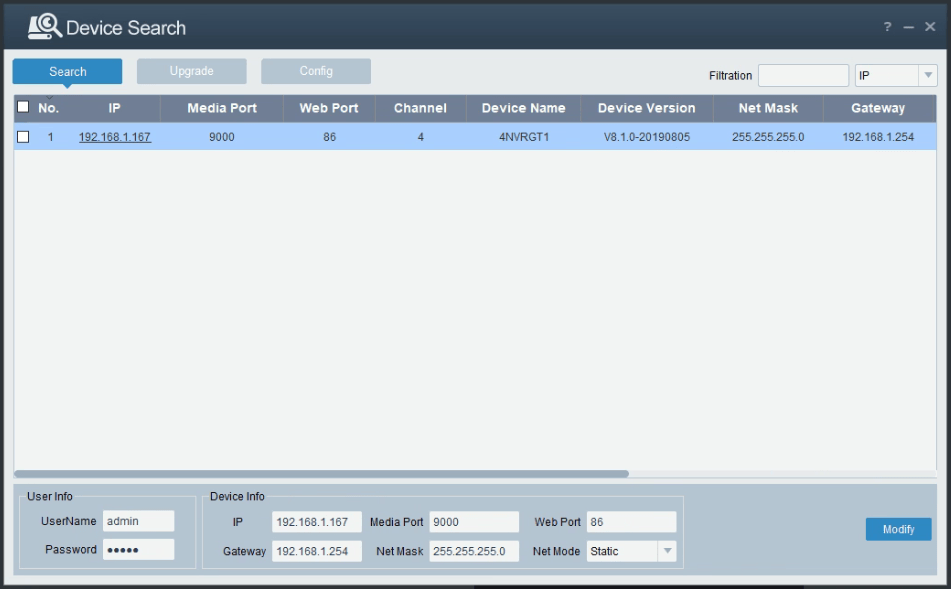
If the recorder/camera does not appear in the program, first ensure they are turned on and check the connections from the device to your internet router. If you are using a Wi-Fi bridge system, make sure that they are configured correctly (if they were not pre-configured) and are both turned on.
Surveillance Client
If you are using Windows you can download Surveillance Client from here.
If you are using a Mac, download it from here.
When you have downloaded and installed Surveillance Client you will be presented with a set-up wizard. Click Next, then Add Online Device. Your recorder/camera should appear in the list; select it then click Add Selected Device.
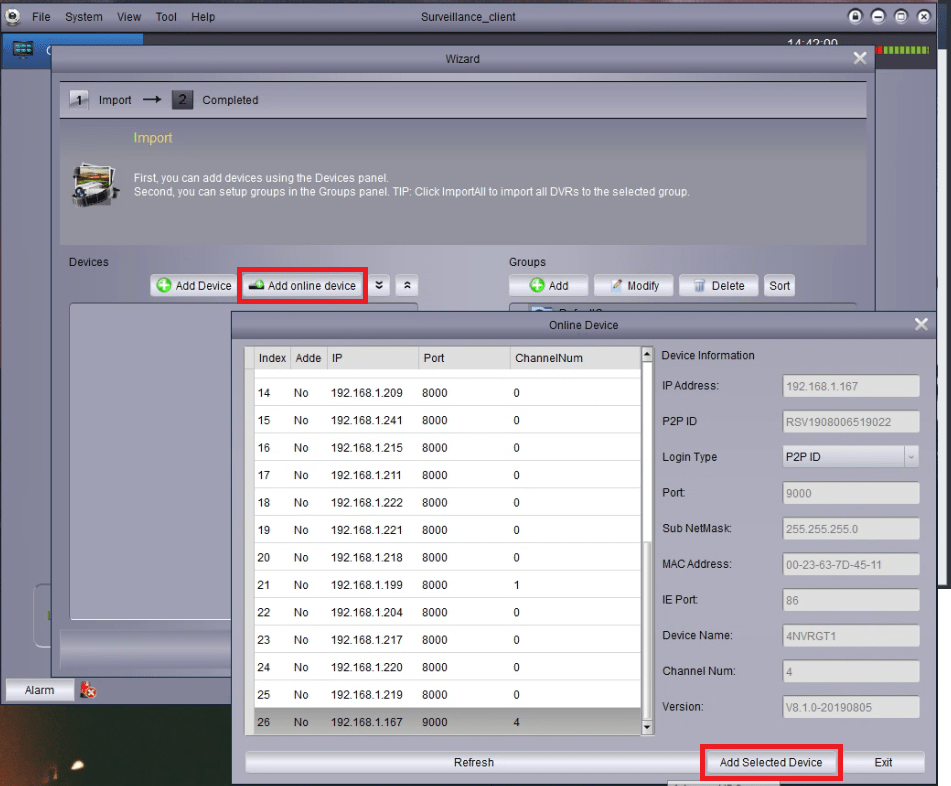
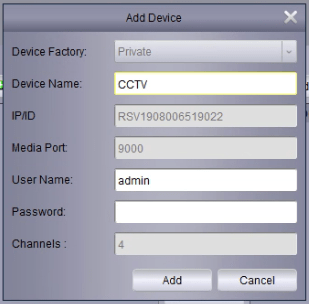
Now choose a name for the recorder/camera. By default the username is admin and the password is blank. Now click ‘Add’.
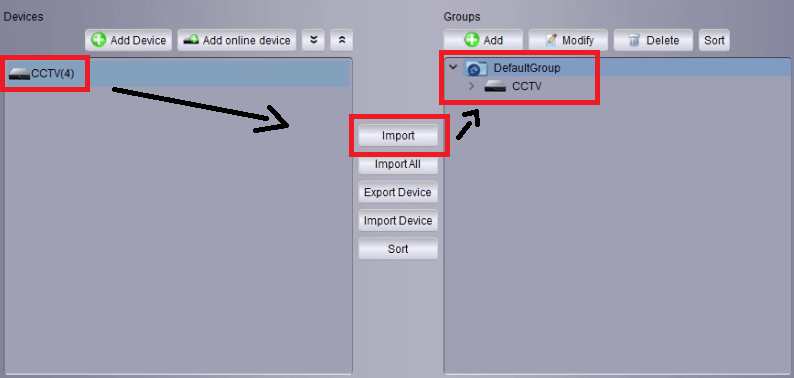
You will see the device appear in the left hand pane. Select it, click ‘Import’, then open the ‘DefaultGroup’ folder on the right side and you will see it has been added.
Click ‘Next’ then ‘Finish’ and you will be taken to the main menu. Now click on ‘Main View’.
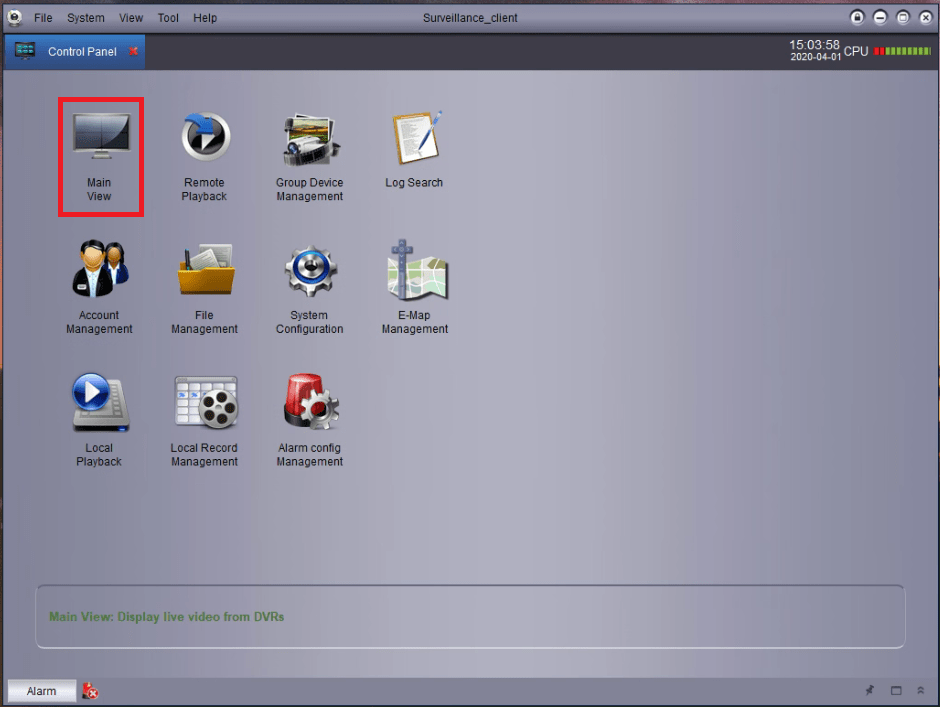
When you are taken to Main View, double click on DefaultGroup, then the name of your recorder (if you have one) and the cameras will be shown. In the screenshot I only have one camera connected, which is signified by the green play icon. Double click on the camera name to begin live view. If you want the camera to be in full screen, double click on the live feed.
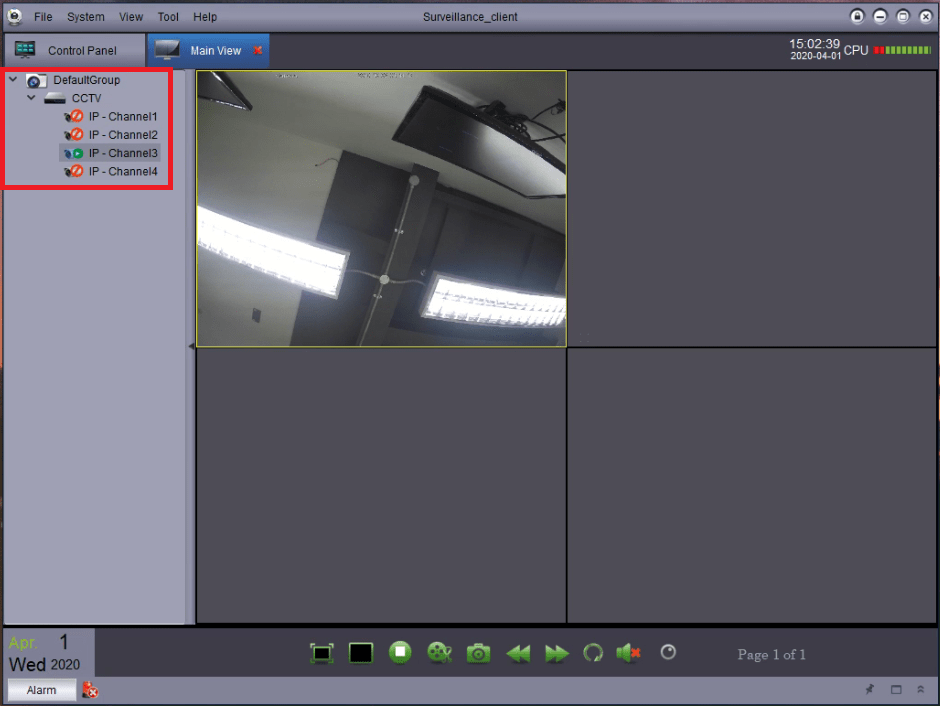
To access recordings, go to back to the Control Panel and then click on Remote Playback. Open up DefaultGroup on the left side panel, then select the cameras which you would like to view recordings from and click the play button. You can select the date using the calendar on the bottom right.
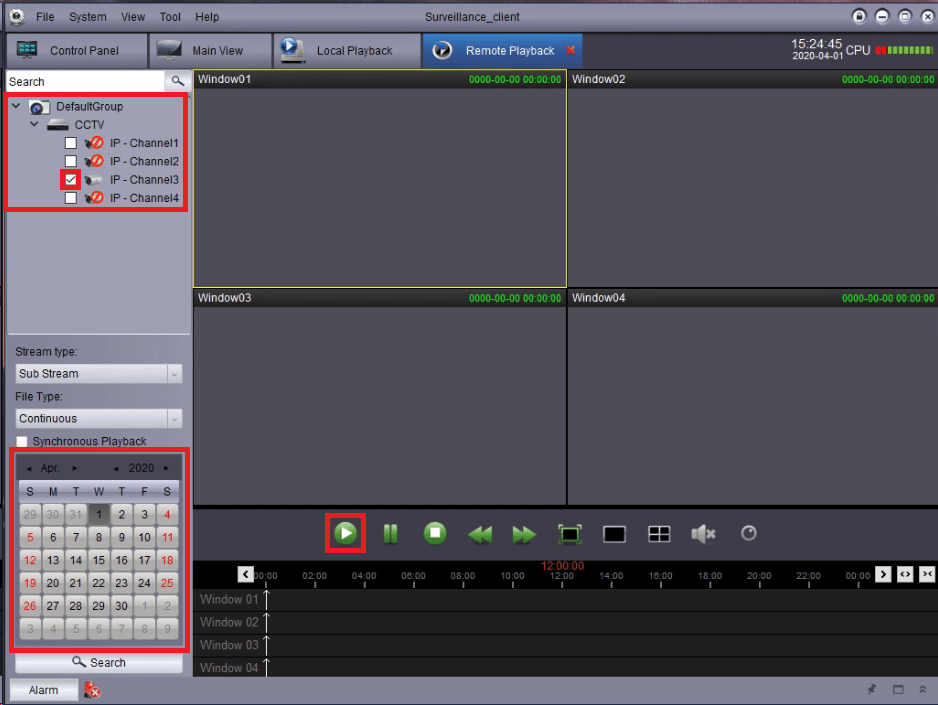
To access the settings of the recorder/camera itself, go to the Control Panel, click on Group Device, then click on the spanner icon next to your recorder.
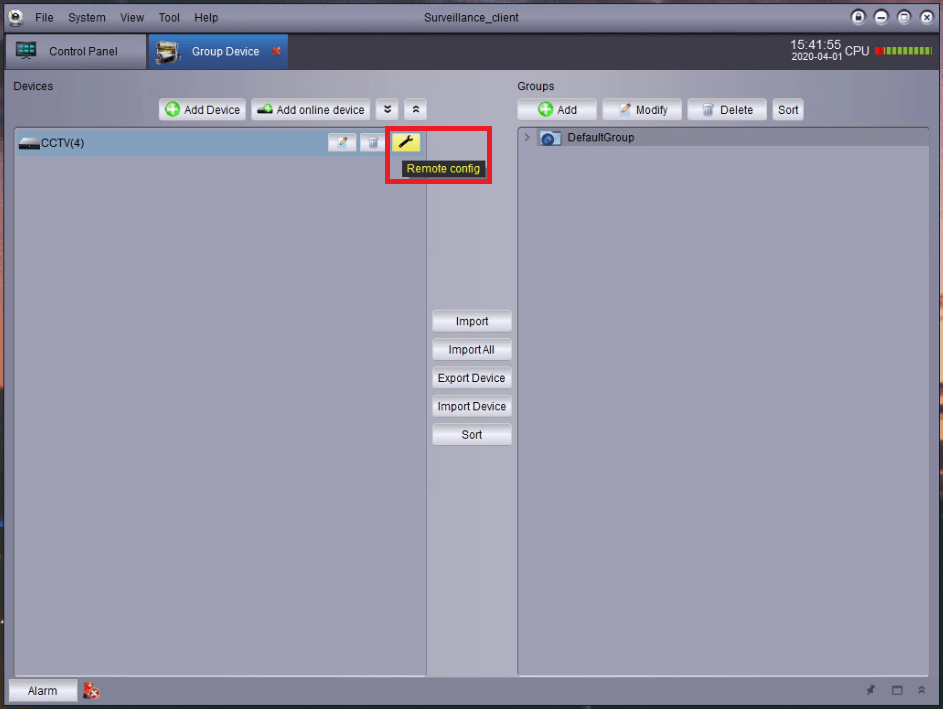
For more information on the settings of the recorder, please refer to the quick start guide or the manual.
