Vivotek NVR Linux based user guide, VIVOTEK’s ND9425P is a H.265 Linux-based standalone NVR that supports up to 4K IP camera video decoding and local 4K video display. With advanced H.265 compression technology, users are able to experience Full HD quality video while expending less HDD capacity than H.264.
The NVR features embedded 16x 802.3 at/af PoE ports to provide users easy and convenient IP camera installation, and also supports remote and mobile access via VIVOCloud and iViewer apps for both iOS and Android devices. The VIVOCloud app provides instant push notification and direct video playback functions when triggered by an alarm notification and provides users a flexible and intelligent NVR for seamless use in small to medium sized video surveillance applications.
Highlight Feature
New Web UI Available for Plug-in Free Browser
Actively adopting current trends and simultaneously protecting your cybersecurity, VIVOTEK’s new web UI supports Chrome browsers without the need for web plugins. It lets users login and operate with ease, and solves issues related to system administrator authority, safety risks, browser, and OS updates. Furthermore, it now supports H.265 technology meaning that users can attain higher and more efficient image compression rates than previous H.264 systems while maintaining high image quality.
Smart VCA Event Search
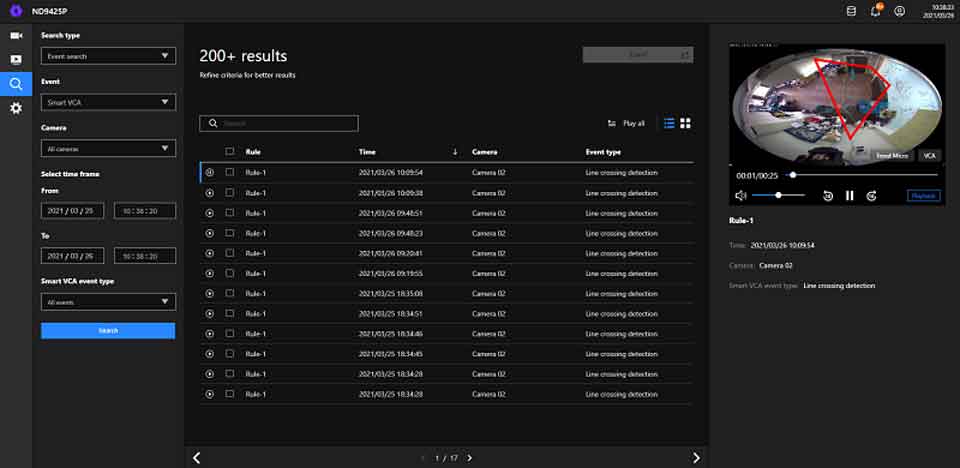
The NVR supports alarm management and event search of VIVOTEK’s deep-learning video analytics technology, Smart VCA. The user can search by single or multiple event types, playback triggered events and then export these search results to video clips.
PoE Management
Allow users to quickly troubleshoot problems and monitor power use for better operation. When overloaded, some PoE ports will auto power-off until system power is falls below the threshold for system protection.
Integration with Genetec™ Security Center
VIVOTEK NVR’s are not only fully integrated with our own VMS software – VAST 2, now they are also able to connect with Genetec™ Security Center via ONVIF, offering various functions including NVR search & add, video/audio display, video streaming configuration, edge playback, and NVR firmware upgrades. With the connection to Genetec™ Security Center, reliable video surveillance solutions can be delivered to address small, medium, and large surveillance implementations.
Customer Support
Customer support allows VIVOTEK technical support to rapidly debug your NVR, users only need to export logs by pressing one key and providing the logs to the technical support team to get customer support.
In addition, you can get an access ID while connected to the internet. By keeping the remote access button on and providing the access ID to the technical support team, we can remote access your NVR to analyze the cause of errors and then debug it.
Better Video Quality with Lower Bandwidth
With H.265 standard and VIVOTEK’s Smart Stream technology, VIVOTEK NVR is not only able to provide the high quality video, also save the usage of network bandwidth and recording capacity more than regular H.264 standard.
4K IP Camera Video Input and 4K Local Video Output
Supporting 4K IP camera video input and 4K local video output, VIVOTEK’s NVR can provide users extra high definition video resolution ensuring they will never miss a single detail in both video monitoring and recording.
VIVOCloud App & Portal for 24/7 Viewing
The free VIVOCloud app makes surveillance lightweight and portable, ensuring efficient operation. The latest P2P technology makes remote access even more convenient, by simply scanning the QR-code and installing the app, users can view live streams and play recorded clips with the intuitive interface anytime, anywhere. Armed with the Push Notification function, users will directly get an alert message on their Android/iOS mobile device and directly playback the video to check for any suspicious activity.
Vivotek NVR Linux based user guide
Read Also : Vivotek firmware DVR NVR IPC Software download
What information of the ND/NV-Series NVR should I provide to contact technical support for help?
Please provide the following information while contacting technical support for help:
How to know the MAC address, model name, firmware version and device pack version of the ND/NV-Series NVR(Linux-based)?
How to get the configuration file of the ND/NV-Series NVR(Linux-based)?
How to collect logs for Linux-based NVR and provide to VIVOTEK support team?
How to export debug logs and enable remote access function from ND/NV-Series NVR(Linux-based)?
We might need the following information, but they are not compulsory:
[Linux-based NVRs] How to upgrade the ND-series NVR?
Enhancing the functionality and security of your ND/NV-Series NVR is crucial, and firmware upgrades play a pivotal role in this process. Please follow the steps below to upgrade the ND/NV-Series NVR:
Before starting the upgrade, it’s recommended to back up your current settings and data to prevent any potential loss.
Step 1. Search for your NVR model on the VIVOTEK official website: https://www.vivotek.com/.

Step 2. Click on the webpage of your specific NVR model.
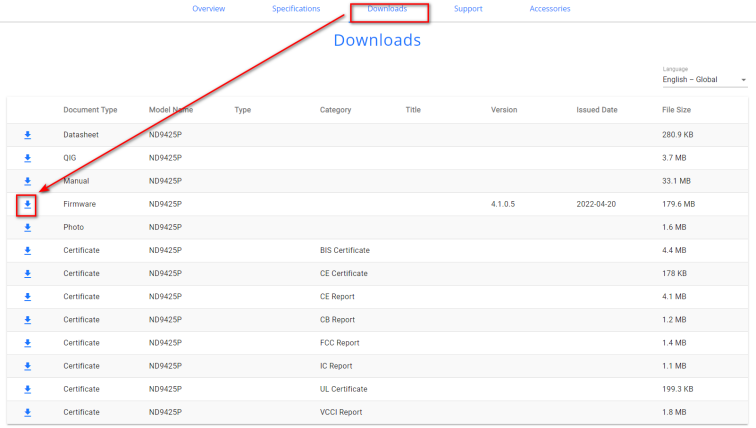
Step 3. Select ‘Downloads’ to find and download the latest firmware version (for example, ND9425P, as shown in the picture).
Step 4. After downloading, unzip the file to find a .img file.
Step 5. To update the firmware, access the NVR and import the .img file via Settings > System > Maintenance > Update Firmware.
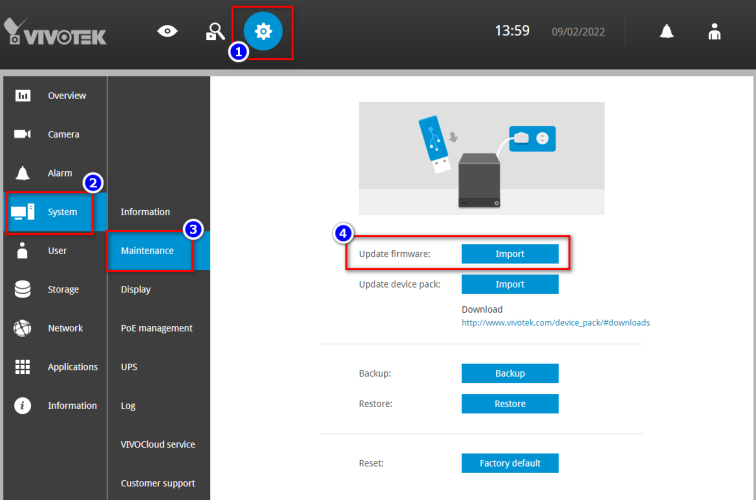
There are two ways to access the NVR: via a Web console or a Local console. Please choose the appropriate method for accessing your NVR.
Web console
Navigate to Settings > System > Maintenance > Update Firmware and follow the previously mentioned steps.
Local console
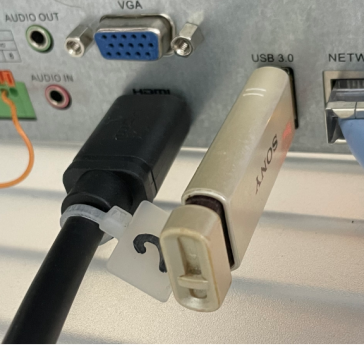
Firstly, place the .img file on a USB drive and insert it into the NVR.
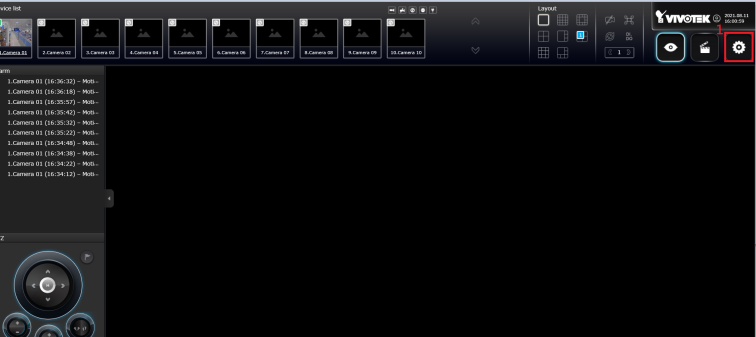
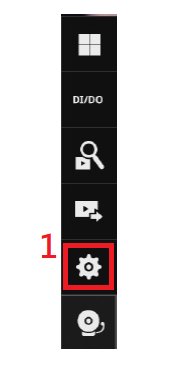
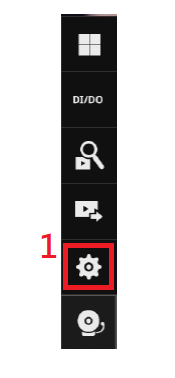
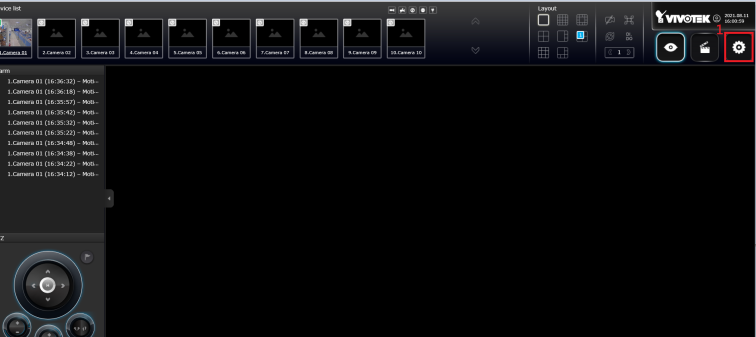
Then, access the system settings by clicking on the gear icon in the local view.
Once in the ‘Settings’ interface, go to System > Maintenance > Update firmware and proceed as described earlier.
How to export debug logs and enable remote access function from ND-Series NVR(Linux-based)?
Starts from firmware version v4.1 of ND/NV-Series NVR, VIVOTEK add remote access function on the customer support page.
Please follow the step below to export debug logs and enable remote access* function to get access ID:
There are two ways to access the NVR, please choose which one you access to NVR.
Note 1:
1.Remember to provide MAC address of ND-Series NVR at the same time when providing the access ID.
2. Remote access has 14 days validity.
Note 2:
* Important Notice *
The ND9213P, ND9323P and ND9425P NVR remote access service for customer support will be temporarily stopped starting from Feb. 7th, 2022 until the middle of April, 2022 due to service maintenance and firmware tunning. After the proper changes have been done in the cloud platform and the firmware, VIVOTEK will release an statement informing the new NVR firmware v4.1 release and will resume the remote services for those specific models.
For ND9441. ND9541, ND9441P, ND9541P, ND9322P, ND9424P, ND9322P-v2 and ND9424P-v2, remote cloud service will NOT be supported.
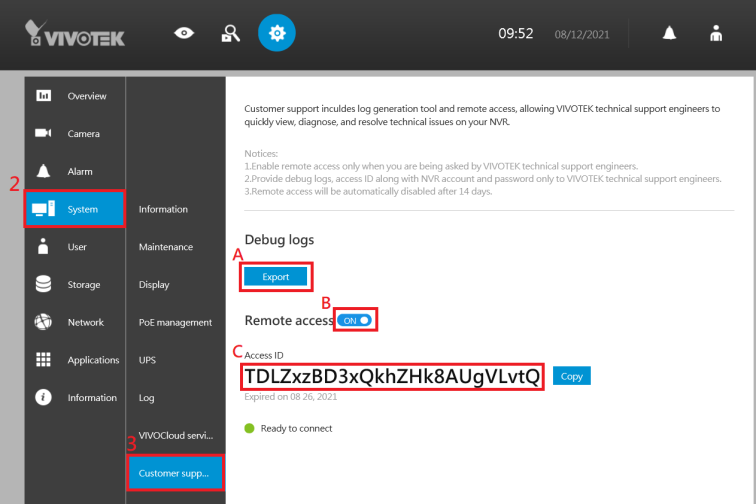
Web console.
(A). Export debug logs.
(B). Enable remote access.(OFF->ON)
(C). Cope Access ID.
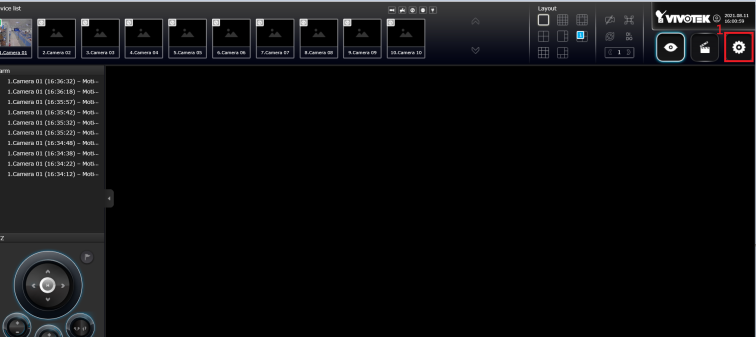
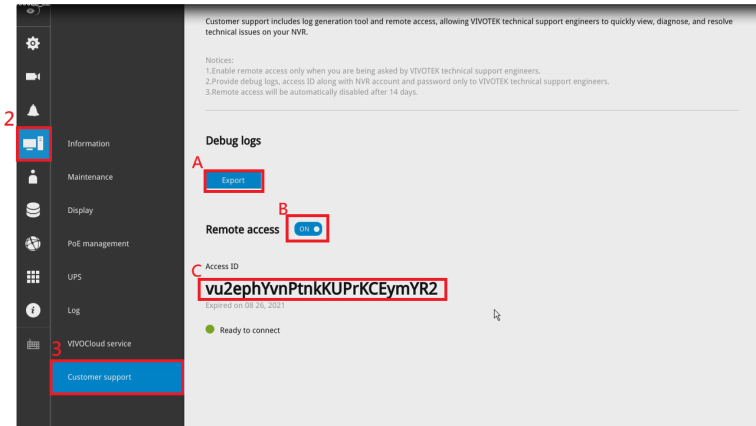
Local console.
(A). Export debug logs.
(B). Enable remote access.(OFF->ON)
(C). Cope Access ID.
How to export the backup/configuration file of the ND/NV-Series NVR(Linux-based)?
The NVR backup file contains the device configuration files, usually this file is exported as a security measure in case the device needs to be reset to defaults and then be restored with a predetermined configuration or previous configuration. This file can also be used by VIVOTEK Technical Support in case they require to reproduce an issue (using the same configuration parameters). In order to export the backup file of the ND/NV-Series NVR please follow the next guide:
Chose your interface:
There are two ways to access the NVR, please choose which one you access to NVR.
Note: If you are planning to provide the configuration file to Technical Support for analysis/troubleshooting please remember to provide the password of the admin account as well.
Web console:
Step 1. Using a browser, access the NVR using the username and password.
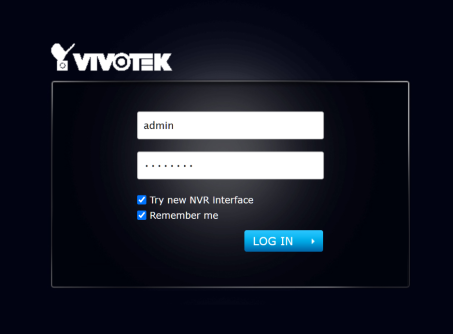
Step 2. Click on the gear icon to access the NVR configuration page.
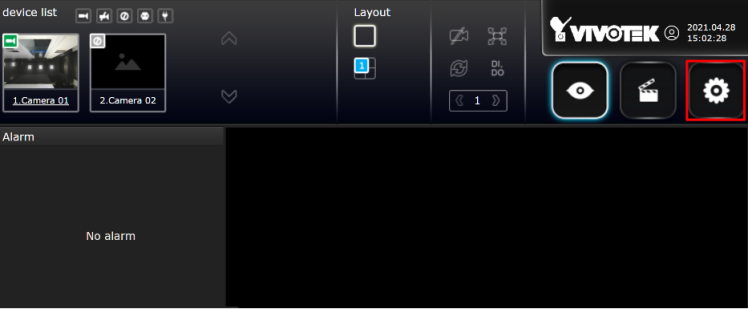
Step 3. Click on the “System” tab and select “Maintenance”.
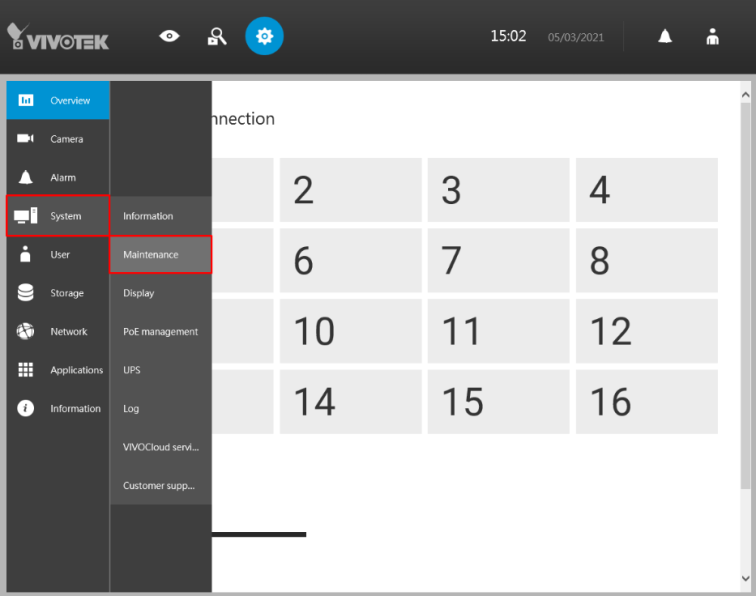
Step 4. In the “Maintenance” interface click on the “Backup” button to export the backup/configuration file of the NVR.
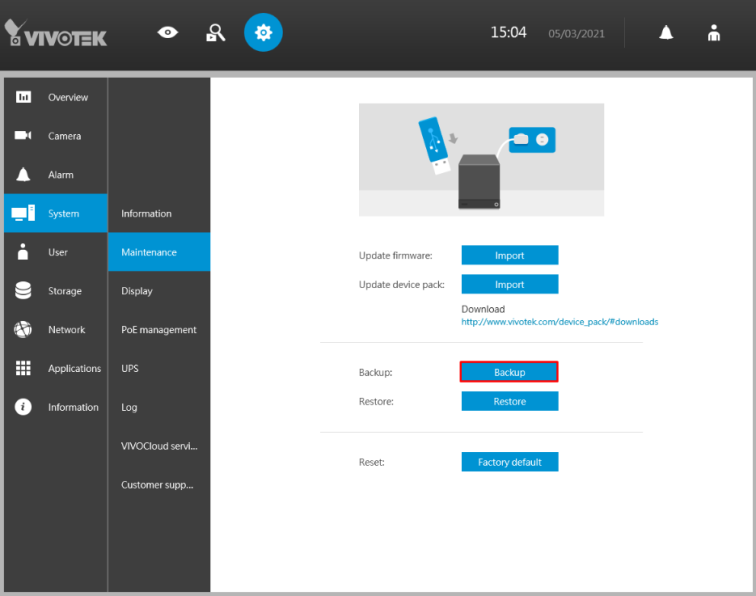
Step 5.When the download promp appears, click on “Save” to save the backup file to the computer.
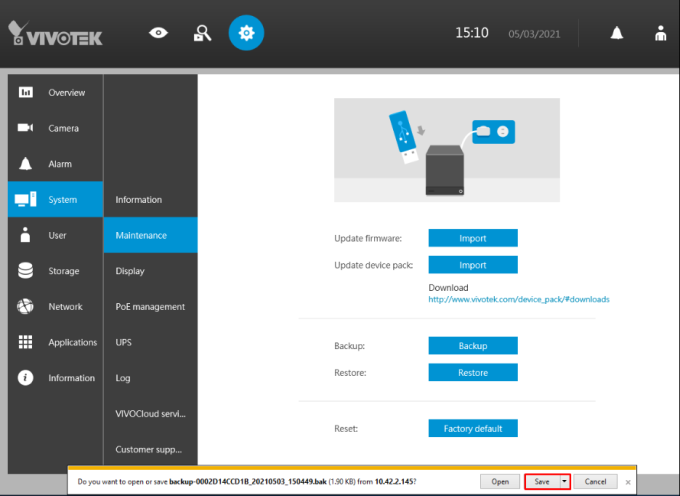
Step 6.Be sure that the file was correctly stored.

Local console:
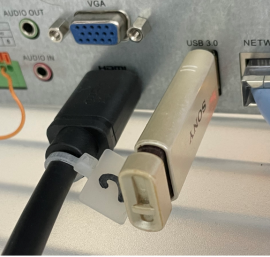
Step 1. Prepare and insert the USB into the NVR USB port. You can use either the back panel USB and frontal panel USB ports (if any) to extract the files.
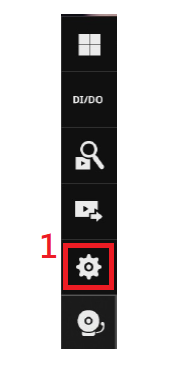
Step 2. In the Live View interface, click on the gear icon to access the device configuration page.
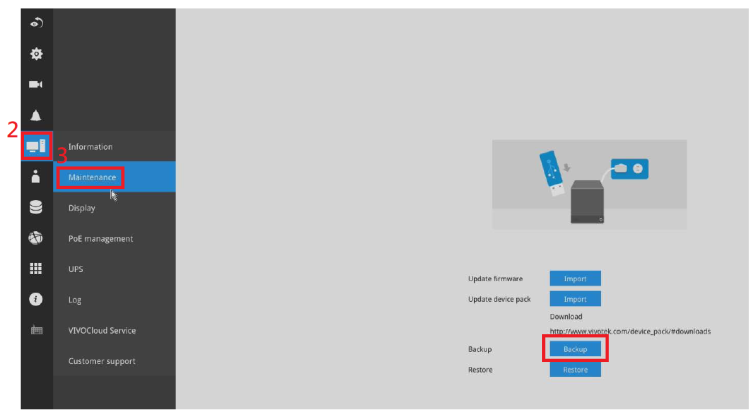
Step 3. Go to the system tab, select the maintenance section and click on the “Backup” button to copy the configuration file in the USB.
How to know the MAC address, model name, firmware version and device pack version of the ND/NV-Series NVR(Linux-based)?
Please follow the steps below to check the MAC address, model name, firmware version, and device pack version of the ND/NV-Series NVR:
There are two ways to access the NVR, please choose which one you access to NVR.
Web console.
Please open the Shepherd on your PC to find the MAC address of NVR.
(Refer to How to get camera list with camera model name, firmware version and MAC addresses via Shepherd?)


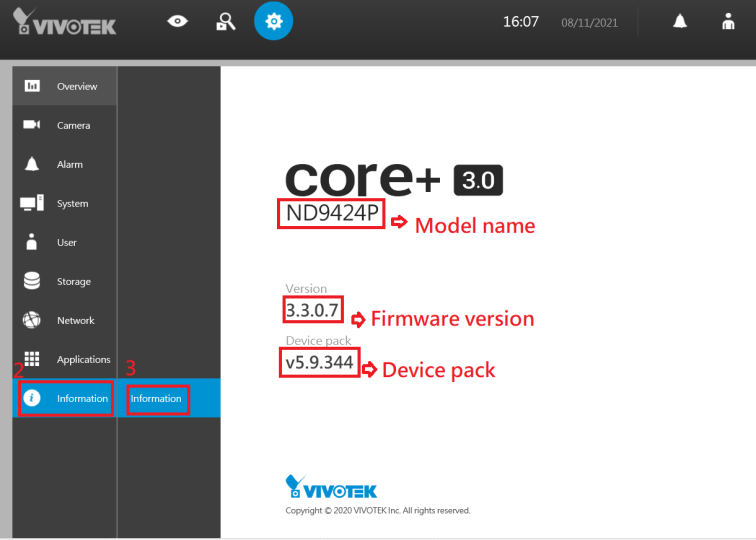
Go to setting>Information>Information
Local console.
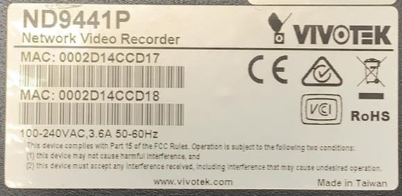
Please find the MAC label on the top of cover or bottom cover of ND/NV-Series NVR.
If there are 2 MACs on the MAC label, please provide us 2 MACs.
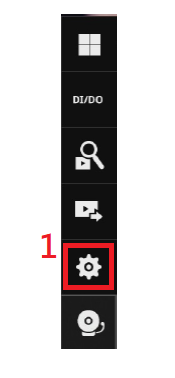
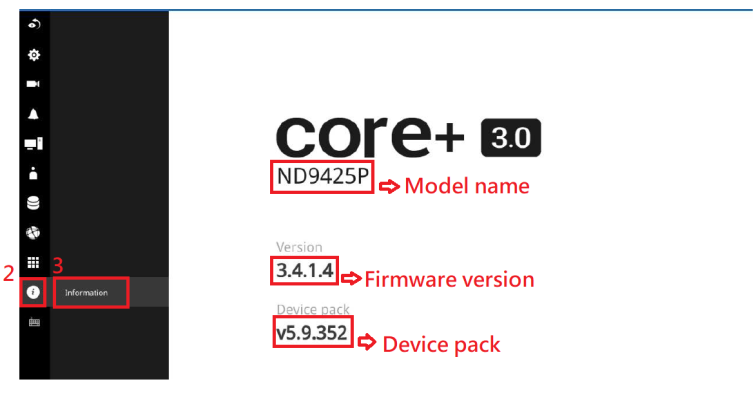
Go to setting>Information>Information
How to get camera list with camera model name, firmware version and MAC addresses via Shepherd?
Question
How to get camera list with camera model name, firmware version and MAC addresses via Shepherd?
Answer
