2MN NVR XVR Troubleshooting 2024, This is valid for some NVR models, it depends on the firmware version of them. If they do not have this new password reset method, please go to our other guide for password reset.
There are two possible ways to reset the password with the new firmware. However both need the person to access the NVR either by being in front of it or by access in on the computer (entering the IP address on the browser). The screenshots shown on this guide will be the ones we can get on the NVR itself:
Bring up the login screen by right-clicking anywhere and clicking on the “Menu” option. When you see the login screen, click on the “Forgot Password” link:
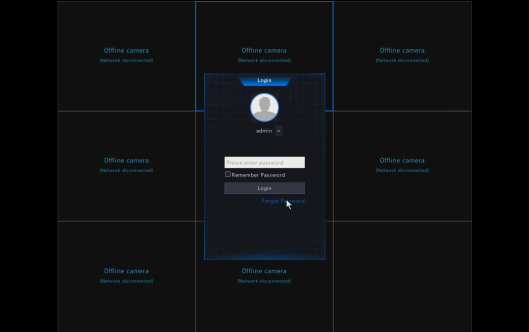
After that, either 2 types of screens will come up: The first one is to enter an email address to get a new temporary password:
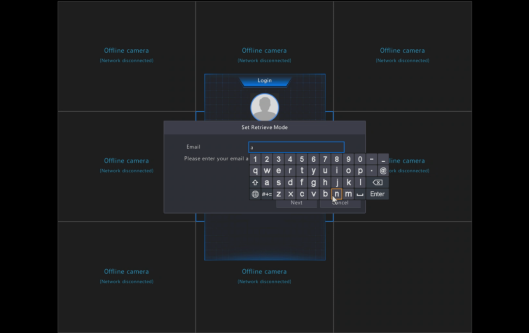
Please enter a valid email address to get your new temporary password:
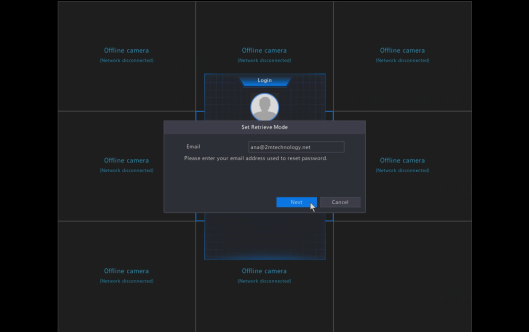
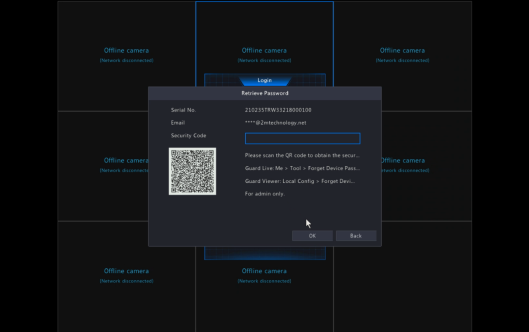
The second type of screen is the same as the one it will show when we click “Next” after entering the email address:
2MN NVR XVR Troubleshooting 2024
Read Also : Xmeye Dvr System Instructıons For Use
When you reach this screen, you can follow one of the following options:
Option 1:
If you have downloaded the 2M Guard App for your phone, you can do the password reset yourself.
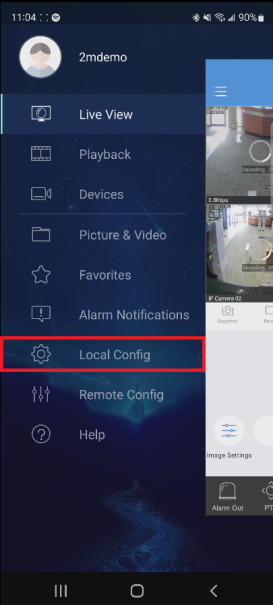
Click on the “Local Config” option:
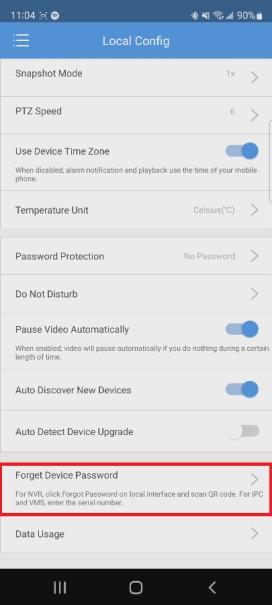
Click on the “Forget Device Password” option and scan the QR code on the NVR screen:
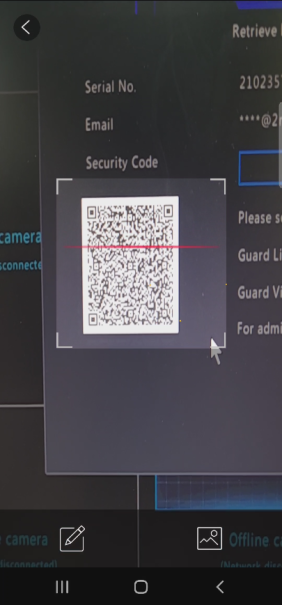
After that, a message will appear saying that the temporary password will be sent to the registered email address:
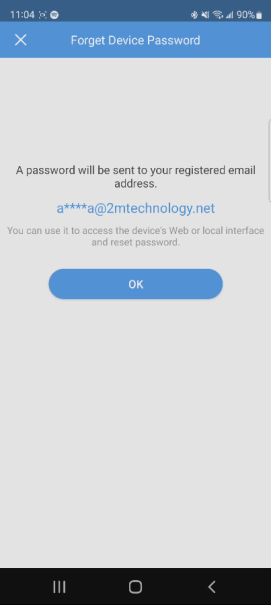
Click on “OK” to send the password and wait for the confirmation page:
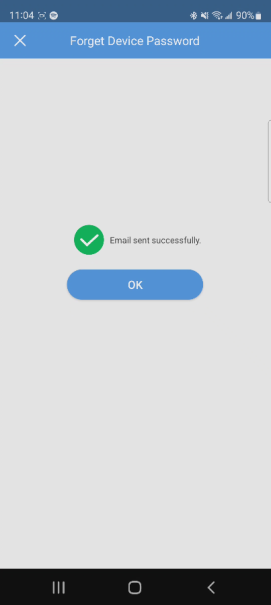
Click “OK” again and wait. The email will look like this:

Take note of the security code and enter it on the “Security Code” field of the Retrieve Password screen (The security code is case sensitive, this means that upper and lower case letters matter):
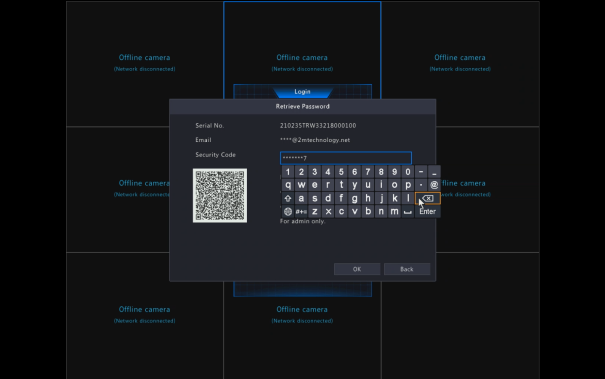
After entering the security code, press “Enter” and press “OK”. After that, a new pop-up screen will appear to enter a new password on the “Password” field. Don’t forget to enter the same new password on the “Confirm” field:
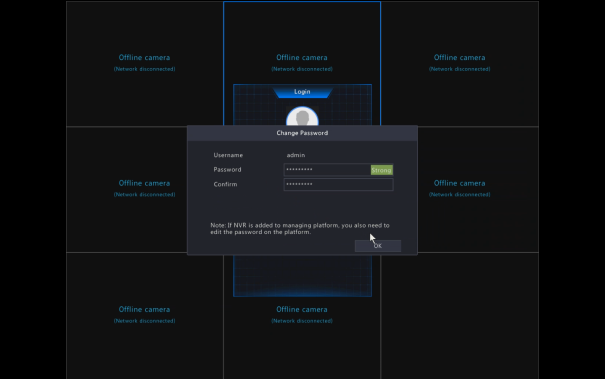
After that, click on “OK”.
Option 2:
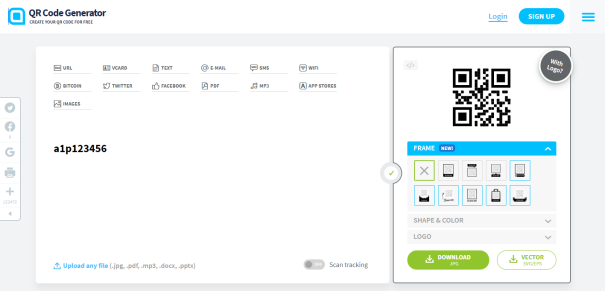
If you don’t have the 2M Guard App downloaded, you can take a picture of the QR code shown on the “Retrieve Password” screen. Here is an example of the picture you should take.

After you take the picture, please contact Technical Support to receive more instructions. We will do the password reset using the QR code picture taken.
NOTE: Please do NOT exit from the “Retrieve Password” screen after you take the picture of the QR code. The security code only lasts for a day, so please keep that in mind before starting a password reset process.
How to Access Device from Web
This guide is valid for models 2MT-4004, 2MT-4008, 2MT-4088, 2MT-4016, 2MN-8004-P4, 2MN-8008-P8, 2MN-8116-P16, 2MN-8232-P16.
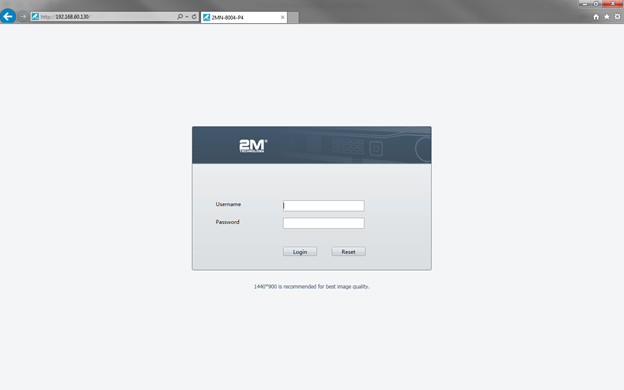
When devices are connected to the network, they can also be accessible from a computer. The first thing you need to make sure of is that the computer you are using and the DVR/NVR are connected to the same network (network is coming from the same router for both devices). You will first need to obtain the IP address of the DVR/NVR from Menu → System → Network → IPv4 address.
After noting the IP address of your device, open Internet Explorer and in the address search bar type in the DVR/NVR IP address. If the NVR and the computer are on the same network then it will pull up the login page of the DVR/NVR. The credentials will be the same as when you log into the local interface of your device.
How to Use the Check Template to Create Schedules
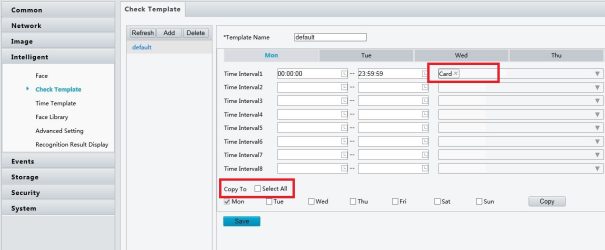
The check template supports a time range-based authentication mode with a maximum of eight time ranges available per day. This is useful if a company only wants to allow employees to enter when their shift is supposed to start and not outside of those hours.
First, you will need to create the time schedules for each day. This is done in the Check Template page under each Time Interval. You can create up to 8 different intervals per day, but it is not necessary to use all eight. You must also choose a checking method for each time interval: card, face, password, card + face. Each day of the week can have the same schedules or you can create different schedules for different days. If you choose to have the same schedule for all days, or for multiple days, just Copy To at the bottom of the screen and Copy.
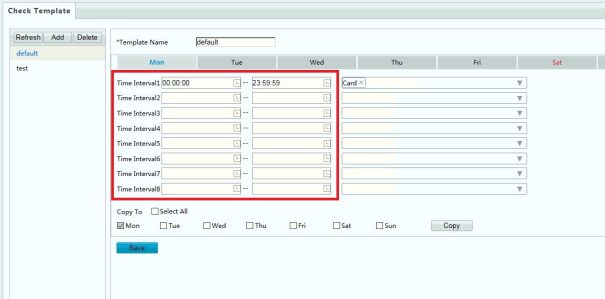
Once all of the desired time intervals have been added, name the template so that it can be easily defined, and click on Save.
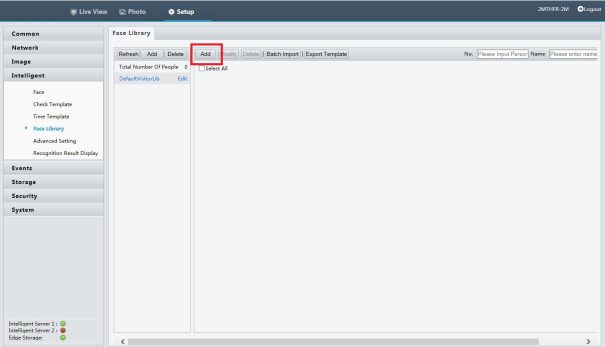
Now that the template(s) have been created, we need to assign each group to a schedule. Go to the Face Library and create different libraries based on each group of people that you would like to have. NOTE: Only a maximum of 16 face libraries can be set.
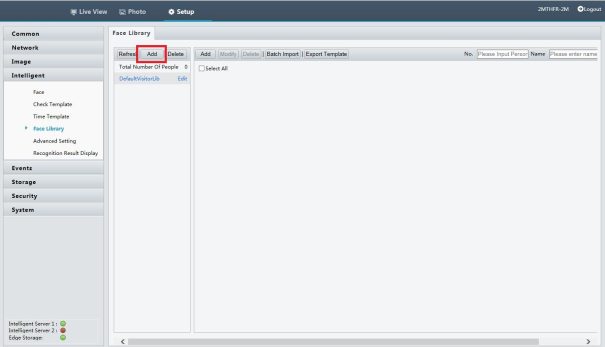
There are two different library types: Employee and Visitor. When you create a library, it gives you the option to choose a Check Template. This is where you will choose from one of the templates that were created earlier. If you do not choose a template at this stage, you can always edit the library at a later time.
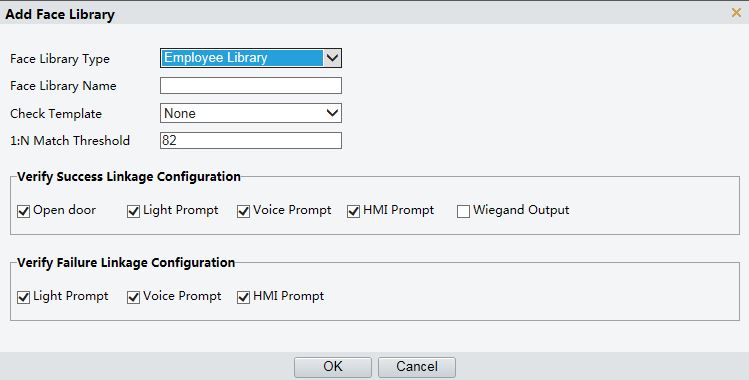
After creating all of the necessary libraries, now you can add employees into each appropriate library. When all of the employees have been added into the right libraries with the right templates, they will only be able to enter during the specified time frame.
How can I make sure my device and computer are on the same network?
In order to access network devices from a computer, they both have to be connected on the same network. But how do you check that the settings are correct, and if they are not, how do we fix that? This article is based off of the assumption that the computer and the device are connected to the same router/network switch.
Basic Explanation of the Network
Before we begin the steps on how to configure our network, we need to understand why we are doing it. Each device within a network has its own IP address – we will use 192.168.1.13 as an example – and its structure is like this:

The host ID will be different because that is what differentiates each device from one another. Within a network, the network prefix will be the same and so should the subnet ID, but there will be sometimes where it is different on a device. If the network prefixes and subnet IDs are the same for the devices, then that means they can all reach and communicate with each other.
If either one of the two are different, then that means they are not connected and they cannot establish a connection with each other. The purpose of this article is to make sure that the network prefix and the subnet ID are the same for the computer and your device so that you can create a connection and reach the device.
Checking the Network of the Computer and Your Device
The easiest and fastest way to check the network of your computer is to open up the command prompt. Open the Windows menu and type in “cmd” for command prompt.
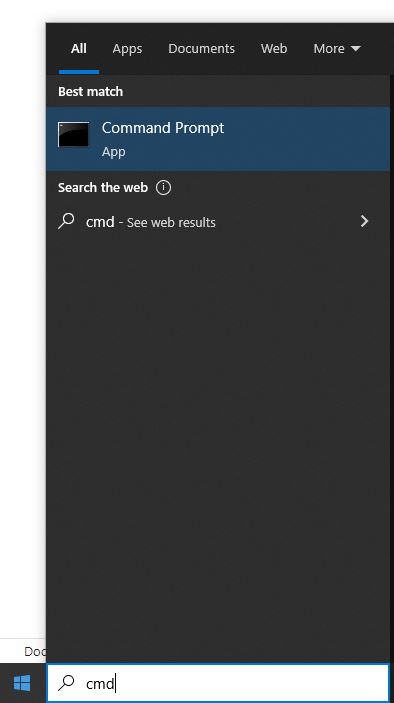
Once the window is open, type in “ipconfig” and hit Enter. This will pull up the basic network information of your computer. Make note of the IPv4 address and the default gateway. Now that you have found the IP of the computer, please find the IP of your device – the method to obtaining the IP address might be different for each device. As mentioned above, if the network prefix and the subnet ID are the same for both the computer and your device, then they will be able to communicate with each other. If they are different, then please follow the steps as below:
Changing the Network of Either the Computer or Your Device
The most simple solution to allow both devices to be on the same subnet is to edit the IP address of your device. Usually, you just need to disable DHCP and enable a static IP address. But this is not always possible depending on the set up. NOTE: The computer must be connected with Ethernet in order for this configuration to work. It will not work through Wi-Fi.
In order to change the network of your computer, you will need to go to the Network and Sharing Center. On Windows 10 operating systems, it can be reached by either the Control Panel or from the Taskbar. In the Sharing Center you will be able to see all Connections the computer has. Click on the correct Ethernet connection.
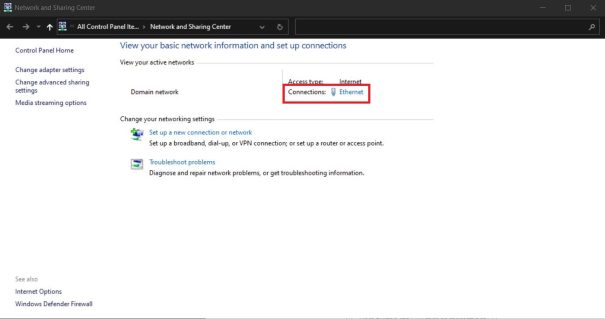
After clicking on the Ethernet connection the Ethernet Status window will pop up. Click on Properties → double-click on Internet Protocol Version 4 (TCP/IPv4). By default, your computer will be set to “Obtain an IP address automatically”, but we will want to change it to Use the following IP address. Remember in the steps above that we found out the IPv4 address of the computer through the command prompt. This is where it will come in handy again. When you select Use the following IP address the boxes below will become active. The information will be as follows:
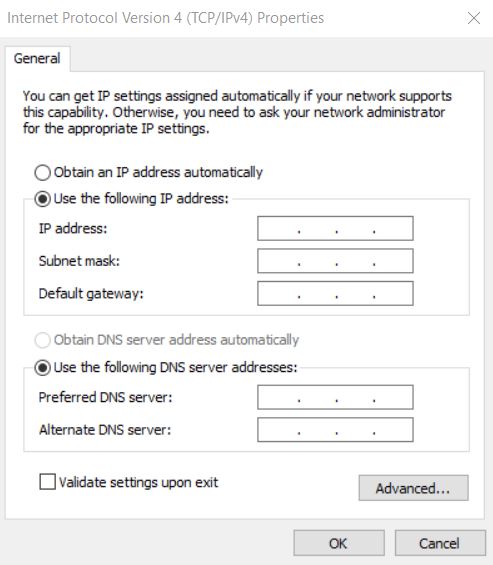
Once all of that information is filled out, click on Advanced in the bottom-right corner of the window, and it will open up the Advanced TCP/IP Settings where you will Add a new TCP/IP address. Please make sure the new TCP/IP address will match the subnet as the device you are trying to access, or else it will still not connect. NOTE: Please do not use the same IP address as the device. The Network Prefix and Subnet ID should be the same, but the Host ID should be different.
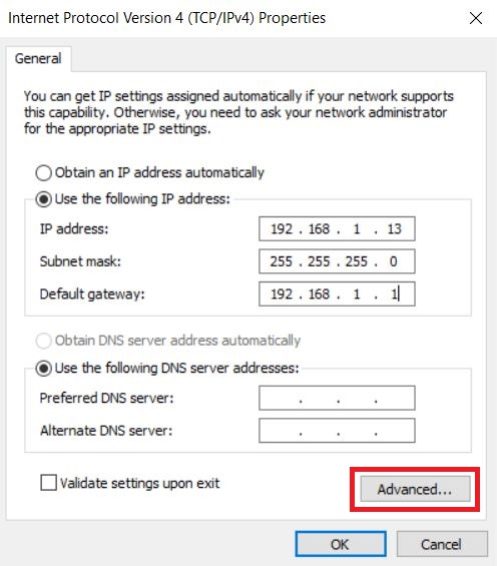
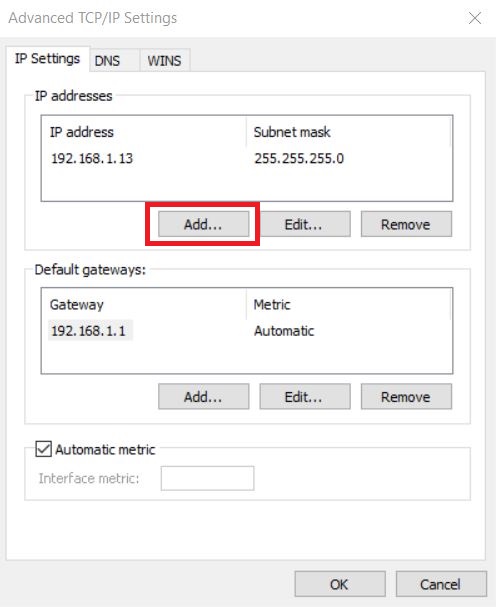
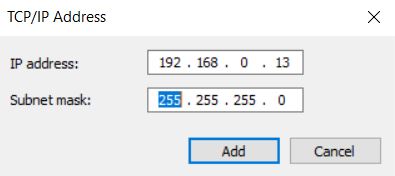
Adding the Subnet Mask can be easily done by hitting Tab after inputting the IP address because the fields will automatically be filled afterwards. Click Add after entering the correct information, and then just keep clicking okay until you are back at the Ethernet Status window. Then close the window.
You can check if the configuration was done properly by opening the command prompt and pinging the device’s IP address. You can do this with the prompt: ping IP address. For example: We are using the IP address 192.168.0.10 for the device. Enter the command prompt and type ping 192.168.0.10. If you receive a response, that means the configuration was done correctly, and you may now access your device.
How to Use External QR Scanner
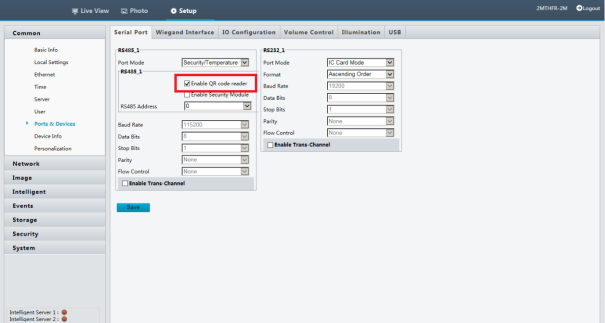
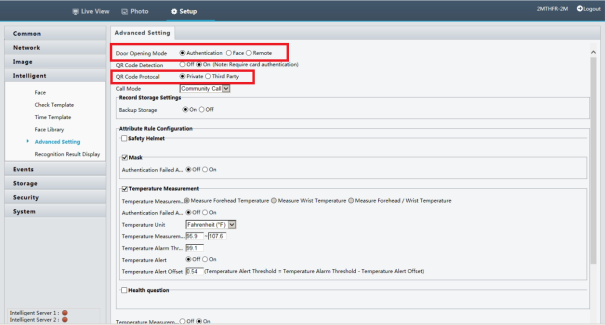
This article is applicable to the facial recognition temperature scanners which are models 2MTHFR-2M or 2MWTK.

