2N IP intercoms Full User Guide, We invented the world’s first IP intercom. Since then, we’ve kept innovating. Whether you’re looking for a customisable touchscreen display or a durable high-security unit, a modular intercom for a large office project, or a smaller device for family homes – we have what you need.
2N IP Intercoms – Factory reset
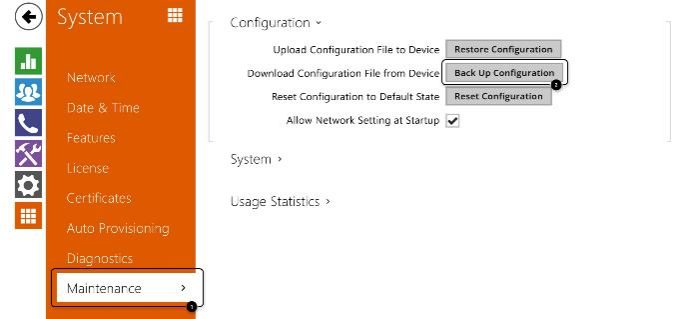
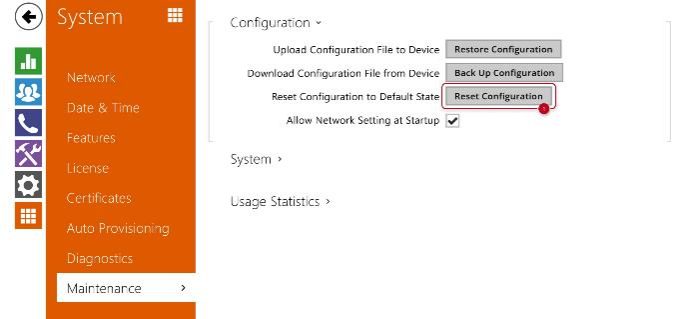
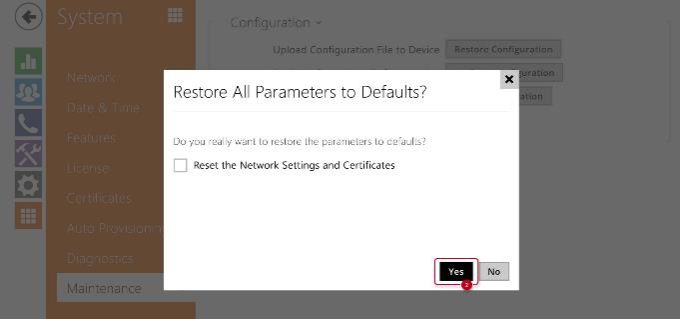
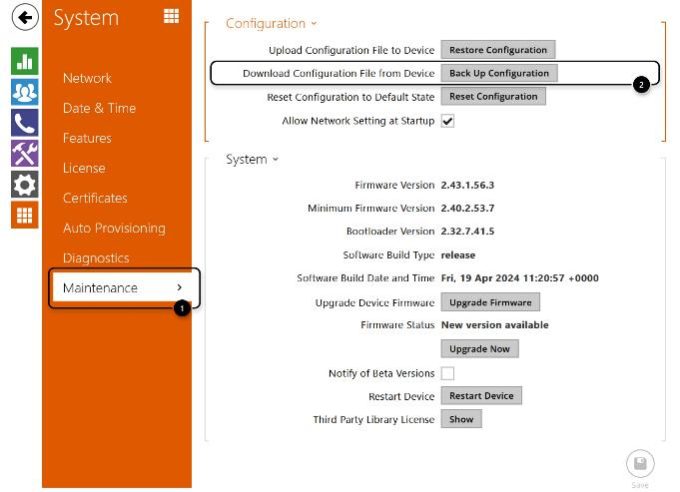
If needed, you can return the device to the factory settings. In case you can access the web interface (know the login password), you can backup the configuration and use the software reset with possibility to keep the network settings. Otherwise there is available the hardware reset.
The factory reset erases the licence key (if entered) as well, we recommend you to store it for entering it back after the procedure.
In case of on-line installation, the device can get the license back from our license server by itself.
Prerequisituis
(especially in case of software reset)
Software reset
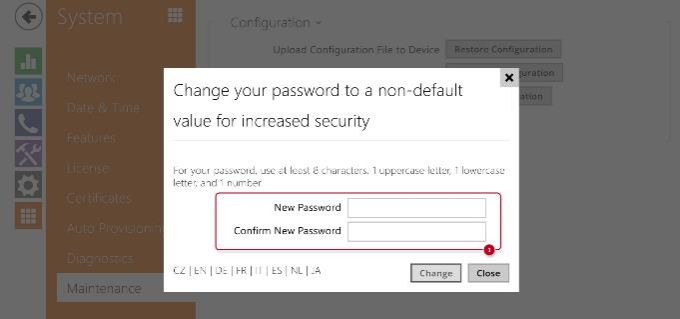
The procedure is completed in a while and you are asked for the new login password.
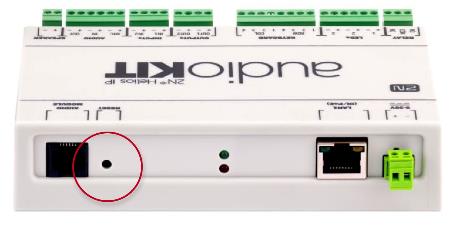
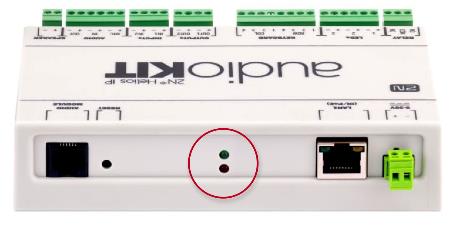
Hardware reset
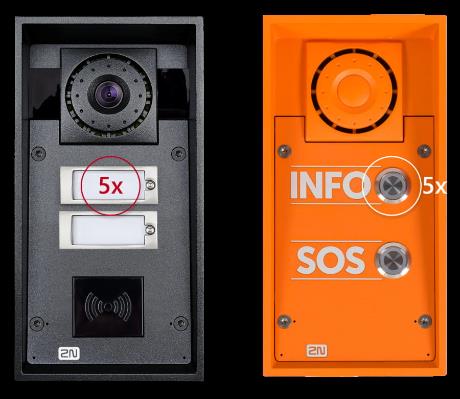
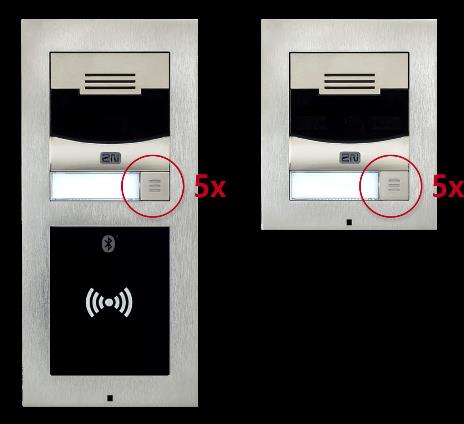
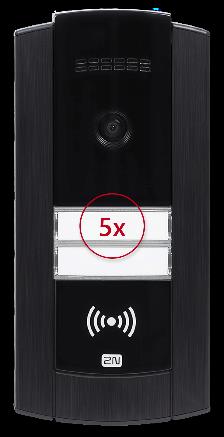
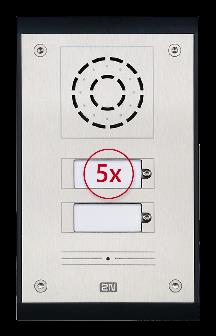
Please click on the part (model) you are interested in and it will be displayed for you.
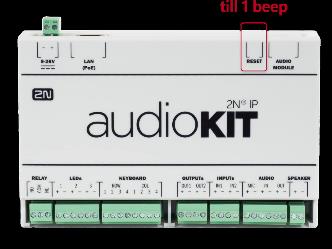
2N IP Audio/Video Kit
.
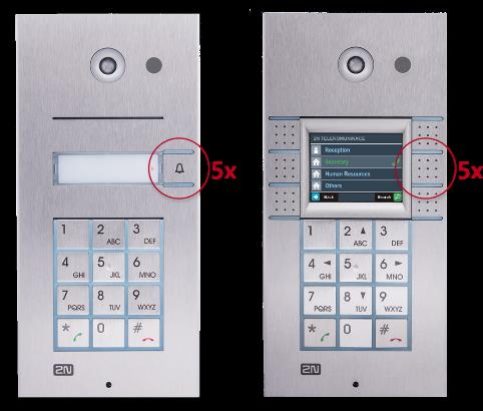
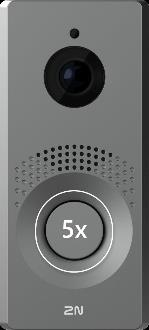
| approx. 15 seconds | approx. 3 seconds | approx. 3 seconds | approx. 3 seconds | approx. 3 seconds |
| __ _ __ _ | __ _ __ _ | __ _ __ _ | __ _ __ _ | __ _ __ _ |
| . | 🔈 ) | 🔈 )) | 🔈 ))) | 🔈 )))) |
If pressed longer till finishing boot, then factory reset is not proceeded.
.
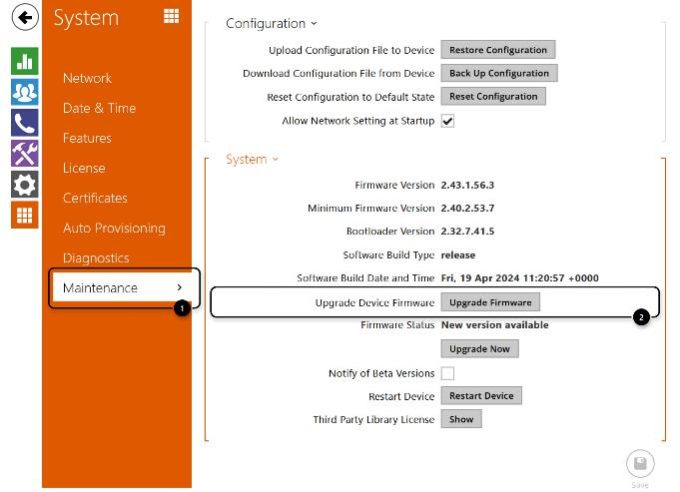
2N IP intercoms – Firmware upgrade
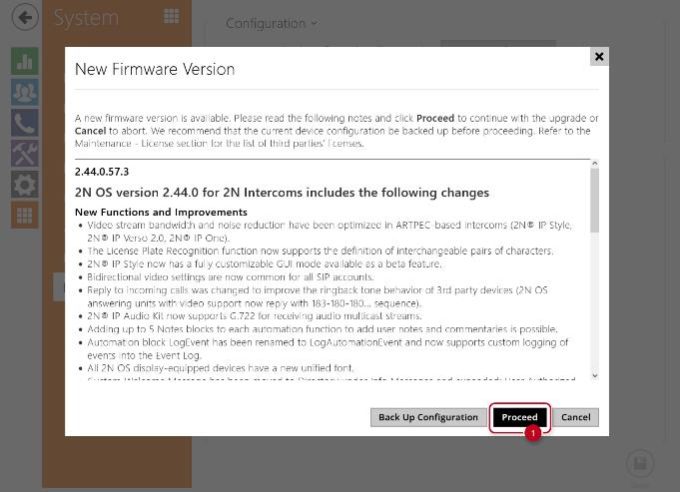
We always recommend to have the latest firmware in your devices. This article will guide you through the upgrade procedure even if there is a very old version at this moment.
Prerequisities
Feature properties
If your firmware version is lower than 2.31.1
-> 1.11.0 -> 1.16.1 -> 2.5.0 -> 2.9.1 -> 2.15.2 -> 2.17.1 -> 2.18.1 -> 2.31.1 -> the latest one
Then use the offline upgrade method guided later; when you are on 2.31.1, you can use the online upgrade method as well.
Please note that some intercoms were launched later and thus some older firmware versions may not exist for them. Simply continue with the next higher version than it currently has.
Configuration backup
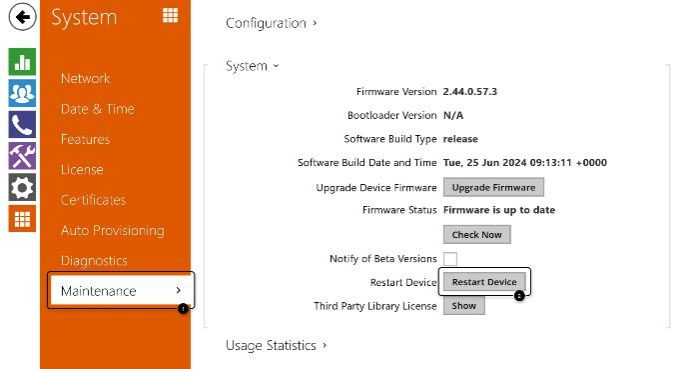
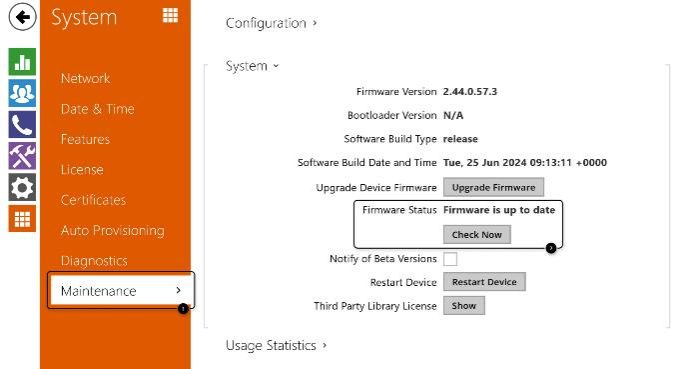
You can proceed it in System – Maintenance.
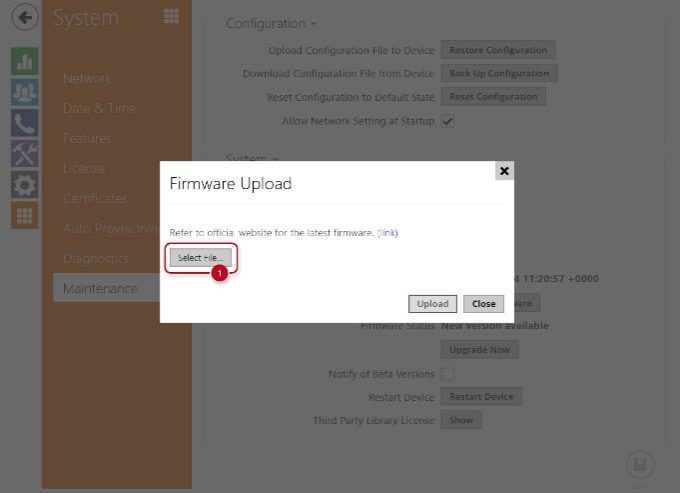
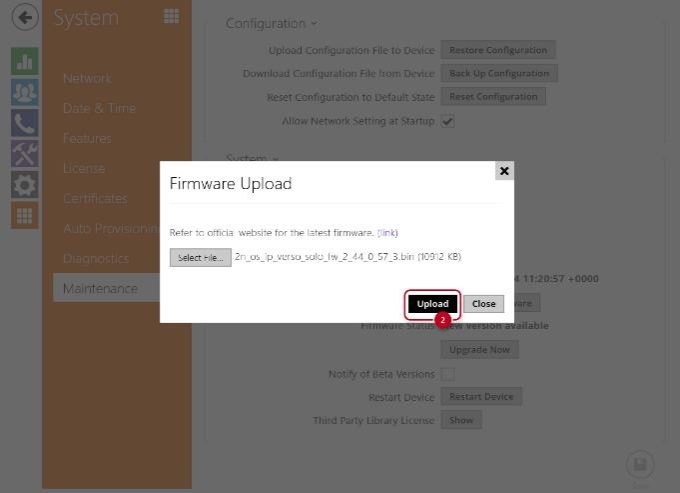
Offline upgrade method
https://www.2n.cz/en_GB/support/documents/firmware#filter-category-intercoms
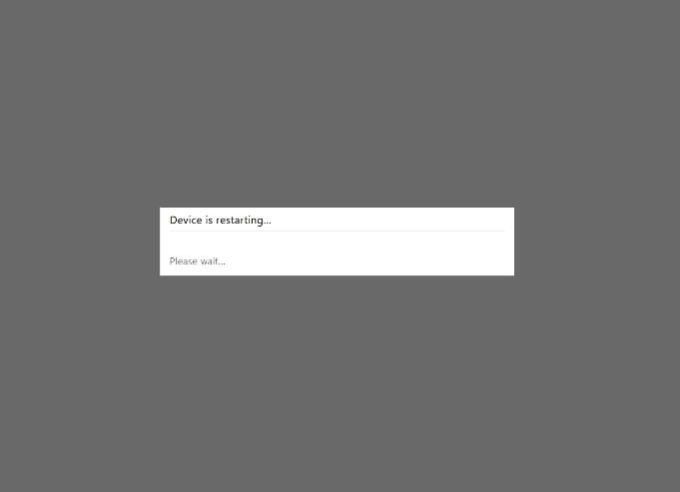
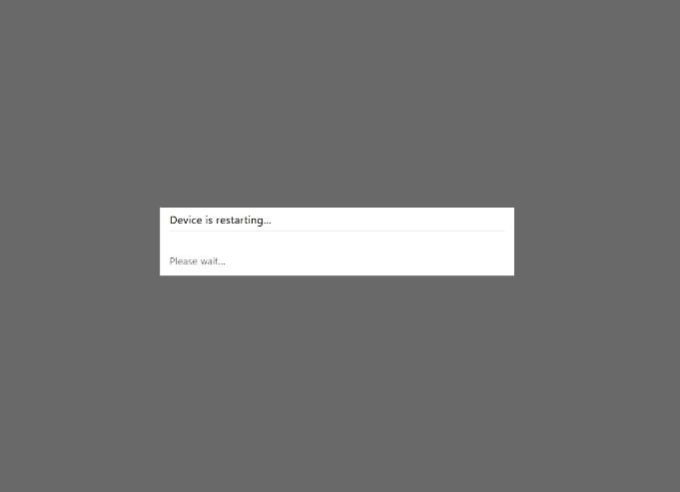
The whole update process takes less than a minute.
Online upgrade method
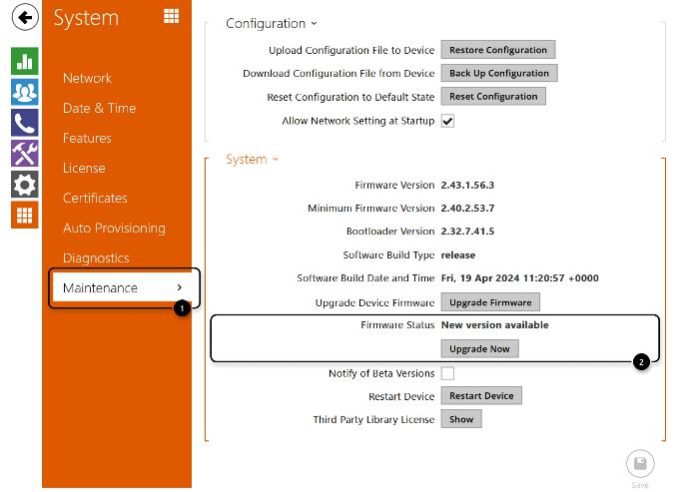
Just go to System – Maintenance and click on Upgrade Now button when the interom says that a new version is available.
The whole update process takes less than a minute.
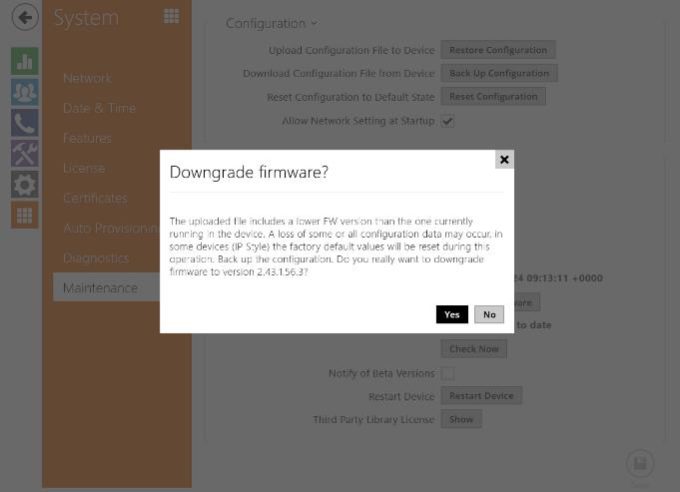
Downgrade firmware
2N IP Intercoms – How to add user access credentials
This FAQ describes how to add access credentials to 2N IP intercoms and Access Units. These scenarios can be used on following devices:
RFID card access
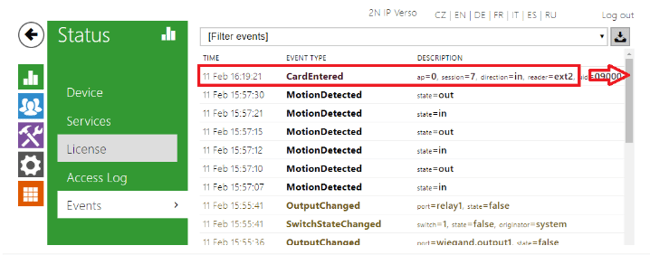
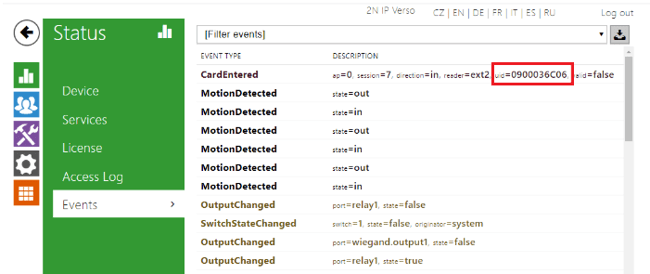
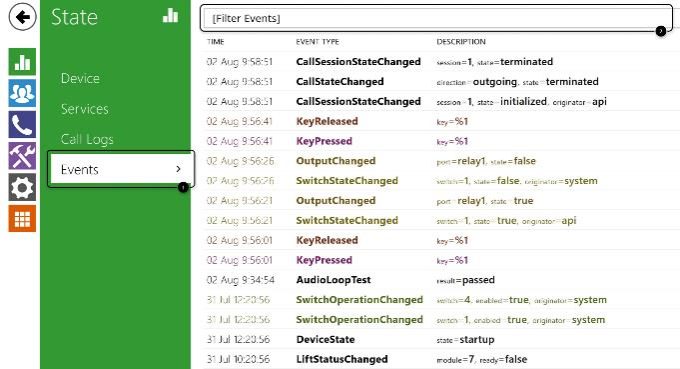
To add a new RFID card to the unit, you need to first find the ID of the card. Please put the card on the reader and then see the unit’s log in Status -> Events. You will see the event “CardEntered”, you need to see the “uid” parameter. Scroll to the right and copy it:
Now please go to Directory -> Users. You can either create a new user (1) or edit an existing one (2):
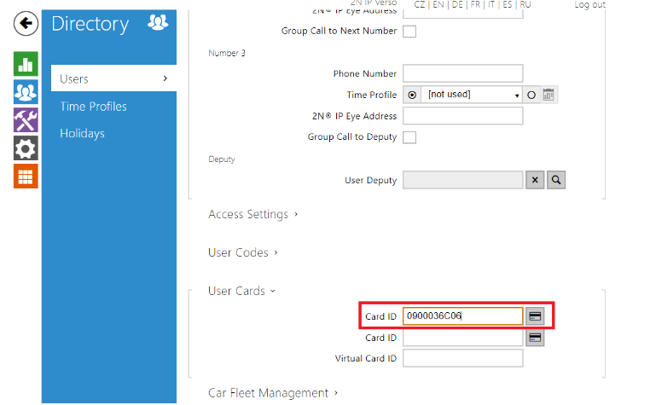
In User details, go to User Cards and paste the card ID here:
Now the RFID card access has been created.
Saving a new RFID card’s ID can be also done with 2N USB RFID reader. A driver is needed for this device, more info is here. When the driver is installed, you can start scanning from the reader by clicking the button next to the field for Card ID.
Fingerprint access
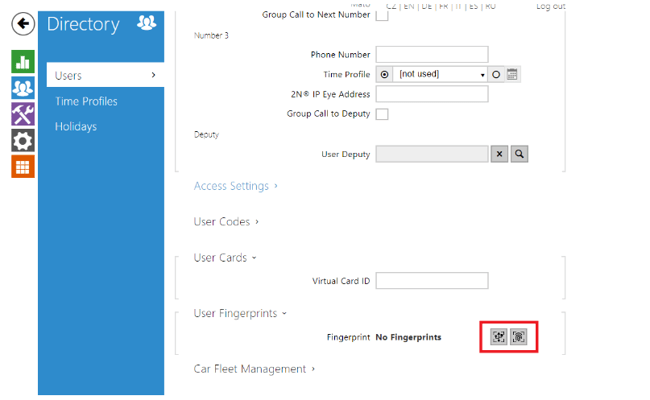
To setup a fingerprint access, go to Directory -> Users -> select User -> User Fingerprints -> click on one of the highlighted buttons. Left one is for assignment via 2N External Fingerprint reader. Right one is for assignment via reader module mounted on a unit:
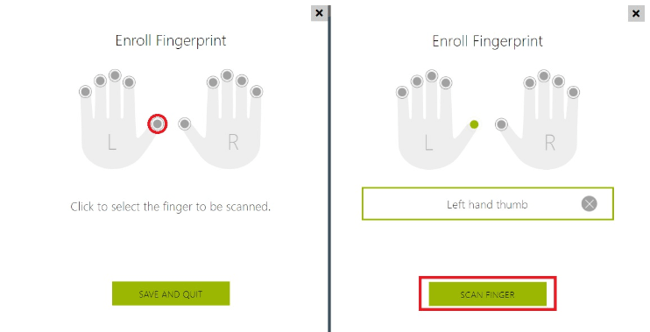
Now select the finger you want to use and click Scan Finger:
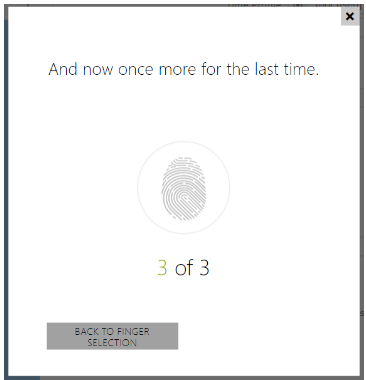
Now you need to scan it 3 times and save it:
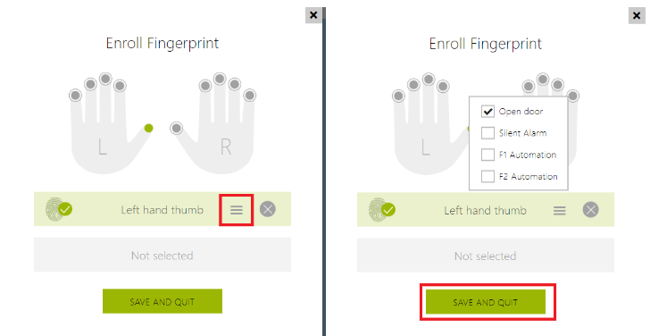
Now you can choose what this fingerprint will be used for by clicking on the highlighted button:
By default, Open door option is selected. Silent Alarm option is for triggering a silent alarm when this finger is scanned. F1 and F2 Automation option is for use in Automation scenarios. After you set the correct function, click Save and Quit.
PIN code access
There are several ways of adding a PIN code access to the device:
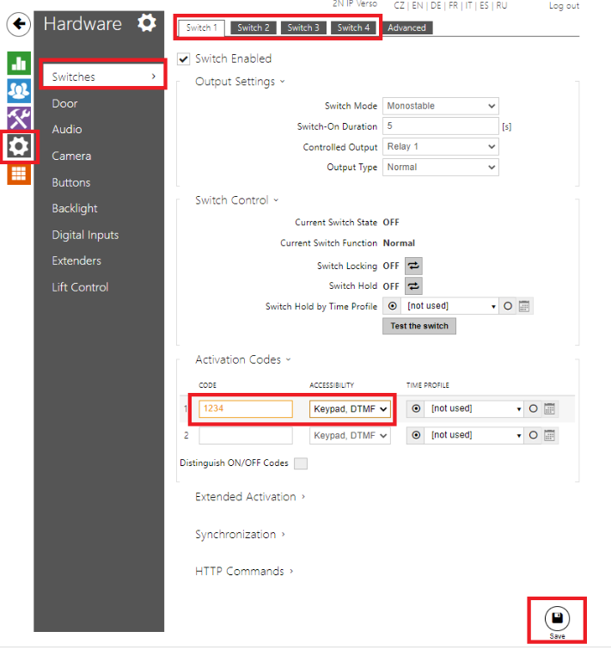
1) The PIN code is associated with the respective Switch
In this case, when the correct PIN is entered, unit will not show which User activated the switch, it will just show that the correct PIN was entered and the switch was activated. You can set this in Hardware -> Switches -> (for example) Switch 1 -> Activation Codes. You will also need to make sure that Keypad, DTMF or Keypad only option is active. After you enter the code, click Save:
2) The PIN code is associated with a User
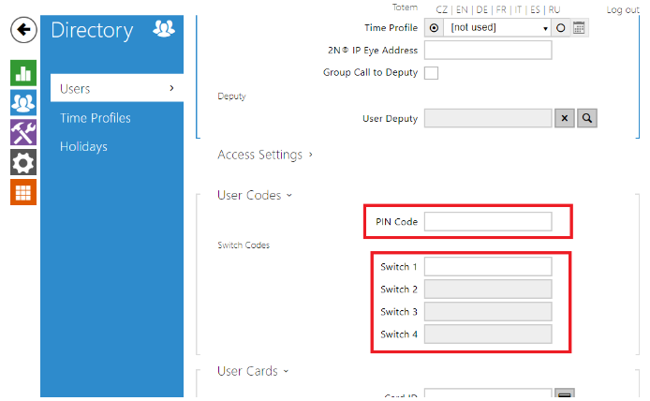
In this case, using a PIN code will generate an Event in the unit that will inform which User’s PIN code was used. In this scenario, each User has their own PIN code(s). To configure this, go to Directory -> Users -> select the User -> User Codes:
PIN Code option – this PIN code will activate a Switch that is associated with Door (in Hardware -> Switches). Good for scenarios where each User needs their own PIN code and they need to control just one Switch.
Switch codes – these codes are associated with respective Switch. User can control each Switch individually and those PIN codes are associated with this User only. The fields for codes here are greyed out if the respective Switch is not enabled. You can enable a Switch in Hardware -> Switches.
QR code
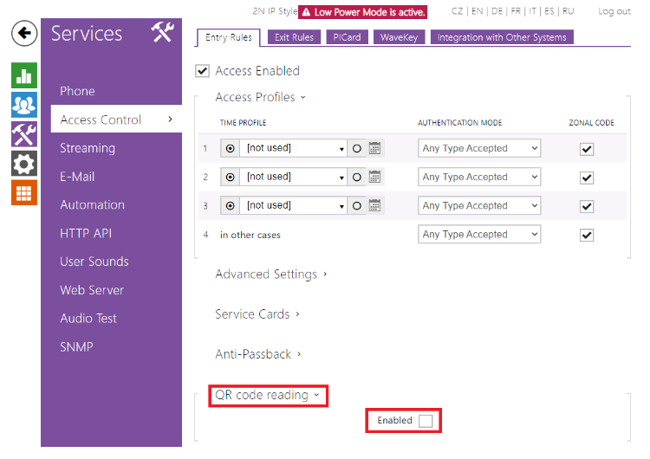
To be able to use QR codes for authentication, you need to first enable this function, you can do so in Services -> Access Control -> Entry rules -> QR code reading:
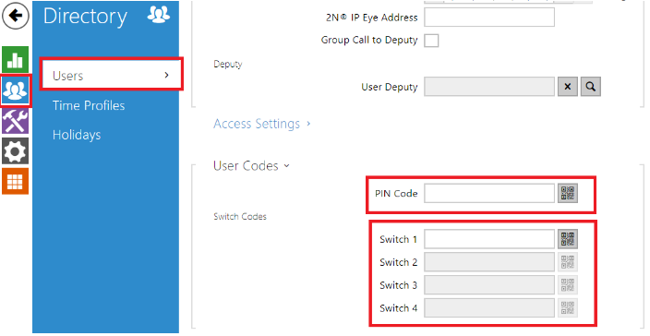
To create a new QR code credential, go to Directory -> Users -> select a User -> User Codes:
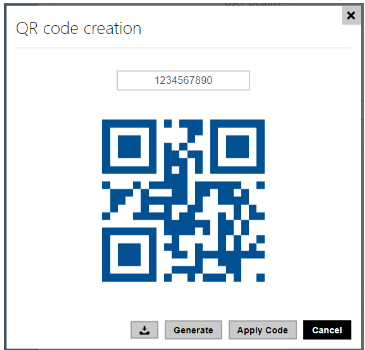
You can enter numeric code with at least 10 digits and then click the button with QR symbol next to the field for entering the code. This will show you a QR code representing the digits entered:
You can download the image with QR code with the first button. Generate button will generate a new code. Apply Code will close the window and fill in the field for the code with the last generated code.
Virtual Card
For more information about Virtual Card, please refer to this manual: Virtual Card ID – What is it for and how to set it up
Bluetooth access
For more information about adding a bluetooth access credential, please refer to this manual: Bluetooth, 2N® Mobile Key – Opening door with Bluetooth
License Plate Recognition
For more information about adding a car’s license plate as an access credential, please refer to this manual: License Plate Recognition (LPR) – how to configure it?
2N® Access Unit – Configuration backup – How to backup configuration and how to capture a trace? Electric output – How to set electrical outputs on 2N Access Units
2N IP Intercoms – IP Address retrieval
You have to know your intercom IP address to log in to the integrated web server. Upon purchase or factory reset, the device is set to the dynamic IP address mode – it retrieves the IP address automatically if there is a properly configured DHCP server in the LAN. If no DHCP is available, you can operate it in the static IP address mode.
You can retrieve the IP address by our 2N® Network Scanner
2N® Network Scanner – Locating 2N devices in the network
Or you can let the intercom tell you the IP address by itself (guided in this article).
Prerequisities
How to retrieve the IP address by the inbuilt speaker
If you hear 0.0.0.0, it means the intercom has not obtained the IP address from the DHCP server
(DHCP server is not available, not presented in network or does not have any free IP address to assign).
Specific procedure for each IP intercom model
.
2N IP Intercoms – User sounds uploading
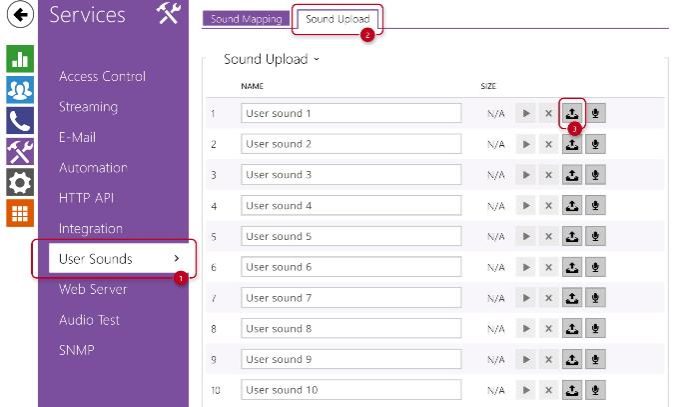
You can upload up to 10 user sound files into the intercom and use them in your scenarios, e.g. to welcome your visitors with your voice message when opening the door.
Prerequisities
(except 2N IP Uni, which does not support this feature)
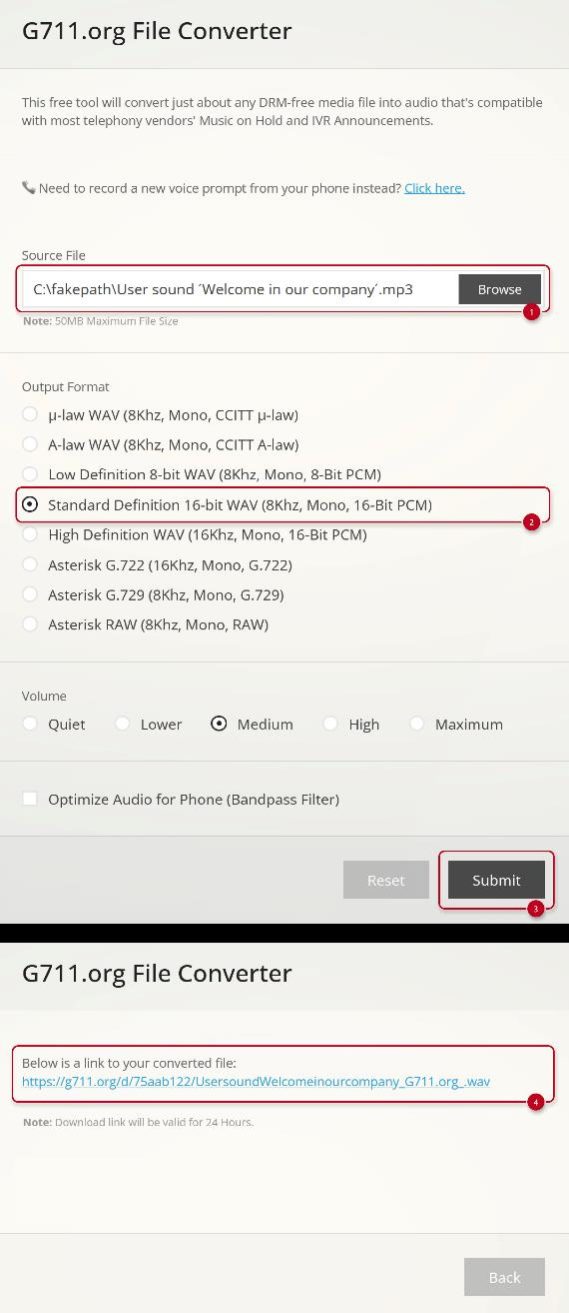
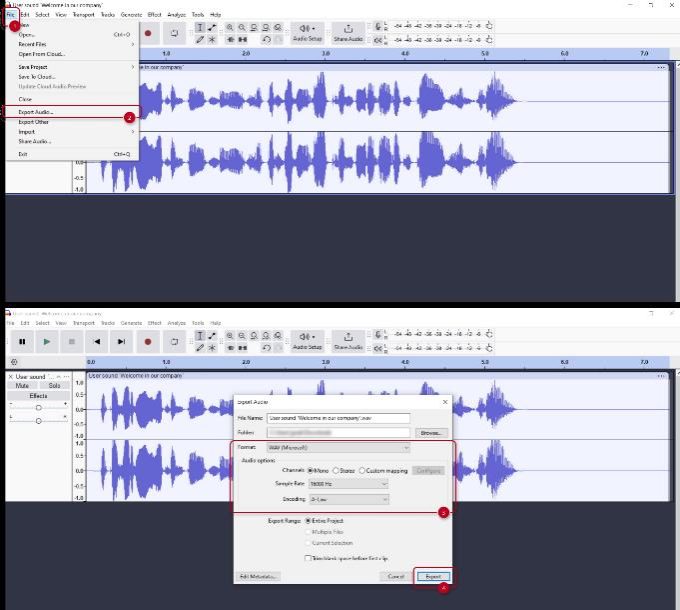
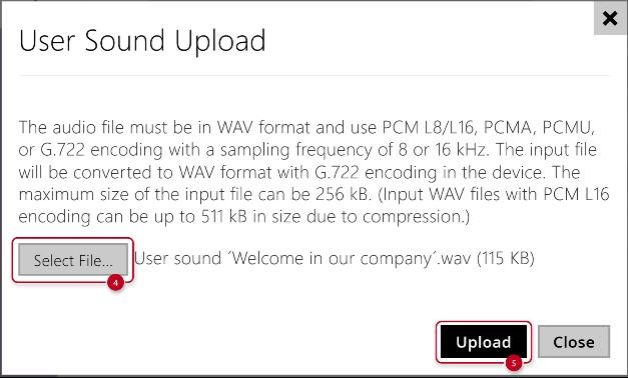
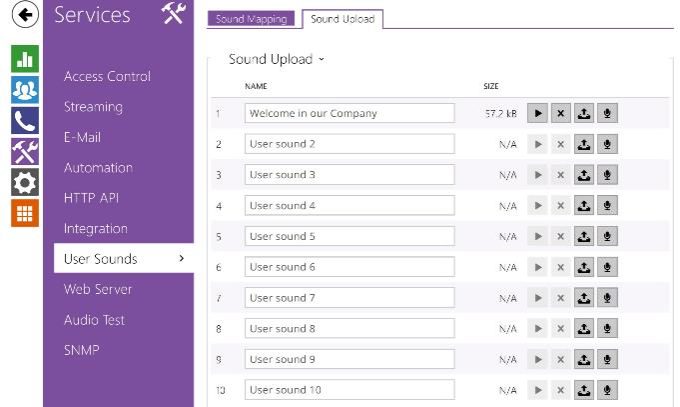
Uploading a prepared sound file
(file with different parameters will be refused)
| Format | Encoding | Sampling | Maximum size |
| WAV | PCM L8/L16, PCMA, PCMU, or G.722 | 8 or 16 kHz | 256 kb |
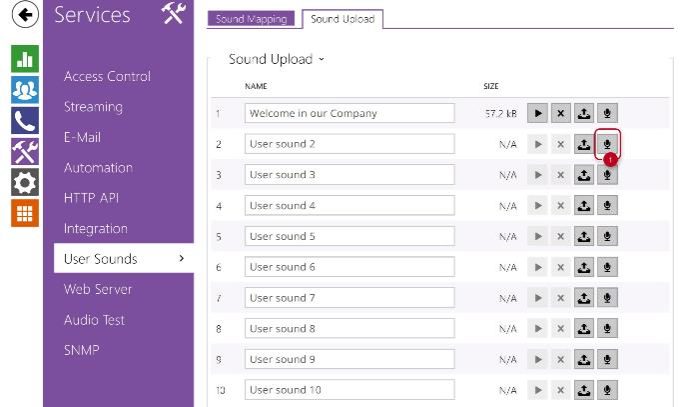
Recording a sound file directly to the 2N IP Intercom
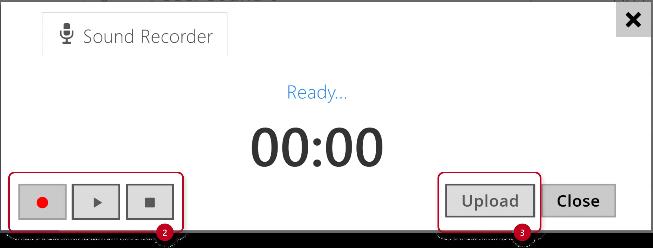
You can also record the sound directly to the device using your PC microphone.
.
2N IP Intercoms – Integration with 3rd party NVR/VMS systems without ONVIF and RTSP
You’ve got a 2N IP intercom and would like to integrate it with your NVR or VMS systems. Your first choice would usually be to use ONVIF but this requires the GOLD license. Or maybe you’d just like to quickly take a look who’s in front of your intercom from your web browser?
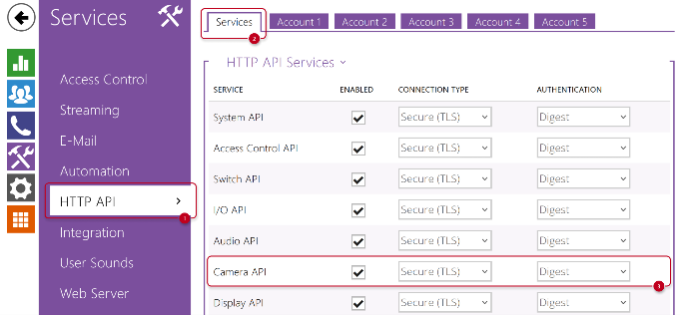
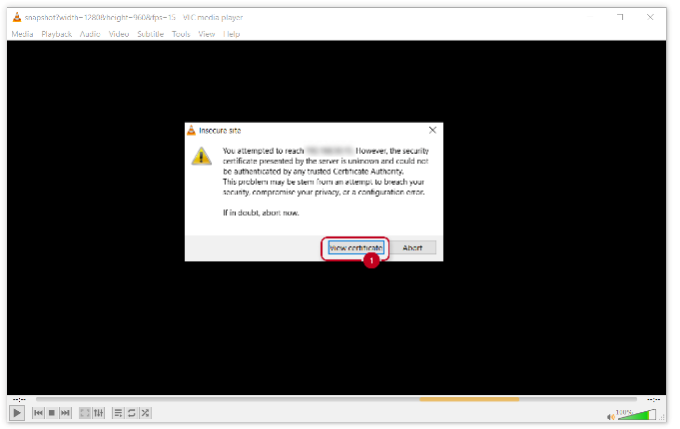
For cases like these, you can view the camera feed using HTTP API
Prerequisites
No additional license is required.
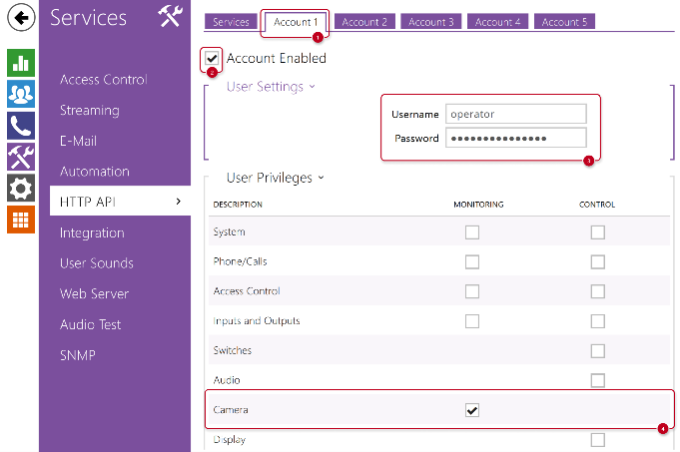
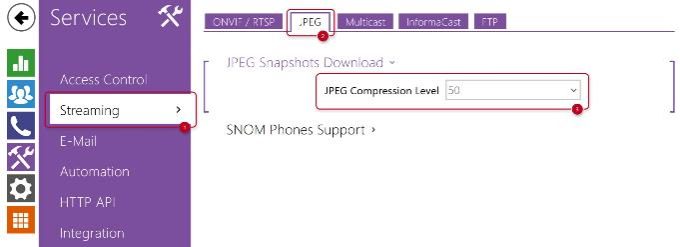
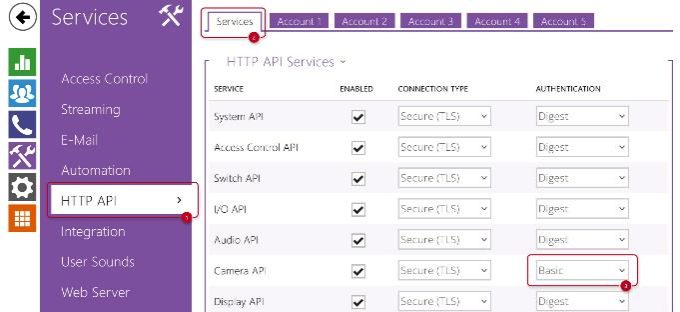
HTTP API setup
How to view the camera feed
• Enter the following string into any of the following programs and replace IP_address with your intercom’s respective IP address.
https://IP_address/api/camera/snapshot?width=1280&height=960&fps=15
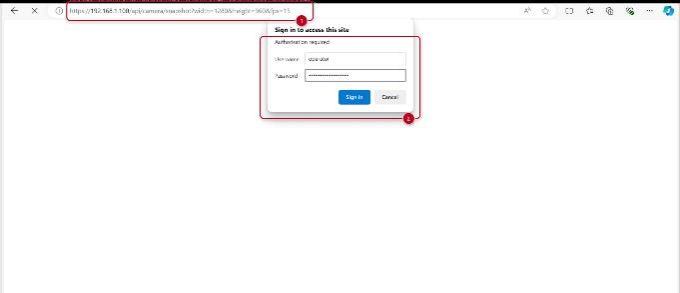
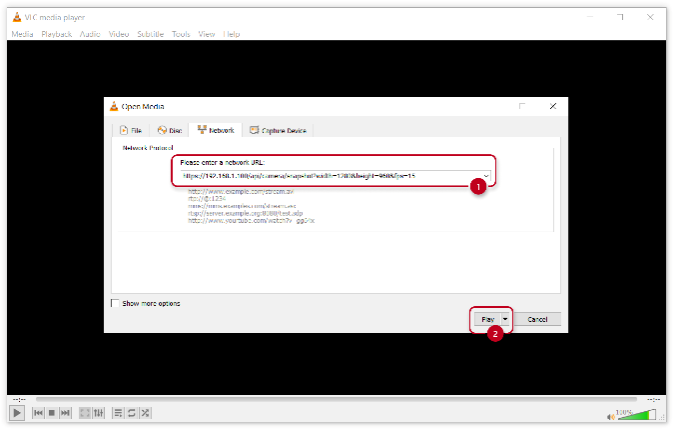
https://192.168.1.100/api/camera/snapshot?width=1280&height=960&fps=15
Where to view the camera feed
The easiest way to view the camera feed would be from your web browser. Just enter the above string into your web browser’s search field.
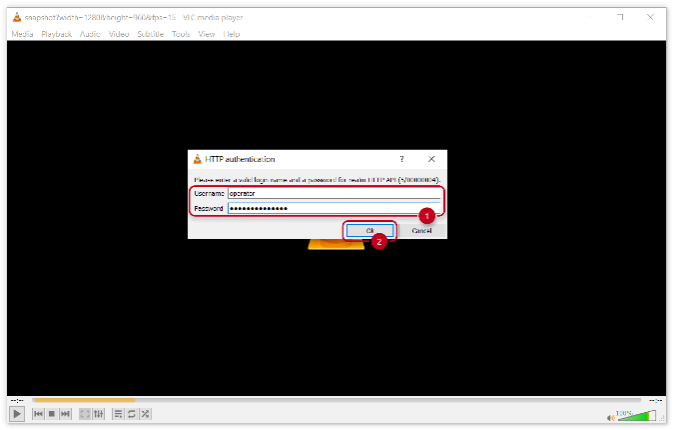
You’ll be asked to enter the HTTP API Account credentials you filled in previously. Shortly after, the camera feed appears in your web browser.
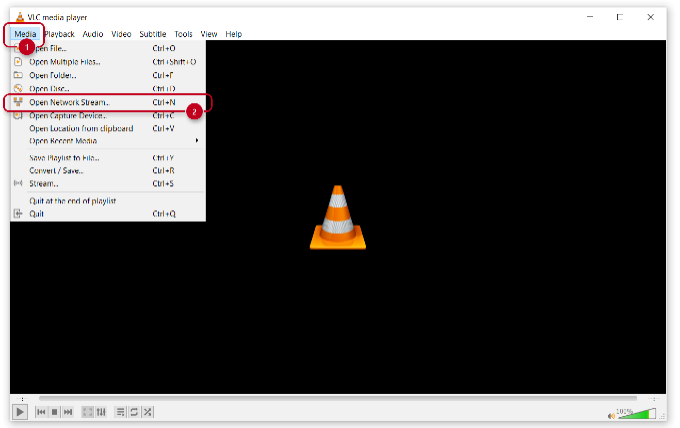
VLC media player can open various media formats, one of which are network streams.
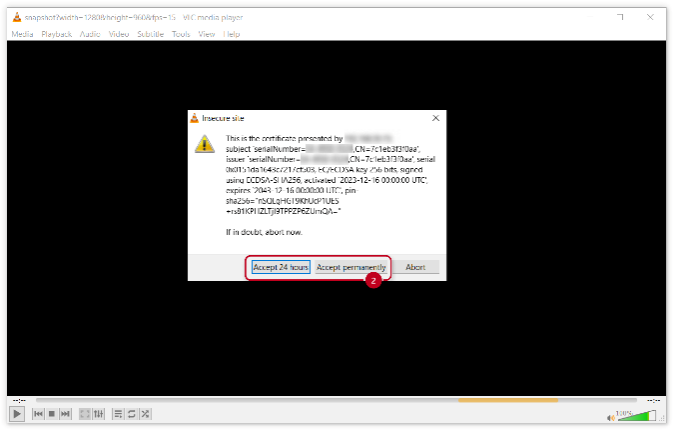
If you see some error message instead, close the message and repeat the previous steps.
The same string would get you image in any NVR or VMS system that supports it.
.
2N IP Intercoms – Diagnostics and Troubleshooting
Have you found an issue with our 2N IP Intercom?
Don’t worry, we will show you diagnostic tools and troubleshooting options to make everything running as expected.
Prerequisities
no additional license is required for any of mentioned step.
What you can try yourself
Before contacting the technical support team (which will be described later on), you can try some few things yourself.
Depending on your technical skills, you can choose from basic or advanced methods.
.
Basic methods
You can follow instructions in this article: 2N IP Intercoms – Firmware upgrade
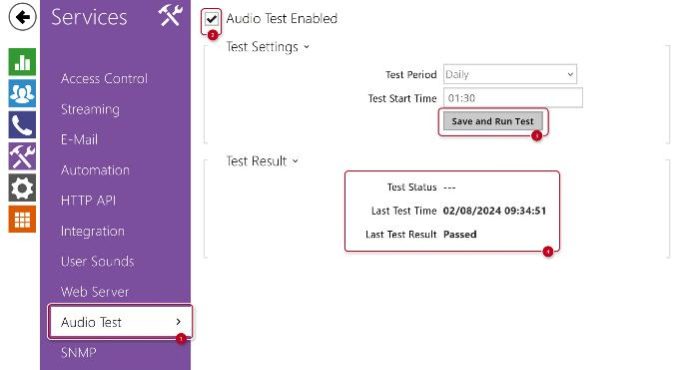
In section Services – Audio Test, let the speaker beep and the microphone pick it up .
If all right, you will see the Passed test result.
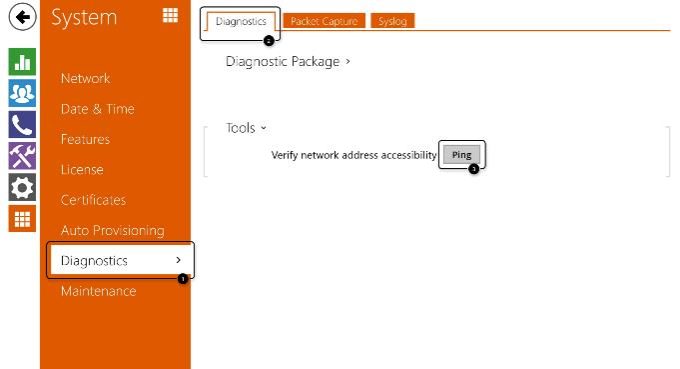
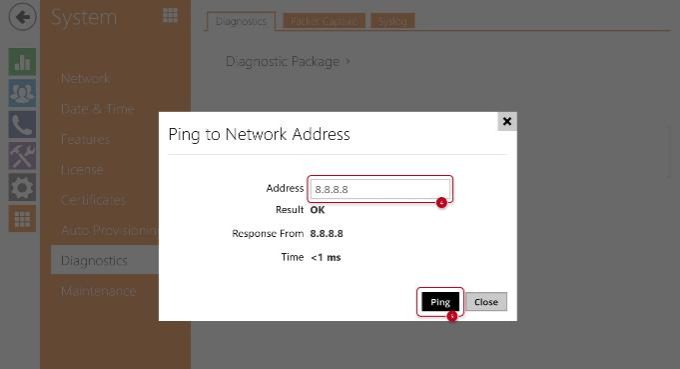
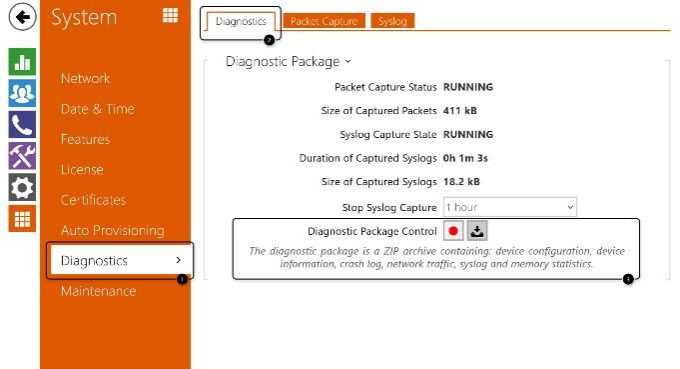
In section System – Diagnostics you can run Ping tool, you may already use it in your computer command line.
It contains all the needed information, incl. device configuration, system logs and network traffic.
Just start recording, replicate the issue, download the package.
The records will be kept even if you reboot the device.
Advanced methods
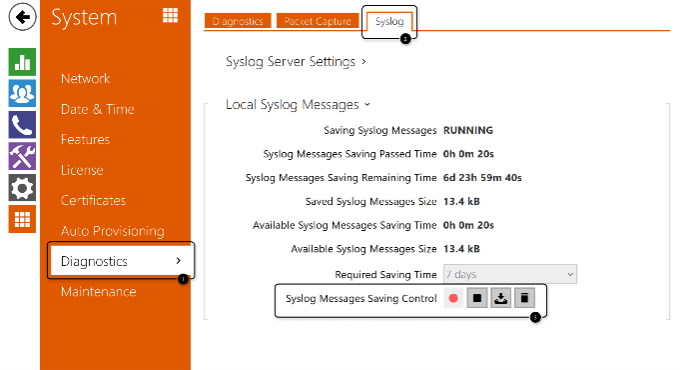
• In system logs, you can see all the device states and processes (e.g. pressing a button, switch activation, calling answering unit).
This way will keep the records even if you reboot the device.
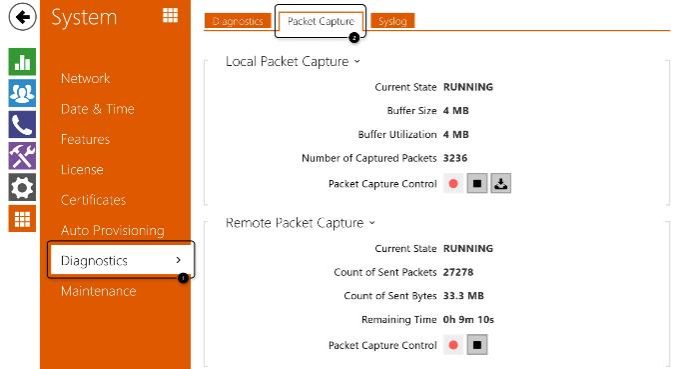
• Are you familiar with the network packet capturing (pcap)? Then you can start it and after replicating the issue also download here.
.
You can follow instructions in this article: 2N IP Intercoms – Factory reset
We are happy to help
In case of any issue, feel free to contact the technical support of your local distributor or directly contact the 2N technical support team.
Here are mentioned all the ways how you can contact the 2N technical support team: https://www.2n.com/support/technical-support
.
We will be glad, if you can tell us following information for the smooth process, it will make it easier for both parties.
.
We already mentioned the procedure in this article (at the end of the basic diagnostics methods).
If your issue can be clearly visible or heard eg. LED blinking, bad sound quality, please take a pictures or record a video (by your phone) for us.
You can attach it to the e-mail or upload it to your cloud storage (e.g. OneDrive or Google Drive) and send us just the download link.
If you have an issue regarding electrical circuit, please send us a diagram of that, incl. specifications of the controlled device (lock, gate, lights etc.).
.
2N IP intercom into My2N using the Security Code
The My2N Management Platform is a powerful cloud-based platform that makes managing and configuring the devices in your project’s solution more efficient.
My2N cloud includes video calling from an IP intercom to a smartphone or a tablet.
Prerequisites
please read the following article: My2N cloud – registration and setup
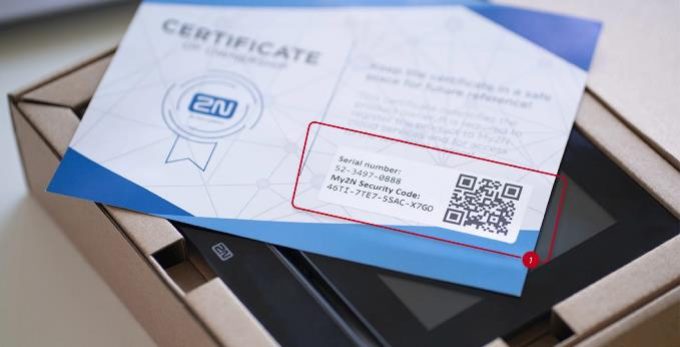
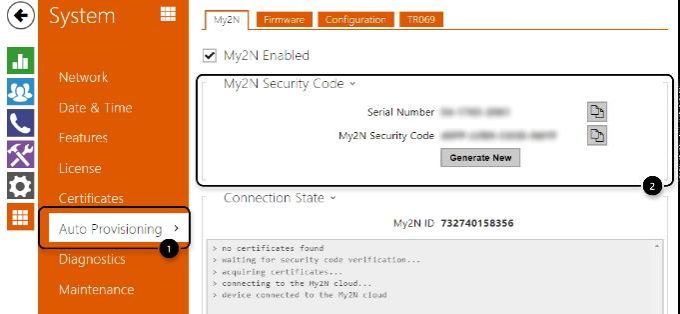
Locate Serial Number and Security Code
• Or login to the device´s web management and go to the section System – Auto Provisioning – My2N.
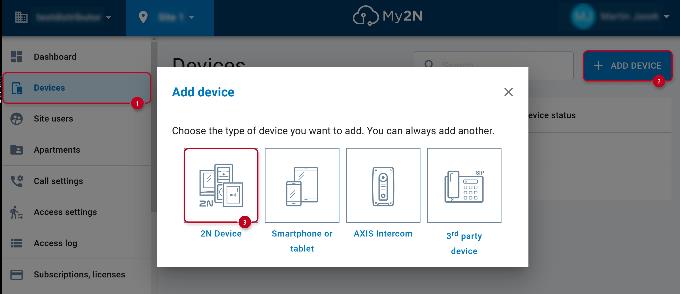
Add 2N IP intercom into your My2N site
Choose the 2N Device option.
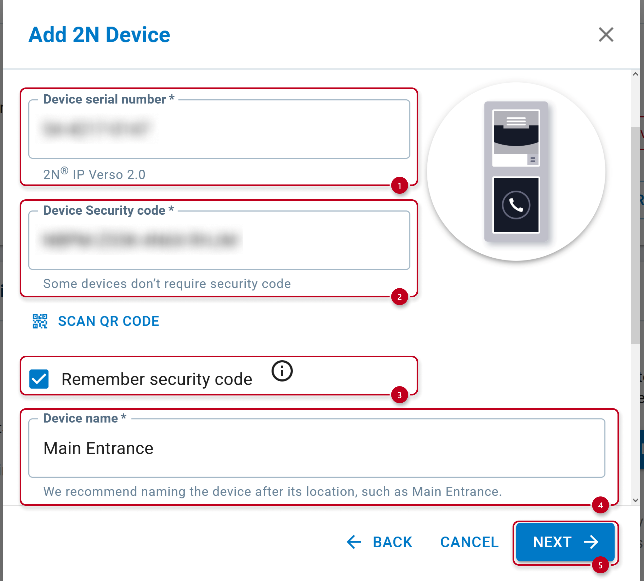
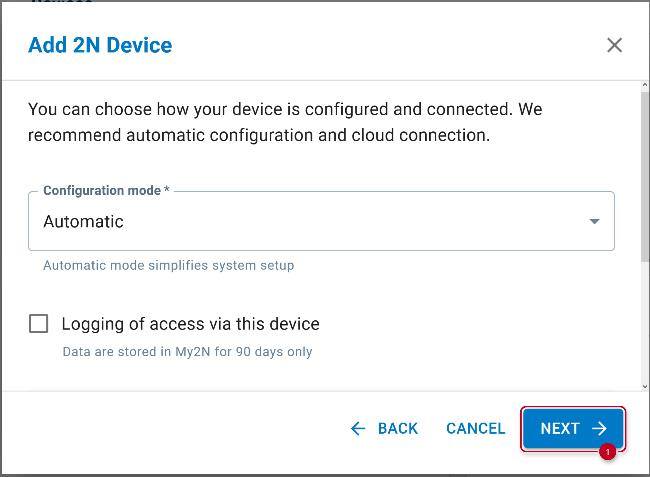
• In a newly opened window, please fill in details about your 2N IP intercom.
2.Fill in this device’s Security code from the same place.
Alternatively you can click on SCAN QR CODE and point the camera of your laptop or phone at the ownership card to easy fill in this two details.
Please note that one device (one serial number) can only be assigned to one My2N account at once.
If you have already registered that intercom to a different My2N account, you need to remove it first.
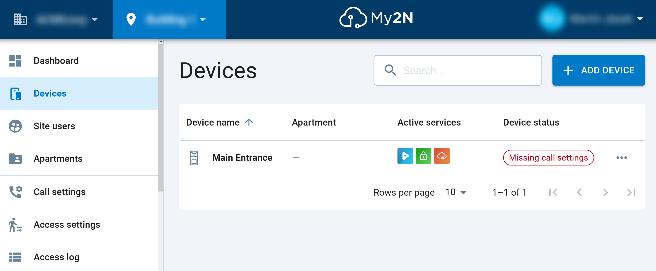
Device status is Missing call settings, which means the call feature has not been set yet as described below.
.
What to do next for call feature
You can follow this article: My2N – How to add smartphone or tablet
buttons on the intercom need to be configured to call the correct mobile devices.
You can follow this article: My2N – Call setting
.
