How to Initially Set up PoE NVR with Monitor Connected You may follow this guide for proper cabling and initial setup of your PoE NVR with a monitor connected.
Load More : How to Connect Non-POE or Wireless IP Camera to POE NVR via the Onvif Protocol?
Here is a diagram that will help you learn each option on the PoE NVR.

Now, please refer to the following steps to set up your NVR.

Step 1. Connect the NVR to a Monitor or TV via the VGA or HDMI cable.
1. If there is no display, please connect it to a VGA monitor and change its resolution to 1920*1080.
2. If you need audio output on your TV monitor, the resolution MUST be set to 1920*1080 or 1280*720.

Step 2. Connect the camera’s RJ45 network socket to any POE Camera port on the NVR using the Ethernet cables provided.

Step 3. Connect an Ethernet cable from the LAN port of the NVR to LAN port of your router.

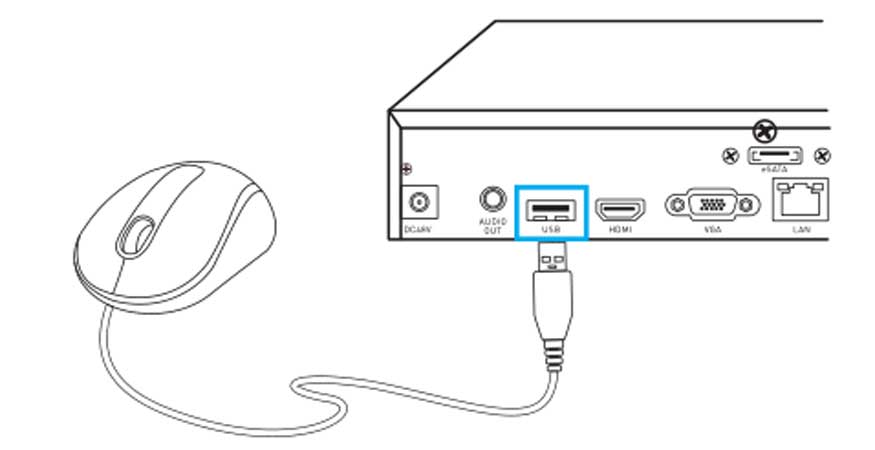
Step 4. Connect the mouse to the USB port.

Step 5. Connect the Power Adapter. Please use the supplied power adapter. For POE NVR device, it is 48 volts.

Step 6. And then you will see the below splash screen. System booting up might take a few seconds.

Step 7. Follow the Setup Wizard to set your NVR, click Next to continue and at the last step, click Finish to save all the settings.


Wizard Setup
- Set up language, Resolution, Time Zone, Date Format, Time Format, System time
- Create your password, Enable/disable screen Auto-lock.
- Set up password security question.
- Set up device name. HDD Management (Init)
- Network Configuration (DHCP by default)
- Email Configuration (Gmail is suggested to use the sender one)

can you help me please
Can you write your contact number?