Access the DVR/NVR System via Guarding Vision Software on PC
Summary: This article shows you the steps to access the ANNKE system on a computer via the client software Guarding Vision.
Adding via IP address only allow local access (ANNKE system and computer must be in the same network/router). But you will get a better experience when watching camera live view/playback and download recordings, etc.
To access the system remotely on Guarding Vision, please add via P2P Cloud. See this instruction.
Video Guide:
Step by Step:
1. Download and install the software Guarding Vision on your computer.
For Windows, click here to download.
For Mac, click here to download.
2. Plug the ANNKE system into your router via an Ethernet cable.
3. Make sure your computer has been connected to the same router as the ANNKE system.
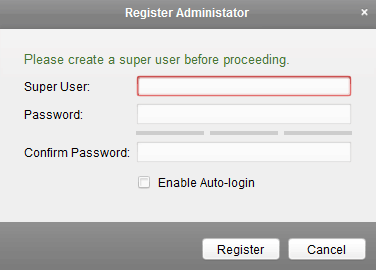
4. Run the software Guarding Vision. Register an administrator account.
Note: This account is only for logging in to Guarding Vision. It’s not the same as your ANNKE system account. (It is suggested to select “Enable Auto-login)
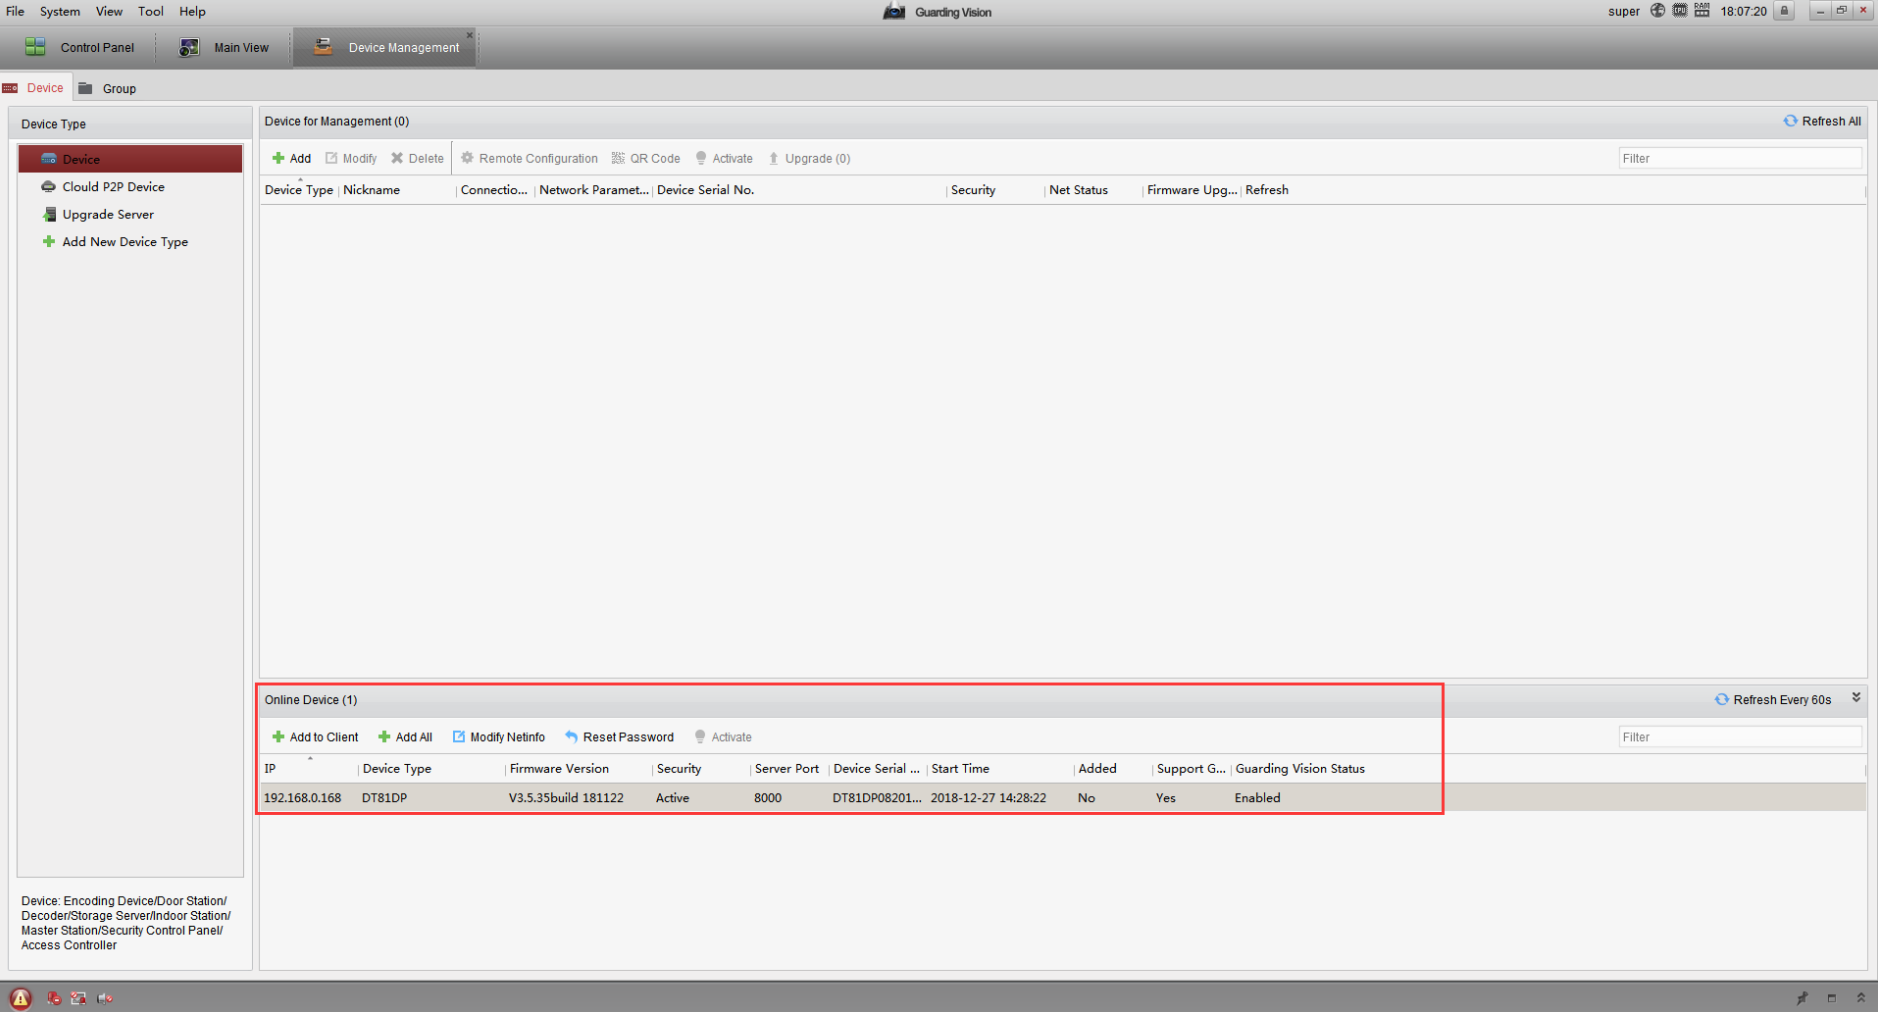
5. Run the software, and go to Device Management -> Device Type -> Device.
If the system and computer are in the same LAN network, you can see the device information under the Online Device list. Select your device, click on Add to Client.
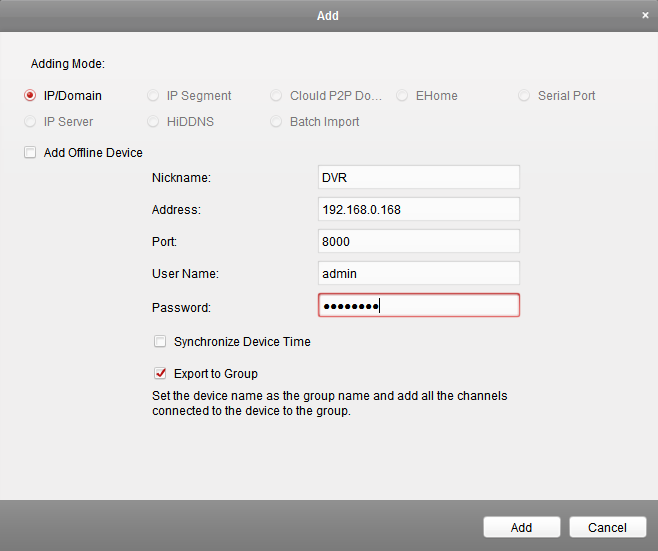
6. On the pop-up page, set the details as the picture below shows, then click on ‘Add’.
Note:
- The IP address of the system may vary from the network. Ensure the IP address you input is correct.
- The user name must be ‘admin’.
- Password is the one you used to log in to your system on the monitor/TV.
- Remember to tick Export to Group.
7. The device information will then be shown on the tab page Device for Management. You can see the Net Status is online as the picture shows.
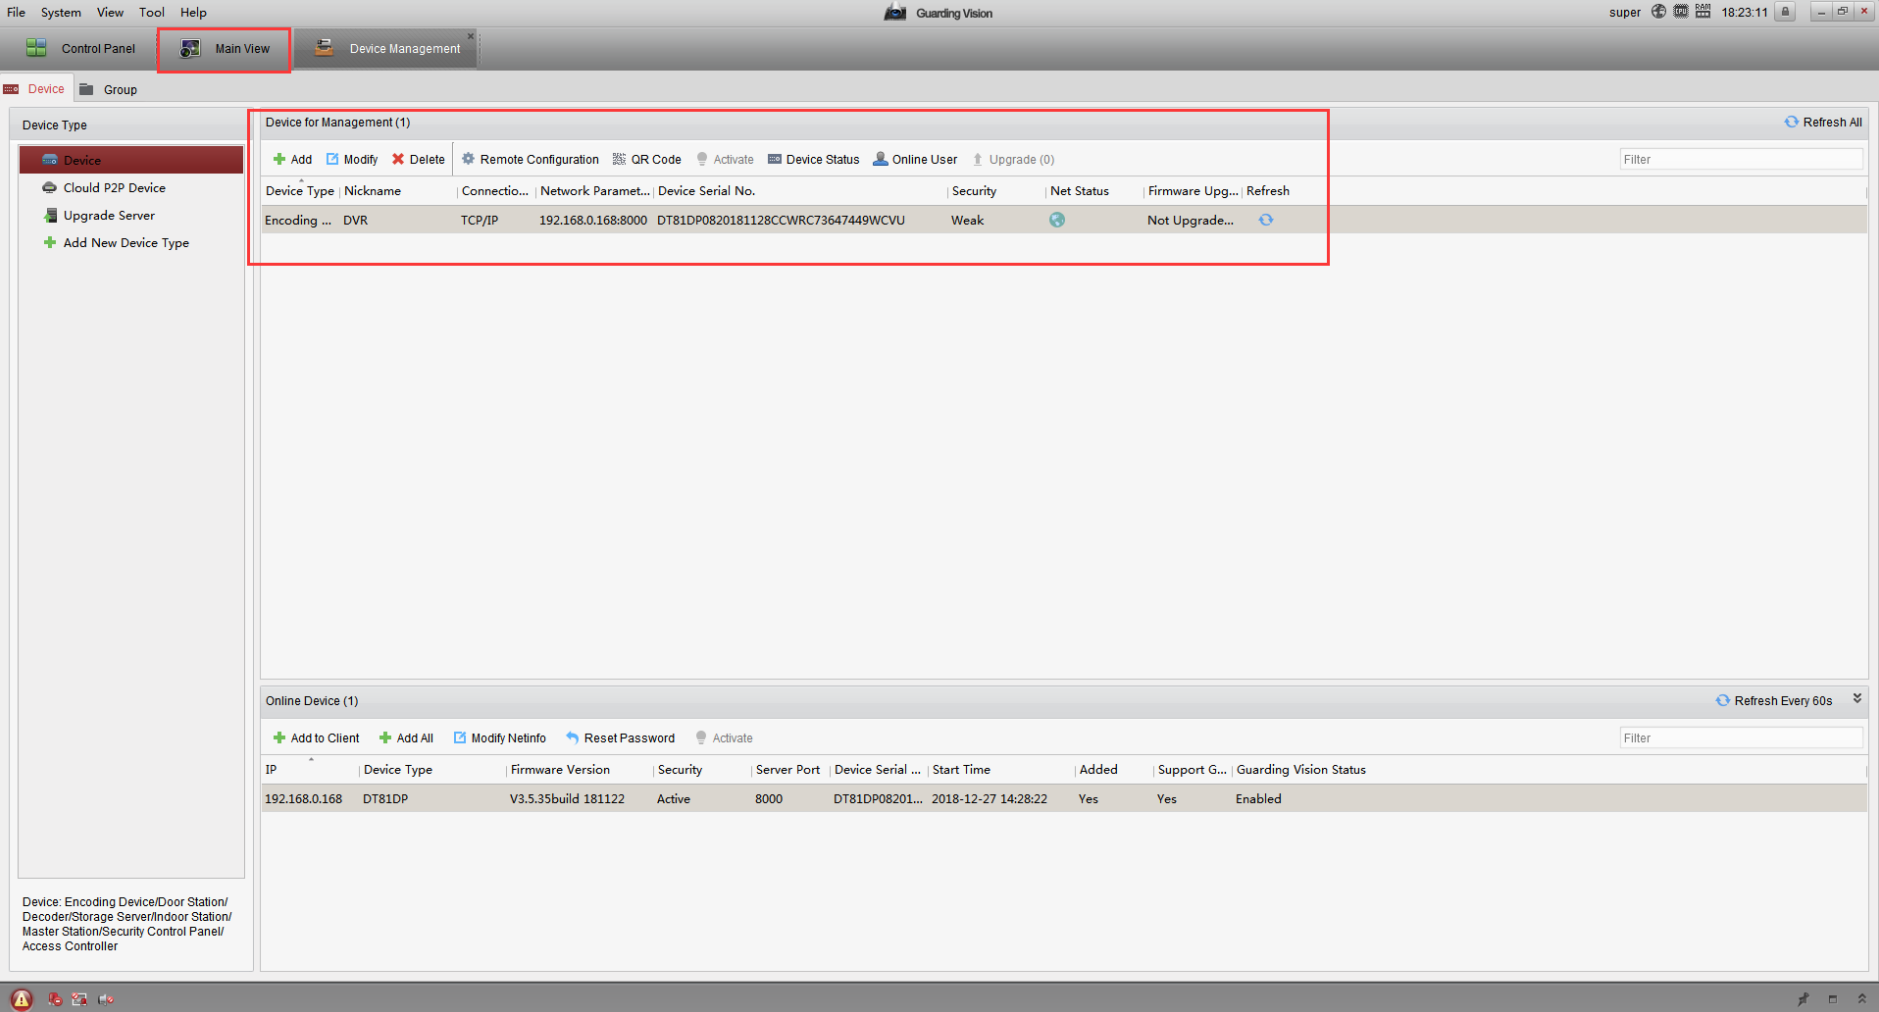
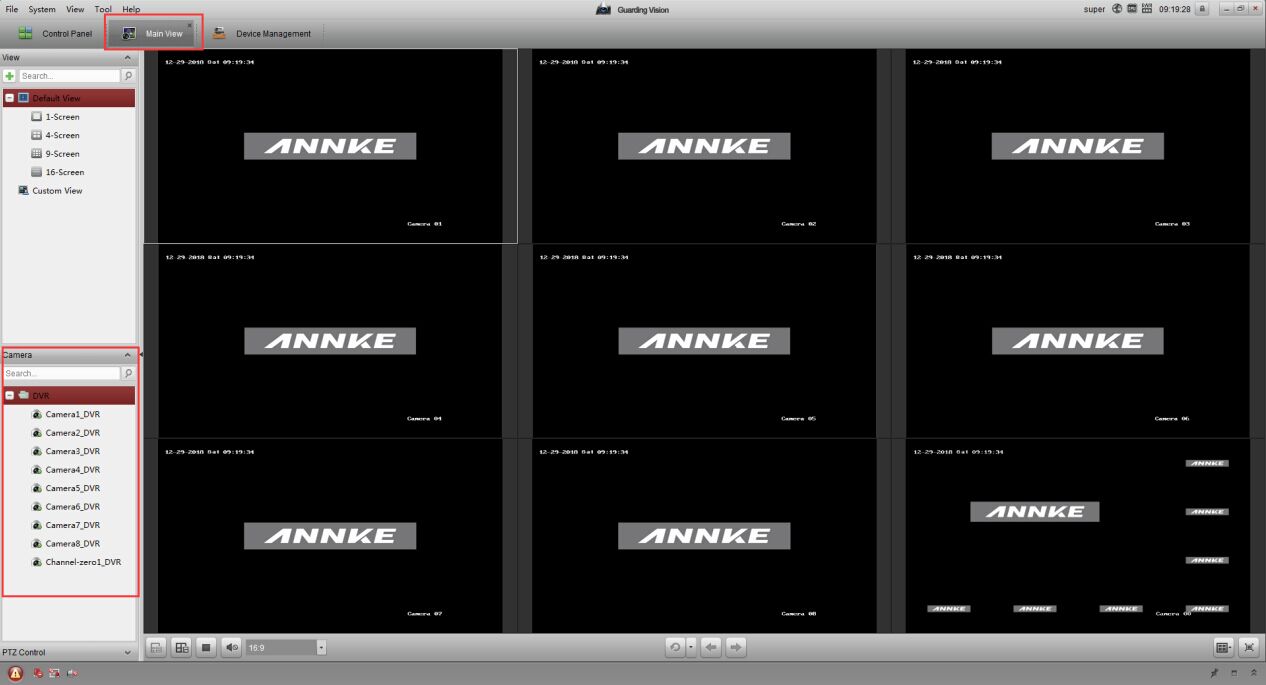
8. Go to the Main View tab page, click on the folder under the Camera list to expand the camera channels. Double-click on the channels to see the live streaming.
How to Remotely Configure The Device on Guarding Vision?
Introduction:
The Guarding Vision enables the user to configure the device directly. You may refer to this article to find detailed instructions.
Steps:
1. Connect the device to the Guarding Vision via the device’s IP address.
Access the DVR/NVR System via Guarding Vision Software on PC (Via IP Address)
2. Go to ‘Device Management’ and click ‘Remote Configuration’.

If you have any other questions, please contact technical support at support@xvraid.com by email.
If this article is helpful to you, please click the “helpful” button after you review it. Any comments would be appreciated.
What to Do If Guarding Vision Asks for The Encryption Code in Live View?
Introduction:
When the user is live to view the cameras on Guarding Vision, it is required to enter the encryption code sometimes. The encryption code is the verification code that the user sets up when activating the device for the first time, which can make your security system more secure. In this article, we will show you how to find the encryption code.
Steps:
1. Refer to the link below to find the encryption code first.
How to Find The Encryption/Verification Code?
2. Go to ‘Device Management→Group‘ and click ‘Modify‘.

3. Type in the encryption code on ‘ Stream Key‘ and click ‘Ok’.
Note: If you have more than one camera, click ‘copy to’ to synchronize the configurations to other cameras.

hello nice sharing thanks
hi how can i do
I sent an e-mail from the communication channel. Can you help?
hi how can i do
please provide support for me i leave my email address
I really love you
It really worked, I appreciate it!
please provide support for me i leave my email address
I can’t upload
please provide support for me i leave my email address
can you help me please
Can you write your contact number?
I really love you
It was a great sharing
Can you write your contact number?
It was a great sharing
hi how can i do
please provide support for me i leave my email address
I sent an e-mail from the communication channel. Can you help?
hi how can i do
It really worked, I appreciate it!
please provide support for me i leave my email address
I can’t upload
It really worked, I appreciate it!
problem not solved thanks