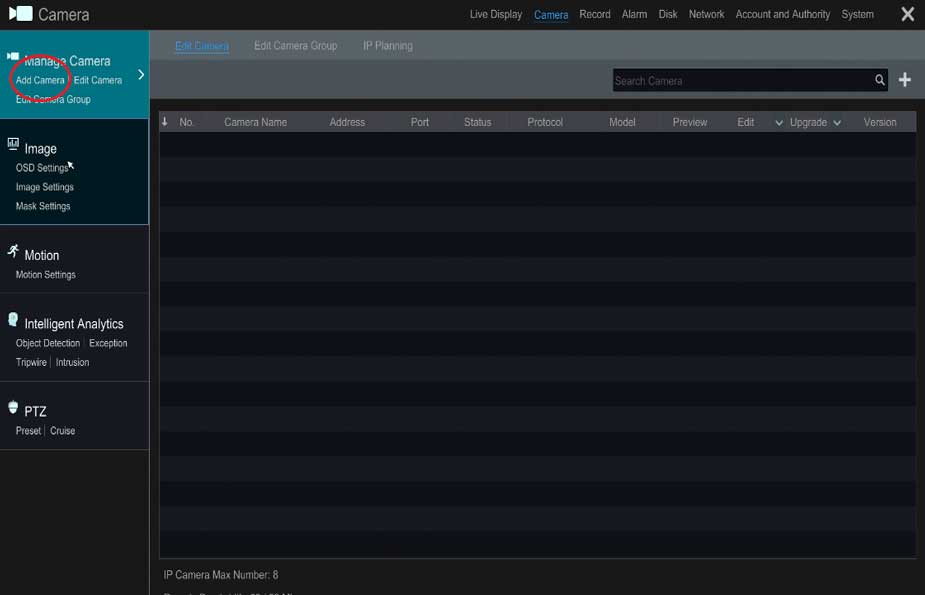
This article, we will cover on how to add an IP camera to a Titanium recorder (NVR/DVR) through a local monitor. This process can also be done on the web GUI, on the local network and remotely as well.
Log into the system by clicking on the icon on the bottom left hand corner and selecting “Login”
After logging in, select “Settings” and select “Camera” in the main menu
Once on the Camera page, select Add Camera on the top left hand corner of the menu.
Generally, the Titanium system will be able to scan the local network to detect IP cameras. For Titanium cameras, after being networked correctly with the IP tool, you’ll be able to mark the check box for each camera and press add; this would complete the connection. For cameras that are not found, select Add Manually.
On the Add Manually page, you can manually input the protocols for any of the IP cameras found within the network. Please make note of the correct protocols, ports, username, and password. It is important to correctly input all the information as anything that is incorrect will cause the connection to fail.
Please note that default protocols for 3rd party cameras are generally ONVIF and port 80. Titanium series cameras will use the IPCAM protocol.
You can confirm that the information is correct by selecting the Test button. If all the information is correct, you will receive a popup stating that the test was successful in connecting to the camera.
After confirming that there is a proper connection, select the add button in the Add Camera page. You will return to the Camera menu and the camera status should indicate that the camera is now online.

It really worked, I appreciate it!
It really worked, I appreciate it!
problem not solved thanks
It really worked, I appreciate it!
It was a great sharing
hi how can i do
It was a great sharing
I can’t upload