How to remotely connect to Bosch Devices, This article contains a step by step guide meant to show you how to remotely connect to your DIVAR Network or Hybrid by using your phone/ tablet via DIVAR Mobile Viewer App.
Step-by-step guide

 It is mandatory to have the monitor & mouse & Keyboard connected to your DIVAR.
|
When adding your DIVAR in Remote Portal, please consider to use a separate Technician account when performing this action. In case you are using an Admin account to connect your DIVAR to it and if you forgot the password of the Admin account, after resetting it, you will be required to re-add the password locally, physically on your DIVAR. Therefore, by using a Technician account added into an Admin account, after resetting the Admin account password, this action will not impact the password of your DIVAR when adding it into the Remote Portal. |
How to remotely connect to Bosch Devices
A) Setting up DDNS & Remote Portal account
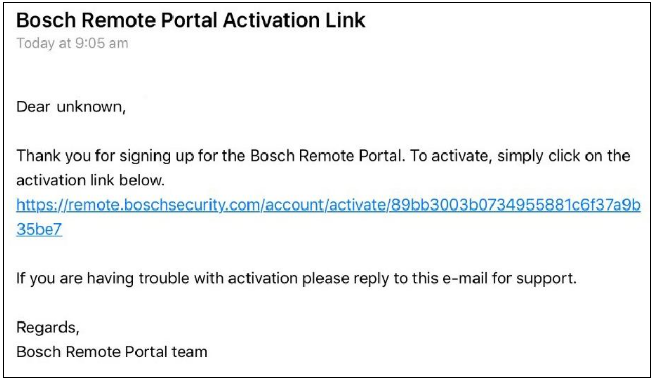
First, you have to create a Remote Portal account, if you don’t have one yet.
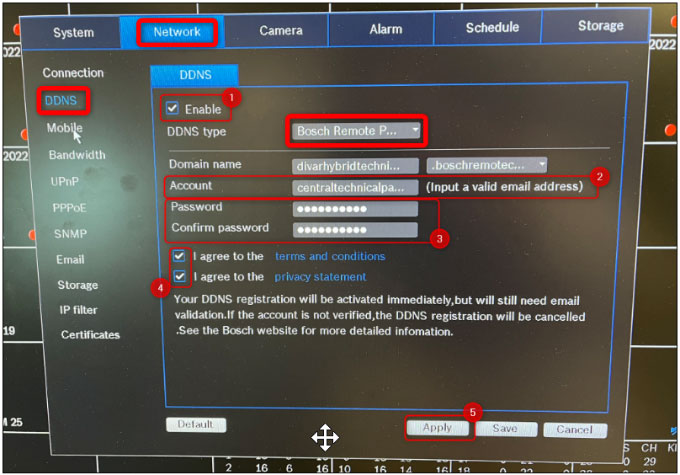
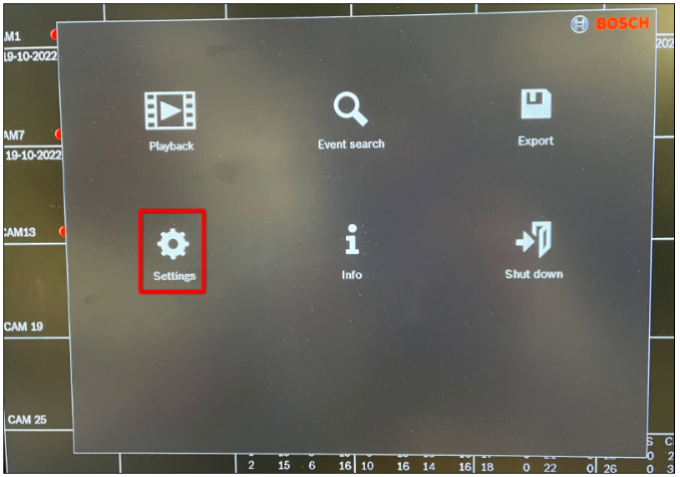
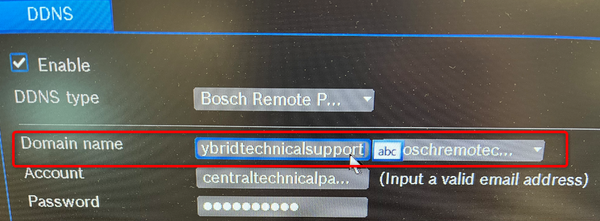
If you already have an account, add it locally (not via web interface) to the DIVAR by accessing Settings > Network > DDNS
You can create the Remote Portal account in advance from any browser by accessing
https://remote.boschsecurity.com and click Sign up button.
Or you can create the Remote Portal account directly from your DIVAR Hybrid/ Network only if you have connected locally the monitor & mouse & Keyboard to your DIVAR:
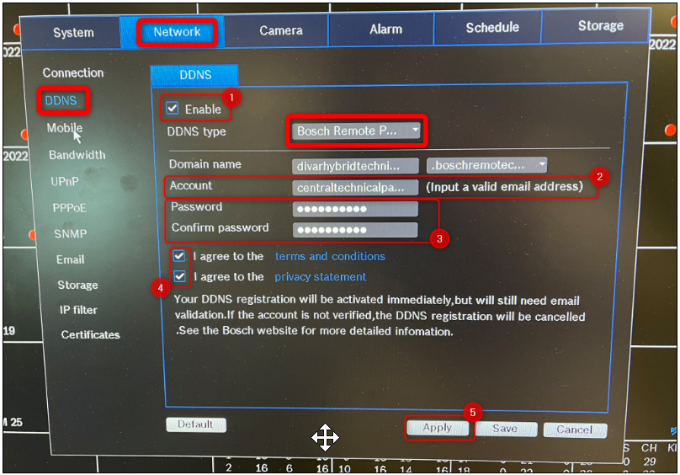
To create a new Remote Portal account from your DIVAR Hybrid/ Network:
|
Make sure the recorder is connected to the open internet, before you configure the DDNS service. (see point B) |
Note: The password must contain minimum 8 characters that must include at least one letter and one number.
Hint: While creating the Remote Portal account, please note that the password length displayed in the dedicated password field will display maximum 11 dots characters instead of the real number of dots characters that you typed in for your password. Therefore, behind the 11 dots characters, it will be the password of your choice.This is also valid for the users on the Divar.
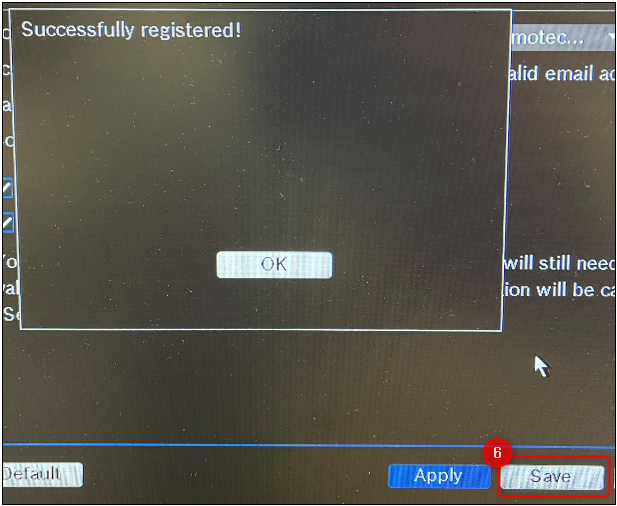
6 Click Save
This message should be displayed:
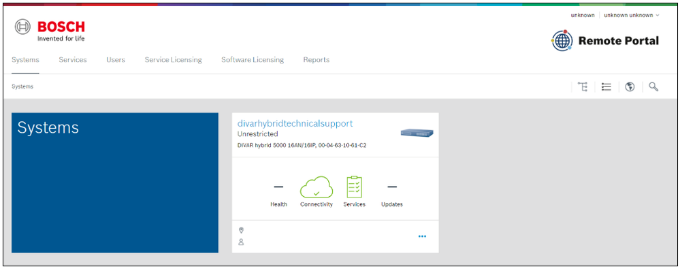
After logging in to your Bosch Remote Portal Account (with the credentials you previously set within your DIVAR, DDNS tab), you should be able to see the DIVAR as connected:
B) UPnP SET UP
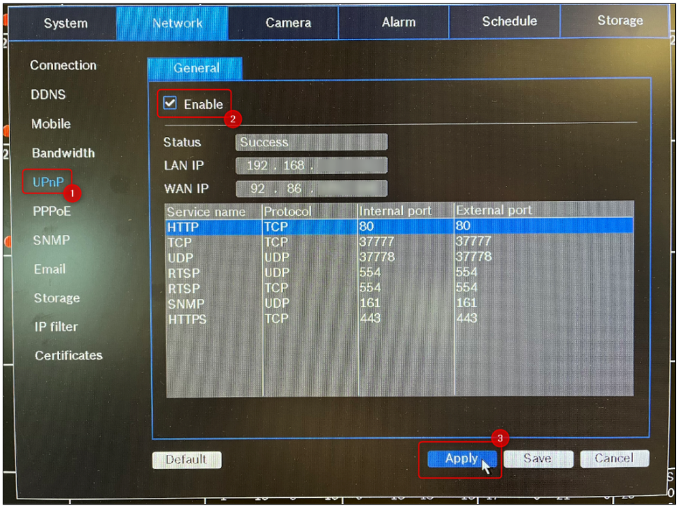
Now, you have to go in the UPnP menu and tick the box next to Enable > click Apply
The status should display “Success” and the LAN IP and WAN IP fields will be populated. The table shows the port-forwarding rules that will be passed through your router, if UPnP is enabled on the router.
|
Please make sure that the Public IP is correctly set. If you don’t know what your Public IP is, type in “what is my IP” in any search engine and you will find it. |
 For remote access on your Divar Network/Hybrid, you will need to forward certain communication ports on your router that connects you to the internet.
Read your router manual for instructions to forward ports to a device or you can refer to this link where basic information on Port Forwarding are provided.
The Divar Mobile Viewer App only needs TCP port 37777.
However, if you also plan to connect remotely to the unit via web browser, you will need to forward the HTTPS port and/or HTTP port. Bosch advises to use only HTTPS connections for a higher security.
See below an overview of the ports default values and their usage:
Bosch strongly recommends to only use HTTPS communication. However, if the network bandwidth is limited, the system has a very high load or the remote workstations are not powerful enough, the HTTP connection can be used to increase the systems performance and reduce network bandwidth stress.
See also this article: Which ports are used by Bosch DIVAR Mobile Viewer App?
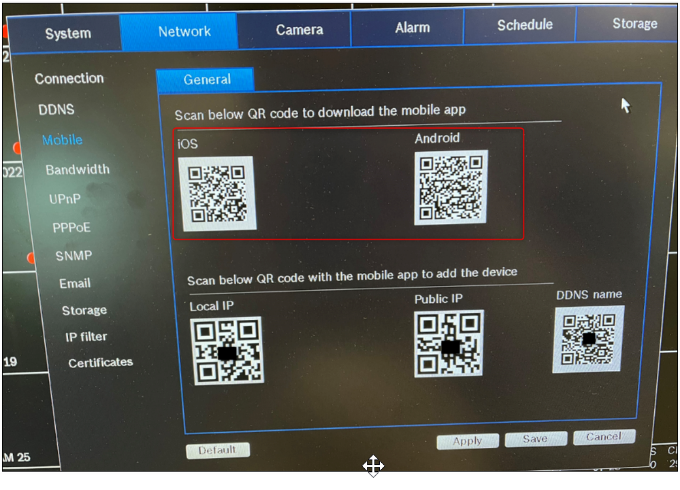
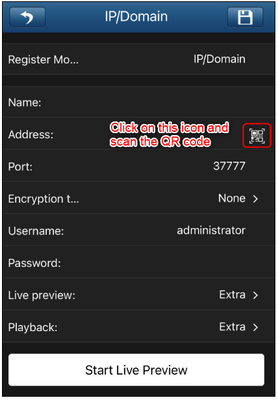
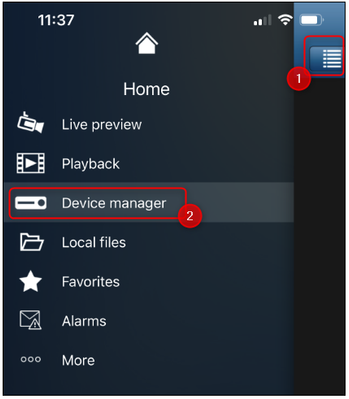
C) Mobile device set up | DIVAR Mobile Viewer App (phone/ tablet)

|
The abc icon is displayed in the domain name when you are hovering over it. Move the mouse outside of it to make the abc icon disappear. |
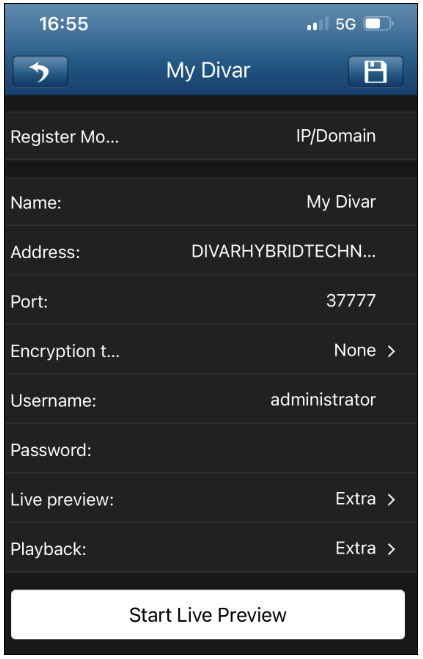
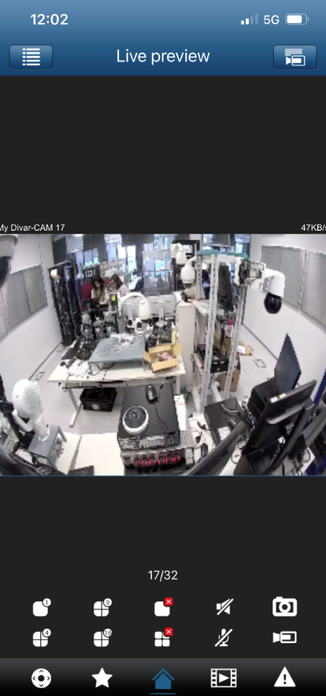
Whether you follow the Option 1 or Option 2, you will have the overview below in the DIVAR Mobile Viewer App:
Enter the Username and the password and click Start Live Preview
|
The username and the password are the credentials of your DIVAR! |
How can I access my DIVAR Network or Hybrid web GUI given that Internet Explorer has been retired?
Question
How can I access my DIVAR network/hybrid 2000/3000/5000 web GUI given that Internet Explorer has been retired?
Answer
Given that the Internet Explorer 11 desktop application has retired and is out of support as of June 15, 2022 for certain versions of Windows 10, the new PCs have only Microsoft Edge installed on them or Microsoft rolled out the New Edge browser automatically via Windows Update.
If you have a DIVAR network/hybrid 2000/3000/5000 recorder and you want to connect and configure it, you can do it with the internet explorer compatibility mode in Microsoft Edge and you can use the system as before.
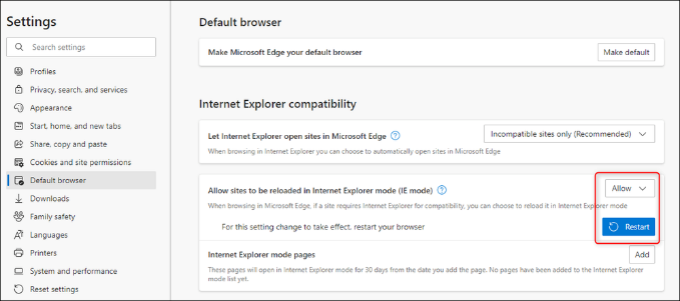
There is an Internet Explorer extension for Microsoft Edge and you can enable it as following:
Enable IE mode on Microsoft Edge
More details here: What is Internet Explorer (IE) mode?
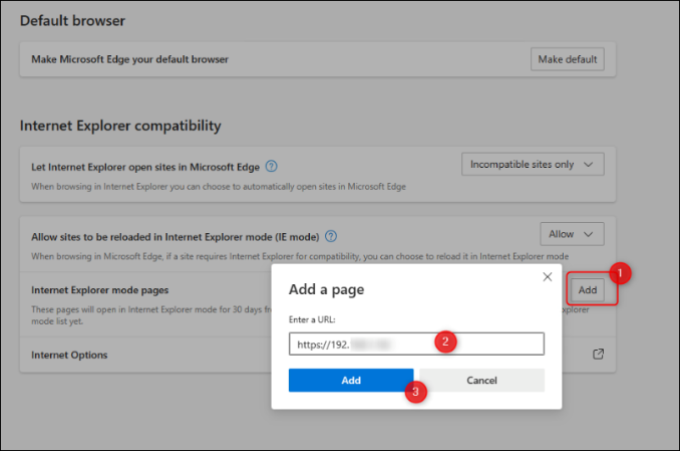
You can also add the IP address of your DIVAR to the IE mode list:
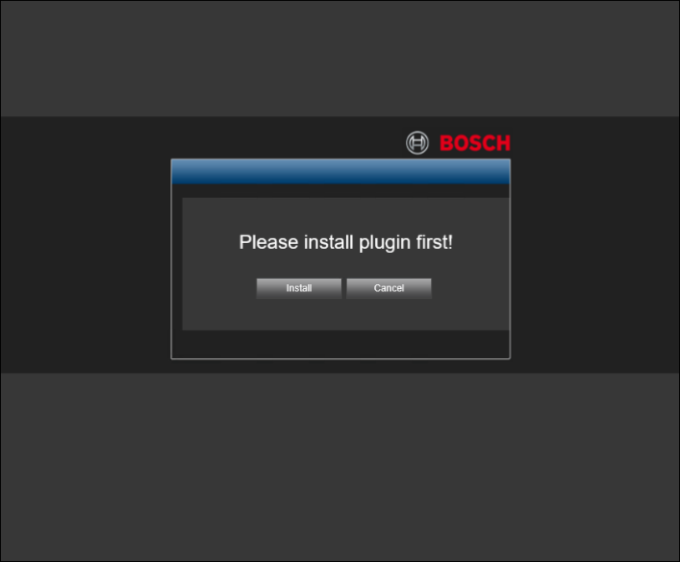
When DIVAR is accessed for the first time using web interface, the URL for downloading the prerequisites (addon) remain the same.
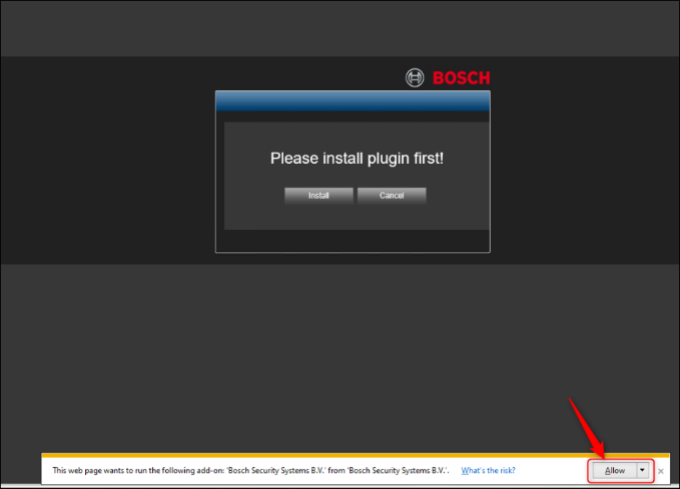
Click “Install“:
Click “Run“:
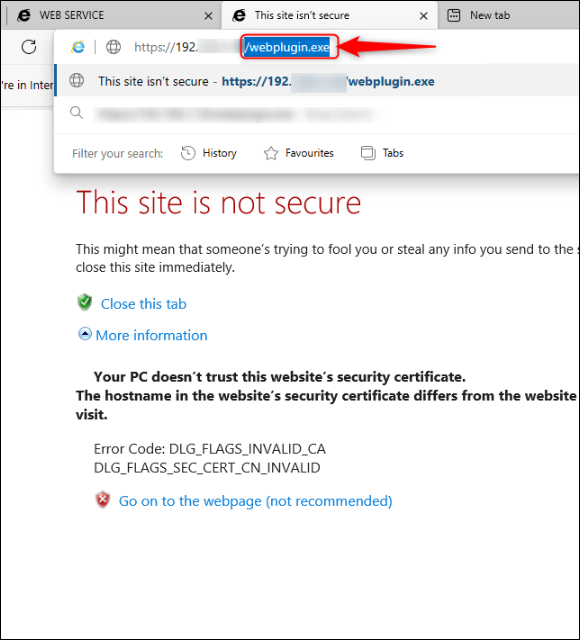
Be aware that after installing the WebPlugin Setup, you will be redirected again to the webplugin.exe link to be downloaded. Select the “webplugin.exe” and remove it from the URL.
Type only the IP address of your DIVAR > press ENTER and click “Allow” for the add-on to run:
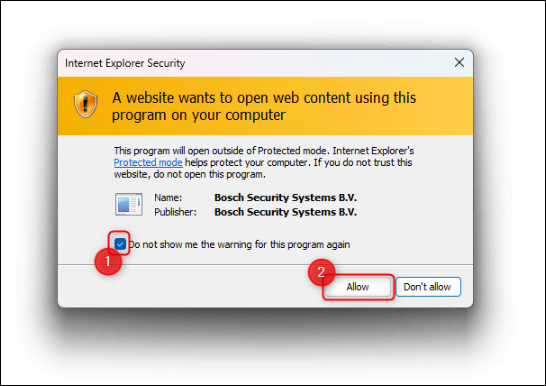
Tick the checkbox and click “Allow“:
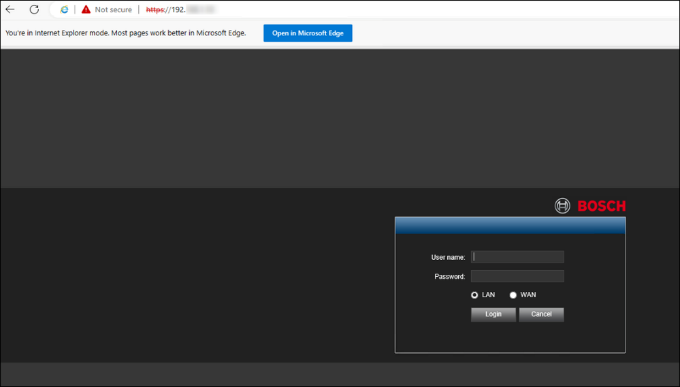
Now, your DIVAR is accessible from the Microsoft Edge in IE mode.
Insert the credentials and start using your DIVAR:
Also, if you need a software to view and monitor the cameras, you can try *BVMS viewer.
*applicable for DIVAR AN as well
How to exchange the battery for the DIVAR Hybrid and Network series?
This article explains how to exchange the battery on the DIVAR Hybrid and Network in a safe way
Product families
When the battery is getting too less power due to his lifetime, it needs to be exchanged. For the above mentioned families the life time of the battery is guaranteed for 5 years. When the power of the battery is getting to low the clock of the recorder will be displaying the wrong date and time at startup it shows 01-01-2000 00:00
This wrong date and time will only be seen at the moment the CTN has been started up after powered off.
Step-by-step guide
What is being done or recommended to address:
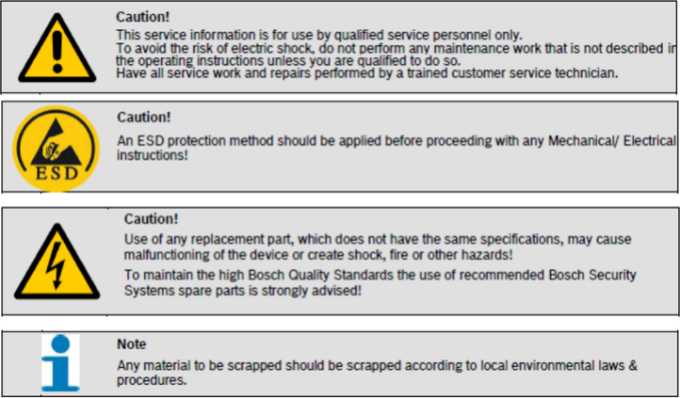
When these safety measures has been taken, you can open the recorder. To open the CTN unscrew the 4 screws marked red and remove the top cover of the unit.
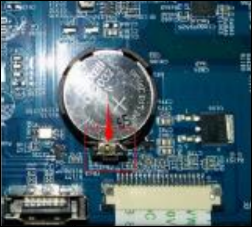
When you look at the main board you can see the battery (see picture below)
Additional information:
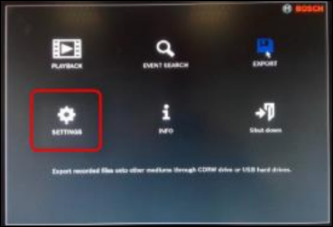
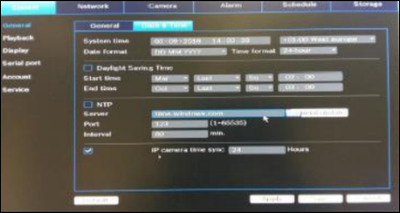
How to change the time:
 To verify if the procedure was successfully done, please restart your unit and check afterwards if the date & time are correctly set.
Bosch device remote connection guide, Remote access to Bosch security system, Bosch remote connection software, How to connect to Bosch devices remotely, Bosch remote access setup instructions, Bosch camera remote connection setup, Bosch device remote access tutorial, Bosch remote monitoring software, Bosch IP device remote login, Bosch device remote troubleshooting, Bosch NVR remote connection setup, Bosch remote access configuration, Bosch device VPN setup for remote access, Bosch cloud remote connection, Bosch remote control device support, Bosch remote network access setup,
Bosch device remote viewing software, Bosch IP camera remote connection, Bosch remote access app, Bosch remote device management tool, Bosch remote device connection guide, Connect to Bosch devices remotely, Bosch device remote access tutorial, Bosch remote connection software, Bosch IP device remote login, Bosch security system remote access, Bosch remote connection troubleshooting, Bosch remote device setup, How to access Bosch cameras remotely, Bosch DVR remote access instructions, Bosch device remote configuration, Bosch device remote monitoring software, Remote login to Bosch IP cameras, Bosch network device remote access, Bosch remote access application, Bosch remote access security setup, Bosch device remote access help, Bosch device VPN connection setup, Bosch cloud-based remote access, Bosch device remote control setup
