How to Set Up PTZ Camera Activation NVR
How to Set Up PTZ Activation Via Stationary Camera on a NVR
Description
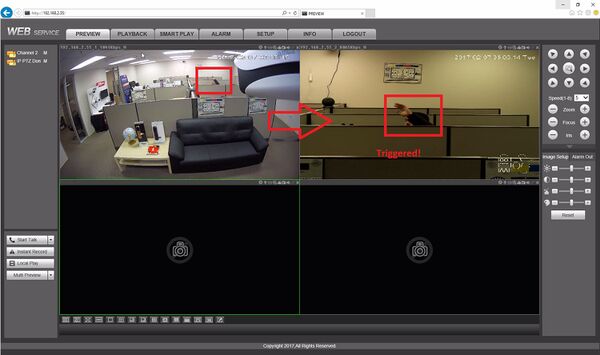
This article will explain setting up a fixed camera on motion detection to trigger a NVR to move a PTZ to a preset.
Prerequisites
- Dahua IP camera (motion detection capability)
- Dahua NVR or HDCVI DVR (both cameras added)
- Dahua Network PTZ (with at least 1 preset)
Video Instructions
Step by Step Instructions
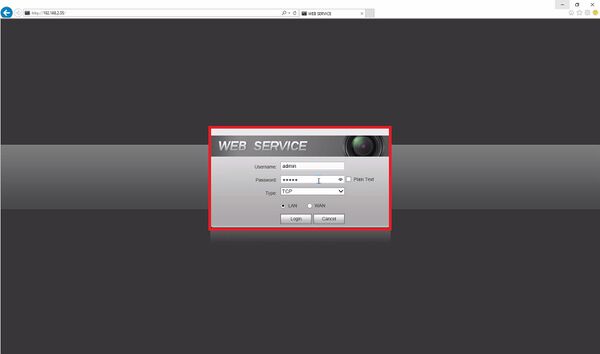
1. Log into the NVR.
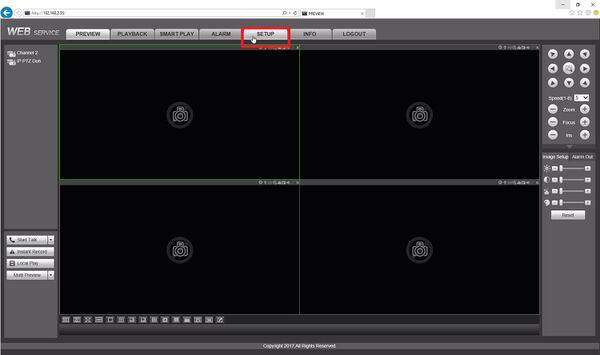
2. Select setup.
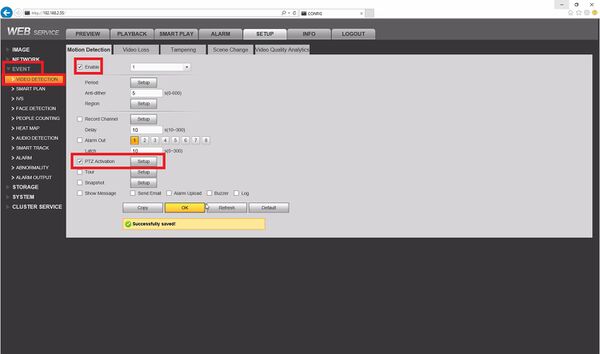
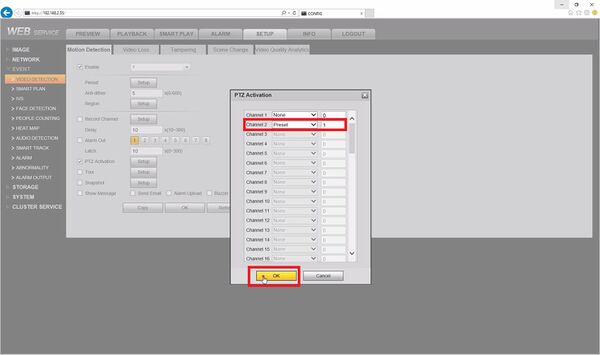
3. Select Event -> Video Detection then select the Enable checkbox. Make sure period and region are set up correctly and trigger appropriately. Now check PTZ Activation and then select setup.
4. On the channel with the PTZ select the preset function and then type in the preset and then select OK.
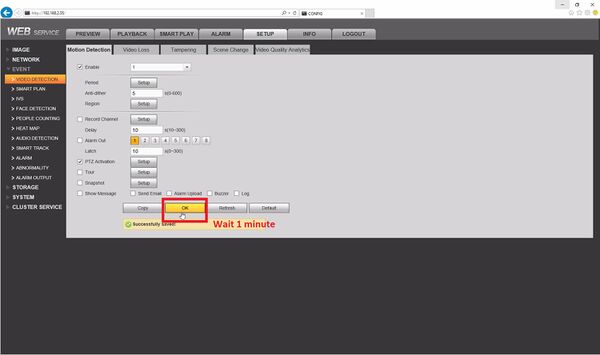
5. Now select OK to Successfully saved! and wait 1 minute.
6. Go ahead and test this solution!
Read More.. What is Speed Dome Camera (PTZ) How to Control
How to Setup Scan
Description
The Scan feature allows you to set a predetermined path from Point A to Point B
Prerequisites
- Dahua Network PTZ
- IP Address of Network PTZ
- Internet Explorer
Video Instructions
Step by Step Instructions
1. Login to your IP Camera via Internet Explorer.
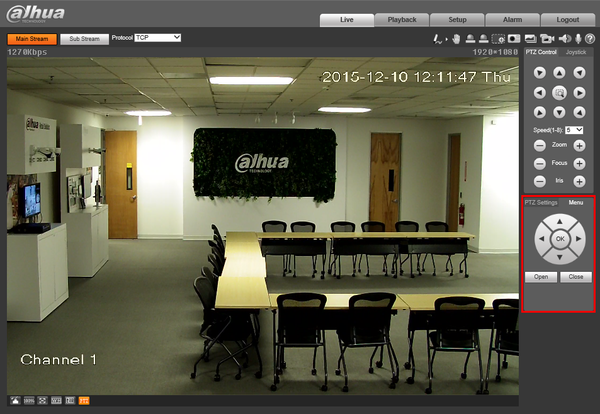
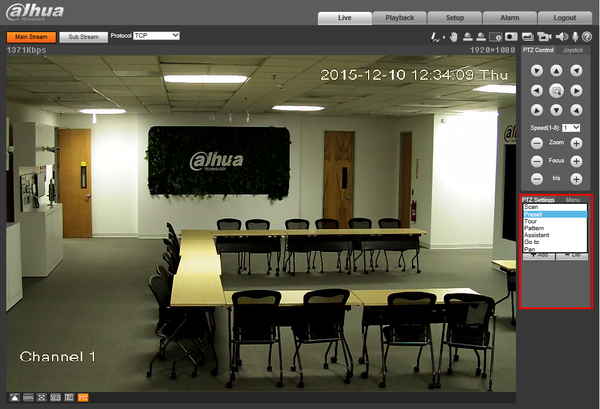
2. On the right hand side click, “PTZ Settings” and make sure, “Scan” is selected in the dropdown menu.
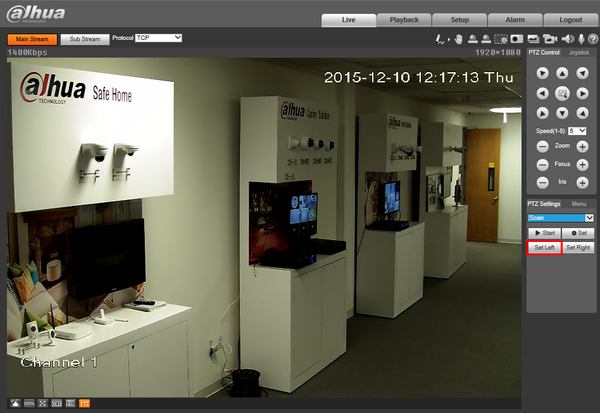
3. Using the PTZ Controls, move the camera into the starting position, and click, “Set Left”
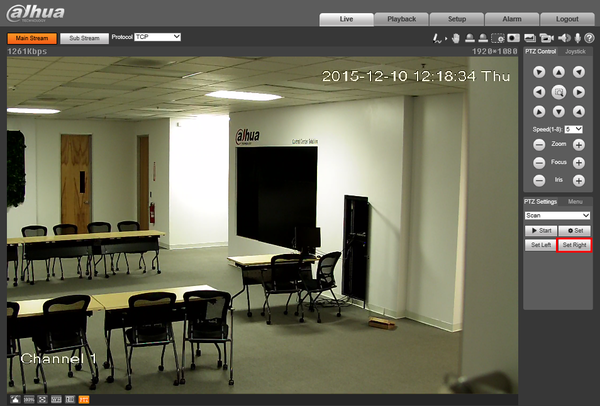
4. Move the camera to the second position, and click, “Set Right”
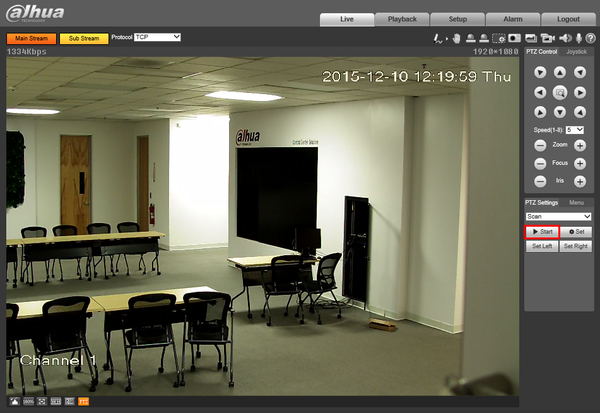
5. To test the results click, “Start”
How to Setup Preset
Description
Pre-sets are used to define single or multiple locations that are saved to the camera’s internal memory. Pre-Sets are used in conjunction with the, “Tour” feature.
Prerequisites
- Dahua Network PTZ
- IP Address of Network PTZ
- Internet Explorer
Video Instructions
Step by Step Instructions
1. Login to your IP PTZ camera via Internet Explorer.
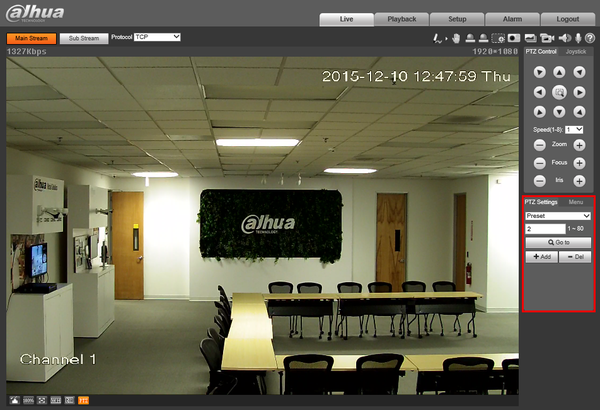
2. On the right hand side, under, “PTZ Settings” click the drop down box and select, “Pre-Set”
Note:For this example, we are going to set Pre-Set 1 and 2. These numbers can be set from 1-80. The number of Pre-Sets available can vary from model to model.
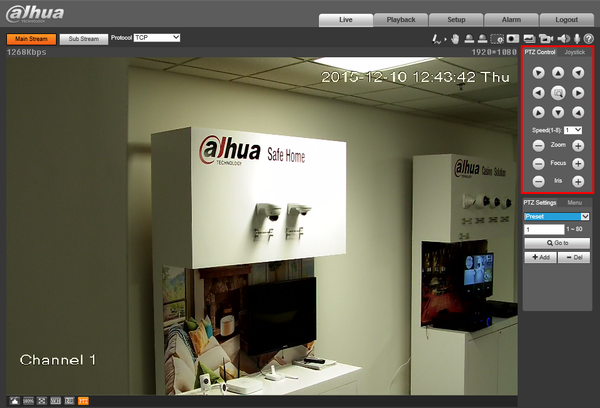
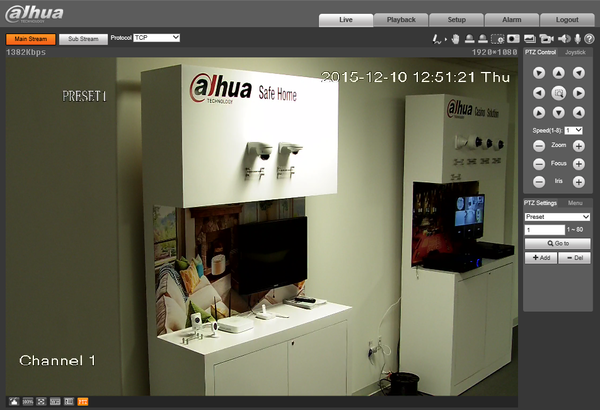
3. Move the PTZ to the location you wish to set for Pre-Set 1 using the PTZ Controls.
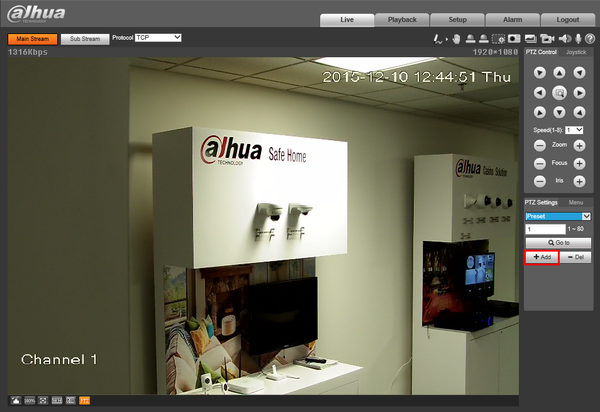
4. Press, “Add”
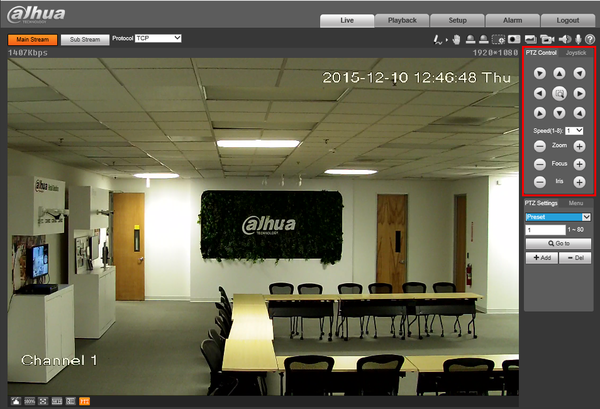
5. Move the PTZ to the second location that you wish to establish for Preset 2 using the PTZ Controls.
6. Change the Pre-Set number to, “2” and click, “Add”
7. To test, change the Pre-Set back to, “1” and click, “Go to” then repeat for each additional Pre-Set you created.
Browse : How to Reset the Camera to Factory Default on DVR?
How to Setup Tour
Description
The Tour feature allows you to set a up multiple locations for the PTZ to cycle through using already established Pre-Sets.
Prerequisites
- Dahua Network PTZ
- Internet Explorer
- IP Address of Network PTZ
Video Instructions
Step by Step Instructions
1. Login to your IP PTZ camera via Internet Explorer.
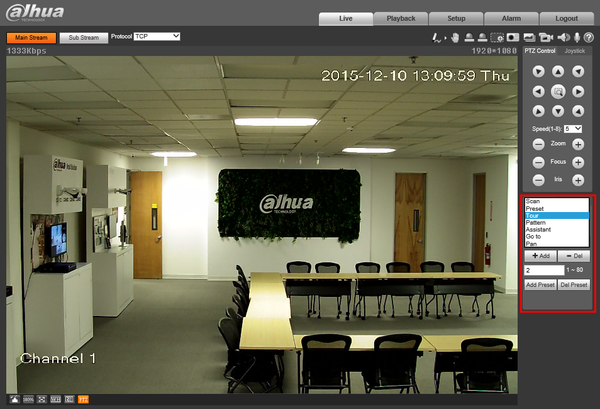
2. Under, “PTZ Settings” click the drop down, and select, “Tour”
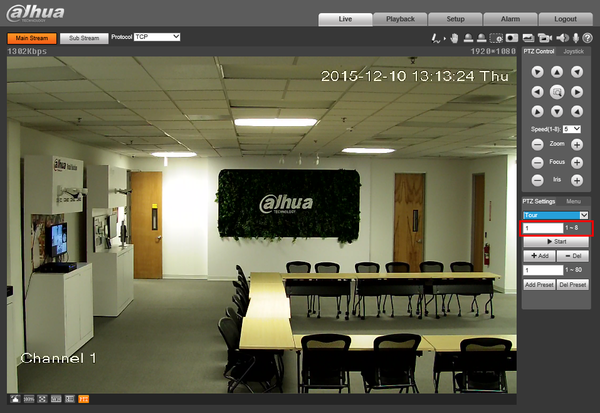
3. The box immediately below the drop down is the, “Pre-Set Number” This can be set to 1-8 (May vary by model) Ensure that this is currently set to, “1”
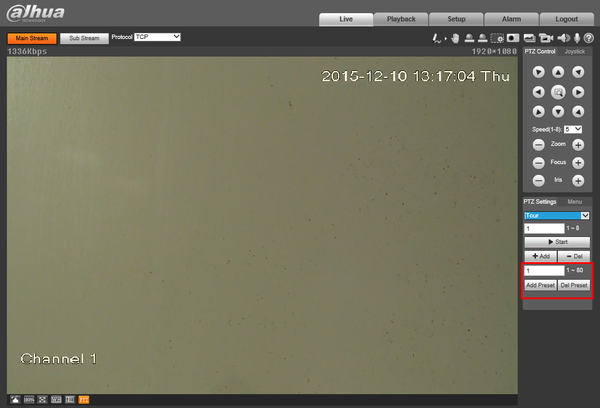
4. In the second box, input the first Pre-Set you wish to establish and click, “Add Pre-Set”
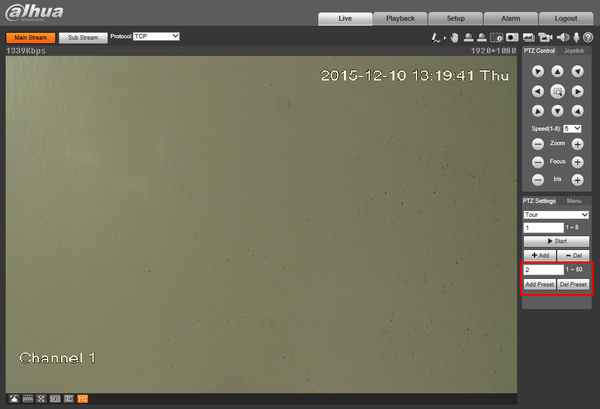
5. In the second box, input the second Pre-Set you wish to establish and click, “Add Pre-Set” Repeat this process for any additional Pre-Sets you wish to use.
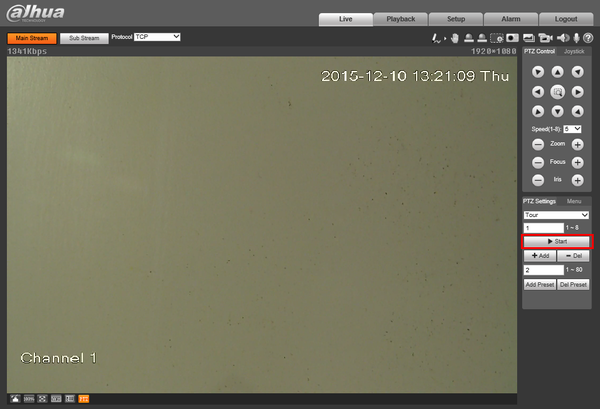
6. Once complete, you can test your Tour settings by clicking, “Start”
How to Setup Pattern
Description
The Pattern feature allows you to set a predetermined path to multiple locations, and adjust Zoom, Focus, and Iris as the camera moves between positions.
Prerequisites
- Dahua Network PTZ
- Internet Explorer
- IP Address of Network PTZ
Video Instructions
Step by Step Instructions
1. Login to your IP Camera via Internet Explorer.
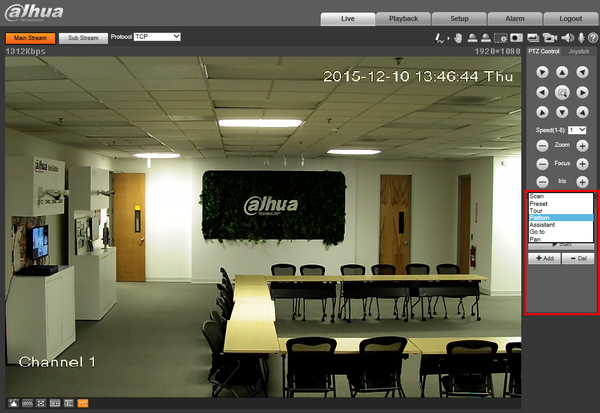
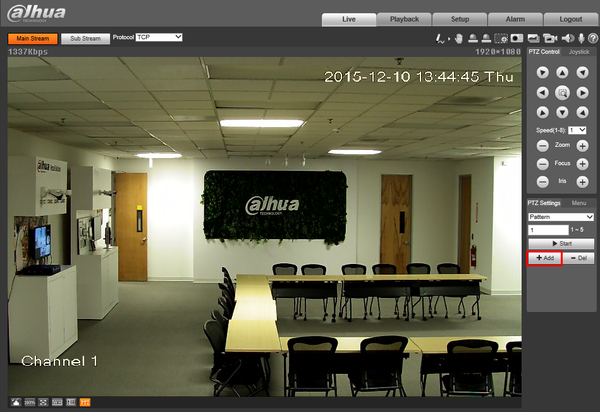
2. On the right hand side click, “PTZ Settings” and make sure, “Pattern” is selected in the drop down menu.
3. Click, “Add”
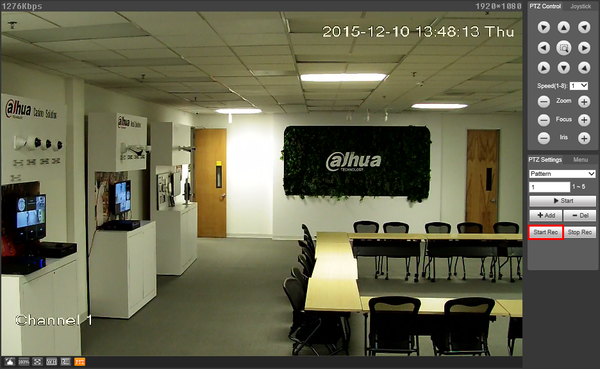
4. Move the camera to the location you wish the pattern to begin, and press, “Start Rec”
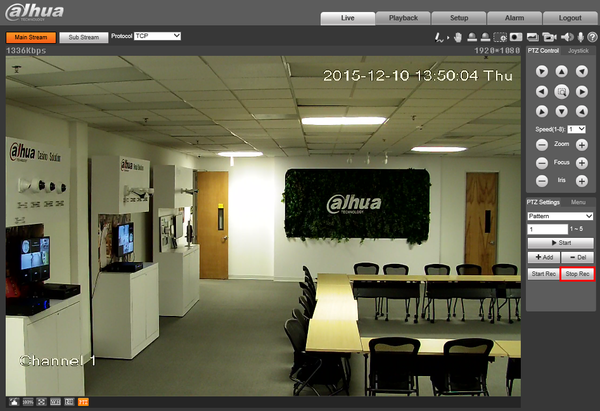
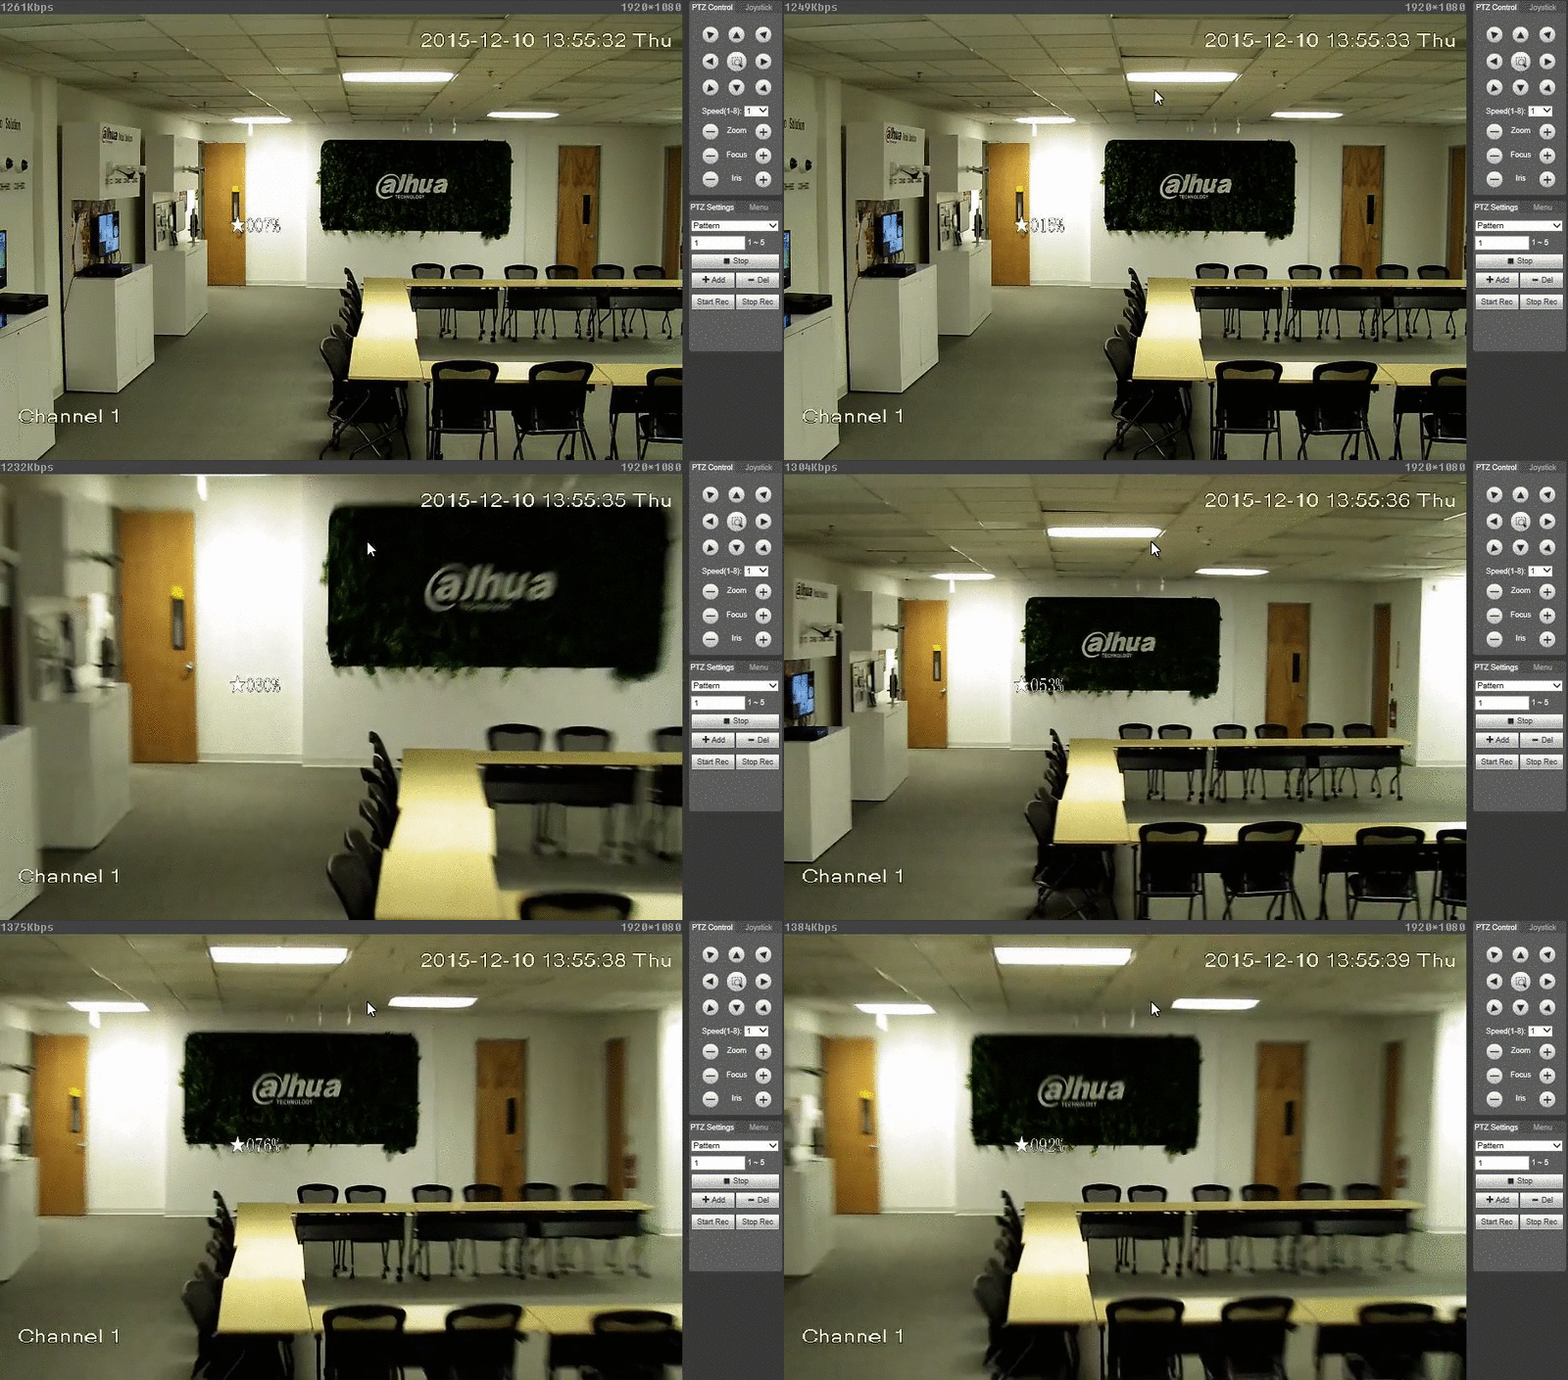
5. Move the camera to each location, one by one. Once complete, press, “Stop Rec”
How to Setup Light Wiper
Description
The Light Wiper feature allows a PTZ equipped with a Wiper to remotely clear moisture from the lens.
Prerequisites
- Dahua Network PTZ with light wiper
- IP Address of Network PTZ
- Internet Explorer
Step by Step Instructions
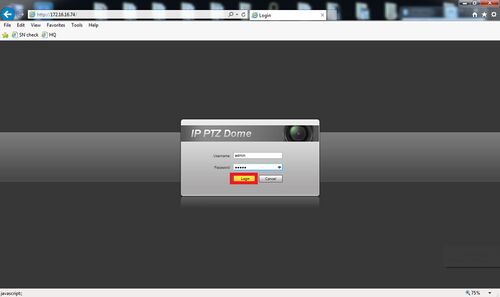
1. Login to your IP Camera via Internet Explorer.
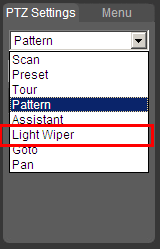
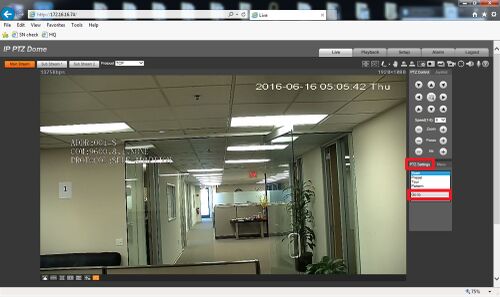
2. Under, “PTZ Settings” click the drop down box and select, “Light Wiper”
How to Setup Goto
Description
- Go to: This feature allows the PTZ to travel to a specific location based on coordinates.
Prerequisites
- Dahua Network PTZ
- IP Address of Network PTZ
- Internet Explorer
Video Instructions
Step by Step Instructions
1. Log into your PTZ camera
2. In the lower right corner select PTZ settings, and then drop down the first menu and select “Go to”
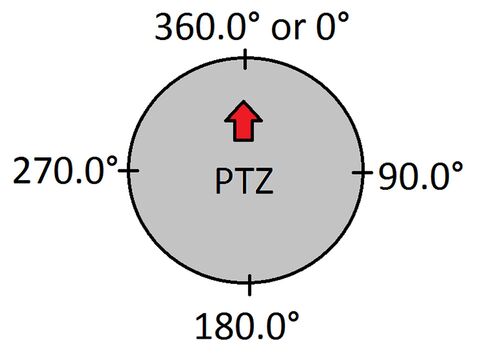
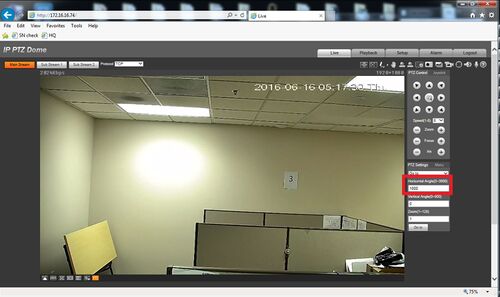
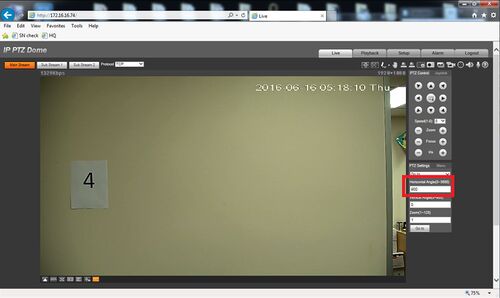
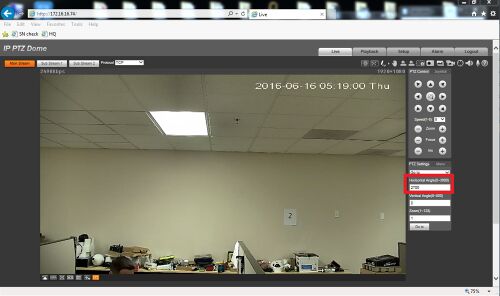
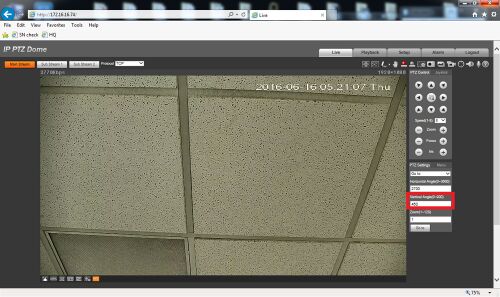
3. Notice you have several fields for the Go to function, the first field is Horizontal Angle (pan) which will point the camera on the horizontal axis in a 0.0° to 360.0° range using increments of 0-3600. Notice 0 and 3600 are the same location, if you want to point in a direction 90.0° enter 900, if you want the opposite side of that (270.0°) use 2700.
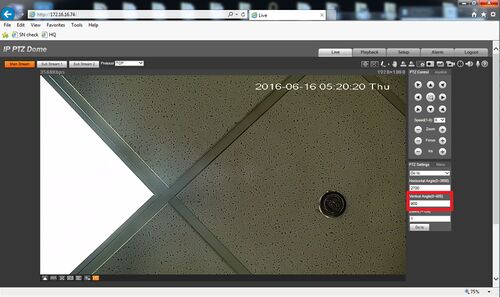
4. The second field is your Vertical Angle (tilt), which has a range of 0-900 or 0.0° to 90.0°. 900 tilts directly downwards from the PTZ’s mounting point, while 0 tilts horizontally.
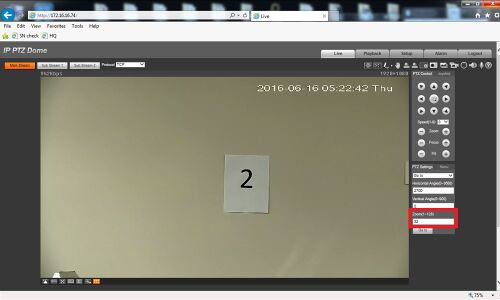
5. The third field is your Zoom function which works in a range of 1-128.
How to Setup Pan
Description
The Pan feature allows the PTZ to move between two pre-established horizontal points.
Prerequisites
- Dahua Network PTZ
- IP Address of Network PTZ
- Internet Explorer
How To Setup Pan Video
Step by Step Instructions
1. Login to your IP Camera via Internet Explorer.
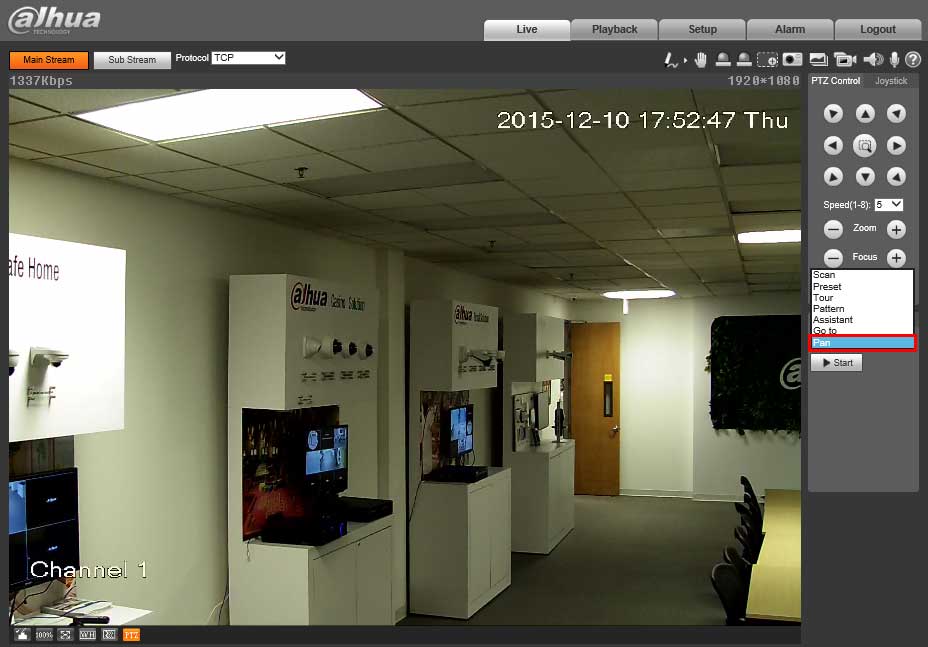
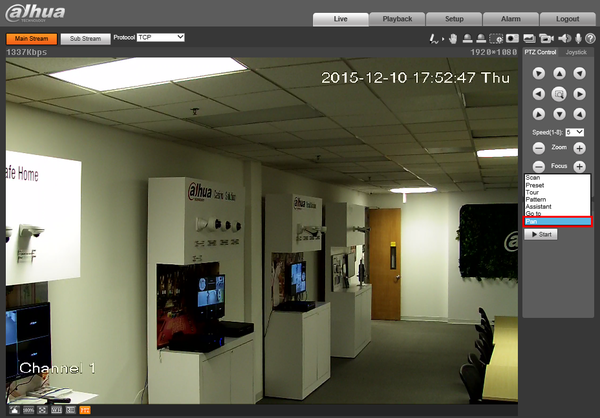
2. On the right hand side click, “PTZ Settings” and make sure, “Pan” is selected in the drop down menu.
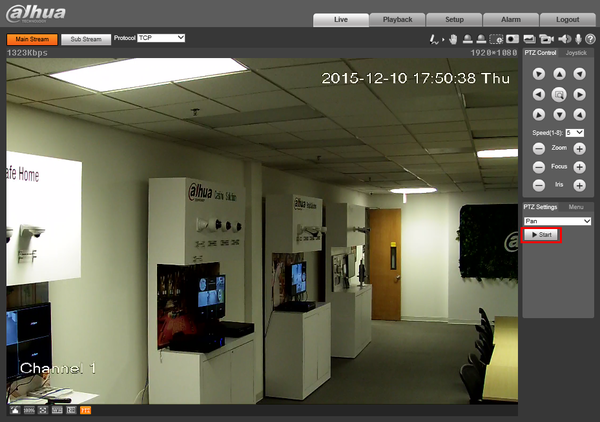
3. Click, “Start”
please provide support for me i leave my email address
I am having trouble with the installation
problem not solved thanks
my recorder is not working
Can you write your contact number?
It really worked, I appreciate it!
hello nice sharing thanks
I sent an e-mail from the communication channel. Can you help?
please provide support for me i leave my email address