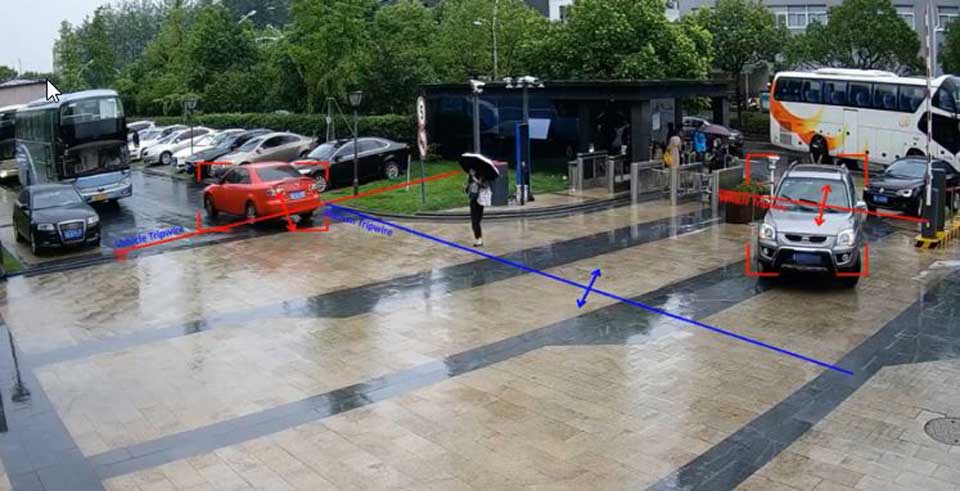
How To Set Up Tripwire, When the detection target crosses the warning line along the set direction, the system will push one alarm and performs any alarm linkage action.
How To Set Up Tripwire
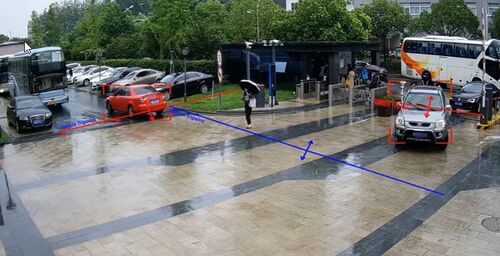
| When the detection target crosses the warning line along the set direction, the system will push one alarm and performs any alarm linkage action. | ||
| Tripwire | ||
| Set Up | Configure Alarm Trigger | Notifications |
| Set Up Tripwire on your device using various interfaces. | Configure responses when the tripwire alarm is triggered, such as email notifications or alarm output. | Receive notifications using the mobile app |
Instructions
![]()
SystemUI Old
Video Instructions
Step By Step Instructions
1. From the Main Menu select Event in the Setting section
2. Select Smart Plan on the left. Then select the camera channel at the top. Select and highlight IVS (You may need to deselect any other options). Select Apply and then OK
3. Select IVS on the left. Then choose the channel number at the top. Select Add at the bottom to create a new IVS alarm rule. Click on the drop-down menu under Type for the new rule you created and change set it to Tripwire. Select the Pencil icon under Draw
4. Left click anywhere on the camera view to start the tripwire line. Left click anywhere else on the camera view to complete the segment of the line. Continue moving your mouse and left clicking to continue making multiple segments of the tripwire line.
When done drawing the line segments, right click to finish the line. Give this rule a name by selecting the text box next to Name and typing in a name.
Select the drop-down menu next to Direction to choose if the IVS alarm is triggered in both directions (Both) or just one direction (“A To B” or “B To A”)
5. When you are done configuring the Tripwire rules, select OK
6. Select the Gear icon under Trigger to configure what happens when the tripwire alarm is triggered:
Select Apply to save the settings
Read More :
![]()
SystemUI New
Video Instructions
Step by Step Instructions
1. From the Main Menu select AI
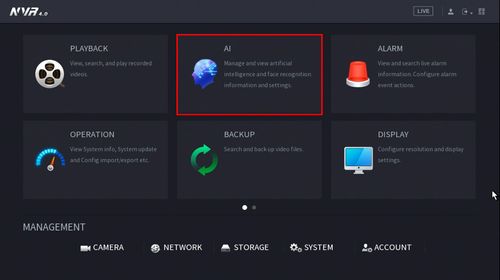
2. Select Parameters on the left.
Select Smart Plan.
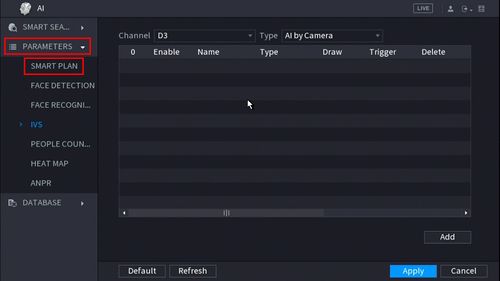
3. Use the drop down box to select the Channel
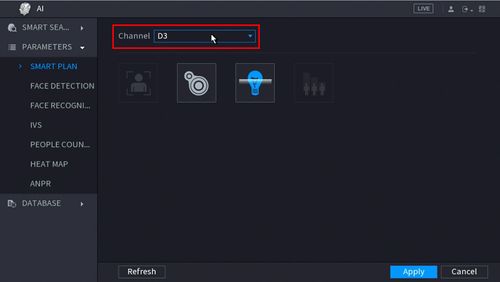
4. Click and highlight IVS (You may need to de-select any other options).
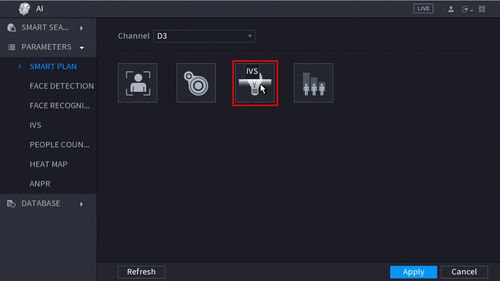
The icon will highlight when selected.
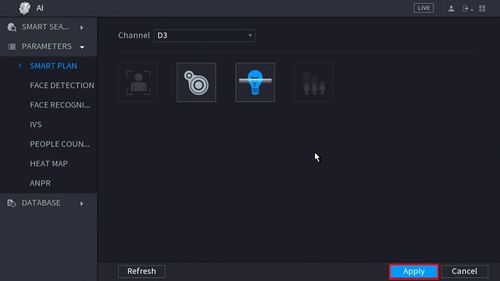
Click Apply
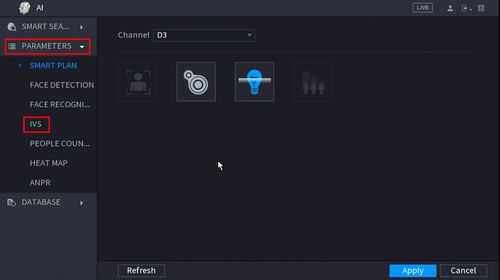
5. Click Parameters > IVS
6. Use the drop-down box to select the Channel
Then click Add in the lower right side of the screen to Add an IVS rule
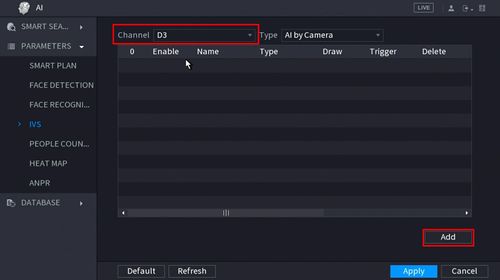
7. The created rule will appear in the list
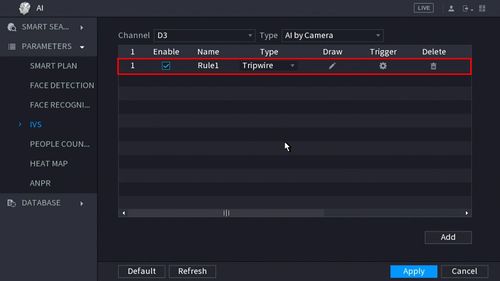
9. Click the Pencil icon to draw the Tripwire rule
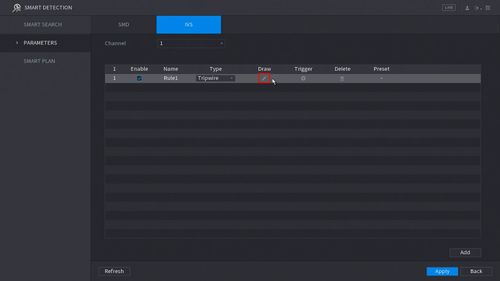
10. The Channel will fullscreen.
Left click anywhere inside the video frame to begin drawing the Trip line, then use the mouse to draw the trip line.
Right click to end drawing

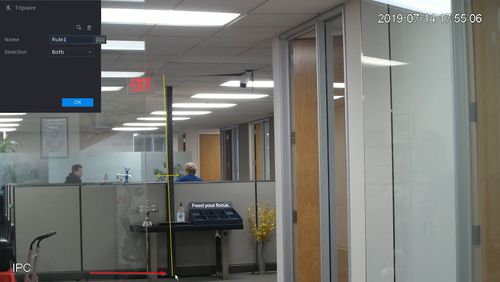
11. The Tripwire menu will appear
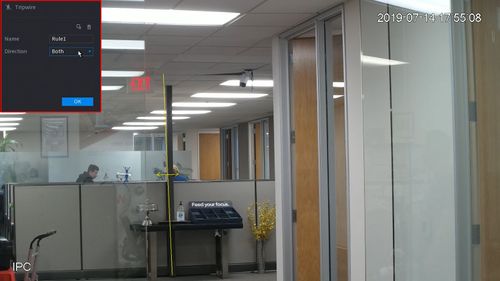
- Name: A name can be applied to the rule
- Direction: Both, A To B, B To A
Click ![]() icon to set the Target Filter (maximum and minimum size size for Objects to follow rule)
icon to set the Target Filter (maximum and minimum size size for Objects to follow rule)
Click ![]() icon to clear the current rule
icon to clear the current rule
Once the tripwire rule settings have been created click OK
12. Click the ![]() icon to set the Trigger settings when the IVS Tripwire rule is engaged.
icon to set the Trigger settings when the IVS Tripwire rule is engaged.
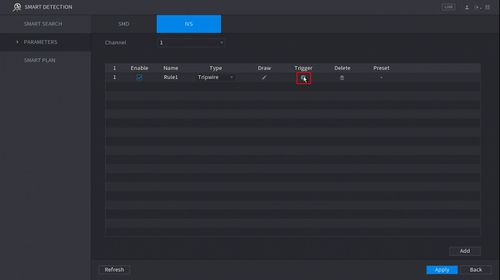
Click Apply to save the settings
WebUI Old
Video Instructions
Step By Step Instructions
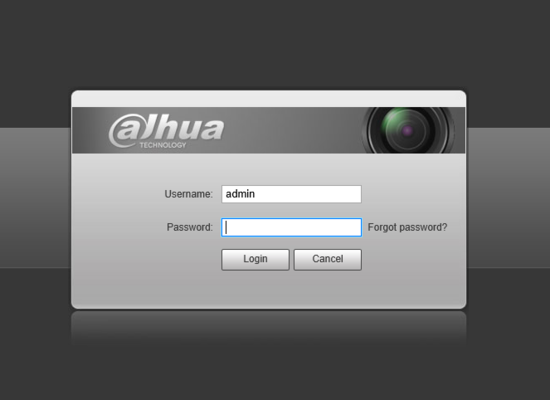
1. Navigate in a web browser to the IP address of the camera or recorder and log into the device
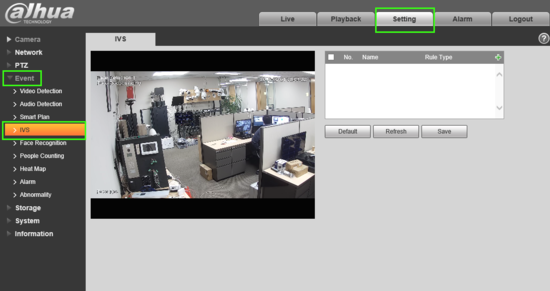
2.Select Setting -> Event -> IVS.
3. Next to Rule Type click “+” in the new rule that shows below, define the Rule Name and in the drop down select “Tripwire” as the rule type
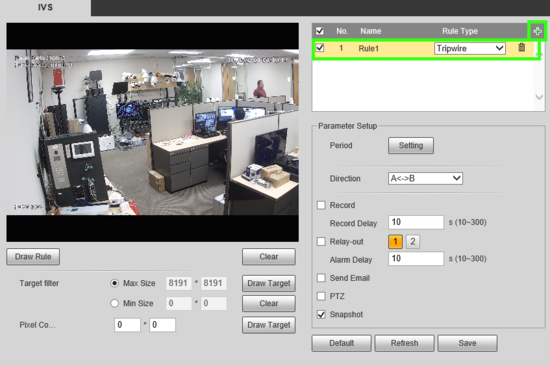
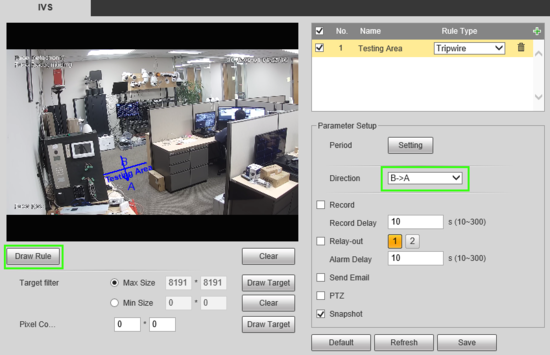
4. Once the rule is created and named, use “Draw Rule” to place your Tripwire line and under the “Direction drop down define in which direction, if only one, crossing is prohibited. In this example crossing from B -> A is prohibited.
5. Click “Setting” next to Period and a new window will appear. Here you can set the active time periods for the tripwire. By default the tripwire will be active 24/7. Each day can be edited individually or you can select multiple at once by checking the boxes and using the forms below to enter times. Up to 6 periods can be set for each day.
Setting Button
Setting Window
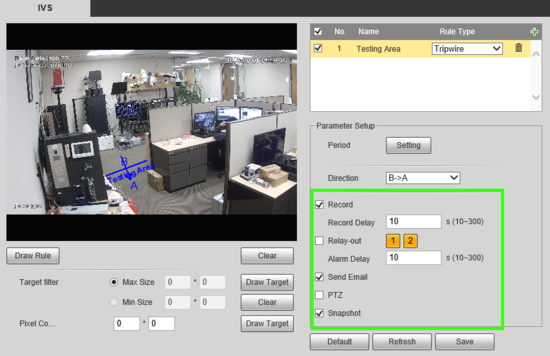
6. Next be sure to check any other options you may want such as Record & Record Delay, Snapshot, Relay out (1, 2, or both)alarm Delay and email.
Note: For instructions on email setup see Email Setup.
To record or save snapshots an SD card or recorder is required.
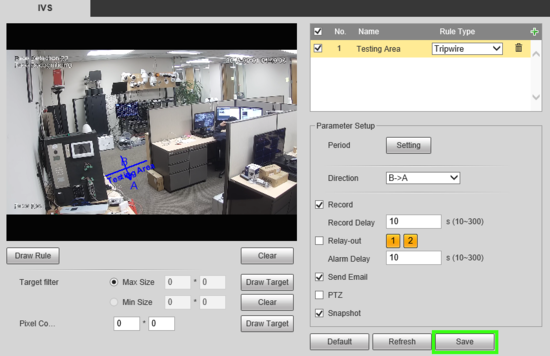
7. When finished click Save.
![]()
WebUI New
Video Instructions
Step By Step Instructions
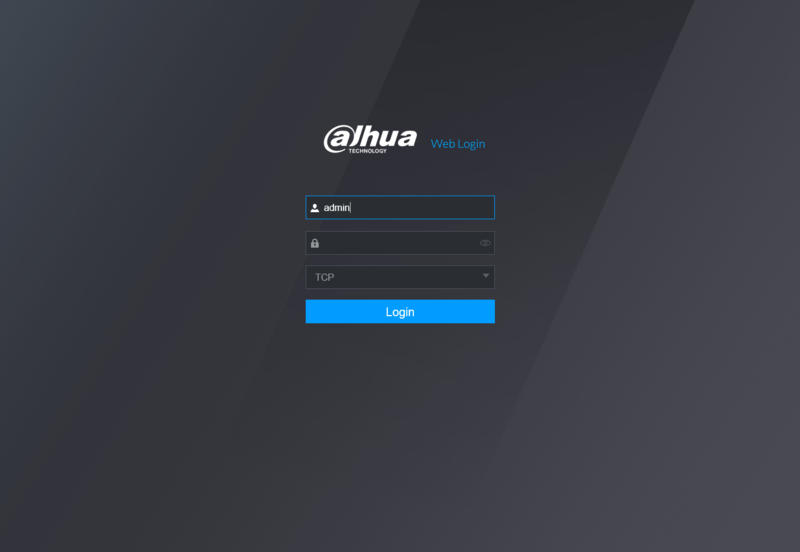
1. Navigate in a web browser to the IP address of the camera or recorder and log into the device
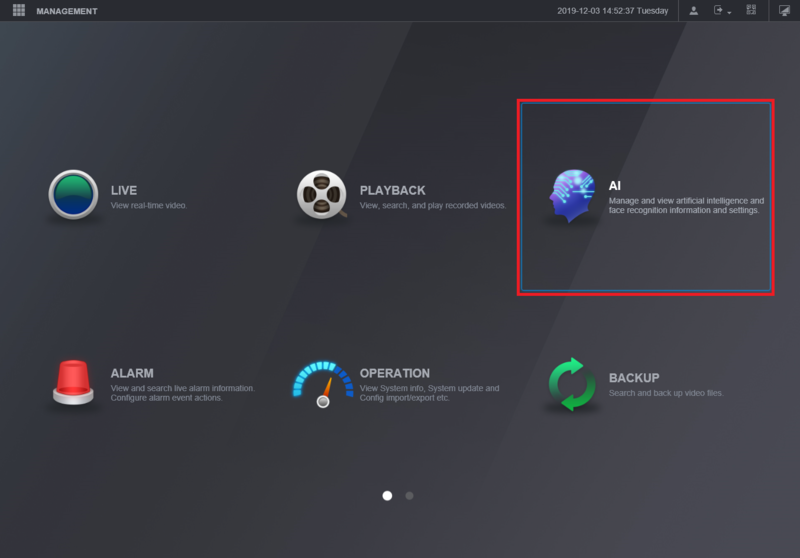
2. From the Main Menu select AI
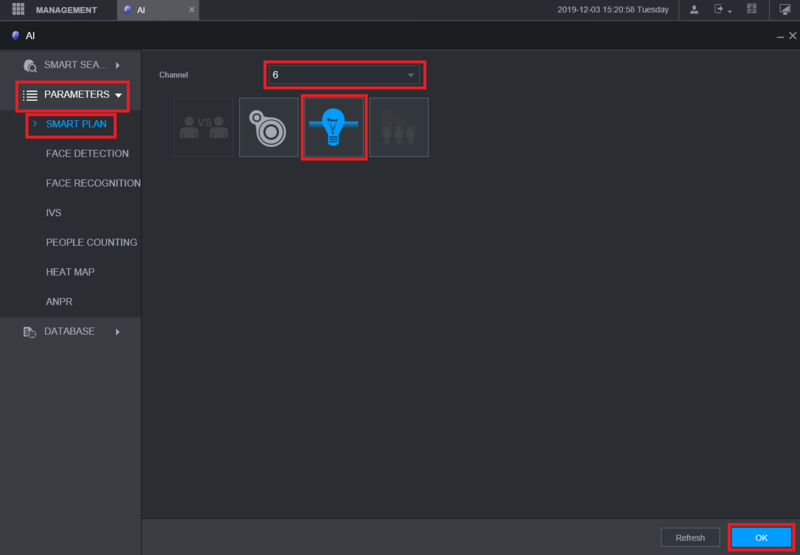
3. Select Parameters on the left.
Then select Smart Plan.
Select the camera channel at the top.
Select and highlight IVS (You may need to de-select any other options).
Select OK
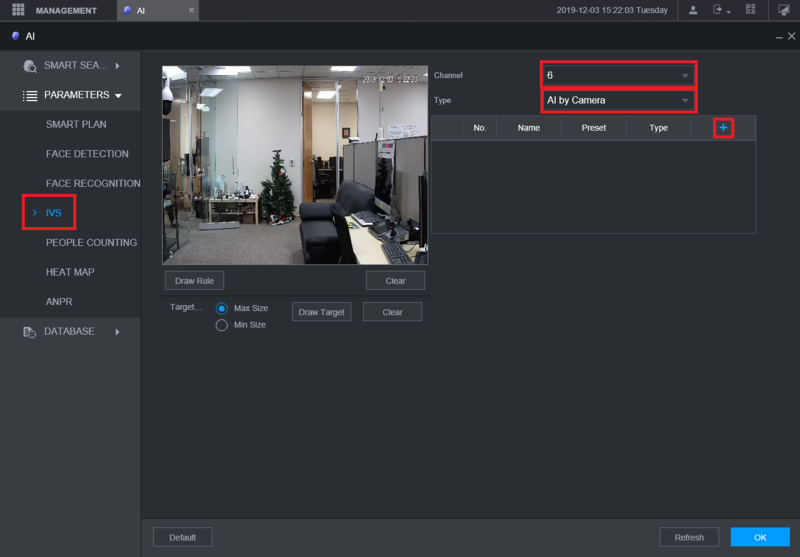
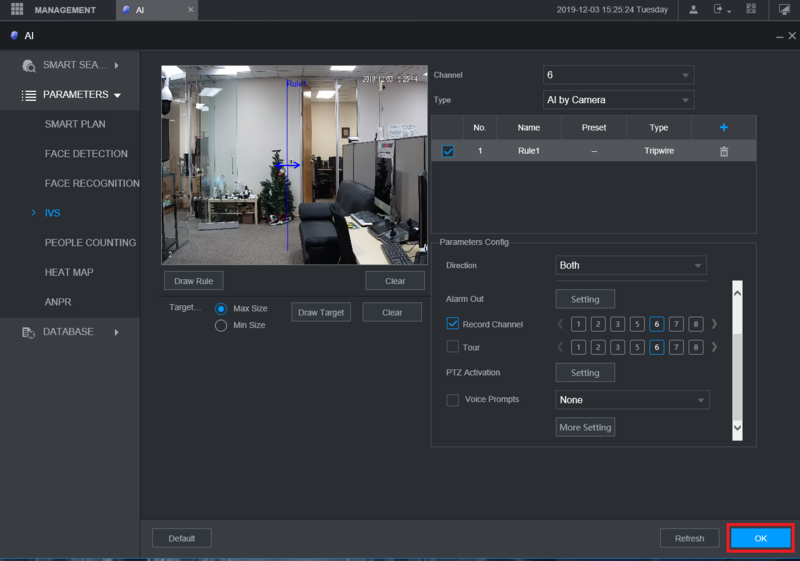
4. Select IVS on the left.
Then choose the channel number at the top right and if the IVS will be done by the camera or by the recorder, by selecting either “AI by Camera” or “AI by Device” below the channel number.
Select the Plus button on the right to create a new IVS alarm rule
5. Double-click on the option under Type for the new rule you created and set it to Tripwire.
Give this rule a name by double-clicking the text box under Name and typing in a name.
Select the Draw Rule button on the left.
Left click anywhere on the camera view to start the tripwire line.
Left click anywhere else on the camera view to complete the segment of the line. Continue moving your mouse and left clicking to continue making multiple segments of the tripwire line.
When done drawing the line segments, right click to finish the line.
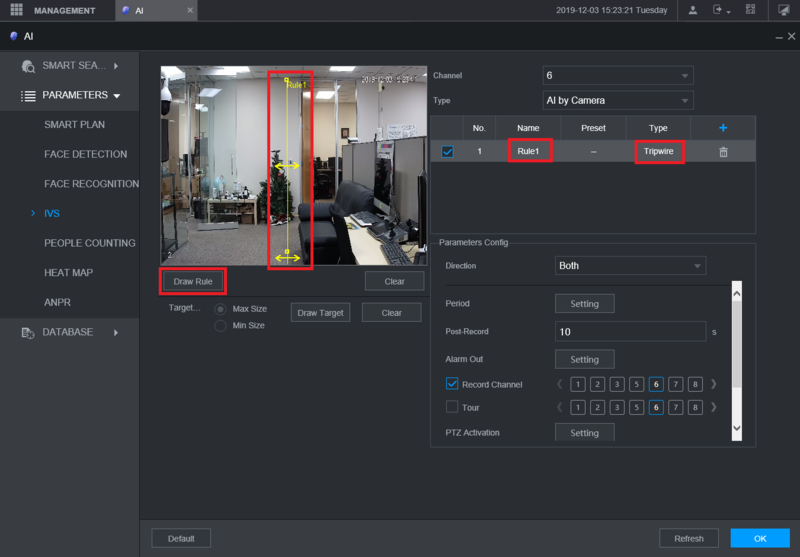
6. Select Draw Target.
Then select Max Size and adjust the size of the box on the camera view to the relative maximum size for a target that can trigger the tripwire.
Select Min Size and adjust the size of the box on the camera view to the relative minimum size for a target that can trigger the tripwire
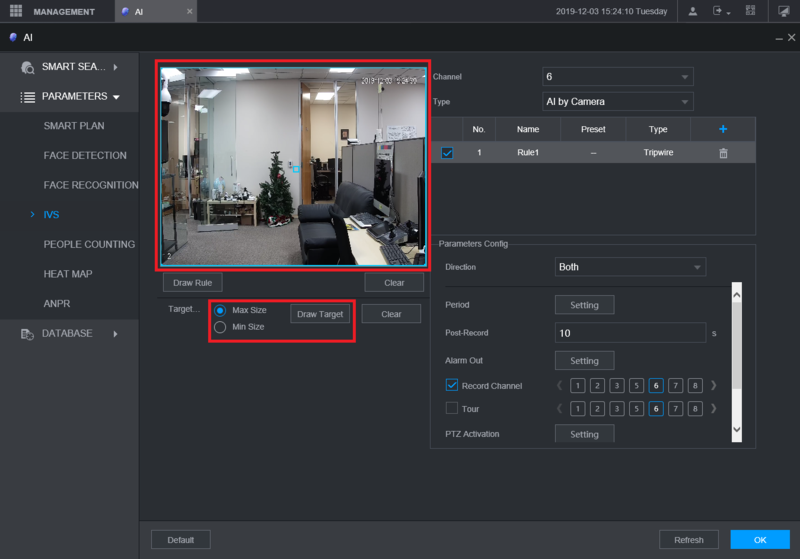
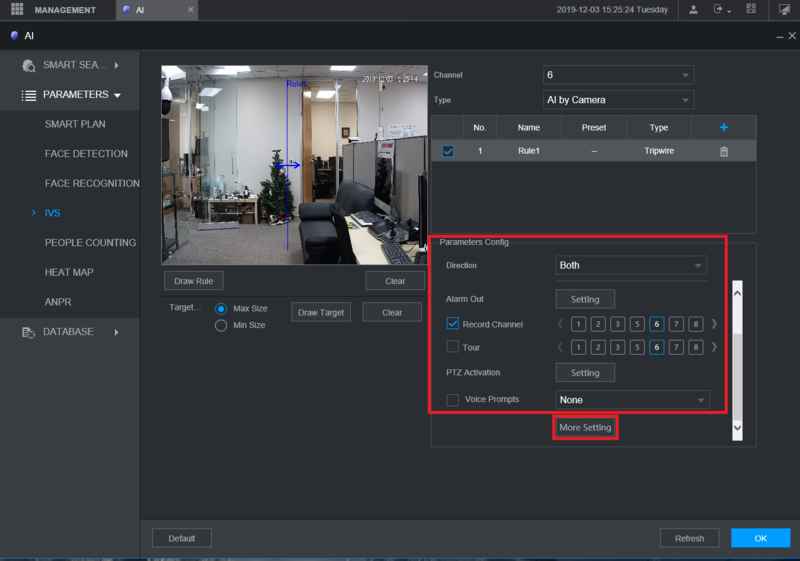
7. Select the drop-down menu next to Direction to choose if the IVS alarm is triggered in both directions (“Both”) or just one direction (“A To B” or “B To A”).
Adjust the settings below Direction to configure what happens when the tripwire alarm is triggered:
Select OK to save the settings
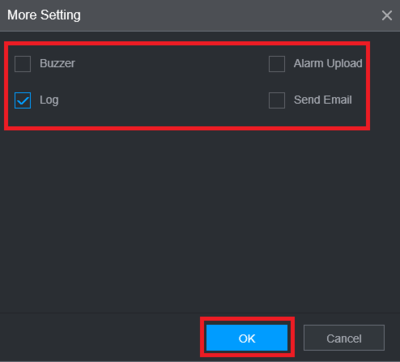
8. Select OK to save the Tripwire IVS alarm settings
![]()
SmartPSS
