How to Update XVR Firmware A Comprehensive Guide, Updating the firmware of your XVR (eXtended Video Recorder) is essential for maintaining optimal performance, improving security, and ensuring compatibility with the latest devices. This detailed guide will walk you through the entire process, from preparation to troubleshooting.

.
Step 1: Prepare for the Update
1. Check the Current Firmware Version:
• Access the XVR Menu: Use the remote control or front panel buttons to navigate through the menu options.
• Locate System Information: Look for sections labeled “System Information” or “Firmware Version.”
• Note Down the Version: Write down your current firmware version for reference.

2. Visit the Manufacturer’s Website:
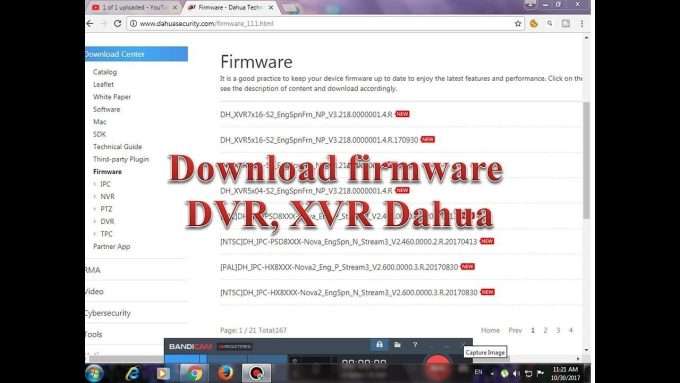
• Official Website: Go to the official website of your XVR’s manufacturer.
• Support or Downloads Section: Navigate to the support or downloads section of the site.
• Search for Firmware: Enter your XVR model number to find the latest firmware update.
• Download the Firmware: Ensure the downloaded firmware matches your XVR model exactly. Save the file to your computer.
.
Step 2: Backup Your Settings
1. Backup Configuration:
• Access the Backup Menu: Use the XVR’s menu to find the backup section.
• Save Current Settings: Follow the prompts to save a backup of your current settings to a USB drive or your computer. This step is critical for restoring settings if needed.
.
1. Prepare a USB Drive:
• Format to FAT32: Ensure the USB drive is formatted to FAT32 to be compatible with most XVR devices.
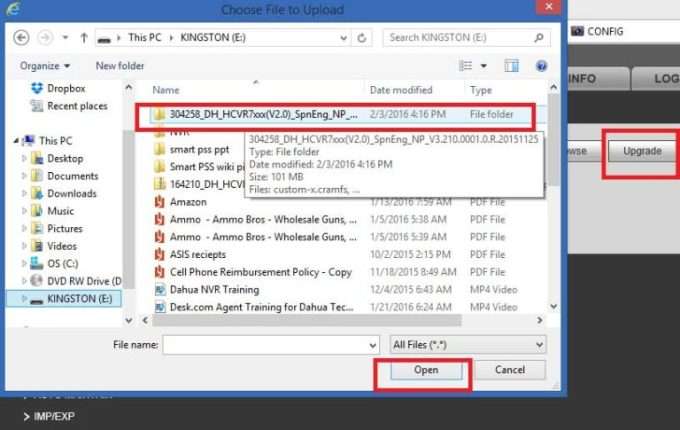
• Copy Firmware File: Transfer the downloaded firmware file to the root directory of the USB drive.
2. Insert the USB Drive into the XVR:
• Power On the XVR: Ensure your XVR is turned on and functioning.
• Insert the USB Drive: Plug the USB drive into the designated port on the XVR.

3. Access the Firmware Update Menu:
• Navigate the System Menu: Use the remote or front panel controls to access the system menu.
• Find Firmware Update Section: Locate the firmware update section within the system menu.
4. Start the Firmware Update:
• Select Firmware File: Choose the firmware file from the USB drive.
• Initiate the Update: Follow on-screen instructions to start the update process.
• Do Not Interrupt: Ensure the XVR remains powered on and connected throughout the update process, which may take several minutes.
.
How to Update XVR Firmware A Comprehensive Guide
Step 4: Verify the Update
1. Check the Firmware Version:
• Restart the XVR: After the update completes, restart the device.
• Verify Version: Go to the system information section to confirm the new firmware version is installed.
2. Restore Configuration:
• Access Backup Menu: If necessary, use the backup menu to restore settings from the previously saved backup.
.
Troubleshooting Tips
1. Ensure Compatibility:
• Double-Check Firmware: Confirm that the firmware is specifically designed for your XVR model to avoid compatibility issues.
2. Stable Power Supply:
• Use a UPS: Connect the XVR to an uninterruptible power supply (UPS) to prevent power interruptions during the update.
3. Follow Manufacturer Instructions:
• Read Documentation: Refer to the manufacturer’s manual or support documentation for any specific instructions or precautions.
4. Common Issues:
• Update Fails: If the update fails, retry the process with a freshly formatted USB drive and ensure the correct firmware file is used.
• Device Not Recognizing USB: Try a different USB port or a new USB drive.
.
Conclusion
Regular firmware updates are vital for the smooth operation of your XVR, enhancing security features, and maintaining compatibility with new technologies. By following the steps outlined in this guide, you can confidently update your XVR firmware, ensuring your device remains up-to-date and fully functional. Always refer to your device’s manual for model-specific instructions and consult manufacturer support if you encounter any issues.
or alternative guide
Updating the firmware of your XVR (eXtended Video Recorder) is crucial for maintaining its performance, enhancing security features, and ensuring compatibility with new devices. Here is a step-by-step guide to help you update the firmware on your XVR device:
Step 1: Prepare for the Update
1.Check the Current Firmware Version:
◦ Navigate to the System Information or Firmware Version section.
◦ Note down the current firmware version.
2.Visit the Manufacturer’s Website:
◦ Go to the official website of your XVR’s manufacturer.
◦ Locate the Support or Downloads section.
◦ Search for the latest firmware update for your specific XVR model.
3.Download the Firmware:
◦ Ensure you download the correct firmware version compatible with your XVR model.
◦ Save the firmware file to your computer.
Step 2: Backup Your Settings
1.Backup Configuration:
◦ Navigate to the Backup section.
◦ Save a backup of your current settings to a USB drive or your computer. This step is essential in case the update process requires you to restore your settings.
Step 3: Update the Firmware
1.Prepare a USB Drive:
◦ Format a USB drive to FAT32 (if required).
◦ Copy the downloaded firmware file to the root directory of the USB drive.
2.Insert the USB Drive into the XVR:
◦ Ensure the XVR is powered on.
◦ Insert the USB drive into the designated USB port on the XVR.
3.Access the Firmware Update Menu:
◦ Go to the System menu on your XVR.
◦ Find the Firmware Update section.
4.Start the Firmware Update:
◦ Select the firmware file from the USB drive.
◦ Follow the on-screen instructions to initiate the update process.
◦ Do not turn off or unplug the XVR during the update process as it might take a few minutes.
Step 4: Verify the Update
1.Check the Firmware Version:
◦ After the update process is complete, restart the XVR.
◦ Navigate to the System Information or Firmware Version section to verify that the new firmware version is installed.
2.Restore Configuration:
◦ If necessary, restore the backup configuration saved earlier to ensure all your settings are retained.
Troubleshooting Tips
• Ensure Compatibility: Always confirm that the firmware is specifically designed for your XVR model.
• Stable Power Supply: Ensure the XVR is connected to an uninterruptible power supply (UPS) during the update to avoid power failures.
• Follow Manufacturer Instructions: Refer to the manufacturer’s manual or support documentation for any specific instructions or precautions.
Conclusion
Regularly updating your XVR firmware ensures the device runs smoothly, maintains security, and supports new features or devices. Following the steps outlined in this guide will help you successfully update your XVR firmware with minimal hassle. Always refer to your device’s manual for specific instructions related to your model.
.


1 thought on “How to Update XVR Firmware A Comprehensive Guide”