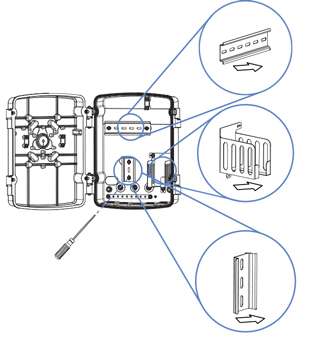
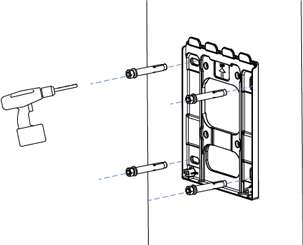
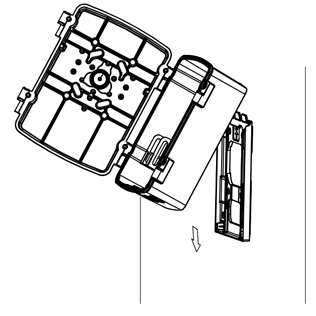
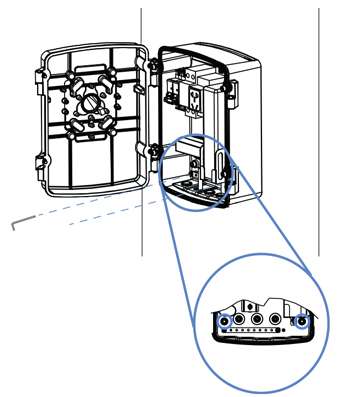
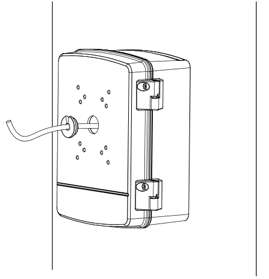
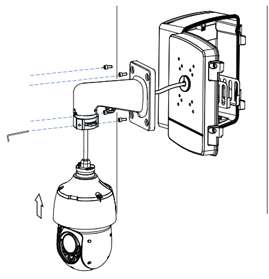
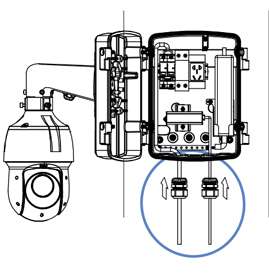
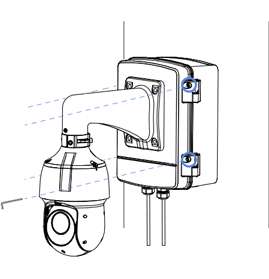
Junction Box for PTZ Cameras Installation Guide, Your customizable commercial-grade solution for your PTZ camera—the new Junction Box. With its versatile design, it offers unmatched weather, dust, and vandalism protection, clutter-free cables, and effortless access and maintenance.
What’s Included:
Junction Box for PTZ Cameras Installation Guide
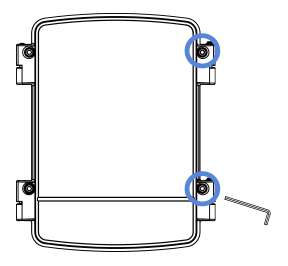
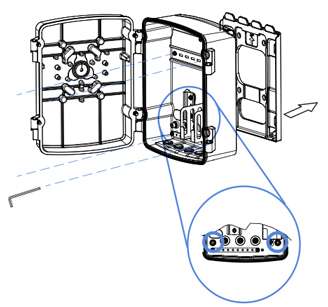
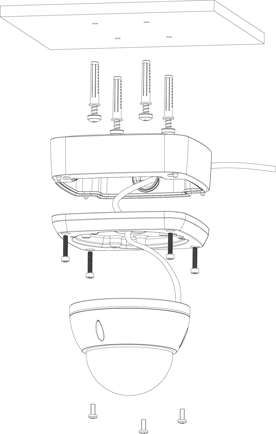
Installation:
Warning: Install in an area that can support 3× total weight of the camera and junction box.
Note: The products mentioned and shown above are not included.
Junction Box for PTZ Cameras: Troubleshooting Guide
This article provides troubleshooting guidance for addressing issues for your AJLZ junction box for PTZ cameras.
I cannot fit my camera’s cable through the front of the junction box
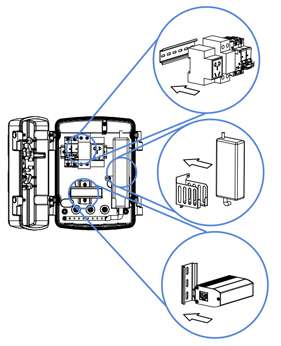
My PTZ Camera has external accessories
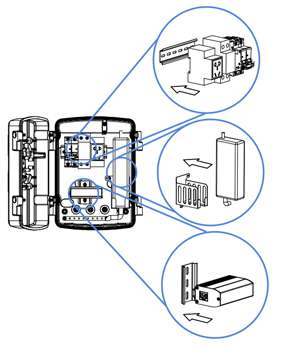
You can install external accessories inside the junction box in the metal trays.
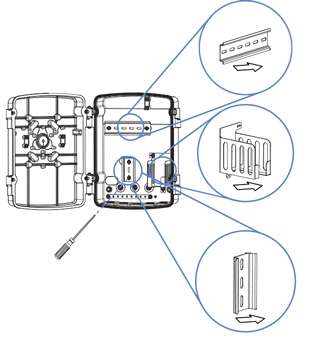
I want more room for cables in my junction box
You can make more room in the junction box by removing the metal trays inside with a Phillips head screwdriver.
I need to organize my cables
The included cable ties are for cable organization inside of the junction box. Manually coil your cables until the junction box outputs the desired length of wire, and then use the cable ties to keep the coil together.
Junction Box for PTZ Cameras: Frequently Asked Questions
This article answers frequently asked questions about your AJLZ junction box for PTZ cameras.
Setup
What tools do I need to install my junction box?
To install your junction box, you will only need a drill, however to customize your junction box with accessories you will need a Phillips head screwdriver.
How do I fit my camera’s cable through the front of my junction box?
Where can I install the junction box?
The outdoor junction box can be installed at any location that can support 3× total weight of the outdoor junction box and the attached camera. However the following criteria are recommended for best performance:
Location Selection:
Mounting Surface:
Other recommendations:
What are the benefits of the junction box?
The outdoor junction box adds protection, and aids in wire organization for your device.
How much weight can the junction box hold?
The outdoor junction box can carry up to 17.64 lb / 8.0 kg, which includes the weight of any of the compatible devices.
How do I install my junction box?
Please refer to the Installation Guide for your junction box.
How do I organize the cables inside the junction box?
The included cable ties are for cable organization inside of the junction box. Manually coil your cables until the junction box outputs the desired cable length, and then use the cable ties to keep the coil together.
General
What is a junction box
A junction box attatches to a device and secures its cables in a contained space. It allows for improved safety, organization, and look for a device and it’s cables. This PTZ camera junction box allows you to keep your PTZ camera’s cables, and applicable added accessories safe and secure from weather and tampering.
How many cables can exit or enter my junction box?
Up to 5 cables can enter or exit the junction box and plu in externally. Up to 3 cables can be weatherproofed with a cable gland.
What are the dimensions of the outdoor junction box?
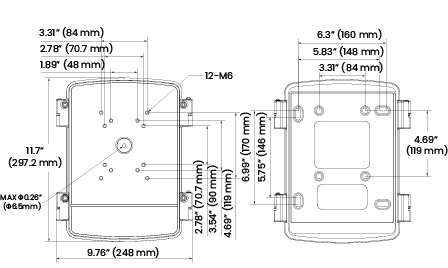
The dimensions of the outdoor junction box are (W × D × H) 11.70 × 9.76 × 5.15” / 297.2 × 248.0 × 130.7 mm.
Which cameras are compatible with this product?
Please see the Compatibility Chart to find compatible cameras.
What is the size of the included Allen key?
The included Allen key is 5 mm.
Outdoor Junction Box: Frequently Asked Questions
The following FAQ article answers common questions about the AJLD-1W Series – Outdoor Junction Box. Where applicable, the FAQ includes links to articles where you may find more information.
How do I install my E851AD camera with this product?
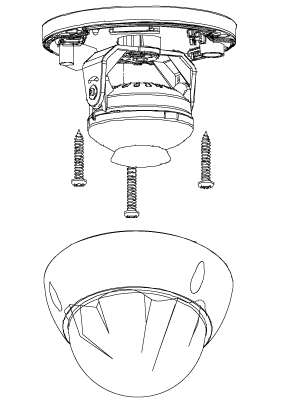
The E851AD camera equips a cable that exits from the bottom edge of the device, while other models equip cables that exit from the middle of the bottom side. Because of this, extra care must be taken to attach the outdoor junction box to the E851AD camera. Please follow the following steps for proper installation of your camera and outdoor junction box.
Note: Do not remove the dome cover in humid or dusty environments and always wash your hands before handling your camera.
Enjoy using your new E851AD camera, with your new outdoor junction box.
Where can I install the outdoor junction box?
The outdoor junction box can be installed at any location that can support the entire weight of the outdoor junction box and the attached camera (up to 7.8 lbs / 3.54 kg). However the following criteria are recommended for best performance:
Other recommendations:
What are the benefits of the outdoor junction box?
The outdoor junction box adds protection, and aids in wire organization for your device.
How much weight can the outdoor junction box hold?
The outdoor junction box can carry up to 1.19 llbs / 0.54 kg, which includes the weight of any of the compatible devices.
What are the dimensions of the outdoor junction box?
The dimensions of the outdoor junction box are (W × D × H) 5.27 × 5.25 × 2.05” / 134 × 133.5 × 52 mm.
Which cameras are compatible with this product?
Please see the Compatibility Chart to find compatible cameras.
