Resetting your UNV NVR Password 3 Ways
Resetting your UNV NVR’s Password (3 Ways)
Overview
When an NVR password is lost or forgotten, configuration and playback become locked off from view. This tutorial will guide you through resetting your UNV password in a variety of ways, making it easy and convenient to recover access to your device without the need for assistance.
Prerequisites
This tutorial assumes you have already gone through the initial setup of your NVR and created an account on the EZView mobile application. If you have not completed the basic setup of your NVR or created an EZView account, please CLICK HERE for a tutorial on setting up your UNV NVR and EZView account creation.
Resetting your UNV NVR Password 3 Ways
Read More :
Video Tutorials
EZView Recovery: https://youtu.be/wmAt6Zfgjns
EZLive Recovery: https://youtu.be/3pDCvrcestY
EZCloud Recovery: https://youtu.be/mTgLHtfbSJI
Part 1: Local Password Reset (NVR Direct/EZView)
Step 1
Starting at the Live View screen, follow the below steps to access the login screen from the NVR directly:
Right Click Anywhere on Live View > Menu
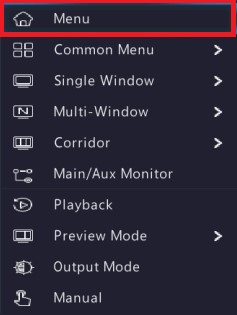
Step 1.1
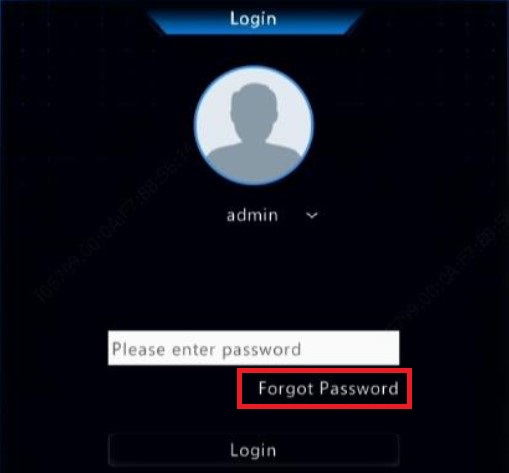
If you have a pattern lock, click “Forgot Pattern” to get to the login screen. Once at the login screen, click “Forgot Password”.
Step 2
You may be asked to type in an email in order to continue. At this point, you must type in an email. Please note that you have to be able to access this email in order to reset your password, so please make sure it is an email you can log into. Additionally, please verify that you have spelled the email correctly. If you misspell the email, you cannot go back to change it and will not be able to reset your password in this manner.
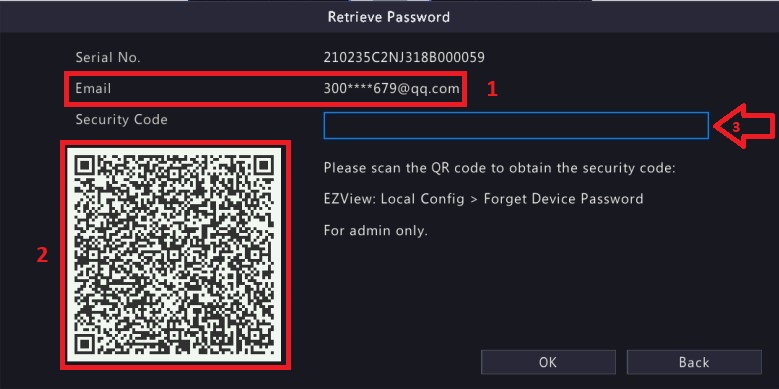
After typing your email into the email field, click NEXT or OK. You will be greeted with a screen that has your serial number, email address and a QR code for you to scan.
Step 3
From here, open up your EZView application. If you have not already created an account on EZView, do so now. CLICK HERE for a tutorial on EZView account creation.
Step 3.1
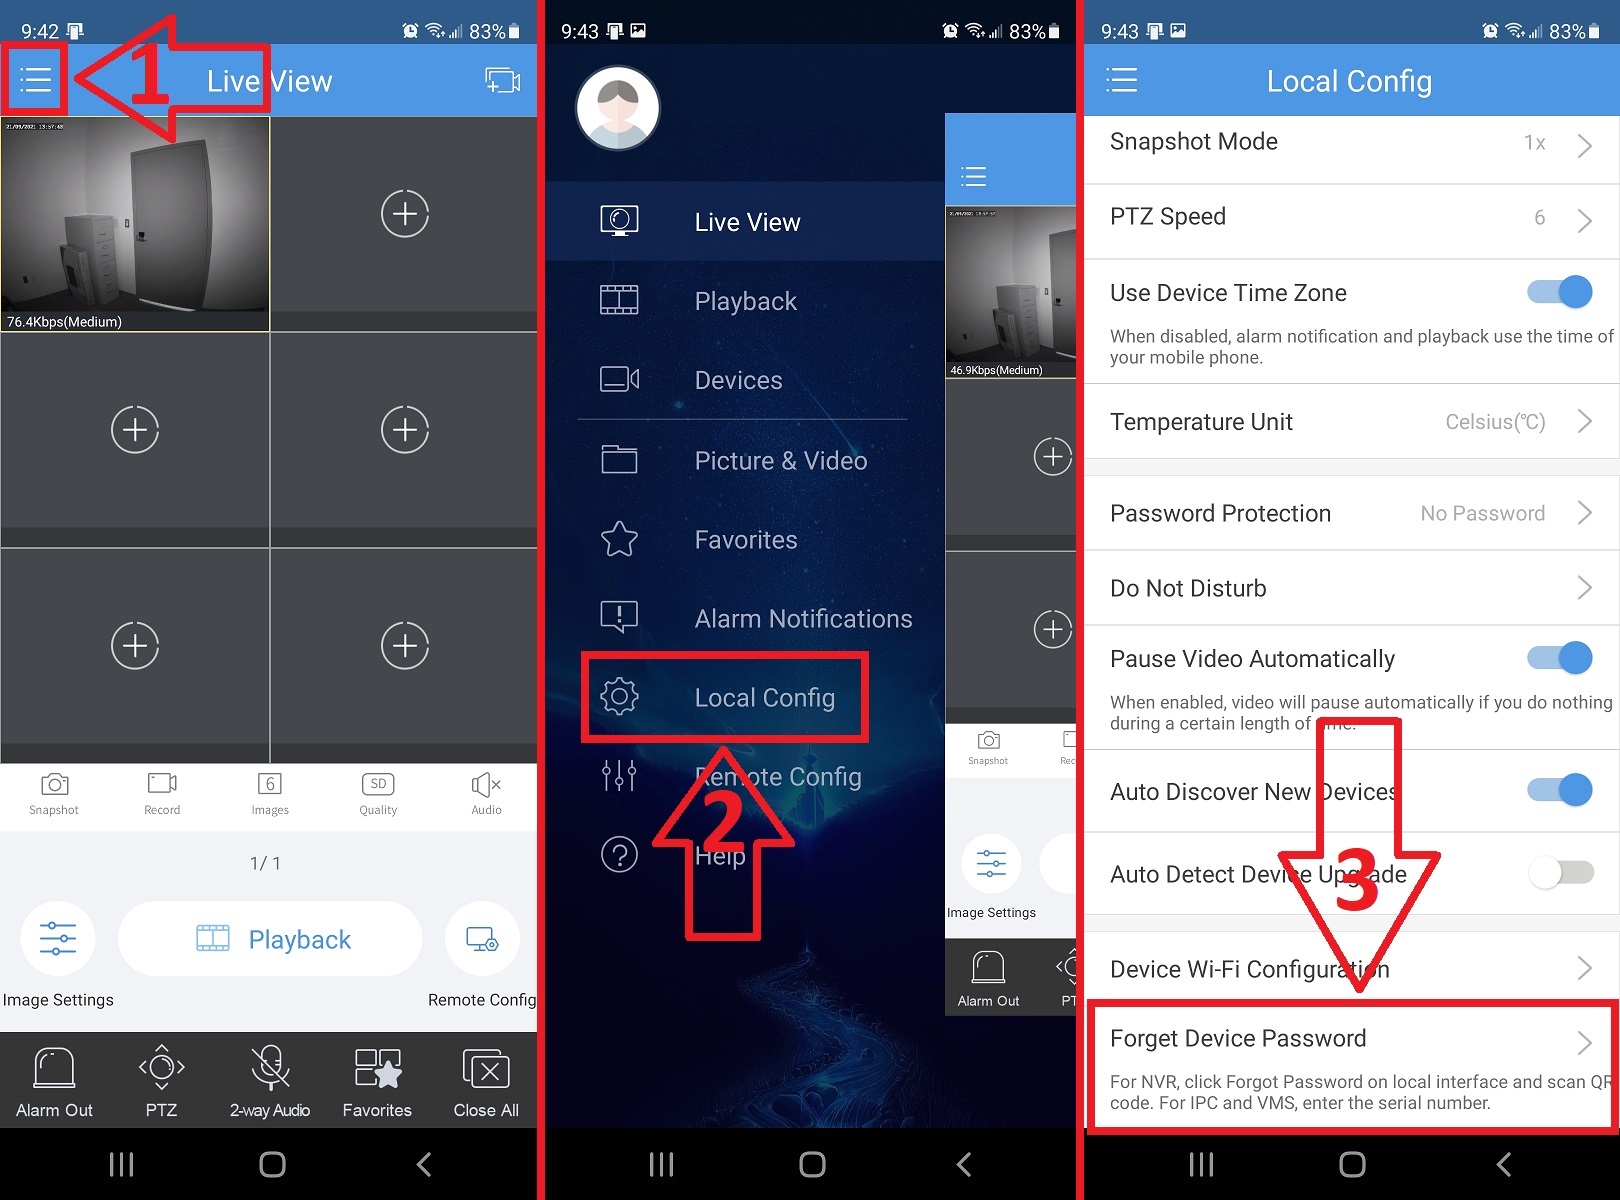
At the Live View screen of the EZView mobile application, click on the three lines on the top left-hand side of your screen.
Step 3.2
This will bring up the main menu of the application. Once this menu is open, click “Local Config”.
Step 3.3
You will be greeted with the local configuration menu. At the very bottom of the menu, click “Forgot Device Password”.
Step 4
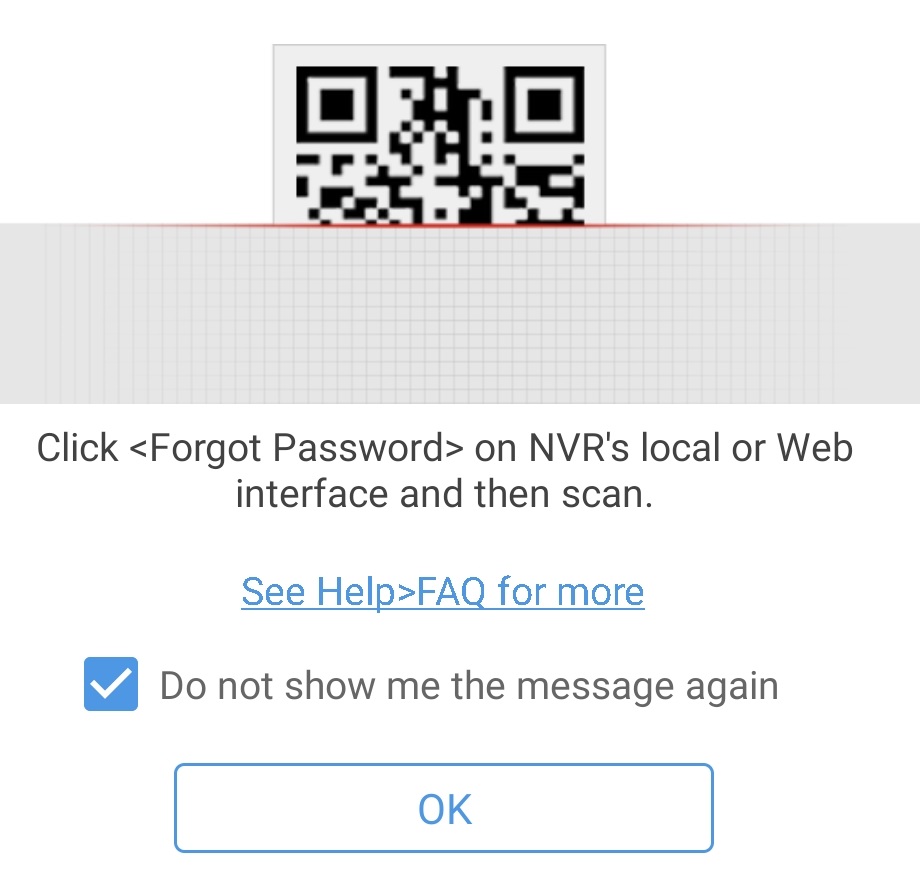
This will open up your phone’s camera. You may see a popup window asking you for permission to use your phone’s camera. You must allow this permission to continue. Additionally, a box will appear with instructions on where to scan on your device. You can safely close this box, assuming you have followed the steps above.
Step 4.1
Using the box on your phone’s camera, scan the QR code on your NVR’s menu.
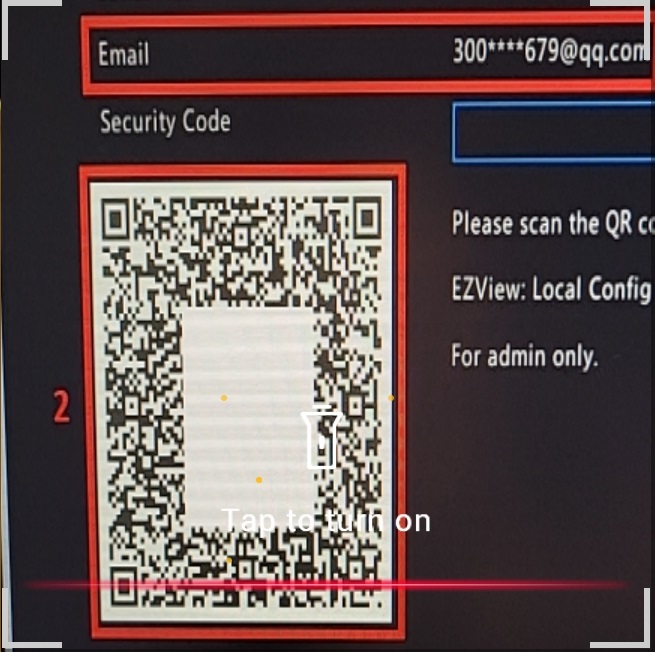
Please note: The white box in the middle of the QR code is only there to prevent successful scanning for the purposes of the screenshot. Your QR code will not have this white box.
Step 4.2
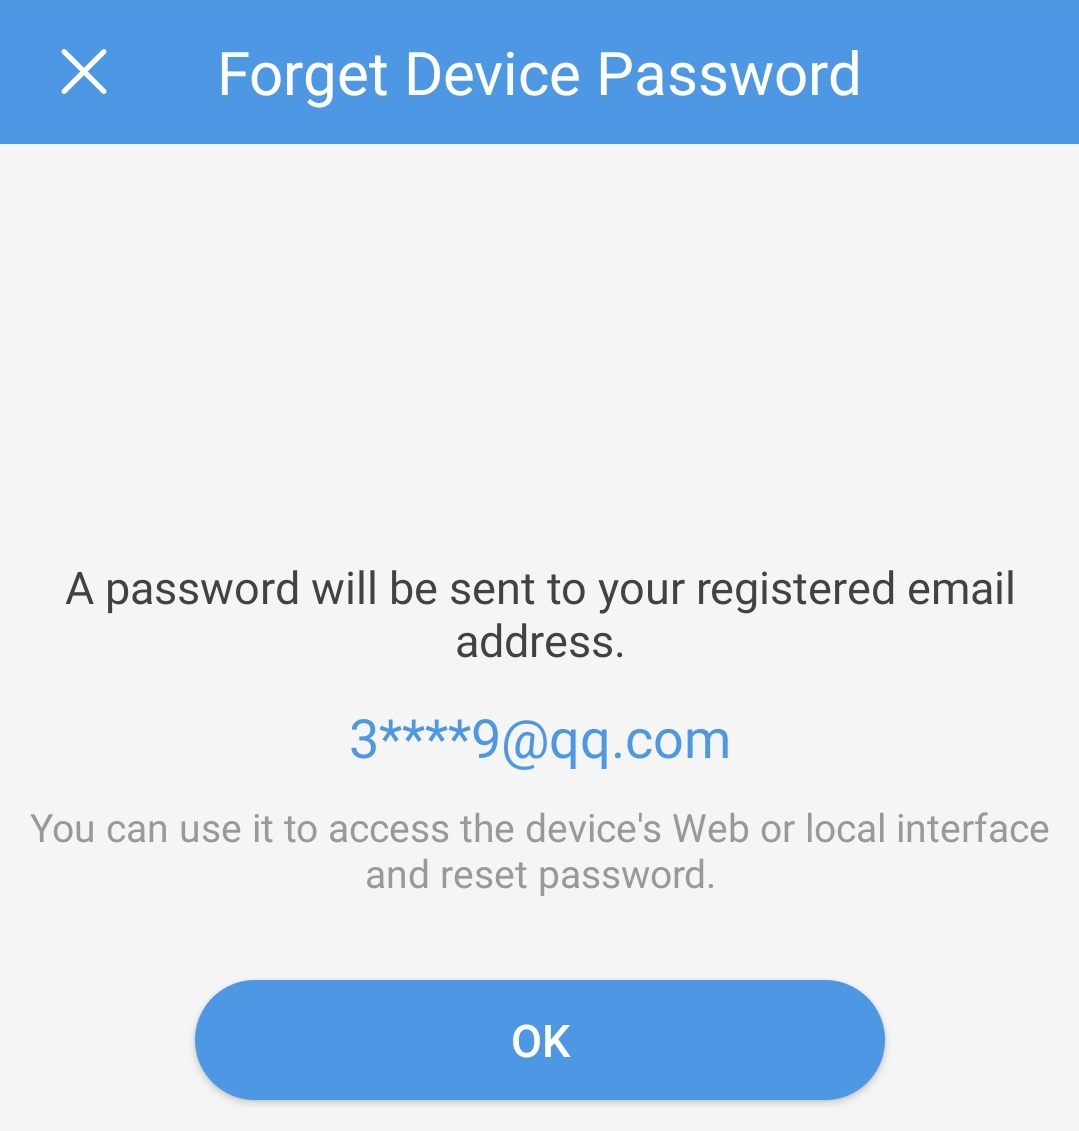
Once the QR code scans successfully, you will be taken to a screen confirming your email. Click “Ok” to have the code sent to your email.
Step 5
Check your email to find the security code. Please allow for up to 15 minutes for the email to be sent to you. Additionally, check your Spam/Junk folder to verify that your code did not send to those folders. Once you have your code, return to your NVR’s forgot password screen.
Step 6
You will see a field next to the words “Security Code”. Type your security code into that field.
Step 7
You will be brought to a screen asking you to change your password.
If there is a field for “Security Code”, please reenter the security code into this field.
New Password: This is where you will type in your new password. Please note that your password must be considered a “STRONG” password to work. A strong password is typically at least eight characters long with a number and special character (!, @, #, $, etc)
Confirm Password: This is where you will retype in your new password in order to confirm it. Please note that your passwords must match in both the New Password and Confirm Password field in order to save correctly.
Part 2: Local Password Reset (NVR Web GUI/EZView)
Please Note: This section of the tutorial assumes you have the local IP address of your UNV NVR. If you do not know the local IP address, please CLICK HERE for a tutorial on finding the local IP address of your NVR.
Step 1
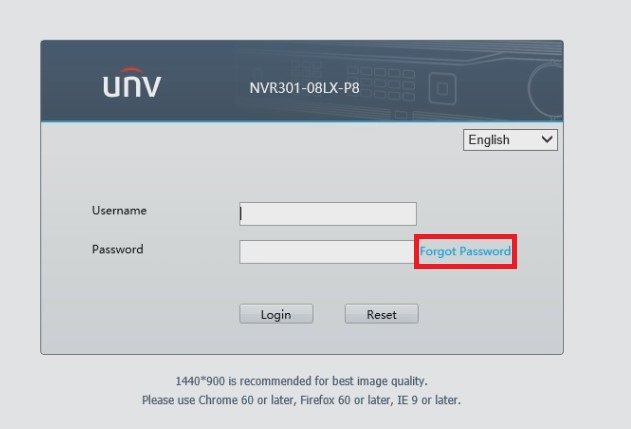
After typing the local IP Address into the URL bar of your web browser, you will be brought to the login splash screen of the NVR. On the right side of the Password field, you will see a blue hyperlink that says “Forgot Password”. Click there.
Step 2
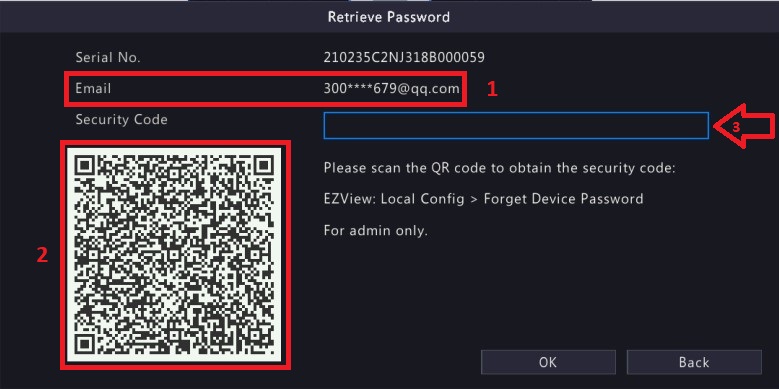
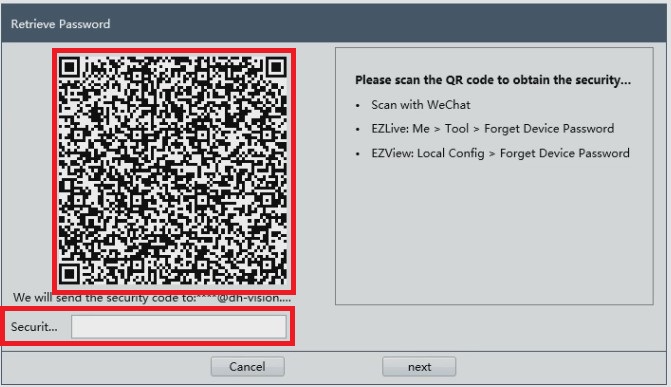
You will be required to have an email set in the NVR to continue. If you have not done so already, please reference Step 2 of Part 1 of this tutorial. Once you have entered an email and click “Forgot Password”, you will be greeted with a Retrieve Password pop up menu.
Step 3
Please reference Steps 3 through 5 of Part 1 of this tutorial for acquiring the security code for your UNV NVR. Please note that, instead of scanning the QR code directly on the NVR itself, you may scan the QR code on the above “Retrieve Password” screen instead. Additionally, once you have acquired the security code for your UNV NVR, you may type it into the Security Code field under the QR code on your web GUI.
Step 4
You will be brought to a screen asking you to change your password.
If there is a field for “Security Code”, please reenter the security code into this field.
New Password: This is where you will type in your new password. Please note that your password must be considered a “STRONG” password to work. A strong password is typically at least eight characters long with a number and special character (!, @, #, $, etc)
Confirm Password: This is where you will retype in your new password in order to confirm it. Please note that your passwords must match in both the New Password and Confirm Password field in order to save correctly.
Part 3: Remote Password Reset (EZCloud)
Please Note: This tutorial assumes you have already created an EZCloud/EZView account and have added your UNV NVR to your account. If you have not done so already, please CLICK HERE for a tutorial on creating an EZCloud/EZView account and registering your device to your account.
Step 1
Open either Internet Explorer or Google Chrome on your computer. In the URL bar, type:
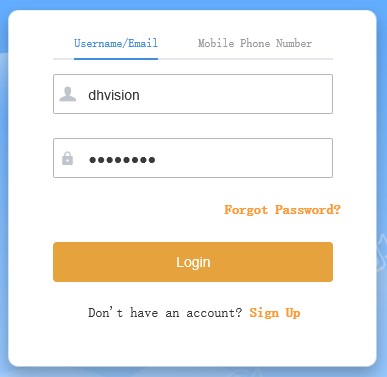
This will bring you to the EZCloud login page. You will need to log into your EZCloud/EZView account to proceed. Type in your username/email and password for your account and click “login”.
Step 2
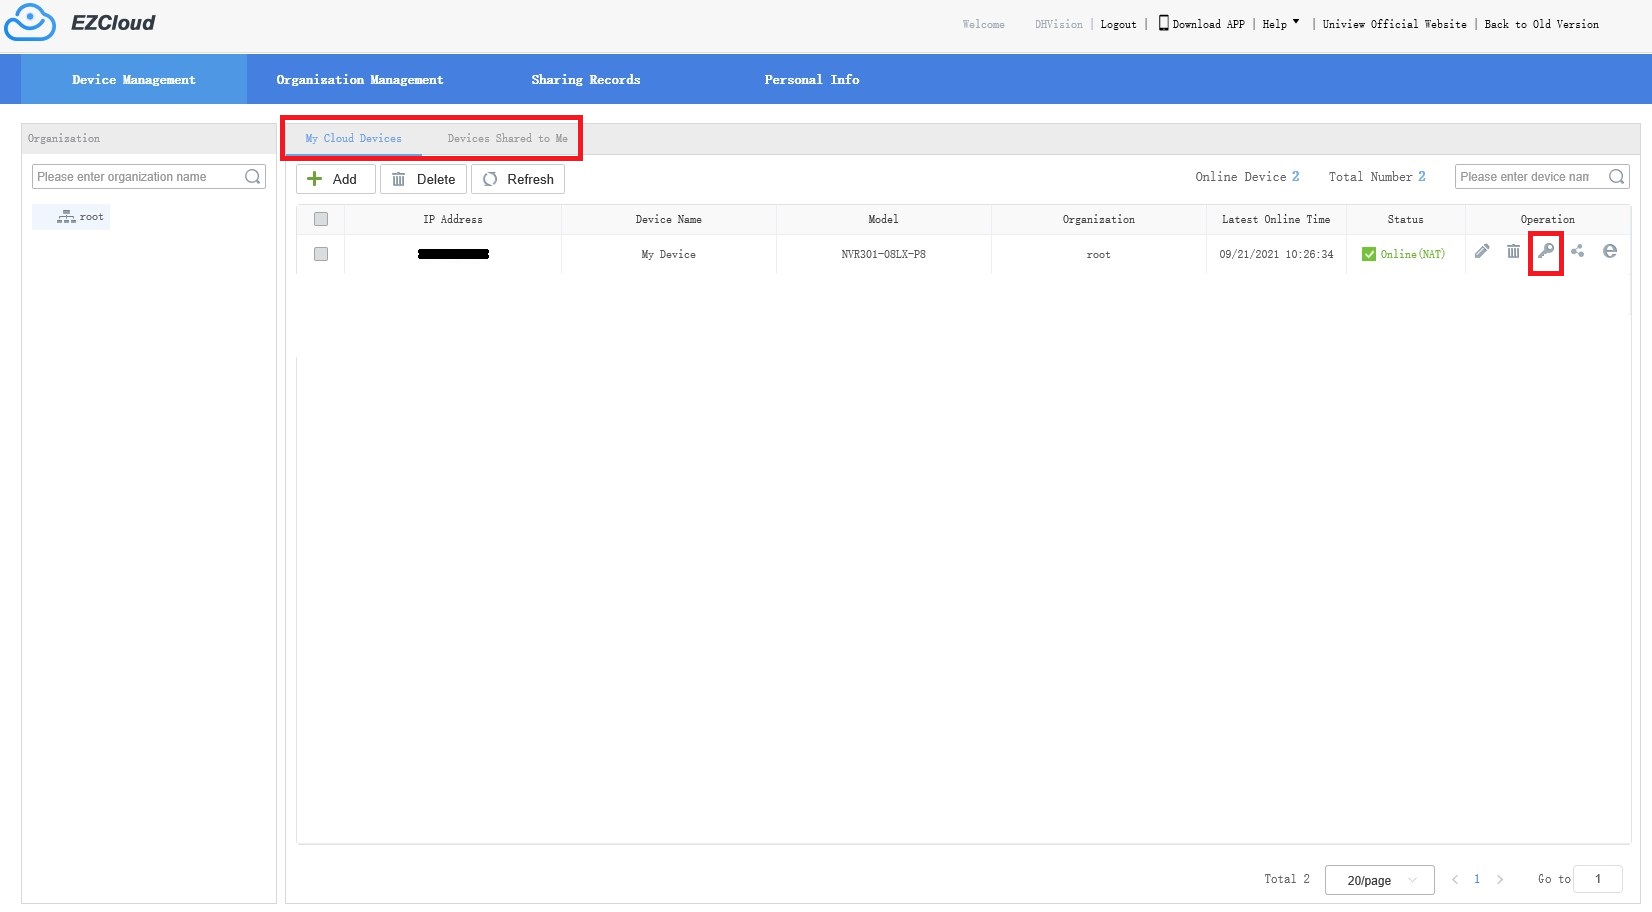
After clicking “Login”, you will be brought to your Device page.
Step 2.1
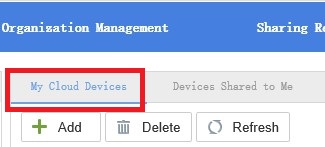
If the device is registered directly to your account, you will see the name of the device in the “My Cloud Devices” menu, which appears first by default. If this is the case, skip to Step 3.
Step 2.2
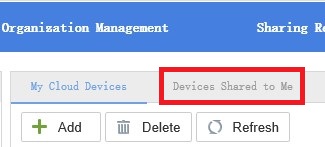
If the device is registered to another account and has been shared to you, you will see the name of the device in the “Devices Shared to Me” tab of your menu. Click there to see your device listed in the menu.
Step 3
You will see your device in the menu. It will have the External IP Address of the device, the Device Name, model and organization, as well as the last time it was accessed online, the status and an operation menu.

Step 3.1
In the “Operation Menu”, you will see 5 icons. For the purposes of this tutorial, please click the icon that looks like a key. This is the “Retrieve Password” icon.

Step 4
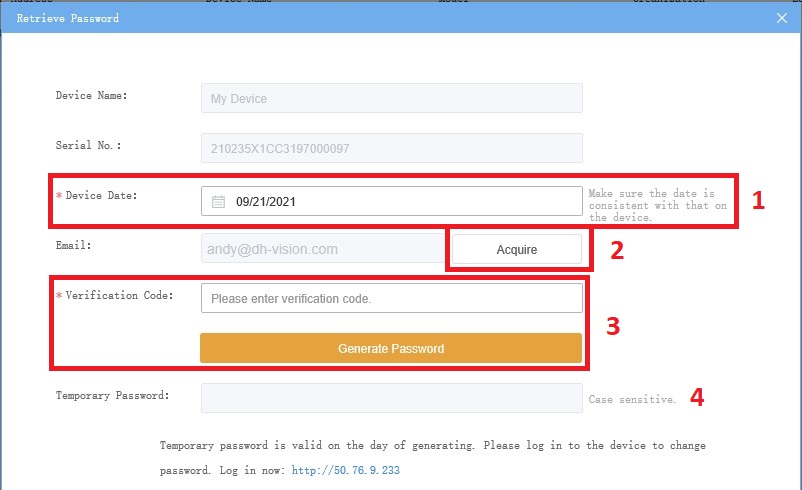
You will be brought to a Retrieve Password screen. On it, you will see your Device Name and Registration Code, which cannot be changed. Additionally, you will see a field for Device Date, your email (which cannot be changed) and a Verification Code.
Step 4.1
First, select the date that your NVR is set to. Typically, this is the same date as real time.
Step 4.2
Click “Acquire” next to the email field. This will begin the process of sending off a verification code to your email address. Please note that this email could take up to 15 minutes to arrive and may send to your Spam/Junk mail folder. Please check these folders if you have not received your email after 15 minutes.
Step 4.3
Once you receive your verification code, type it into the Verification Code field and click “Generate Password”. This will generate a temporary password for your device. Please copy this password to your clipboard or write the password down. Please note that the password IS CASE SENSITIVE, meaning you must enter the password just like you see it, with any capital letters capitalized.
Step 4.4
Once you have copied your temporary code, click the blue hyperlink on the bottom of the menu, next to the words “Log in now:”
Step 5
You will automatically logged into the NVR, as you do not need a password to access the device over the cloud. Once the Live View page loads, click “Setup” on the top of the screen.

Step 6
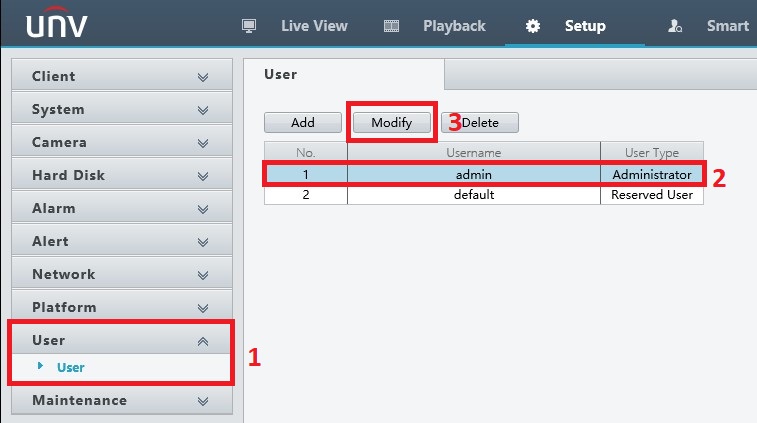
You will be brought to the NVR’s setup menu. For the purposes of this tutorial, please navigate to the ‘user” tab on the left-hand side of the screen.
Step 6.1
Click the “User” sub menu to open the User menu.
Step 6.2
Left click the ‘admin’ account to highlight the admin account. (It will turn blue)
Step 6.3
Click the “Modify button above the account list. This will bring you to the modification screen to update your password.
Step 7
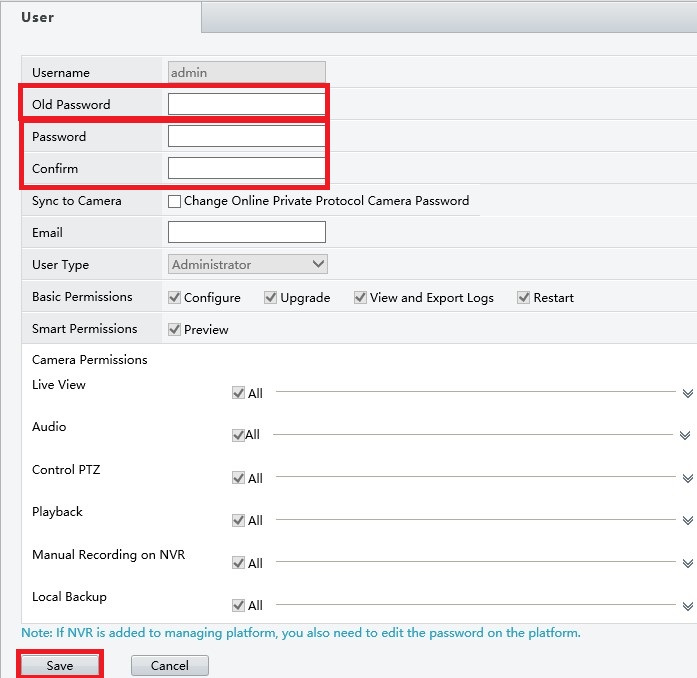
You will have several empty fields in the Modification screen.
Step 7.1
Old Password: Type the Temporary Password into this field. It will act as your old password for the purposes of updating your pasword.
Step 7.2
Password: Type your new password into this field. Please note that your password must be considered STRONG to continue. Typically, a strong password is at least eight characters with a capital letter, a number and a special character.
Step 7.3
Confirm: Re type your new password into the field to confirm it. Please note that your passwords must match in both the New Password and Confirm Password field in order to save correctly.
Step 7.4
Click the “Save” button at the bottom left-hand side of the menu. This will verify and save your new password.