SCS Pro XVR full installation guide, To significantly augment the capabilities of your existing analog setup, look no further than the cutting-edge security camera HD DVR offered by CCTV Security Pros. We empower you to leverage your traditional analog cameras or seamlessly transition to our high-quality HD over coax cameras, ensuring unmatched versatility. With various compatible camera options, such as bullet, domes, and PTZ cameras, you can now achieve enhanced clarity with video monitoring.
Step 1
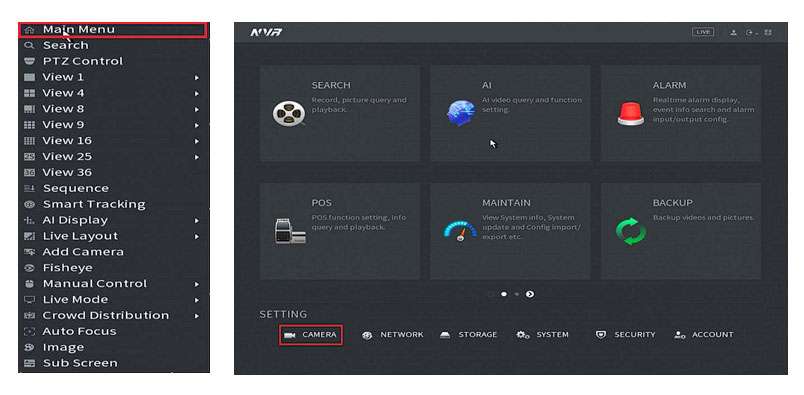
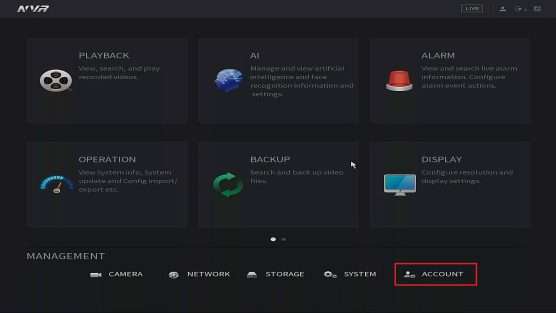
From the Main Menu select Account
Step 2
Select User ➞ Click on Add User to create a new Username and Password
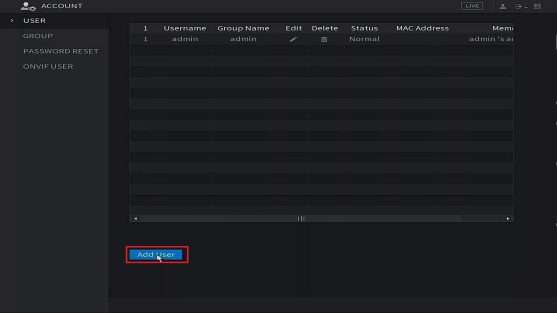
Note: You cannot modify the systems defaulted User Names.
Step 3
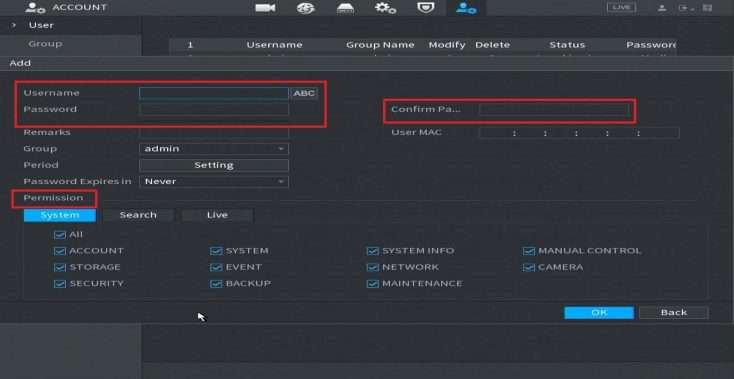
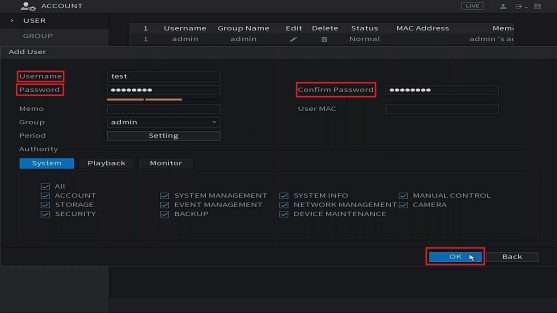
Create a Username and Password for your new account
Select the permissions you would like the account to access
Step 4
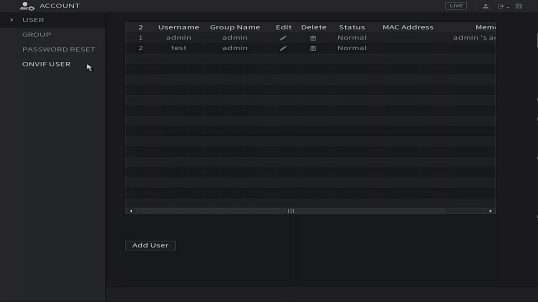
If successful, you should now see your new user listed below
Audio Recording Setup
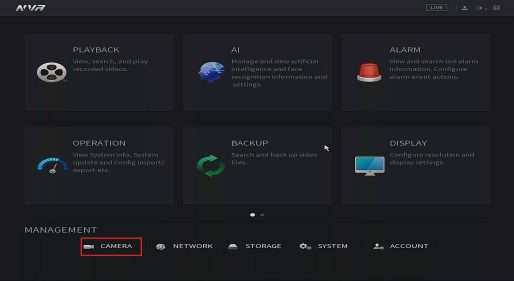
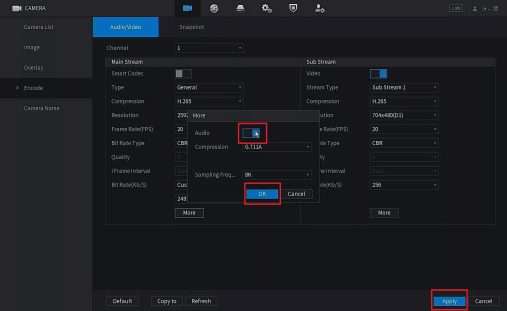
From the Main Menu, go to Camera->Encode
Click the More Settings option
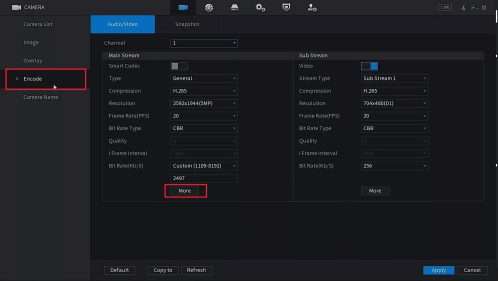
Click Audio on, Okay and then, Apply
SCS Pro XVR full installation guide
Read More : Dahua NVR XVR Basic Setup Initial Setup
How to Setup Push Notifications via SCS Pro
The following guide will apply to the SCS Pro App on the iOS App Store or Google Play Store.
Start by opening the App. On the Home screen you will tap on the … next to the DVR/NVR you want to enable alerts on.
Then you will tap on Device Details.
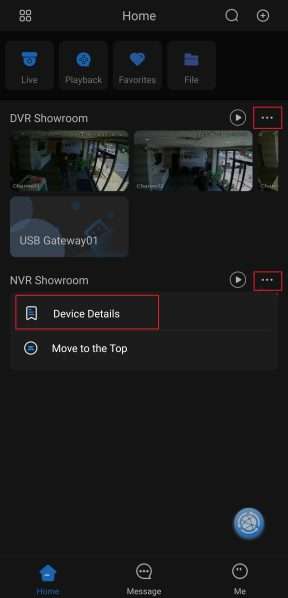
On the Device Details page you will tap on Multi-channel Alarm Subscription.
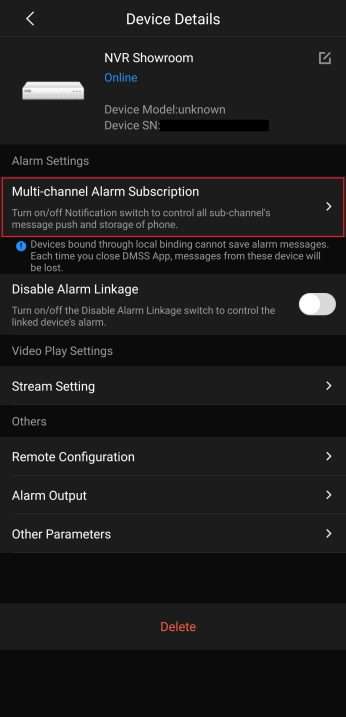
Enable the alarm notifications by sliding the switch at the top of the screen.

Select which type of alert you would like to enable below. This example will show motion detection alerts.
Select the cameras you want to enable Motion Alerts for by tapping on the circle on the right. You can also tap on Select All in the top right if you want to enable alerts for all your cameras. Once you have made your selections tap on the back button on the top left.

Tap on Save at the bottom of the page.

You will now be receiving alerts on your mobile device. You may need to alter your SCS Pro App settings inside of your phone or tablet to allow notifications.
Changing Camera Names
This guide will assist you with changing the name of the camera in the Live View Display.
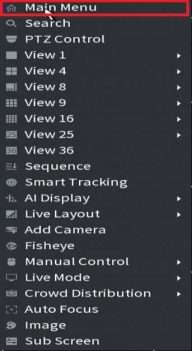
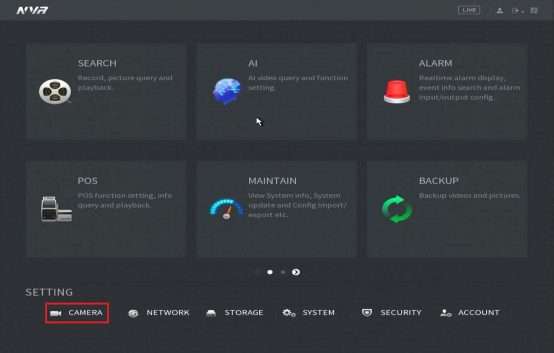
First you will need to access the main menu by right clicking anywhere on the screen. Left click on Main Menu and enter your password. Then click on Camera under settings.
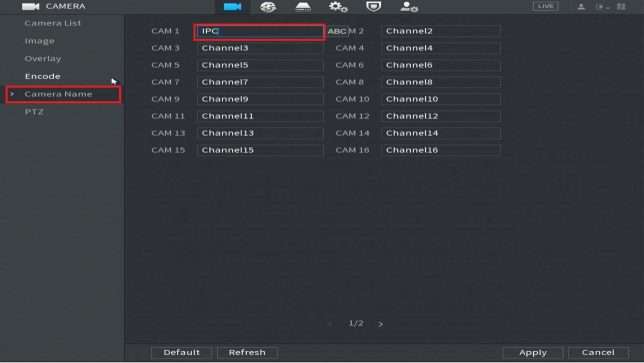
In the camera settings click on Camera Name on the left .You will see a list of all the camera channels with their default names. Click in the text box next to the camera you want to modify and type with the on screen keyboard.
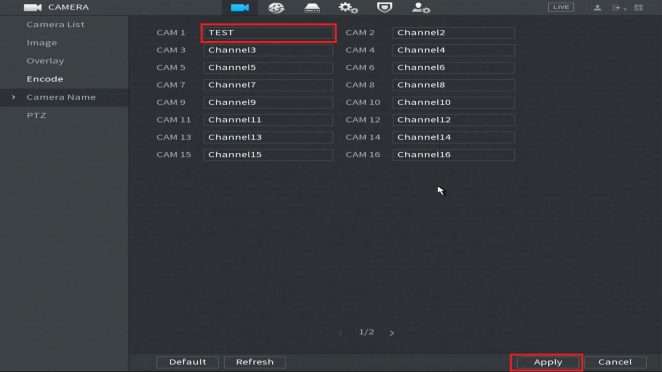
For this example we will name the Channel TEST and then click the apply button on the bottom right.
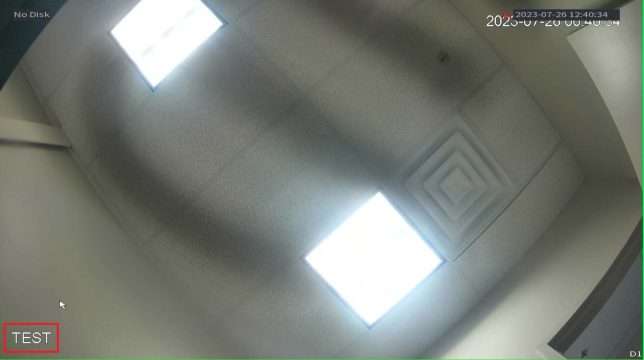
You should now see the updated channel name on the Live View screen for that camera.

Go to https://www.noip.com and Sign Up for an account.
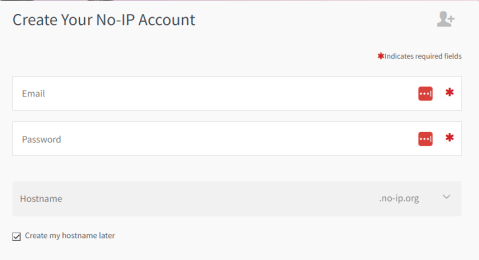
Make sure to Check the box “Create my hostname later” and create your account.
Step 2
Once your account is created and verified proceed to the Login Page https://www.noip.com/login?ref_url=console
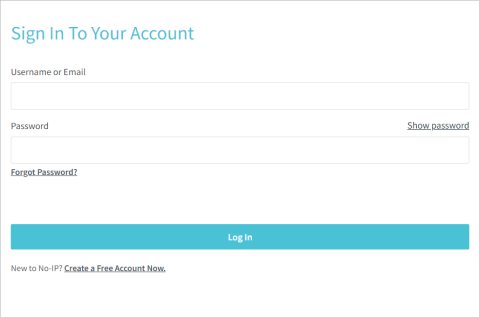
Login with your account from here.
Step 3
Once you login you will be greeted by the dashboard, from the top left proceed to Account > Account Info page.
From the Account Info page, you will need to go to username and add a username. See Figure 1 below. This is for your device to login with later.
Once done, the NVR/DVR can be bound to the account and trace the Public IP from your Local Network and send that information to NOIP.
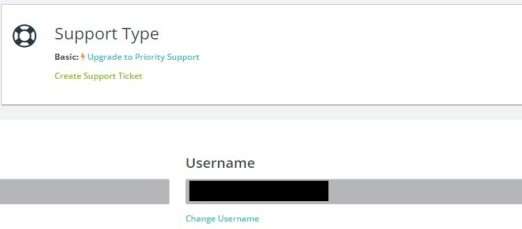
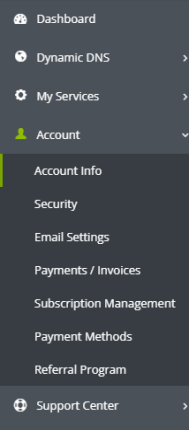 Figure 1
Step 4
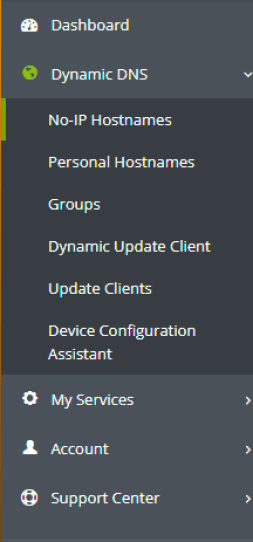
Once the account info has been configured go to Dynamic DNS > NOIP Hostnames and create a Hostname
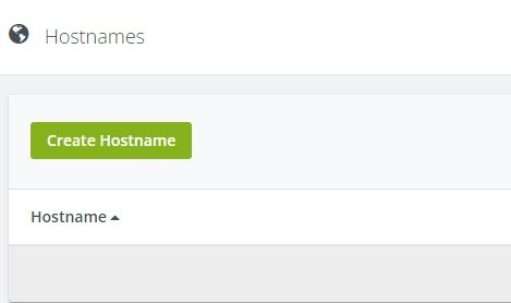
When creating a hostname, you would put in the hostname spot a name or address that is easy to remember. For example, if the hostname is myhost211 and the domain is set to ddns.net when it is created it will look like “myhost211.ddns.net”
See Figure 2
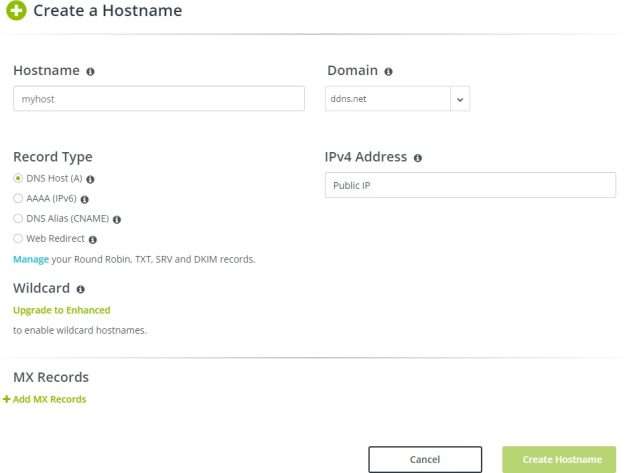

Figure 2
Step 5
Once your DDNS is created, you can go into your system’s Main Menu > Network > DDNS page and select NOIP for the DDNS type. Then you would type in your login information to the username and password area of the system and type in the full domain name.
i.e., Username: (NOIP Username) Password: (NOIP Password) Domain: “YourNOIPDomain.quickddns.com”
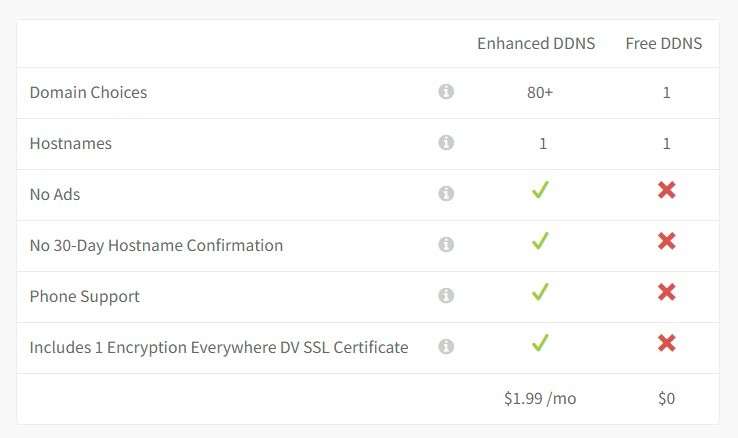
If setup correctly NOIP will Dynamically update the IP as needed on its own. NOIP is a subscription service so if you do not have a subscription you will need to manually re-apply for your DDNS once every month.
To enable this on older DVR’s pre 2015 you may need to go to Settings > Network > Advance Settings > DDNS and Double click on the setting then Enable it.
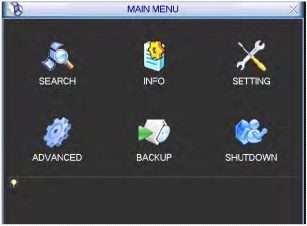
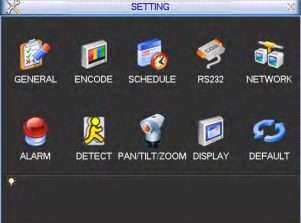
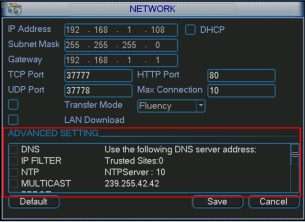
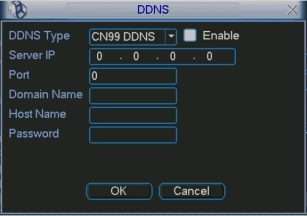
With the DDNS configured on the system you will need to then port forward your router with either the TCP or HTTP ports for your system.
The Default ports that need to be opened for the Blue / Black line systems are TCP 80 for Web and TCP 37777 for the Apps.
You can learn more about Port forwarding on your router here.
How To Set Up Port Forwarding – Port Forward
With the steps above correctly setup your system will be configured to the NOIP Server.
If you have any questions or issues please contact our Support team at
support@cctvsecuritypros.com or (888-653-2288) ext 3
How to Reset Password via SCS Pro
The following guide will apply to the Blue and Black Line recorders.
If using a Blue line NVR, make sure all cameras are connected.
Start by Right Clicking with your mouse anywhere on the screen. Then select
Main Menu
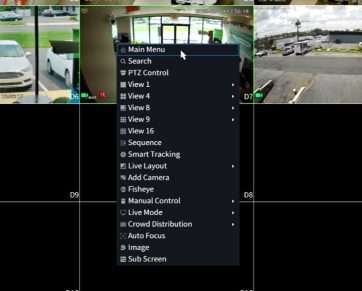
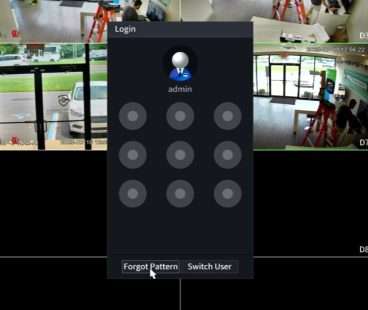
If you previously setup a Pattern Login. You will select Forgot Pattern
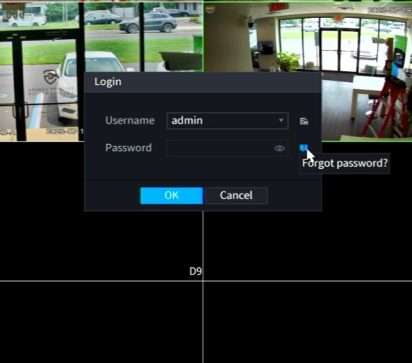
On the Login Screen select the Forgot Password option on the right..
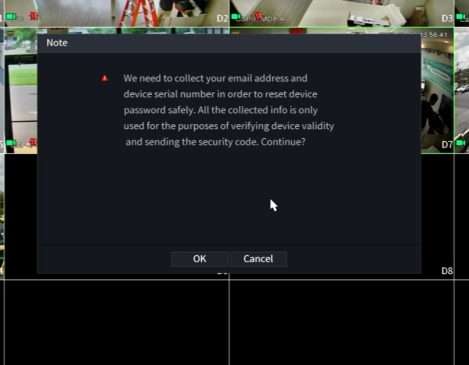
On the Next Page. Please read and select OK at the bottom
This is the Password Reset screen. This screen shows a QR code on the Left that you will scan with your Smartphone or Tablet using the SCS Pro App.
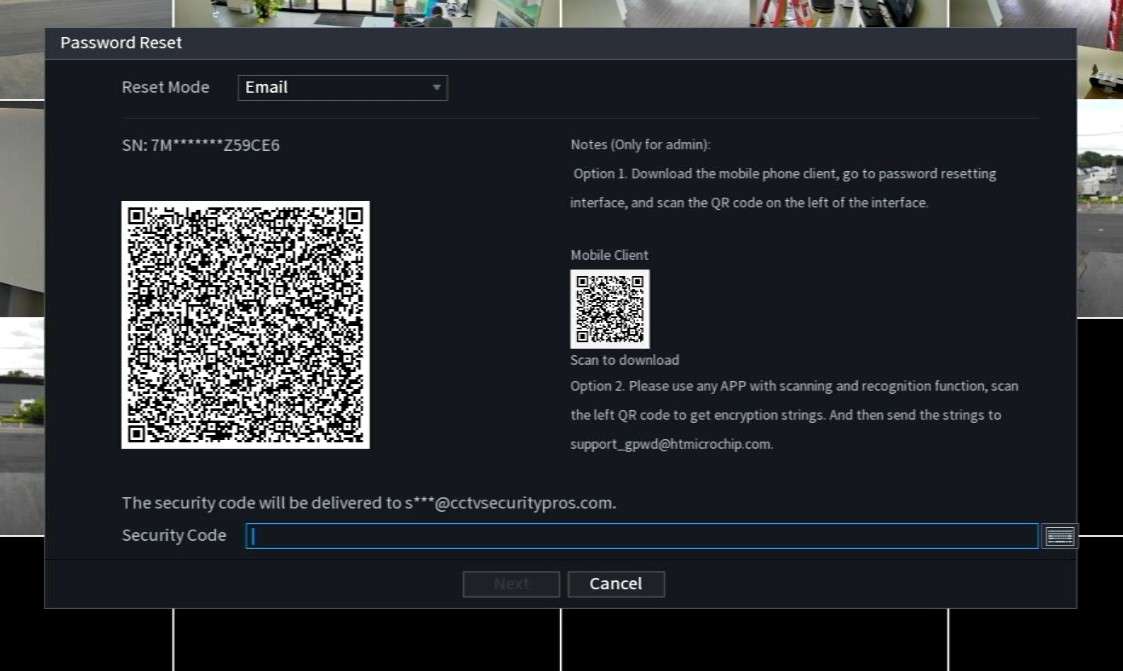
Once correctly scanned with SCS Pro. The email at the bottom of your screen will receive a Security code to reset your password. Please ignore the Mobile Client QR code on the Right.
The steps on the next page will be using the SCS pro application on your Smartphone or Tablet
Once you have SCS Pro installed and opened. Click Setting at the bottom right.
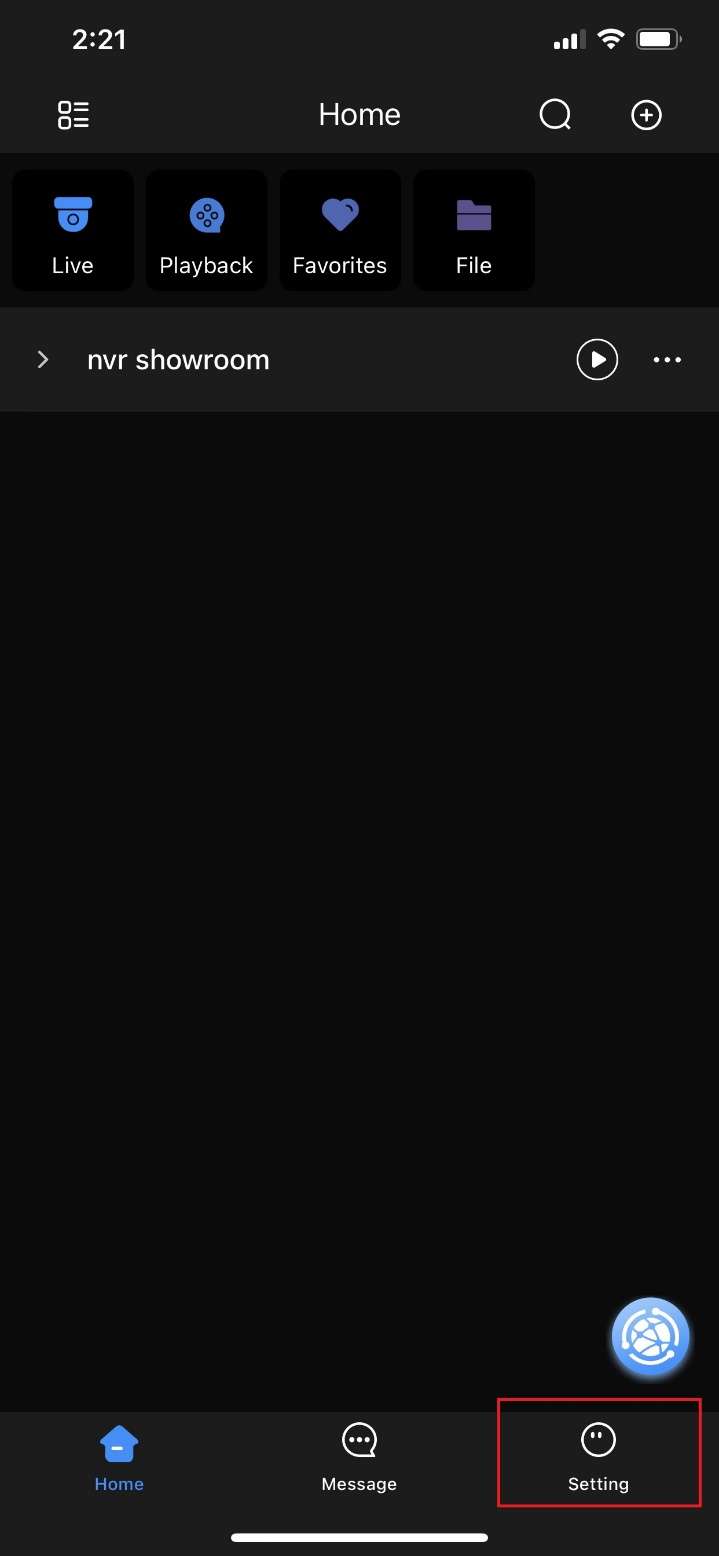
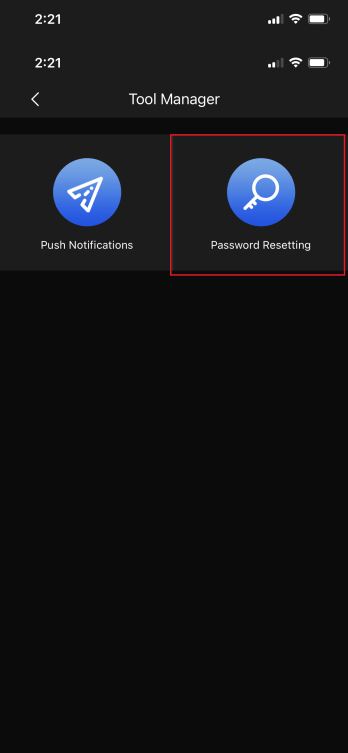
Tap on Tool Manager at the middle of the page.

On this page, Select Password Resetting. This will bring up your Camera to scan the QR code. Please allow any permissions for the app.
You can then Scan the QR code on the Left of your Password Reset screen.
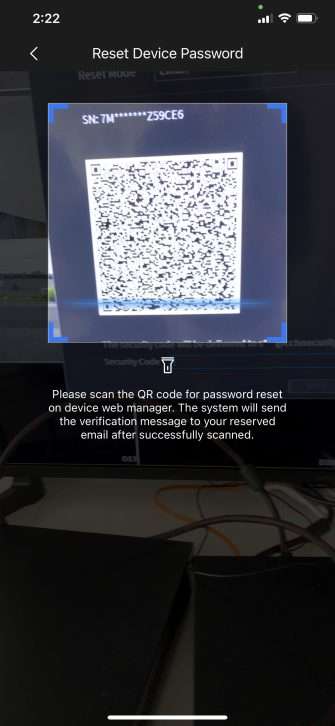
If scanned correctly, a Security Code will be sent to the email at the bottom of your Password Reset screen. Type the security code in at the bottom and create a new password. If asked to Sync Password with Remote Devices select Yes.
Any issues please contact us at Support@cctvsecuritypros.com
SMTP Setup Guide for
Blue/Black Line NVR on Gmail
Step 1.
Go to https://myaccount.google.com
Navigate to Security > How you Sign in to Google and Enable Two Step Verification.

Once the 2-Step Verification is Enabled you need to go into your Google Account Security page and Search for App Passwords at the top
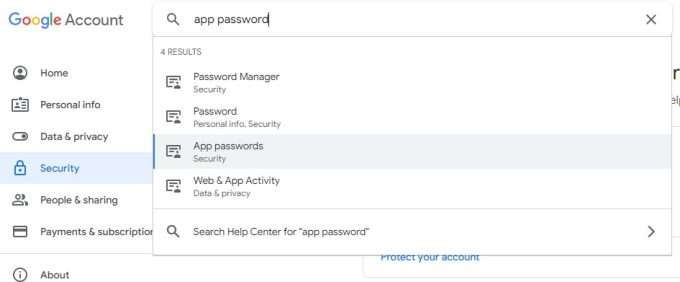
Select a Custom Device from the Right Dropdown Menu

Once done click Type in a name for the Device and click Generate
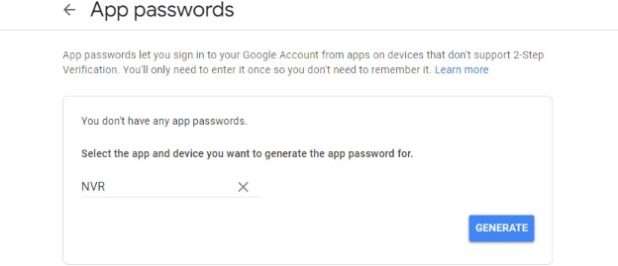
Copy the Generated Password Google gave you and save it somewhere safe.

You will need the password here for the next step.
From the system interface you will now navigate to the Main Menu > Network > Email
Input the following account information as listed in the image below.
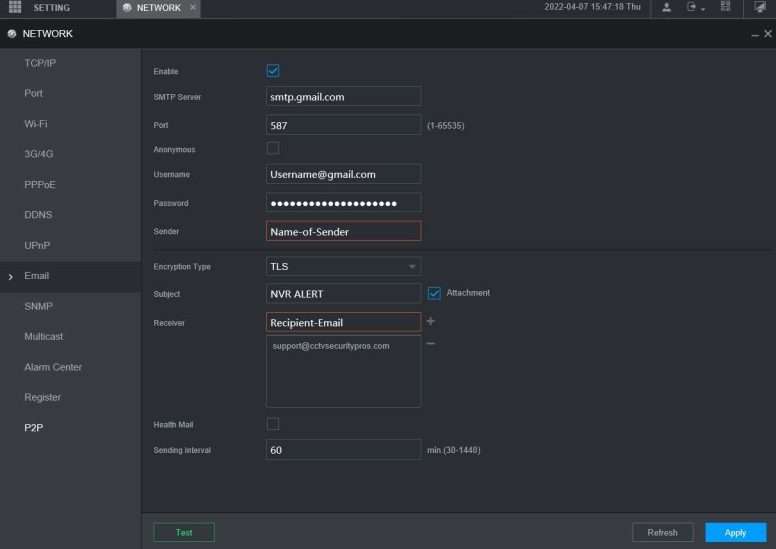
Perform a test to confirm you are able to send emails from the SMTP Service.
You can set up Alarm Event / Trigger Actions for the cameras on their corresponding Alarm
or AI page.
For Example on the system under Main Menu > Alarm > Motion Detection > More you can enable it to Send Email alerts whenever there is a motion event.
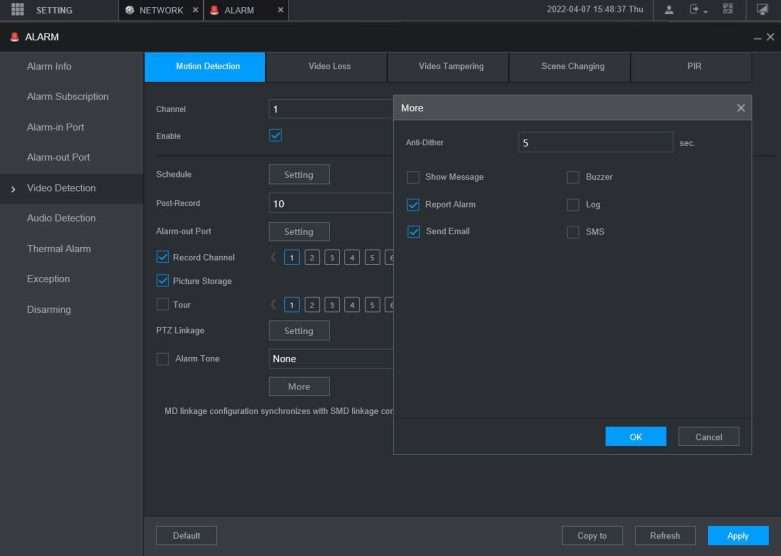
This can be applied to any screen with the Send Email function.
With that you should be able to configure your Blue and Black Line system for email alerts. If you have any questions or issues please contact our Support team at support@cctvsecuritypros.com or (888-653-2288) ext 3
Date & Time Setup
In order to change the Date and Time you will need to go to Main Menu->System
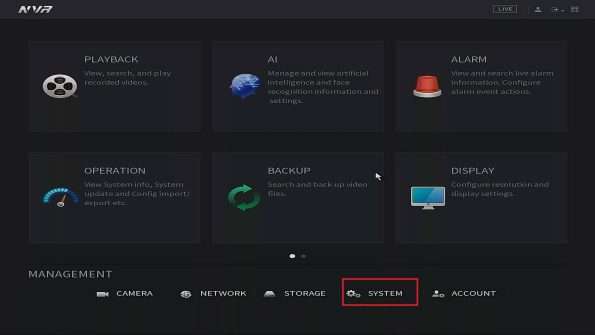
Inside of System Settings navigate to the General Tab on the Left and Date & Time. Enter in your System Time. You may change the Format of the system time from a 24 Hour clock to a 12 Hour clock if you prefer. You may enter the Daylight Saving Time settings under “DST”.
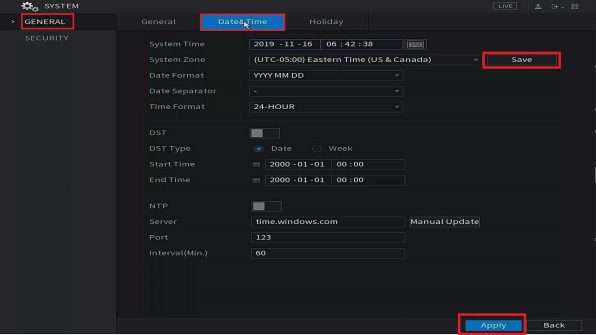
Be sure to Save your System Zone and click Apply at the bottom when you are done.
Remote Viewing on Mobile Devices
To access your recorder remotely you must first connect it to your modem or router using an Ethernet cable and power on the recorder.
Go to Main Menu->Setting->Network–TCP/IP and Enable “DHCP” Inside of the Network settings and Save.
*Some models require you to click “Edit or Modify” next to NIC1 to find the DHCP option to enable.
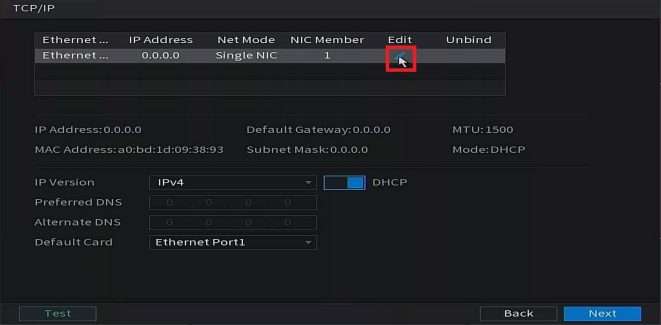
Make sure DHCP is enabled. Click OK at the bottom.
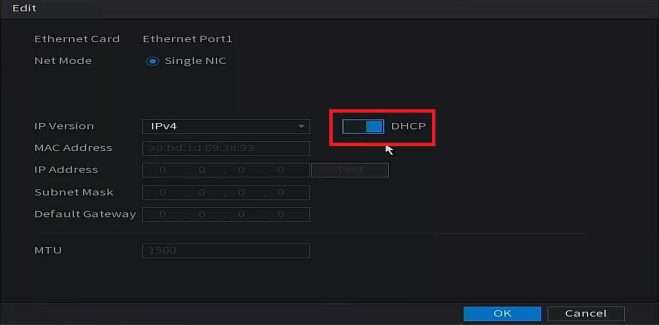
Be sure to Save / Apply these settings before moving on.
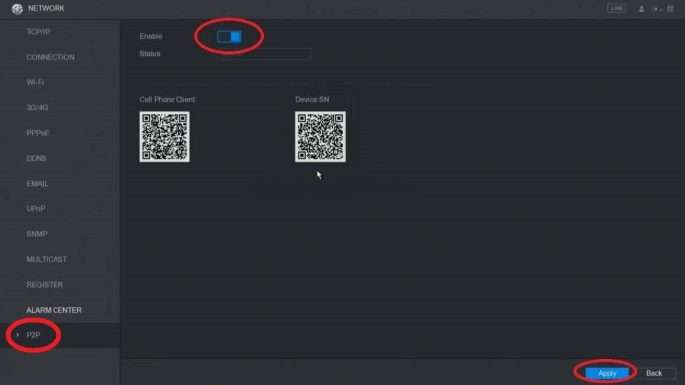 Navigate to the Main Menu-> Setting -> Network -> P2P (sometimes called Easy4IP) Enable P2P at the top of the menu and select Apply
Your P2P status will show “Online” now. If P2P shows “Online” you can proceed to the next steps in this guide.
If you are still getting an “Offline” status
You may want to leave this menu up since we will be using the Device SN QR code in the next few steps.
Downloading SCS Pro on your Mobile Device


 You must use our mobile application SCS Pro on your iOS or Android device. This can be found in the iOS App Store or the Google Play Store. Search for SCS Pro and download our free application.
Launch SCS Pro once it has been downloaded from the App Store or Play Store. Select your Region / Language. Once you are on the Home section of SCS Pro. Click on the + Icon at the top right corner. Select SN/Scan. Scan the Device SN QR code found on the right hand side of your P2P menu on your DVR or NVR. This screen may still be up on your system if you are following this guide. Once the code has been scanned you will see the Device SN appear on your device. Click Next.
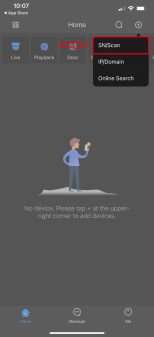
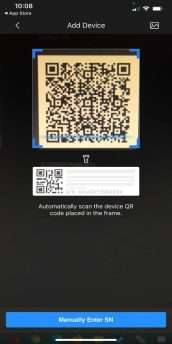
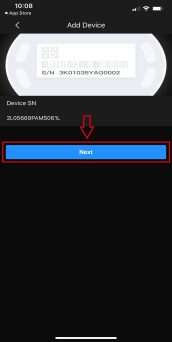 1. 2. 3.
Select DVR/XVR or NVR. Enter a Device Name, your username (admin) and the Password you use to log into your DVR or NVR with. Click Save. The Live View will appear once the device has been saved.
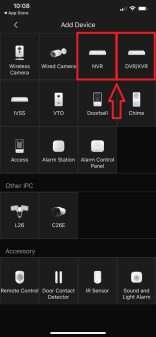
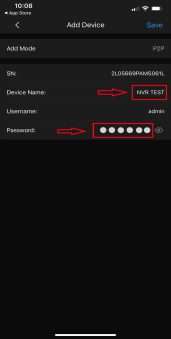
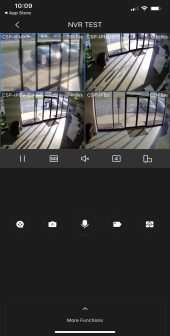 4. 5. 6.
Note: If your P2P status shows “Offline” your cameras will not connect. Please make sure your system is connected to a router or modem with Internet service with an Ethernet cable and that DHCP is enabled.
How to Setup Motion Detection Regions
The following guide will show you how to adjust the Motion Detection Region settings on your system
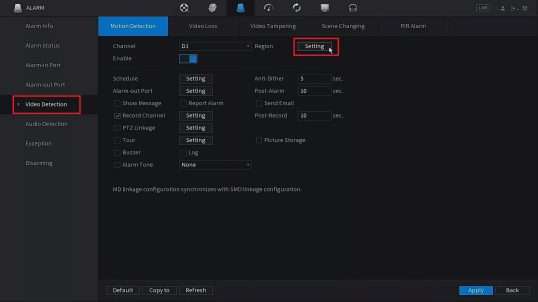
Navigate to Main Menu->Alarm
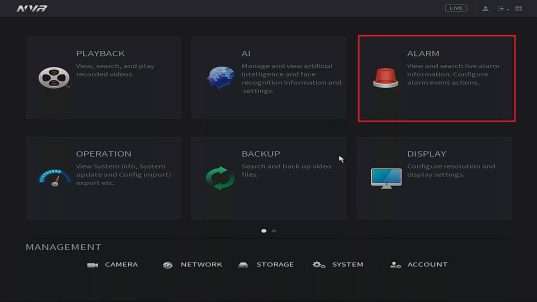
Select Video Detection on the left Column. Then you will select Setting next to Region
on the right hand side
Once you select Setting you will see the camera come up in full screen with Red blocks. At the top of the screen you can adjust the Sensitivity and Threshold of the Motion Detection.
This should be adjusted if you feel the Motion is not recording accurately.
Sensitivity is how sensitive the motion detection will be. The lower the number the less recording you will get. Recommended range is 40-80.
Threshold is how much motion needs to occur in order to trigger the recording. Adjust this only if you plan on recording larger objects (Cars/trucks) only and would like to filter out smaller objects (People/Animals)
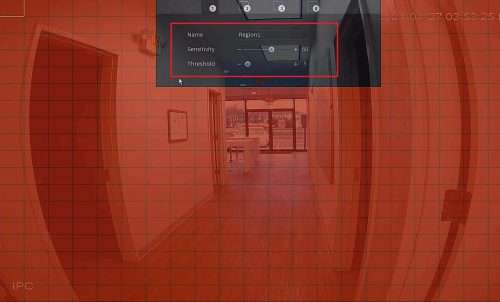
The areas in Red is where the camera will detect motion. This means the recording will only start when motion occurs in the Red areas. If motion occurs in an area that is not Red, the system will not record that event. You can click and drag with your mouse to make the adjustments.
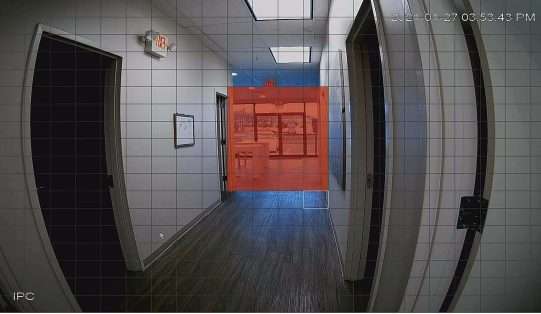
Once you have created the areas that you would like recorded when motion occurs,
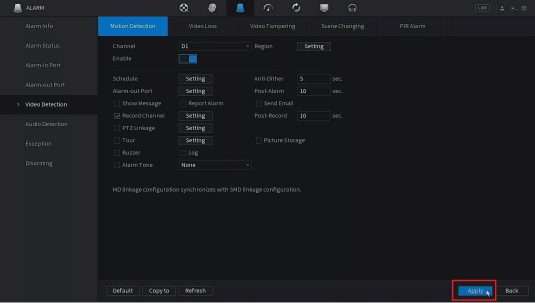
Right Click with your mouse and then select Apply to save the settings.
Motion Detection Setup
Your DVR/NVR is setup to record 24/7 right out of the box. There is no need to follow this guide if you would like to continue recording 24/7. If you would like to conserve some of your Hard Drive space please follow the guide below.
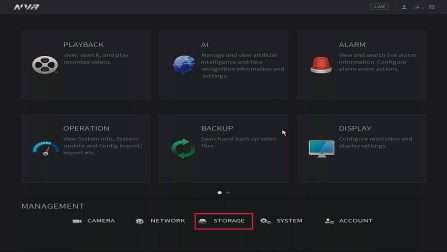 This guide will show you how to set up Motion Detect. Navigate to the following menus, Main Menu → Storage
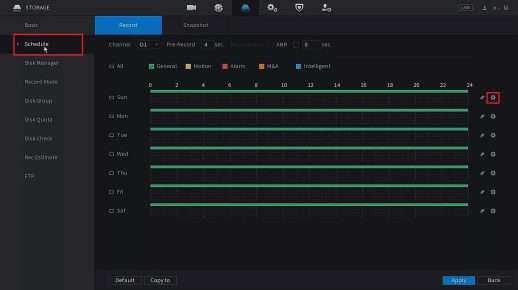
Inside of Storage, Click on Schedule on the left column. Now Click on The Gear Icon on the right hand side of Sunday
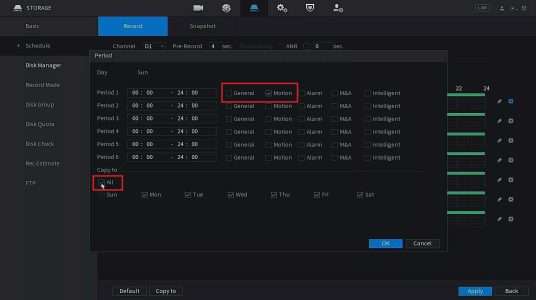
Inside of the next menu you want to remove the check box from General and place in next to Motion under Period 1. Be sure to Copy ALL days of the week at the bottom. Press OK once it looks like this below.
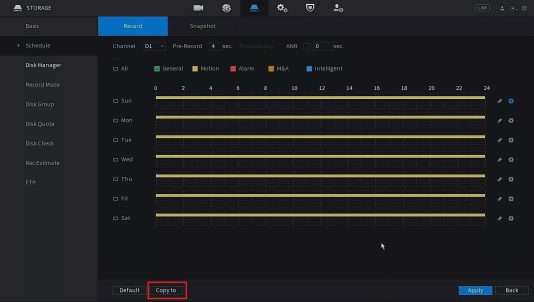
Your Schedule Menu should look like the one below. Be sure to Copy to any Channel you would like set to Motion Detection at the bottom left of the screen. Click Apply.
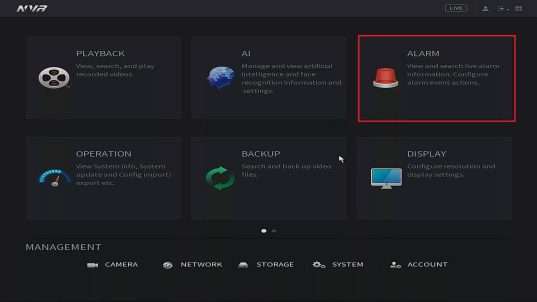
We have now successfully setup a Motion Detection Schedule. We now want to make sure Motion Detection is Enabled for each Channel. This can be done by going back to the Main Menu → Alarm
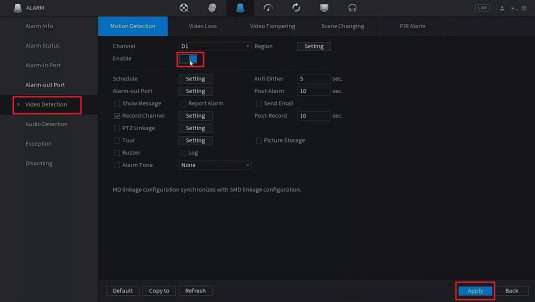
Inside of the Alarm Settings Click on Video Detection. Make sure to check each Channel number and Click the Enable Check Box. Do this one Channel at a time. NOTE: Do not use the Copy button on this menu! Apply once all Channels have been enabled.
![]()
Port Forwarding Guide
Step 1) Make sure you have an Ethernet cable connecting your DVR and your router. Step 2) Enable DHCP mode on your DVR in the Network tab and reboot the system. Step 3) Go back to the Network screen and make note of the IP address.
Step 4) Enter the IP address of the DVR in to your web browser to verify it’s connected with Web Service.
Step 5) Log in to your router and find the Port Forwarding section, if you are unfamiliar with configuring your router, contact an IT professional.
Step 6) Forward ports 80/37777 using TCP protocol to the IP address of your DVR (Info and services for port forwarding can be found at www.portforward.com)
Step 7) Use www.canyouseeme.org to test the ports are open, you should see ‘Success’.
Step 8) Your public IP address may change so we recommend utilizing a Dynamic DNS service like Quick DDNS or NO-IP.
PLEASE NOTE: We recommend using Peer-To-Peer (P2P) instead of a port forwarded connection for security and reliability reasons. P2P is available on most CCTVSecurityPros models as of 1/1/16.
 Sharing Remote Access / Configuring User Permissions
This guide will show you how to share remote access to your NVR/DVR and also how to configure User Account permissions.
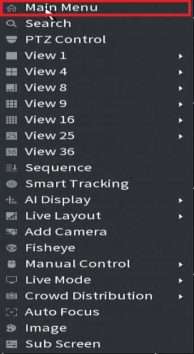
First you will need to access the Main Menu by right clicking anywhere on the screen and then left clicking the Main Menu option.
Once you are logged in, you will select Network under settings.
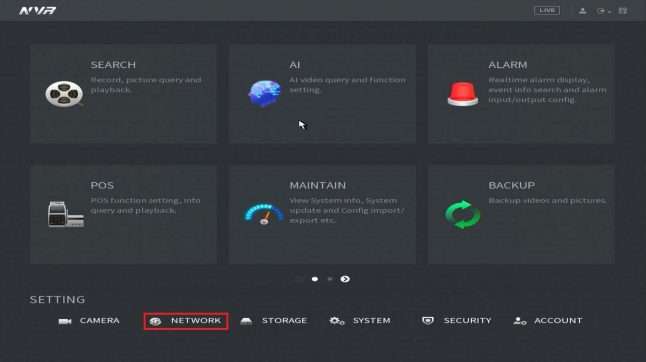
In the Network Settings you will select P2P on the left hand side.
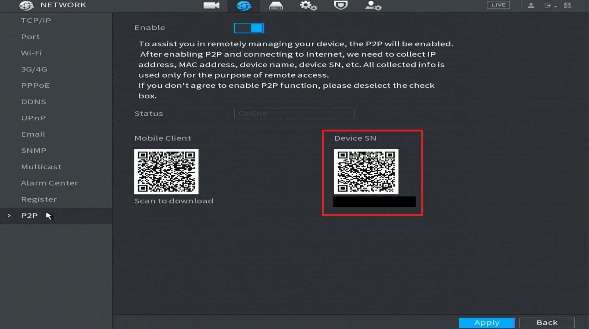
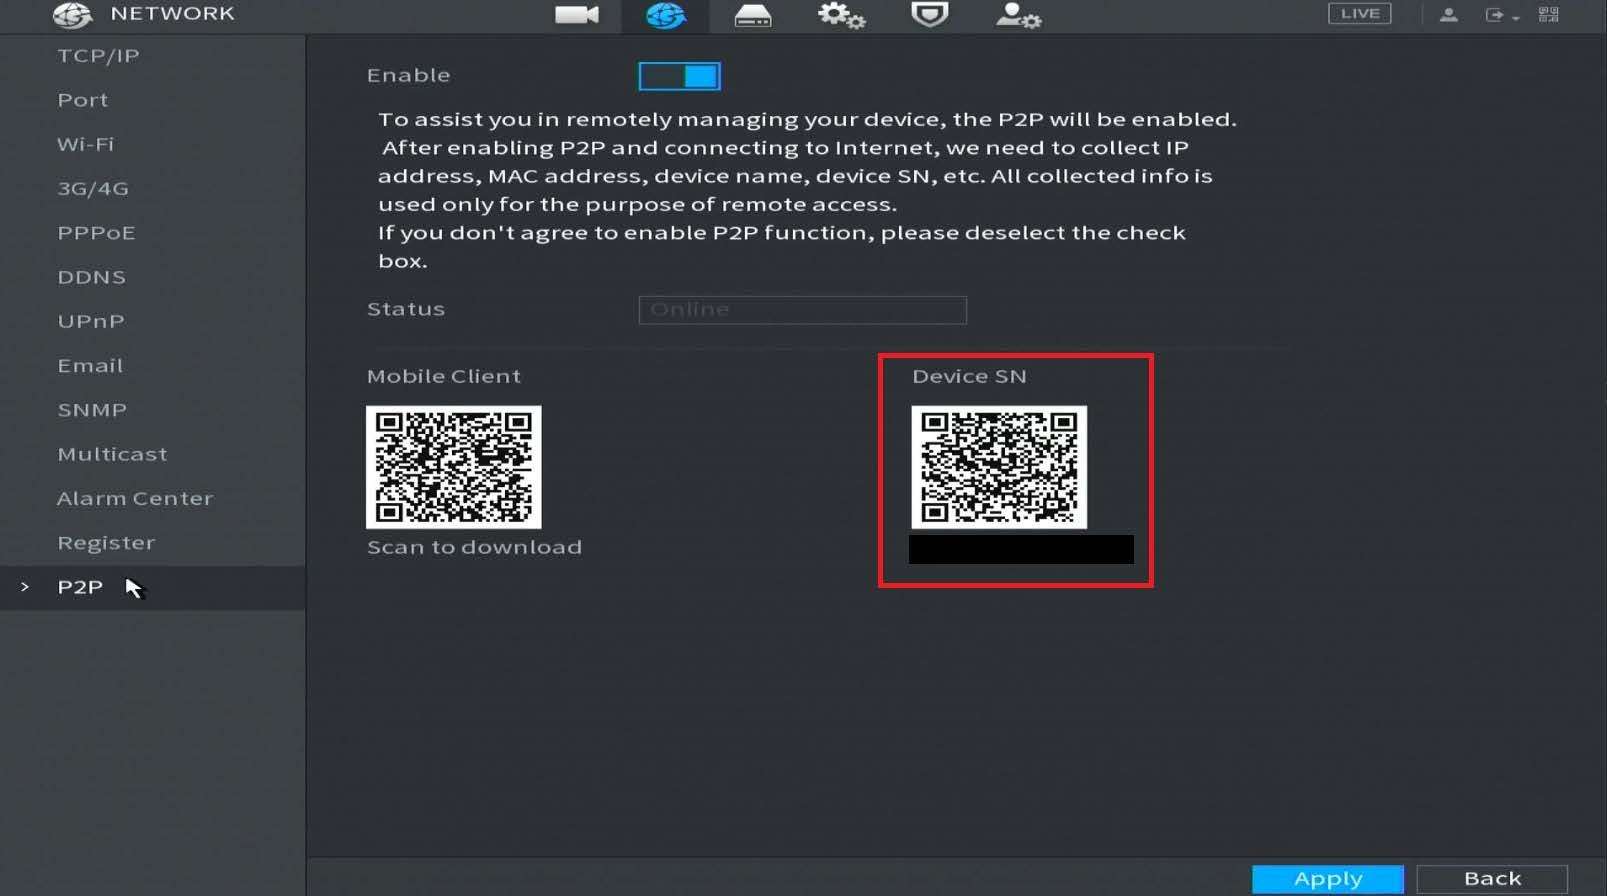
You will find the Serial Number underneath of the QR code labeled Device SN. You can scan this QR code with SCS Pro or DMSS or you can manually enter the Serial Number. If you decide to manually enter the Serial number, keep in mind that no Serial Numbers will use the letter O, it will always be a zero.
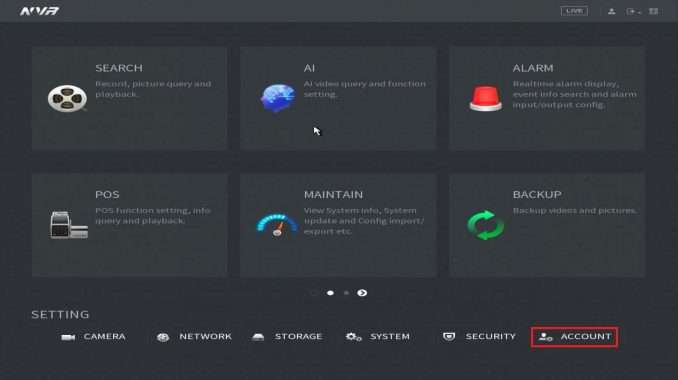
To configure a new user account you will go into the Account Settings on the Main Menu.
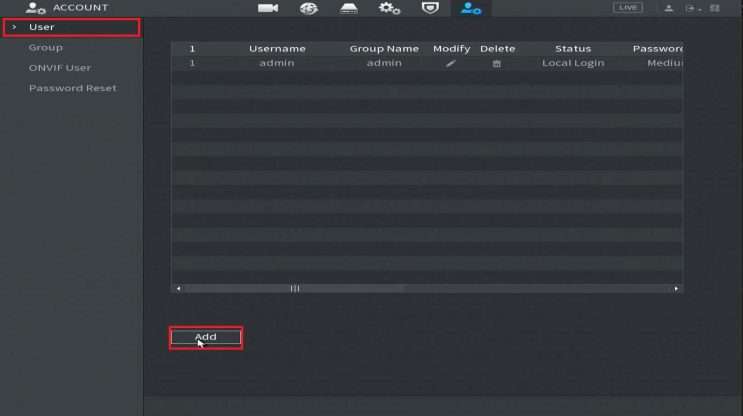
In the Account Settings you will go to the User tab and click Add at the bottom.
In the Add window you will create the Username, Password, Confirm the Password and then under Permissions you can customize what settings and cameras the User has access to.
