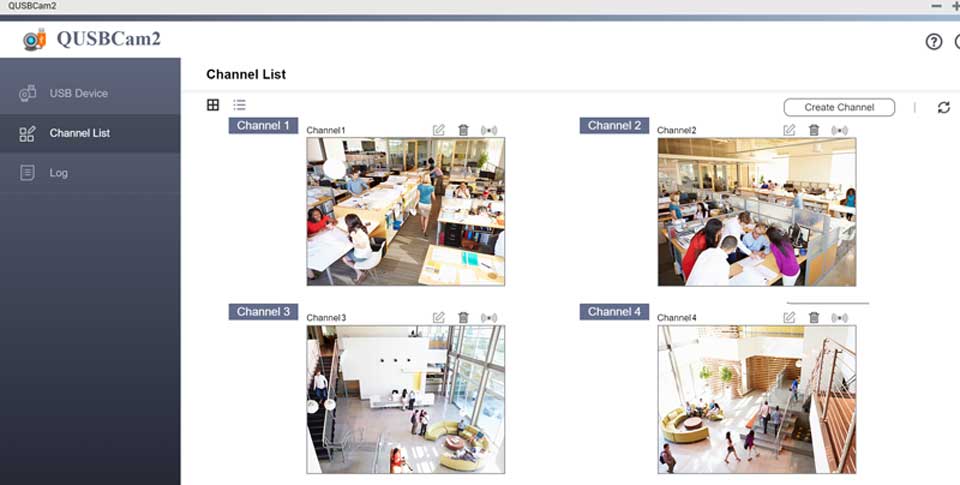
How to use Webcam on Surveillance Station on QNAP NAS? This tutorial is only for QUSBCam. QNAP has released QUSBCam2, an app that allows USB cameras to be used as remotely manageable IP (ONVIF) cameras. QNAP recommends using QUSBCam2 to reduce CPU usage, improve system stability, and simplify your surveillance setup.
Overview
Video surveillance systems can sometimes be too expensive and difficult to maintain for general home users. By supporting webcam monitoring & recording, QNAP Turbo NAS offers an affordable and easy-to-use option for home and small office security. The Surveillance Station app on Turbo NAS is capable of 24/7 recording, taking screenshots, and allows you to remotely view live video streams and recorded files anytime, anywhere.
Webcam surveillance requirements
You will need a webcam with a built-in UVC (USB Video Class) driver. You may refer to the following lists for compatible webcams:
Please note:
How to use Webcam on Surveillance Station on QNAP NAS?
Read Also : Dahua XVR Remote Access Full Guide
Configure Surveillance Station for webcam recording
1. Connect a USB webcam
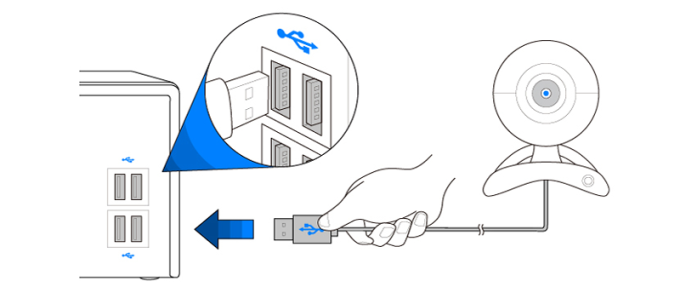
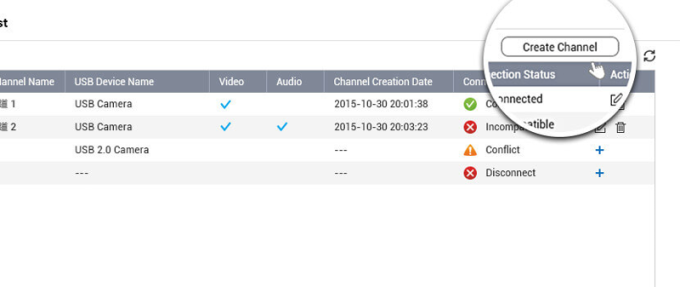
Connect a USB webcam to a USB port on the Turbo NAS. If the webcam is supported, it will be listed as a log showing a generic UVC camera in “Control Panel” > “System Settings” > “System Logs” on the NAS.
2. Install the QUSBCam QPKG from App Center (either Automatically or Manually)
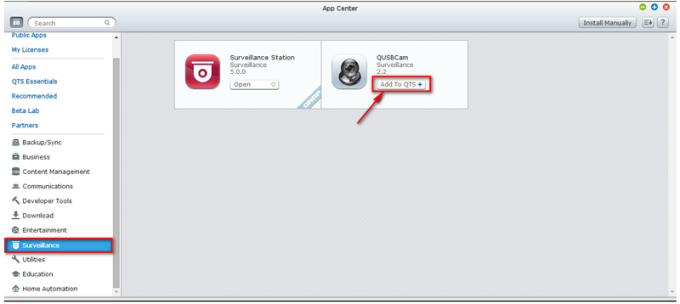
Automatic installation: Install the QPKG from “App Center” > “Surveillance” > “QUSBCam” of the NAS.
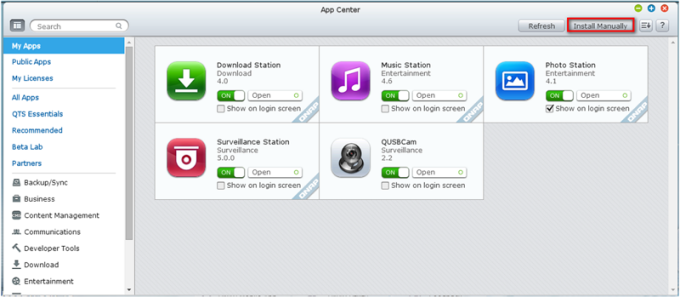
Manual installation: Download the QUSBCam QPKG from the App Center on the QNAP website. Then you can install it by clicking the “Install Manually” button and by selecting the location of the QUSBCam QPKG to start installing.
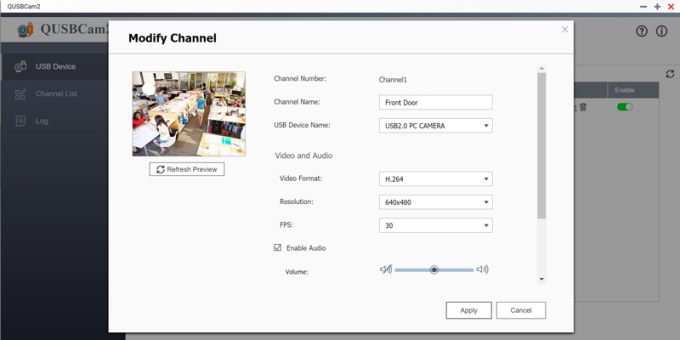
3. Configure webcam in QUSBCam
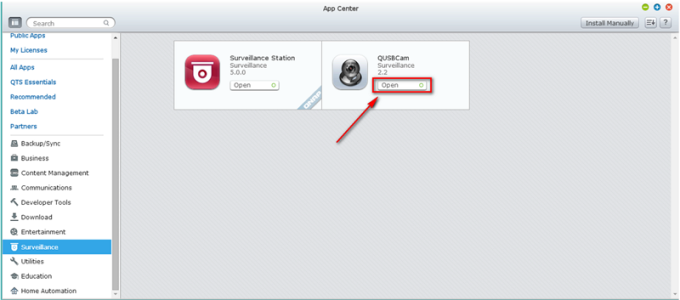
First, open “QUSBCam”.
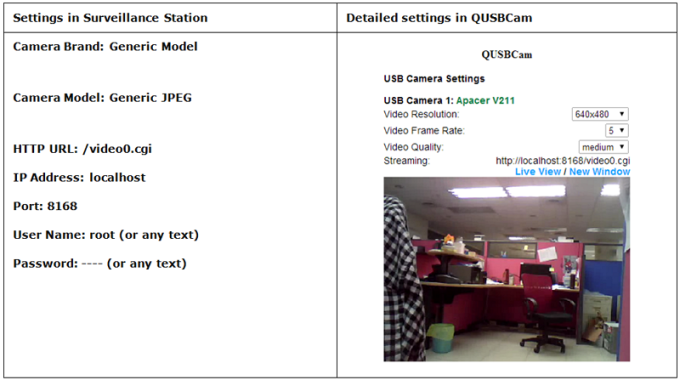
Video settings can be configured here.
4. Configure Surveillance Station
a. Install Surveillance Station
Please note: To ensure proper operations of Surveillance Station, we recommend rebooting the Turbo NAS after its installation is completed.
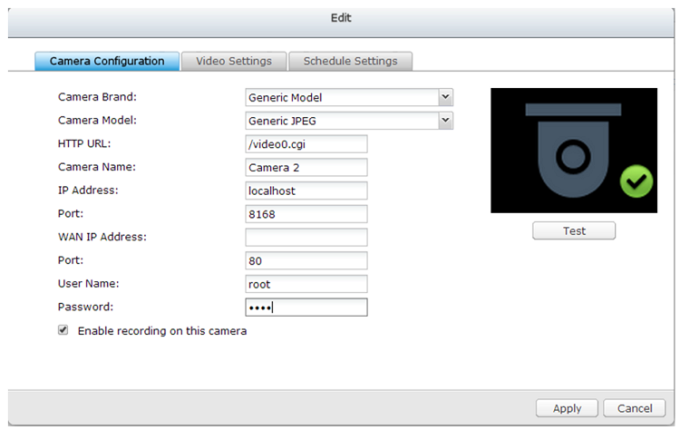
b. Configure the webcam on Surveillance Station with required settings: (Please check the detailed settings in QUSBCam, “HTTP URL” may vary by different situation.)
Please note: Before applying new settings, you can click “Test” on the right to check that the connection to your webcam is successful.
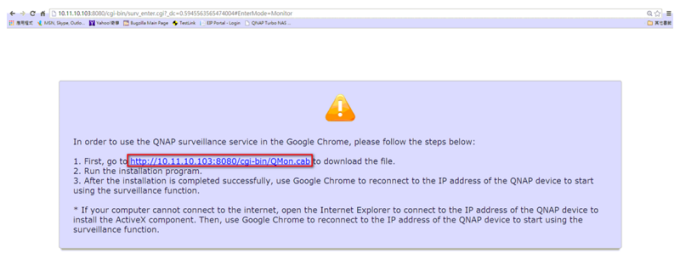
After you have added the USB webcam camera to your Turbo NAS, go to the “Monitor” page. If it is your first time accessing this page in your web browser, you will have to install an ActiveX control (QMon.cab) before using Monitor or Playback functions. Please follow the on-screen instructions to complete the installation. You can use Surveillance Station in Google Chrome, Mozilla Firefox and Microsoft Internet Explorer.
Play Video Files from Surveillance Station
Click![]() or
or ![]() to enter the playback page and follow the steps below to play video files on the remote Surveillance Station.
to enter the playback page and follow the steps below to play video files on the remote Surveillance Station.
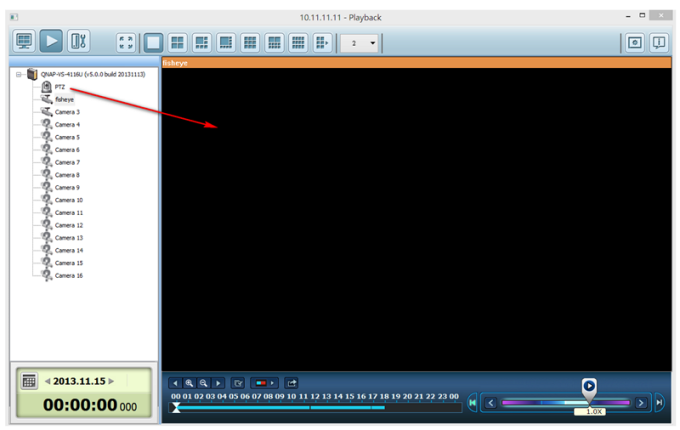
1. Drag and drop camera(s) from the server/camera tree to the respective playback window(s) to select the channel(s) for playback.
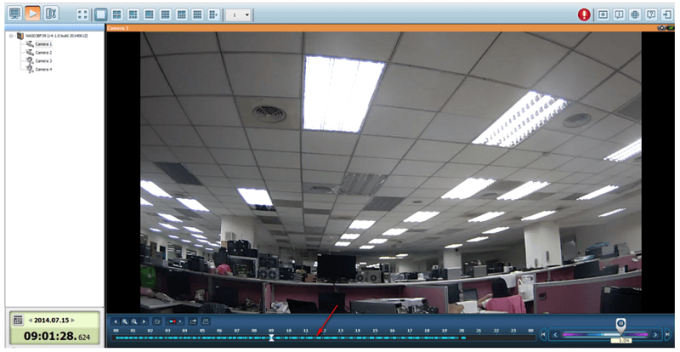
2. Select a playback date using ![]() You can examine each channel to discover the time range when files were recorded using each camera. Blue cells indicate regular recording files. If it is blank, it means that no files were recorded at that time.
You can examine each channel to discover the time range when files were recorded using each camera. Blue cells indicate regular recording files. If it is blank, it means that no files were recorded at that time.
3. Click ![]() to begin playback. You can control the speed and playback direction by dragging the button
to begin playback. You can control the speed and playback direction by dragging the button![]() to left or right of the shuttle bar.
to left or right of the shuttle bar.
4. Specify the time to play back the recording files. You can view a preview image on the timeline bar to search for the moment you want to play.
5. Click![]() to control all the playback windows to play back the recording files. When this function is enabled, the playback options (play, pause, stop, previous/next frame, previous/next file, speed adjustment) will be applied to all of the playback windows.
to control all the playback windows to play back the recording files. When this function is enabled, the playback options (play, pause, stop, previous/next frame, previous/next file, speed adjustment) will be applied to all of the playback windows.
How to Use QUSBCam2 with USB Cameras?
Overview
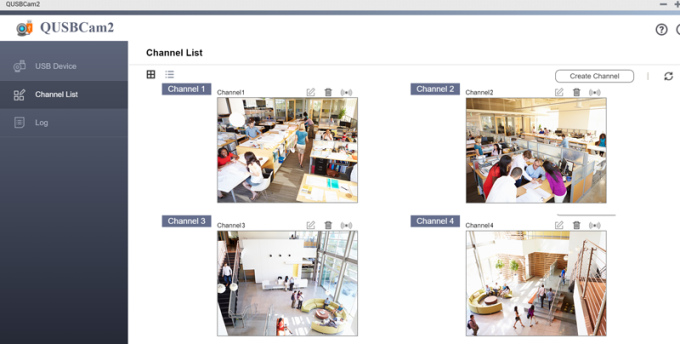
QUSBCam2 transforms USB cameras (webcam)(*1) into IP cameras with ONVIF compatibility and full support for the RTSP protocol. Its live view does not require any extra plug-ins in your browser, and it is a handy surveillance tool for homes and small offices.
Requirements
How to View a Live Stream on QUSBCam2
Configure Surveillance Station for Webcam Recording
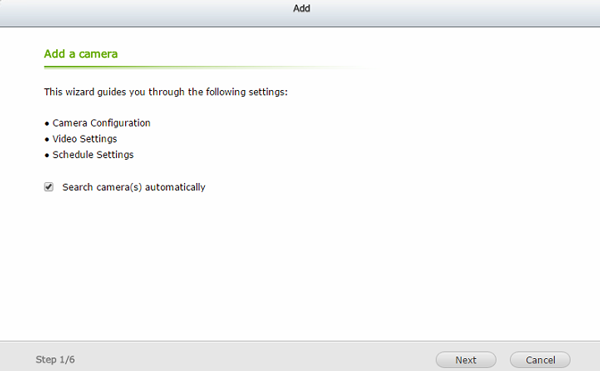
Go to “Surveillance Station” > “Camera Configuration” and then click “Add”. Select “Search camera(s) automatically” and then click “Next”.
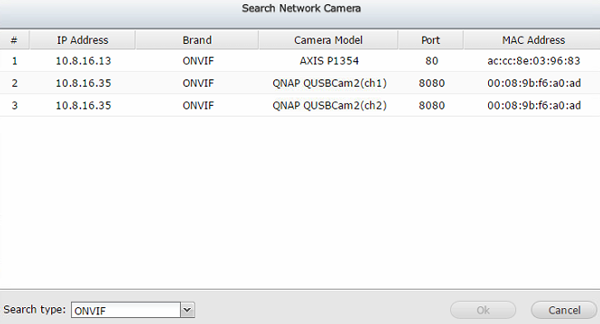
For Search type, select “ONVIF” and then select the QUSBCam2 camera. Click “OK”.
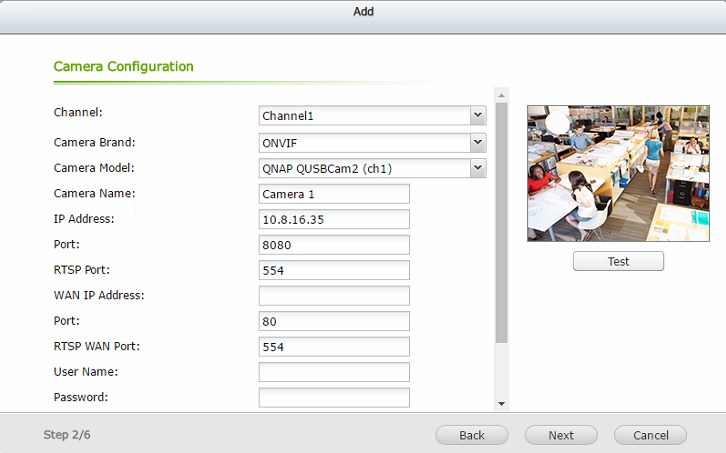
Surveillance Station automatically completes the camera information except for the user name and password. Use the same login credentials for the NAS that you are using.
|
Note: Before applying the new settings, you can click “Test” to check the connection to your QUSBCam2 camera. |
Click ![]() to launch the QVR client to see the live video and recording.
to launch the QVR client to see the live video and recording.
Additional Information
QNAP does not guarantee full compatibility with all USB cameras. For details on compatible USB cameras (webcam), refer to the following lists for UVC (USB Video Class):
Logitech UVC Webcam List
http://support.logitech.com/en_us/article/6471
Linux UVC Webcam List
http://www.ideasonboard.org/uvc/
