The purpose of this guide is to show you how to upgrade the firmware update on iMaxCamPro IP cameras on your network that aren’t directly connected to your NVR in the PoE ports. This guide assumes that these cameras are already on your network and have been accessible on the local network by your NVR. If that isn’t the case, please follow this guide first to configure any and all of your cameras for your local network.
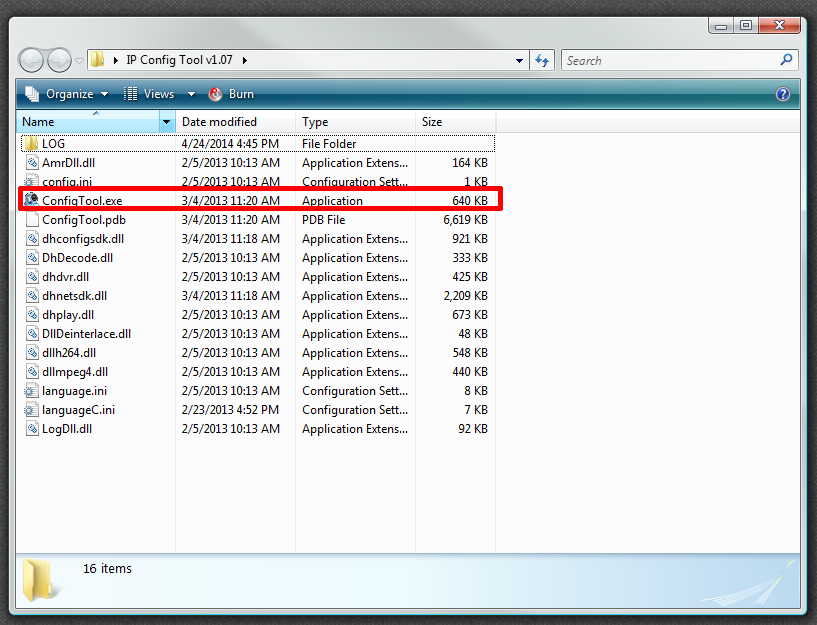
If you don’t have it on your computer already, download the IP Configuration Utility located here. Extract that file and then open up the folder that it created. Double click on the file show below:
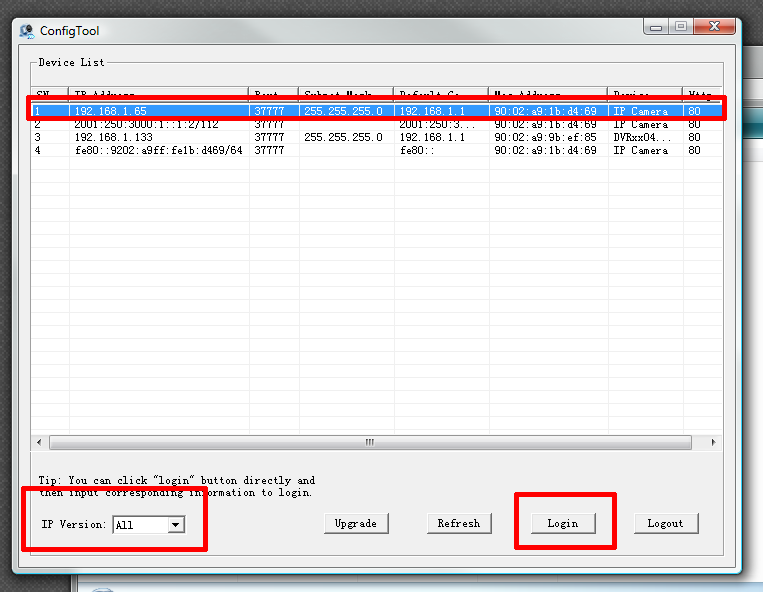
Now in the ConfigTool window that was launched earlier, near the bottom left of the window, select IPv4 from the IP Version selection field and you should see some listings for the IP cameras connected. Click on the first one listed and then click on the Login button.
You should then see the following window appear:
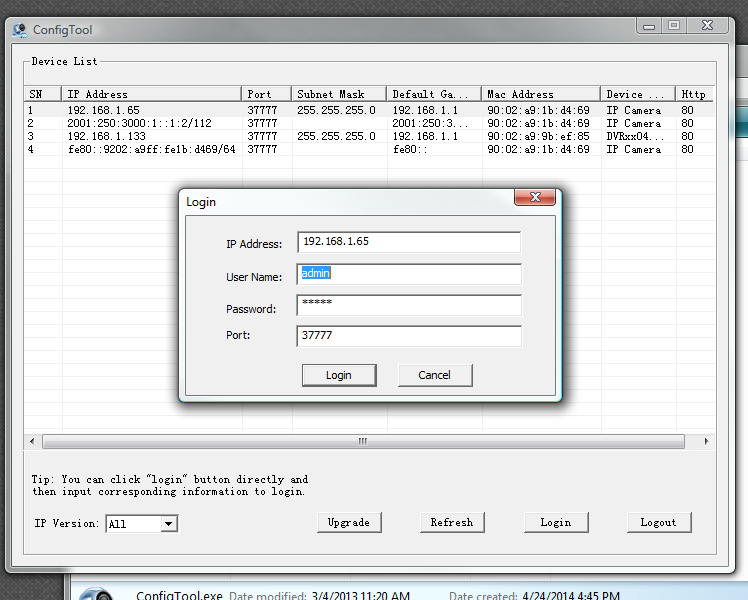
Click on the Login button to enter into the menu that will allow you to upgrade your IP camera(s). Then click on the System Information tab and make note of the current build date of firmware that is in your camera and make sure that the version you downloaded is newer than the version on the camera.

Next, click on the System Upgrade tab and then click on the Open button.
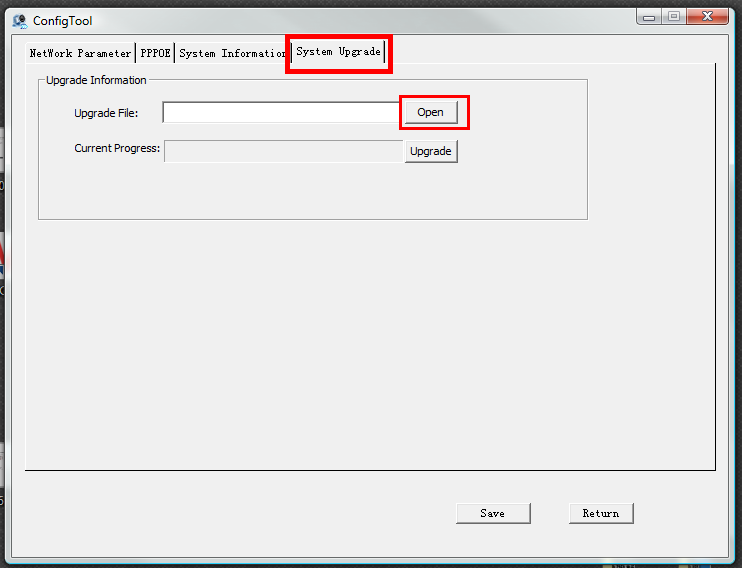
Find the firmware file that you had downloaded, select it and then click on Open
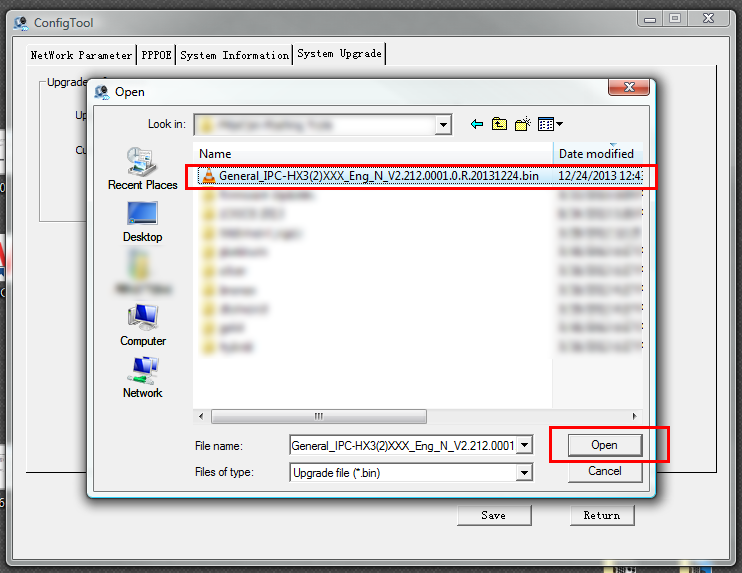
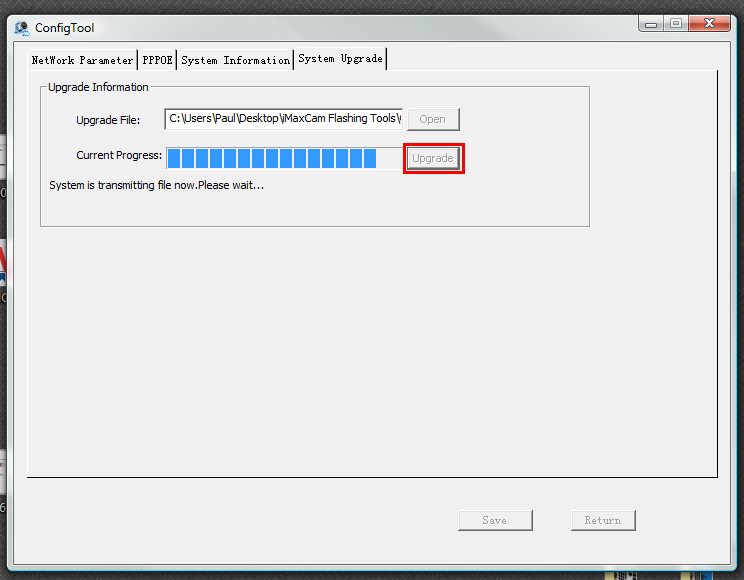
After pressing the Open button, you should see the file path of the firmware file you selected in the Upgrade File field. Press the Upgrade button and you should see the progress bar move as the file is being transmitted and again as the upgrade process is occurring. Please do not disconnect or remove power to camera while this process is occurring, otherwise you may cause irreparable damage to the camera.
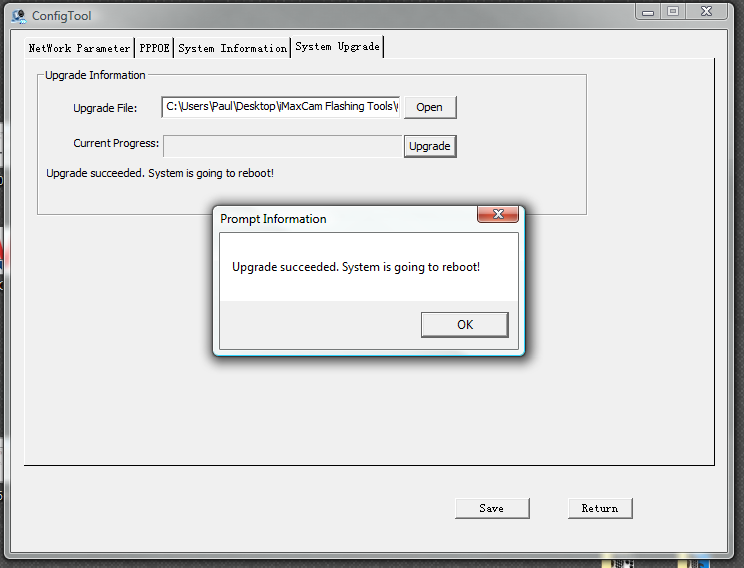
Once the upgrade process is completed, you will see the following window pop up, indicating that the upgrade process has completed. Click on the OK button and the camera will then reboot and the program will take you back to the main ConfigTool window.
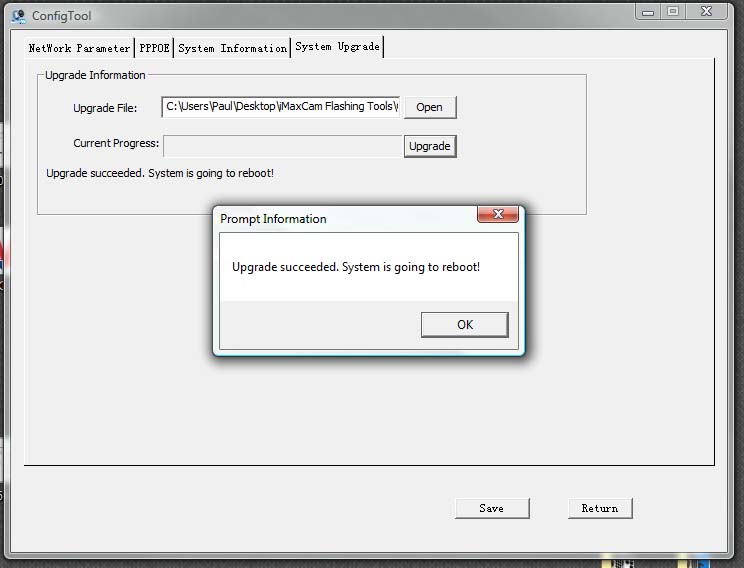
The camera will take anywhere from 1-3 minutes to reboot fully. After this time, you can click on the Refresh button to see if the camera is again seen on the network. If you would like, you can log back into the camera and click on the System Information tab to see if the upgrade process reflects in the new firmware build date. Clicking on the Return button will take you back to main window. You will need to repeat this process for each of the cameras on your network, and also making sure that if you have differnent models of camera to use the correct firmware update file. Should you have any questions during this process, feel free to give our Technical Support department a call and they will be able to help you at any stage of this process.
I really love you
Can you write your contact number?
I can’t upload
please provide support for me i leave my email address
It really worked, I appreciate it!